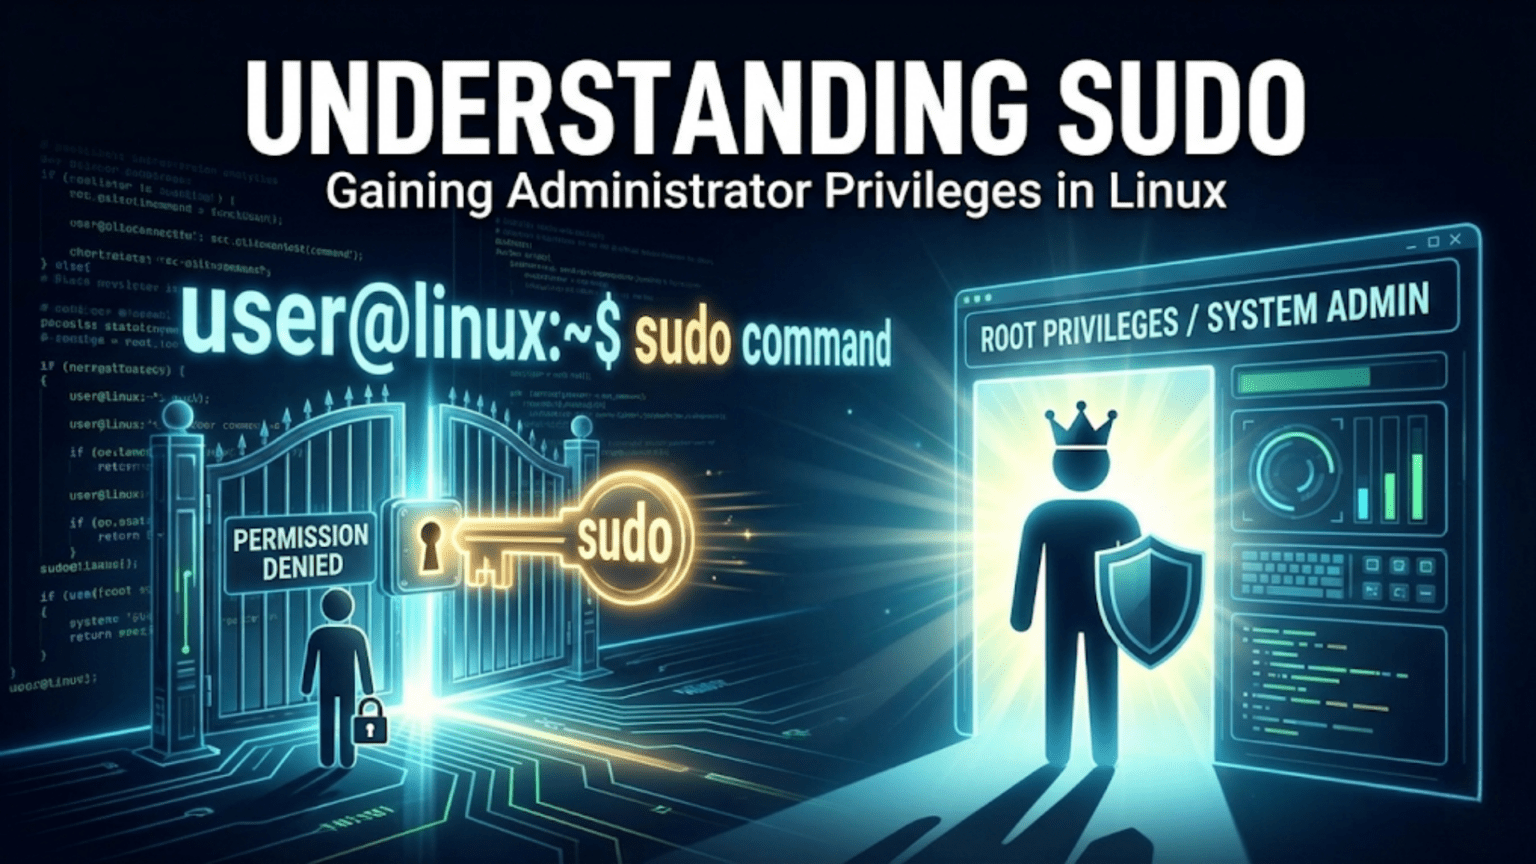
sudo (short for “superuser do”) is a Linux command that allows a regular user to temporarily execute a specific command with administrator (root) privileges. Instead of logging in as the all-powerful root user, you prefix a command with sudo and enter your own password to grant that single command elevated permissions. This design keeps your system secure by limiting how long and for what purpose administrator access is active — you are only root for the duration of that one command.
Introduction: The Guardian at the Gate
Every time you install software, modify a system configuration file, or manage system services on Linux, you encounter a four-letter word that stands between you and the action you want to take: sudo. You type sudo apt install vlc and enter your password. You type sudo nano /etc/.hosts to edit a file. You see “Permission denied” and instinctively reach for sudo to fix it.
For many Linux beginners, sudo is something they use reflexively, copying it from tutorials without fully understanding what it does or why it exists. That reflexive use generally works — sudo is designed to be straightforward — but a deeper understanding of sudo pays significant dividends. You will understand why some commands need it and others do not. You will recognize when using sudo is appropriate and when it is unnecessary or even dangerous. You will be able to configure sudo permissions, add or remove users from the sudo group, and troubleshoot “permission denied” errors correctly.
More fundamentally, understanding sudo means understanding one of Linux’s core security design decisions: the principle of least privilege. Linux is built on the idea that users and processes should have only the permissions they actually need — nothing more. sudo is the mechanism that makes this principle practical, allowing elevated actions when genuinely needed without permanently operating with unlimited system access.
This article takes you from the basics of what sudo is and how it works, through its relationship with the root user, to practical usage, configuration, and security best practices. By the end, sudo will not be a magic incantation you copy from tutorials but a tool you understand and use deliberately.
The Problem sudo Solves: Why Not Just Be Root?
To understand sudo, you first need to understand the problem it was designed to solve.
The Root User: Unlimited Power
Every Linux system has a special administrative account called root (also called the superuser). The root user has unlimited, unrestricted access to everything on the system. Root can read, write, and delete any file regardless of permissions. Root can start, stop, and modify any process. Root can add and remove users. Root can change system configuration that affects every user on the machine. Root can install software that runs with system-level access. In short, root can do anything.
This unlimited power is exactly what is needed for certain system administration tasks — but it is catastrophically dangerous for everyday use. A typo in a command run as root can delete essential system files. Malware running as root has immediate, unrestricted access to the entire system. A compromised application running as root can do anything the attacker desires.
Early Unix and early Linux systems were often administered by users who logged in directly as root. System administrators would log into the root account and do all their work from there, logging out only when finished. This approach worked for technically skilled administrators who were careful — but it provided no safety net. One mistake, one moment of inattention, and the consequences could be system-destroying.
The Principle of Least Privilege
The security principle of least privilege holds that any user, process, or system component should have access to only the resources and capabilities it actually needs to perform its function — nothing more. This principle minimizes the potential damage from mistakes, compromised software, and malicious activity.
Applying least privilege to system administration means: for ordinary computing tasks (browsing the web, writing documents, playing music), you need no administrative privileges whatsoever. For specific administrative tasks (installing software, modifying system files), you need elevated privileges — but only for that task, only for its duration, and only for exactly the access that task requires.
sudo: Targeted Elevation
sudo implements least privilege for system administration tasks. Instead of operating as root all the time, you work as your regular (unprivileged) user account. When you need to perform an administrative action, you prefix the command with sudo. sudo verifies that you are authorized to use it (typically by asking for your password), grants the command root-level privileges for its execution, logs what was done, and then returns to your normal unprivileged state.
The privileges are targeted (only for that command), temporary (lasting only while the command runs), and accountable (logged). This is fundamentally safer than operating as root continuously.
How sudo Works: The Technical Details
Understanding the mechanics of sudo helps you use it correctly and troubleshoot problems effectively.
The sudo Binary and SetUID
sudo works through a Unix mechanism called setuid (set user ID). The sudo executable file has a special permission bit set that tells the kernel: when this program runs, execute it with the permissions of the file’s owner (root), not the permissions of the user who ran it. This is what allows a regular user running sudo apt install vlc to have that command execute with root’s privileges.
The setuid mechanism applies specifically to the sudo program itself — not to the commands you run through it. When sudo decides you are authorized, it arranges for the command you specified to run with elevated privileges. When the command finishes, those privileges disappear.
The Sudoers Configuration
How does sudo know who is authorized to use it? This is controlled by a configuration file called /etc/.sudoers. This file lists which users (and groups) are permitted to use sudo, what commands they are allowed to run with elevated privileges, and whether they need to provide a password.
The /etc/.sudoers file is the most security-critical configuration file on a Linux system. Editing it incorrectly can lock you out of administrative access or create security vulnerabilities. For this reason, it should always be edited using the visudo command rather than a regular text editor:
$ sudo visudovisudo opens the sudoers file in a text editor and, critically, validates the file’s syntax before saving. If you introduce a syntax error in the sudoers file through a regular editor and save it, you can lock yourself out of sudo — with no easy way to fix it. visudo‘s syntax checking prevents this.
The most relevant line in /etc/.sudoers for most users is:
%sudo ALL=(ALL:ALL) ALLThis line says: members of the group named sudo may run any command on any host as any user. On Ubuntu, your initial user account is automatically added to the sudo group during installation, which is why you can use sudo from your first login.
On Fedora and Red Hat-based systems, the relevant group is named wheel rather than sudo:
%wheel ALL=(ALL) ALLThe Password Prompt and Timeout
When you use sudo, it asks for your password. This is your own user account password — not a separate root password. sudo verifies your password to confirm that the person typing commands is the legitimate account owner (and not, for example, someone who sat down at your unlocked computer while you stepped away).
After successful authentication, sudo caches your credentials for a period of time — typically 15 minutes by default. During this window, subsequent sudo commands do not ask for a password again. After the timeout, sudo asks for your password again.
This caching makes everyday use more convenient without permanently elevating your privileges. If you run several sudo commands in sequence, you are only interrupted by the password prompt once. After 15 minutes of inactivity, the next sudo command prompts again.
You can explicitly end your cached sudo session (removing the cached credentials) with:
$ sudo -kThis is a useful security practice when you finish a series of administrative tasks and want to ensure subsequent terminal sessions are not able to use sudo without a password.
The sudo Log
Every sudo command is logged. On most Linux systems, sudo logs to the system journal (accessible via journalctl) and to /var/.log/auth.log (on Debian/Ubuntu systems) or /var/.log/secure (on Fedora/RHEL systems).
A typical sudo log entry looks like:
Feb 18 15:42:31 laptop sudo: sarah : TTY=pts/0 ; PWD=/home/.sarah ; USER=root ; COMMAND=/usr/.bin/apt install vlcThis records who used sudo (sarah), from which terminal (pts/0), in which directory (PWD), to run which command as which user (root). This audit trail is valuable for security monitoring — if someone makes unauthorized changes to a system, the sudo log shows exactly what was done and when.
Using sudo: Practical Examples
With the theory established, let us look at how sudo is used in everyday Linux administration.
The Basic Pattern
The fundamental sudo syntax is straightforward:
$ sudo command [arguments]Everything that would normally be part of your command comes after sudo. For example:
$ sudo apt install firefox
$ sudo systemctl restart nginx
$ sudo nano /etc/.hosts
$ sudo rm /var/.log/old.logIn each case, sudo runs the specified command with root privileges while everything else about your session remains unchanged — you are still in your same directory, your environment variables are largely preserved, and after the command finishes, you return to your regular user state.
Running a Shell as Root
Sometimes you need to perform multiple administrative tasks in sequence and want a root shell for that work rather than prefixing every command with sudo.
$ sudo -iThis opens a new shell running as root (the -i flag makes it a login shell, loading root’s environment). The prompt changes to indicate you are now root:
root@laptop:~#Note the # at the end of the prompt instead of $ — this is the universal Unix convention indicating a root shell.
While in this root shell, all commands run with root privileges automatically — no sudo prefix needed. When you are done with administrative tasks, exit the root shell to return to your normal user:
# exit
$Important caution: Using a root shell (sudo -i or sudo su) gives you unlimited, unchecked power for the duration of your session. It is more dangerous than using sudo for individual commands because there is no per-command authorization check or logging of individual actions (only the initial shell creation is logged). Use root shells sparingly and for genuinely complex tasks that require many rapid administrative commands — not as a general practice to avoid typing sudo.
Running a Command as a Different User
sudo is not limited to running commands as root. The -u flag specifies a different user:
$ sudo -u www-data ls /var/.www/htmlThis runs ls /var/.www/html as the www-data user (the user that web servers typically run as). This is useful for testing file permissions from another user’s perspective without logging out of your own account.
Editing Files with sudo
A common need is editing configuration files that require root privileges. You can open them with sudo and any text editor:
$ sudo nano /etc/.hosts
$ sudo vim /etc/.nginx/nginx.conf
$ sudo gedit /etc/.fstabHowever, using graphical editors (like gedit or kate) with sudo is generally discouraged because graphical applications running as root create security risks — a misconfigured graphical application could allow unexpected code execution with root privileges. For graphical editing of system files, some desktop environments provide a pkexec mechanism (PolicyKit) that is more appropriate than sudo for graphical applications.
A safer approach is to use sudoedit (or equivalently sudo -e), which opens the file in your regular editor but handles the privileged write operation separately and safely:
$ sudoedit /etc/.hostssudoedit copies the file to a temporary location, opens your regular (non-root) editor on that copy, and then writes the modified content back to the original location with elevated privileges only for that final write step.
Checking if You Have sudo Access
If you are not sure whether your account has sudo access:
$ sudo -vIf your account is in the sudoers file, this refreshes your cached credentials (or prompts for your password to do so) and confirms access. If your account does not have sudo access, you see:
Sorry, user sarah is not allowed to execute '/usr/.bin/sudo -v' as root on hostname.You can also check your group memberships:
$ groups
sarah adm cdrom sudo dip plugdev lpadmin sambashareIf sudo (Ubuntu) or wheel (Fedora) appears in your groups, you have sudo access.
sudo vs. Root: Understanding the Relationship
A common point of confusion for Linux beginners is the relationship between sudo and the root user. Let us clarify this precisely.
The Root Account on Ubuntu
On Ubuntu (and several other distributions), the root account exists but is disabled for direct login by default. There is no root password set — attempting to log in as root directly would fail because no password would be accepted. Ubuntu’s designers made this choice deliberately: since all administrative tasks can be performed through sudo, there is no need for a separate root login.
On Fedora and most other distributions, the root account is active and has its own password set during installation. You can log in directly as root (though it is not recommended for everyday use).
The Difference Between sudo su and sudo -i
You may encounter two methods for getting a root shell:
sudo su runs the su (substitute user) command with sudo privileges, switching to the root account. The resulting shell is root’s shell but may not have root’s full login environment.
sudo -i (or sudo --login) runs a proper root login shell with root’s full environment loaded, including root’s PATH and other environment variables. This is generally more appropriate when you need to do sustained administrative work.
sudo -s opens a root shell using your current environment rather than root’s — sometimes useful for specific scripting scenarios.
For most purposes, the distinction between these is minor. When you need a temporary root shell, sudo -i is the cleanest choice.
Why Some Commands Fail Even with sudo
Occasionally, a command prefixed with sudo still fails. This happens for several reasons:
The command is a shell built-in. Shell built-ins like cd, source, and alias are not separate programs — they are part of the shell itself. Running sudo cd /root fails because sudo would try to run a separate cd program, which does not exist. For such cases, you need a root shell (sudo -i) rather than sudo on individual commands.
The command is an alias. If ll is an alias for ls -la, running sudo ll might fail because sudo looks for an executable named ll, not your shell alias. The fix is to run sudo ls -la directly, or to add alias sudo='sudo ' to your .bash.rc (the trailing space tells Bash to check the next word for aliases too).
Environment variables are not passed. sudo, by default, runs commands with a cleaned-up environment for security reasons. If a command requires a specific environment variable, it may fail because sudo does not pass your current environment. The -E flag passes your environment: sudo -E command.
The sudoers file restricts that specific command. In some configurations, particularly on multi-user systems or servers, the sudoers file limits which commands individual users can run with sudo. If your sudo access is restricted, you will see a specific message explaining what is not permitted.
Managing sudo Access: Adding and Removing Users
As you become more comfortable with Linux, you may need to manage sudo access for other users on your system — adding it for users who should have administrative access, or removing it for users who should not.
Adding a User to the sudo Group
On Ubuntu and Debian-based systems, granting sudo access to an existing user account is done by adding them to the sudo group:
$ sudo usermod -aG sudo usernameReplace username with the account you want to grant sudo access to. The user must log out and log back in for the group change to take effect.
On Fedora and RHEL-based systems, add the user to the wheel group instead:
$ sudo usermod -aG wheel usernameRemoving a User from the sudo Group
To revoke sudo access:
$ sudo gpasswd -d username sudo    # Ubuntu/Debian
$ sudo gpasswd -d username wheel # Fedora/RHELVerifying Group Membership
To check which groups a user belongs to:
$ groups username
username : username adm cdrom sudo dip plugdevOr more detailed:
$ id username
uid=1001(username) gid=1001(username) groups=1001(username),27(sudo)Advanced sudoers Configuration
For most home users, the default sudo configuration works perfectly. But understanding more of what is possible in /etc/.sudoers illuminates how flexible and powerful sudo can be in multi-user or server environments.
Granting Specific Command Access
Rather than giving a user full sudo access (all commands), you can restrict them to specific commands. This is the principle of least privilege applied at the sudo level — users get exactly the access they need and nothing more.
For example, to allow a user named backup_operator to run only the rsync command with sudo:
backup_operator ALL=(root) /usr/.bin/rsyncNow backup_operator can run sudo rsync but attempting sudo apt install anything would be denied.
Password-Free sudo for Specific Commands
You can configure certain commands to run with sudo without requiring a password by adding NOPASSWD: to the sudoers entry:
sarah ALL=(root) NOPASSWD: /usr/.bin/systemctl restart nginxThis is useful for automation — scripts that need to restart services can do so without interactive password prompts.
Be conservative with NOPASSWD entries. Any command that can run without a password is a potential security risk if the account is compromised or the terminal is left unattended.
The Defaults Section
The sudoers file includes a Defaults section where system-wide sudo behavior is configured. Key defaults include:
Defaults timestamp_timeout=15 — the number of minutes sudo’s credential cache is valid (0 means always ask; -1 means never expire).
Defaults passwd_tries=3 — how many password attempts are allowed before sudo refuses.
Defaults mail_badpass — send email to the administrator if sudo is used with the wrong password.
Defaults secure_path — the PATH used when running commands with sudo (separate from your normal PATH for security).
Common sudo Mistakes and How to Avoid Them
Mistake 1: Running Everything with sudo
A common beginner habit is to prefix every command with sudo “just in case.” This is counterproductive. Running non-administrative commands as root unnecessarily creates several problems: files created as root in your home directory become owned by root and difficult to manage as your regular user; mistakes have system-wide consequences that would be contained to your home directory if run normally; and it builds bad security habits.
The correct approach: run commands as your regular user by default. Add sudo only when a command fails with “Permission denied” for a genuinely administrative task, or when documentation specifically instructs you to use sudo.
Mistake 2: Using sudo to Fix “Permission Denied” Everywhere
When you encounter “Permission denied,” the instinct is to add sudo. But not all permission denied errors are appropriate for sudo to fix. If you get “Permission denied” trying to read a file in another user’s home directory, the right answer is probably not to read that file as root — respecting user privacy is by design. If you get “Permission denied” writing to your own home directory, sudo is the wrong solution — the correct fix is to check and repair the file ownership and permissions, which indicates a different problem.
sudo is appropriate for system files and directories (in /.etc, /.var, /.usr, etc.). It is generally not appropriate for your personal files.
Mistake 3: Copying sudo Commands Without Understanding Them
Following tutorials often involves copying and running sudo commands. This is a legitimate way to learn, but running sudo commands you do not understand is risky — a malicious tutorial could instruct you to delete system files or create backdoors. Develop the habit of understanding what a sudo command does before running it. At minimum, know the name of the program you are running and its general purpose.
Mistake 4: Not Logging Out of sudo -i Sessions
If you open a root shell with sudo -i and then step away from your computer, anyone who sits down at your keyboard has unrestricted root access. Always type exit to close a root shell when you are done with your administrative work. Never leave a root shell open in an unattended terminal.
sudo in Scripts and Automation
When writing shell scripts that need to perform administrative tasks, sudo requires some additional thought.
Checking for sudo in Scripts
If your script requires sudo, it should check at the beginning whether it is running with adequate privileges rather than failing midway through with cryptic errors:
#!/bin/.bash

# Check if running as root or with sudo
if [ "$EUID" -ne 0 ]; then
    echo "This script requires administrator privileges. Please run with sudo."
    exit 1
fi

# Rest of script...$EUID is an environment variable containing the effective user ID. Root’s UID is 0, so this check confirms whether the script is running with root privileges.
Running the Whole Script with sudo
Rather than sprinkling sudo throughout a script, you can write the script to run entirely as root and instruct users to launch it with sudo:
$ sudo ./.setup.shThis approach is cleaner than managing sudo calls within the script and makes the privilege requirement explicit.
Avoiding Sudo in Automation When Possible
For automated tasks like cron jobs, consider whether root access is actually necessary. If the task only needs access to specific files or services, configure file permissions or use a dedicated service account rather than running cron jobs with root privileges. Limiting automated processes to minimum necessary privileges reduces the impact of any bugs in those processes.
sudo Security Best Practices
Use sudo Instead of Root Login
Prefer sudo for individual commands over logging in as root. If you need a root shell for extended work, use sudo -i rather than setting a root password and using su. The sudo approach maintains accountability through logging and requires your regular user password (adding an authentication layer).
Configure Reasonable Timeout
The default 15-minute credential cache timeout balances convenience and security. On a shared or high-security system, reducing the timeout (or setting it to 0 to always prompt) provides stronger security at the cost of more frequent password entries.
Review the sudoers File Periodically
On multi-user systems, periodically review /etc/.sudoers and the sudo group membership to ensure only appropriate accounts have administrative access. Accounts that no longer need sudo access should be removed from the sudo group promptly.
Monitor sudo Logs
On production systems, monitoring /var/.log/auth.log (Ubuntu) or /var/.log/secure (Fedora) for unexpected sudo usage helps detect compromised accounts or unauthorized access. Commands like:
$ sudo grep sudo /var/.log/auth.log | tail -20Show the 20 most recent sudo entries for quick review.
Be Cautious with NOPASSWD
Password-free sudo entries are convenient for automation but represent a reduced security posture. Limit NOPASSWD entries to the minimum necessary commands, use them only for well-understood programs, and avoid them for commands that could be exploited (editors, shells, or anything that can execute arbitrary code).
Troubleshooting sudo Problems
“username is not in the sudoers file”
Your account is not in the sudo group or the sudoers file. Solutions:
If you have physical access to the machine and another account with sudo access, use that account to add your account to the sudo group.
If your account is the only account and was somehow removed from the sudo group, you may need to boot into recovery mode to regain access. On Ubuntu, boot into recovery mode from GRUB, drop to a root shell, and add your account back to the sudo group:
# usermod -aG sudo username“sudo: command not found”
sudo itself is not installed. This rarely happens on modern distributions but can occur on minimal server installations. Install it:
# apt install sudo          # Debian (as root)
# dnf install sudo # Fedora/RHEL (as root)Commands Failing Despite sudo
Check that the command path is correct with which:
$ which command
/usr/.local/bin/commandIf the command is in a non-standard location not covered by sudo’s secure_path, use the full path:
$ sudo /usr/.local/bin/commandOr adjust the secure_path in sudoers to include the directory.
Putting It All Together: A Reference
| Command | What It Does |
|---|---|
sudo command | Run a single command with root privileges |
sudo -i | Open a root login shell |
sudo -s | Open a root shell with current environment |
sudo -u user command | Run command as a specific user |
sudo -k | Invalidate cached sudo credentials |
sudo -v | Validate (refresh) cached credentials |
sudo -l | List your current sudo permissions |
sudo -e file / sudoedit file | Safely edit a file with elevated privileges |
sudo visudo | Safely edit the sudoers configuration file |
sudo usermod -aG sudo username | Add a user to the sudo group (Ubuntu) |
sudo usermod -aG wheel username | Add a user to the sudo group (Fedora) |
sudo gpasswd -d username sudo | Remove a user from the sudo group |
Conclusion: sudo Is Security Made Practical
sudo is one of Linux’s most elegant security solutions — a practical implementation of the principle of least privilege that makes day-to-day administration safe, accountable, and convenient. By requiring explicit, per-command (or per-session) elevation with authentication and logging, sudo provides a meaningful barrier between routine computer use and potentially dangerous administrative actions.
Understanding sudo means more than knowing to type it before installation commands. It means understanding why Linux separates regular and administrative privileges, knowing when elevation is appropriate and when it is not, recognizing the risks of casual root shell use, and appreciating how the audit trail sudo creates contributes to system accountability.
As you continue using Linux, you will develop an intuitive sense of when commands need sudo and when they do not. That intuition — grounded in understanding rather than trial and error — is one of the hallmarks of a competent Linux user. You will find yourself questioning “why does this need root?” and often discovering that it does not — that the right answer is fixing permissions rather than reaching for sudo, or finding a less privileged way to accomplish the task.
The next article in this series covers keeping your Linux system updated — another topic where sudo appears constantly and where understanding the underlying process makes you a more confident and capable Linux administrator.