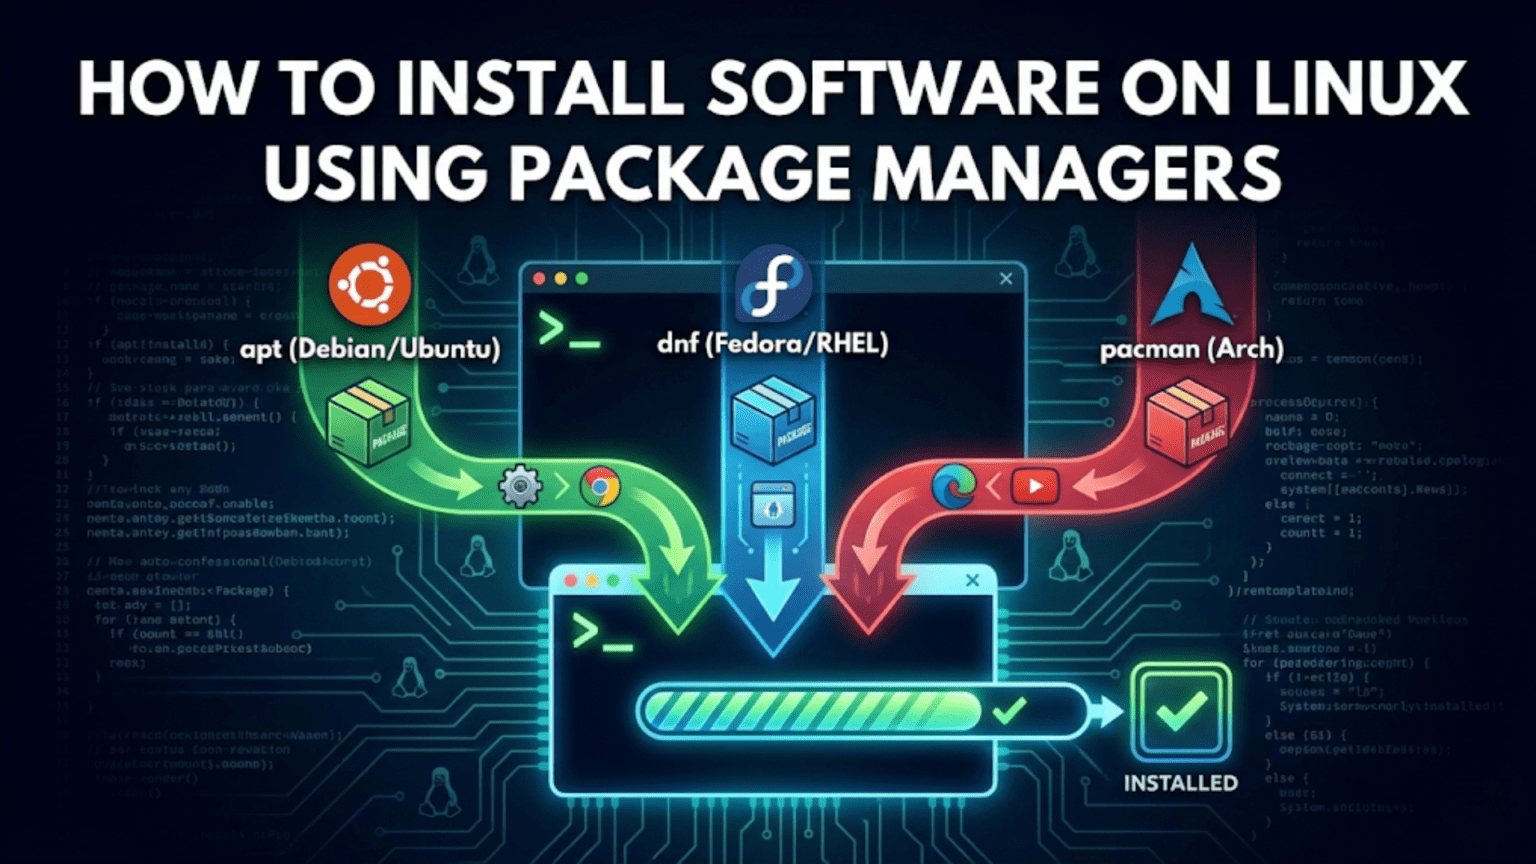
Linux installs software through package managers — tools that download, install, update, and remove programs from curated software repositories. On Ubuntu and Debian-based systems, the main package manager is APT (used with the apt command). On Fedora and Red Hat systems, it is DNF. On Arch-based systems, it is Pacman. Package managers handle dependencies automatically, meaning they install any additional software a program needs to run, and they keep all installed software updated through a single command.
Introduction: A Better Way to Install Software
If you have used Windows, you are familiar with the traditional software installation process: find a website, download an installer file, double-click it, click through a series of “Next” prompts, wait for the installation to complete, and then manage updates individually for each program. Some programs remember to update themselves; others silently become outdated and vulnerable. When you want to remove a program, you hope the uninstaller cleans up properly — it often does not.
Linux takes a fundamentally different approach to software installation, one that most users who experience it find dramatically superior. Almost all Linux software is installed through a package manager — a central system that handles everything from finding software to downloading it, installing it, managing its dependencies, keeping it updated, and cleanly removing it when no longer needed. Every aspect of software management flows through a single, coherent system.
This approach offers concrete advantages. Software is downloaded from trusted, curated repositories rather than random websites. Dependencies — the other software a program needs to function — are resolved and installed automatically. A single command updates every piece of software on your system at once. Removing software cleanly removes all its components without leaving orphaned files scattered across your drive.
Understanding how Linux package management works is one of the most practically valuable pieces of Linux knowledge you can acquire. This article will teach you everything you need to know: what packages and repositories are, how the major package managers work, what commands to use for everyday software management tasks, and how the newer universal package formats (Snap, Flatpak, and AppImage) fit into the picture.
Understanding the Core Concepts
Before diving into specific commands, a few foundational concepts will make everything else clearer.
What Is a Package?
In Linux, software is distributed as packages. A package is an archive file that contains everything needed to install a piece of software: the compiled program files, supporting libraries and data files, documentation, configuration files, and metadata about the package itself (its name, version, description, and most importantly, its dependencies).
Think of a package like a box from a retailer: it contains the product, assembly instructions, and a list of what other products you need alongside it. The package manager is like a store that receives, organizes, and delivers these boxes to your system.
Package files have distribution-specific formats:
- Debian-based distributions (Ubuntu, Linux Mint, Debian) use
.debpackages - Red Hat-based distributions (Fedora, CentOS, RHEL) use
.rpmpackages - Arch-based distributions use
.pkg.tar.zstpackages
While you can sometimes install packages directly from their files, you will almost never need to do this — the package manager handles everything through the repository system.
What Is a Repository?
A repository (commonly called a “repo”) is a server that hosts a collection of packages for a Linux distribution. When you install software through your package manager, it connects to these servers, downloads the appropriate package, and installs it on your system.
Repositories are the critical infrastructure of the Linux software ecosystem. They are organized and maintained by the distribution itself (official repositories) or by third parties (additional repositories). Official repositories contain software that has been tested for compatibility with your specific distribution version and verified by the distribution’s maintainers.
Each distribution maintains multiple repositories:
Main/official repository — software that meets the distribution’s standards and is fully supported. This is where almost everything you install will come from.
Universe/community repository (Ubuntu) — a vast collection of community-maintained packages that the distribution does not officially support but makes available. Contains thousands of additional programs.
Security repository — provides security updates separately from feature updates, ensuring critical fixes reach users quickly.
Third-party repositories — maintained by software vendors or community members outside the distribution. Examples include Google’s repository for Chrome, Microsoft’s repository for VS Code, and RPM Fusion for Fedora. These extend what is available beyond the distribution’s official collection.
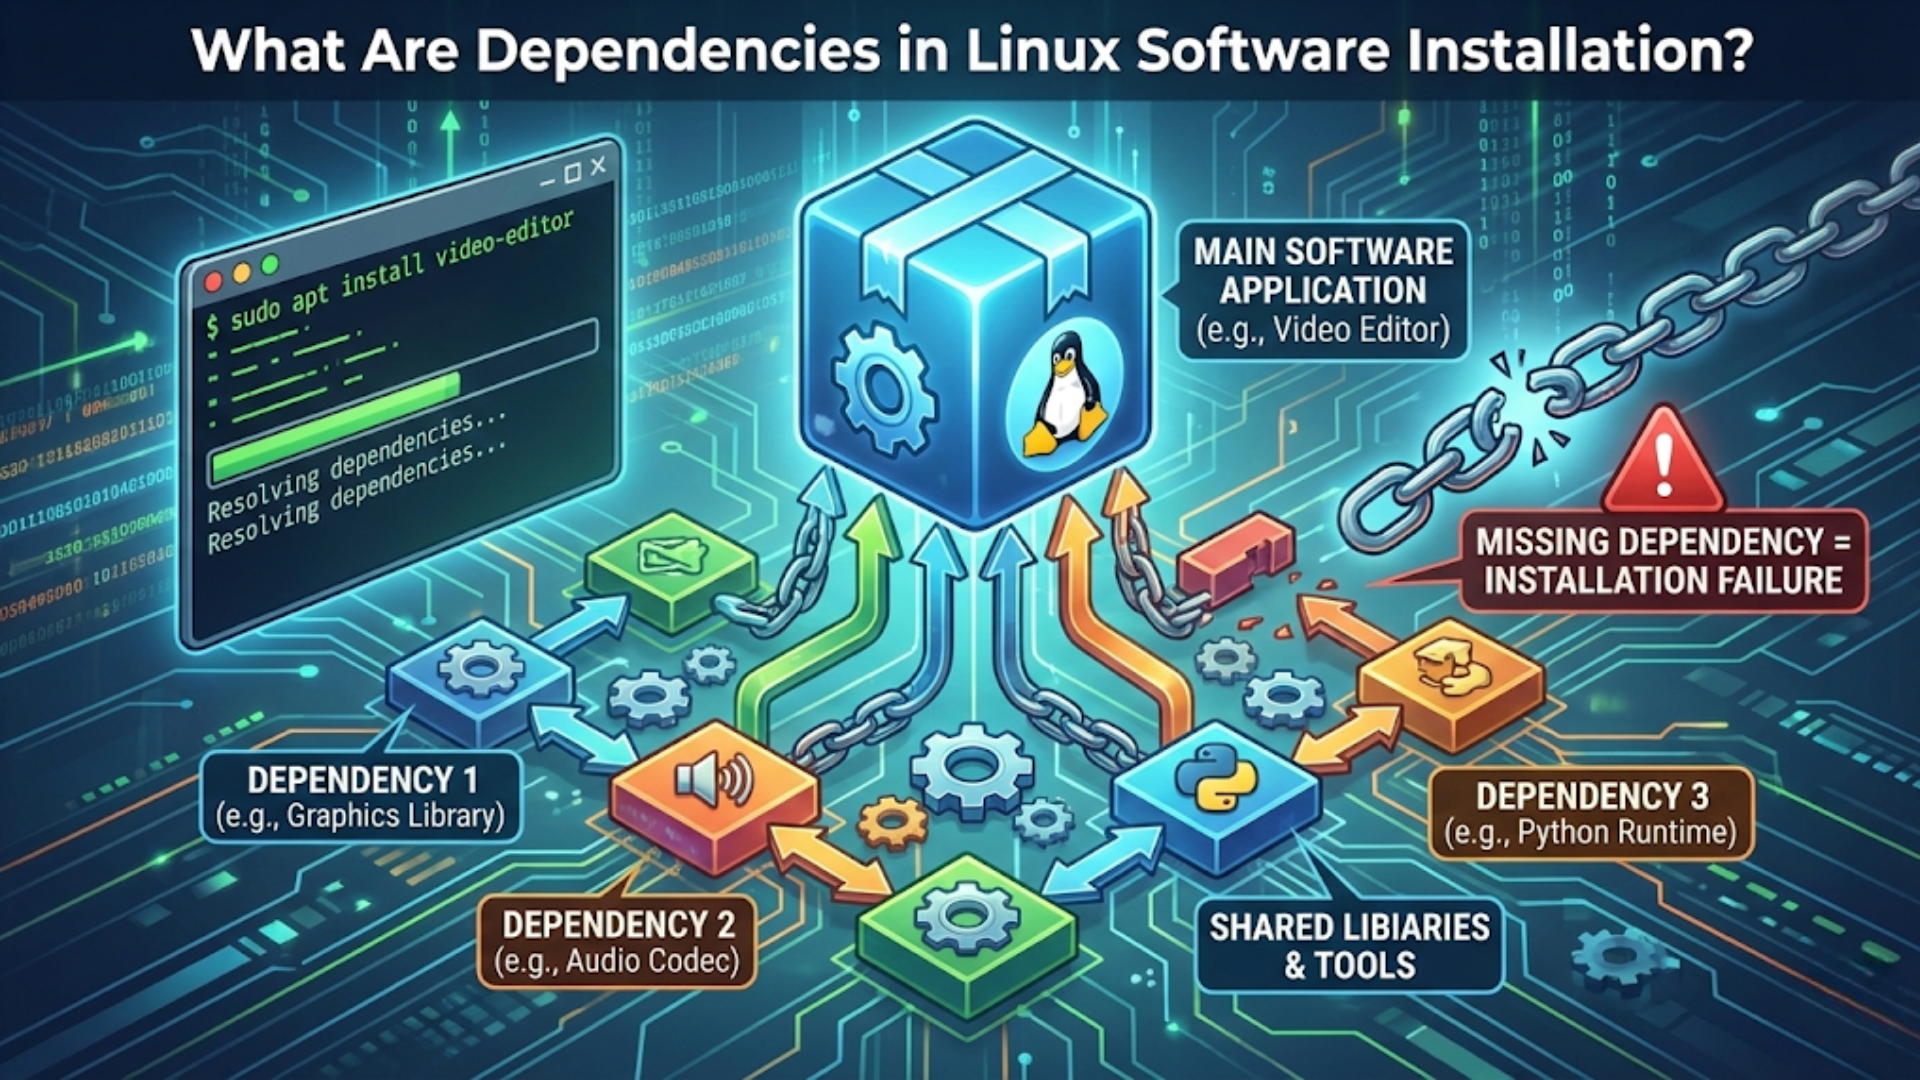
What Are Dependencies?
Almost no piece of software is entirely self-contained. A program typically relies on shared libraries — code that provides common functionality reused by many programs — rather than including its own copies of everything. For example, many different programs need to display images, so rather than each program including its own image processing code, they all use a shared library like libpng or libjpeg.
A program’s dependencies are the other packages it requires to function. The package manager reads the dependency information stored in each package’s metadata and automatically installs all required dependencies when you install a program. If Firefox requires a specific version of a graphics library, and that library is not installed, the package manager installs both Firefox and the library — transparently, without requiring any action from you.
This automatic dependency resolution is one of the package manager’s greatest strengths. It makes installation simple for users and allows software developers to rely on shared code rather than bundling everything.
APT: The Package Manager for Debian and Ubuntu Systems
APT (Advanced Package Tool) is the package management system used by Debian, Ubuntu, Linux Mint, Pop!_OS, and all Debian-derived distributions. It is what you will use on the two most popular beginner distributions: Ubuntu and Linux Mint.
APT is actually a collection of tools. The most important for everyday use is the apt command, which provides a clean, user-friendly interface combining the most common operations. The older apt-get command performs the same operations with slightly different syntax; both work on any APT-based system, but apt is the modern recommendation for interactive use.
Updating the Package List
Before installing or upgrading software, you should update APT’s local package list — its knowledge of what packages are available in the repositories and at what versions. This does not install or upgrade anything; it simply refreshes the index.
$ sudo apt update
Hit:1 http://archive.ubuntu.com/ubuntu noble InRelease
Get:2 http://archive.ubuntu.com/ubuntu noble-updates InRelease [126 kB]
Get:3 http://security.ubuntu.com/ubuntu noble-security InRelease [126 kB]
Fetched 378 kB in 2s (189 kB/s)
Reading package lists... Done
Building dependency tree... DoneThe output shows which repositories were checked and whether any updates are available. You should run sudo apt update before any installation or upgrade operation to ensure you are working with current information.
Why sudo? Modifying the system’s package database requires administrator privileges. The sudo command grants temporary root access for a single command. You will be asked for your password the first time you use sudo in a session. (sudo is covered in detail in the next article.)
Installing a Package
$ sudo apt install package-nameReplace package-name with the name of the software you want to install. For example:
$ sudo apt install vlc
Reading package lists... Done
Building dependency tree... Done
The following additional packages will be installed:
  libvlc5 libvlccore9 vlc-bin vlc-data vlc-plugin-base
The following NEW packages will be installed:
  libvlc5 libvlccore9 vlc vlc-bin vlc-data vlc-plugin-base
0 upgraded, 6 newly installed, 0 to remove and 0 not upgraded.
Need to get 16.4 MB of archives.
After this operation, 68.3 MB of additional disk space will be used.
Do you want to continue? [Y/n]APT shows you exactly what it will install, including all dependencies, and how much disk space will be used. Pressing Enter (or typing Y and Enter) confirms the installation. APT downloads the packages, installs them, and configures them automatically.
Installing multiple packages at once: List all packages separated by spaces:
$ sudo apt install vlc gimp firefoxInstalling without the confirmation prompt: Use -y to automatically answer “yes” to all prompts (useful in scripts):
$ sudo apt install -y vlcRemoving a Package
$ sudo apt remove package-nameapt remove removes the program but keeps its configuration files, in case you reinstall and want to preserve your settings.
$ sudo apt purge package-nameapt purge removes the program AND its configuration files — a complete removal. Use this when you are certain you no longer want the software and do not need to preserve its configuration.
Upgrading Installed Software
$ sudo apt upgradeapt upgrade upgrades all installed packages to their newest available versions (as known from the last apt update). It will not remove any packages or install new ones — it only upgrades existing packages to newer versions within their current package set.
The typical sequence for keeping your system fully updated is:
$ sudo apt update && sudo apt upgradeThe && operator runs the second command only if the first succeeds — this is a safe and common pattern for chaining related commands.
$ sudo apt full-upgradeapt full-upgrade is a more aggressive upgrade that will install or remove packages as needed to complete the upgrade (for example, when a package has been renamed or split). Use this for major distribution upgrades.
Searching for Packages
$ apt search keywordSearches package names and descriptions for your keyword. Note that apt search does not require sudo:
$ apt search video editor
Sorting... Done
Full Text Search... Done
kdenlive/noble 24.02.0-1 amd64
  non-linear video editor

openshot-qt/noble 2.6.1-3 amd64
  create and edit videos and movies

shotcut/noble 23.11.29-1 amd64
video editorGetting Package Information
$ apt show package-nameShows detailed information about a package — description, version, size, dependencies, and which repository it comes from:
$ apt show vlc
Package: vlc
Version: 3.0.20-3build1
Priority: optional
Section: universe/video
Installed-Size: 280 kB
Depends: libvlc5 (= 3.0.20-3build1), vlc-bin, vlc-data...
Description: multimedia player and streamer
VLC is the VideoLAN project's media player...Removing Unused Dependencies
Over time, when you remove software, some of its dependencies may no longer be needed by any other package. These orphaned packages take up space without serving any purpose.
$ sudo apt autoremoveAPT identifies packages no longer required by anything and asks for confirmation to remove them. Running this periodically keeps your system tidy.
Cleaning the Package Cache
APT keeps downloaded package files in a cache at /var/.cache/apt/archives/. This allows reinstallation without re-downloading, but the cache grows over time.
$ sudo apt cleanRemoves all cached package files.
$ sudo apt autocleanRemoves only cached package files for packages that are no longer in the repositories (obsolete packages), keeping current cached packages available.
DNF: The Package Manager for Fedora and Red Hat Systems
DNF (Dandified YUM) is the package manager for Fedora, Red Hat Enterprise Linux (RHEL), CentOS Stream, and other RPM-based distributions. It replaced the older YUM (Yellowdog Updater, Modified) package manager and offers improved performance, better dependency resolution, and a cleaner interface.
If you are using Fedora, the commands in this section are what you will use daily. The concepts are identical to APT — installing, removing, searching, upgrading — just with different commands.
Common DNF Commands
Update the package database and upgrade all packages:
$ sudo dnf updateUnlike APT, DNF combines the “refresh package list” and “upgrade” steps into a single command. dnf update updates the package metadata and then upgrades all installed packages.
Install a package:
$ sudo dnf install package-nameExample:
$ sudo dnf install vlcRemove a package:
$ sudo dnf remove package-nameSearch for packages:
$ dnf search keywordShow package information:
$ dnf info package-nameList all installed packages:
$ dnf list installedRemove unused dependencies:
$ sudo dnf autoremoveClean package cache:
$ sudo dnf clean allDNF also provides history tracking — you can see every installation, removal, and upgrade that has been performed:
$ dnf historyAnd you can undo a specific transaction if something went wrong:
$ sudo dnf history undo 15(where 15 is the transaction number from dnf history)
Pacman: The Package Manager for Arch-Based Systems
Pacman is the package manager for Arch Linux, Manjaro, EndeavourOS, and other Arch-derived distributions. Its design philosophy emphasizes simplicity and efficiency, and it is one of the fastest package managers available. Pacman uses a single-flag command structure that feels different from APT and DNF.
Sync package database and upgrade all packages:
$ sudo pacman -SyuInstall a package:
$ sudo pacman -S package-nameRemove a package and its unneeded dependencies:
$ sudo pacman -Rs package-nameSearch for packages:
$ pacman -Ss keywordShow package information:
$ pacman -Si package-nameArch-based systems also have access to the AUR (Arch User Repository), an enormous community-maintained collection of packages beyond the official repositories. AUR helpers like yay or paru extend Pacman to install AUR packages:
$ yay -S package-namePackage Manager Comparison
| Feature | APT (Ubuntu/Debian) | DNF (Fedora/RHEL) | Pacman (Arch) |
|---|---|---|---|
| Install package | sudo apt install pkg | sudo dnf install pkg | sudo pacman -S pkg |
| Remove package | sudo apt remove pkg | sudo dnf remove pkg | sudo pacman -R pkg |
| Update all packages | sudo apt update && sudo apt upgrade | sudo dnf update | sudo pacman -Syu |
| Search packages | apt search keyword | dnf search keyword | pacman -Ss keyword |
| Show package info | apt show pkg | dnf info pkg | pacman -Si pkg |
| Remove unused deps | sudo apt autoremove | sudo dnf autoremove | sudo pacman -Qdtq | sudo pacman -Rs - |
| Clean cache | sudo apt clean | sudo dnf clean all | sudo pacman -Sc |
| Package format | .deb | .rpm | .pkg.tar.zst |
Finding the Right Package Name
One of the most common beginner challenges is knowing what a package is called in the repository. The name you search for is not always the same as the application’s brand name.
Using apt search or dnf search
The most reliable method is to search:
$ apt search "video player"Read through the results and look for the package that matches what you want. Package descriptions are usually clear enough to identify the right package.
The Distribution’s Software Center
Graphical Software Centers (Ubuntu Software, GNOME Software, Mint Software Manager) show you package names alongside their friendly application names, making it easy to find both the graphical click-to-install option and the equivalent package name for terminal installation.
Command-Not-Found Helper
On Ubuntu and some other distributions, when you type a command that is not installed, the system suggests which package to install:
$ ffmpeg
Command 'ffmpeg' not found, but can be installed with:
sudo apt install ffmpegThis is a remarkably useful feature — it turns an error into an installation suggestion.
Adding Extra Repositories
Sometimes the software you want is not in your distribution’s official repositories. In this case, you can add a third-party repository that provides it.
Adding a PPA (Ubuntu/Mint)
On Ubuntu and its derivatives, Personal Package Archives (PPAs) are commonly used to distribute software outside the official repositories. PPAs are hosted on Launchpad and provide a structured way for developers to distribute their software to Ubuntu users.
To add a PPA:
$ sudo add-apt-repository ppa:developer/ppa-name
$ sudo apt update
$ sudo apt install package-from-ppaFor example, to add the Git stable releases PPA:
$ sudo add-apt-repository ppa:git-core/ppa
$ sudo apt update
$ sudo apt install gitUse PPAs from trusted sources only. A malicious PPA could install compromised software with full system access. Stick to official developer PPAs and well-known community sources.
Adding a Repository via a .list File
Many software vendors provide their own repositories distributed as .list or .sources files. The instructions vary by vendor but typically follow this pattern:
# Add the vendor's GPG signing key
$ curl -fsSL https://vendor.com/gpg.key | sudo gpg --dearmor -o /etc/.apt/keyrings/vendor.gpg

# Add the repository definition
$ echo "deb [signed-by=/etc/.apt/keyrings/vendor.gpg] https://packages.vendor.com/linux stable main" | sudo tee /etc/.apt/sources.list.d/vendor.list

# Update and install
$ sudo apt update
$ sudo apt install vendor-packageGoogle Chrome, Microsoft VS Code, Spotify, and many other popular commercial applications use exactly this pattern to provide their own repositories on Debian/Ubuntu systems.
RPM Fusion for Fedora
Fedora’s commitment to open-source software means that its official repositories exclude certain popular software — NVIDIA proprietary drivers, multimedia codecs, and some other components. RPM Fusion is the standard solution: a well-maintained third-party repository providing these components.
$ sudo dnf install https://mirrors.rpmfusion.org/free/fedora/rpmfusion-free-release-$(rpm -E %fedora).noarch.rpm https://mirrors.rpmfusion.org/nonfree/fedora/rpmfusion-nonfree-release-$(rpm -E %fedora).noarch.rpmAfter adding RPM Fusion, installing previously unavailable packages becomes as simple as any other dnf install.
Universal Package Formats: Snap, Flatpak, and AppImage
In addition to distribution-specific package managers, three universal package formats have emerged that aim to work across different Linux distributions. Understanding their differences helps you choose the right installation method for each application.
Snap
Snap was developed by Canonical (the company behind Ubuntu) and is the default for certain applications on Ubuntu. Snaps are self-contained packages that bundle an application with all its dependencies, running in a sandboxed environment isolated from the rest of the system.
The Snap Store (snapcraft.io) hosts thousands of snap packages. Snap is deeply integrated into Ubuntu — the snapd daemon runs automatically, and some system applications are installed as snaps by default.
Installing a snap:
$ sudo snap install package-nameListing installed snaps:
$ snap listRemoving a snap:
$ sudo snap remove package-nameUpdating all snaps: Snaps update automatically in the background; manual updates are also possible:
$ sudo snap refreshAdvantages of Snap: Automatic updates, sandboxing for security, works across many distributions, easy for developers to publish.
Disadvantages: Slower startup times than native packages (because the snap must be mounted and set up at launch), larger install sizes (each snap bundles its own dependencies), and some users dislike that snaps are controlled by Canonical.
Flatpak
Flatpak is a community-developed universal package format supported by many distributions. Flathub (flathub.org) is the primary repository, hosting thousands of popular applications including Spotify, Discord, Signal, GIMP, Inkscape, LibreOffice, and many others.
Flatpak is available on Ubuntu, Fedora (where it is the preferred format for third-party desktop apps), Arch, Debian, and virtually every other major distribution. Unlike Snap, Flatpak is distribution-neutral and not controlled by any single company.
Setting up Flatpak (if not already installed):
$ sudo apt install flatpak            # Ubuntu/Debian
$ sudo dnf install flatpak # FedoraAdding the Flathub repository:
$ flatpak remote-add --if-not-exists flathub https://dl.flathub.org/repo/flathub.flatpakrepoInstalling a Flatpak:
$ flatpak install flathub app.id.nameFor example:
$ flatpak install flathub org.gimp.GIMPRunning a Flatpak application: Flatpak applications appear in your application menu like any other installed program. You can also run them from the terminal:
$ flatpak run org.gimp.GIMPUpdating all Flatpaks:
$ flatpak updateRemoving a Flatpak:
$ flatpak uninstall app.id.nameAdvantages of Flatpak: Distribution-neutral, large catalog on Flathub, sandbox security model, version pinning possible, no single controlling entity.
Disadvantages: Similar to Snap — larger sizes and slightly slower startup than native packages due to bundled dependencies and sandboxing.
AppImage
AppImage takes a completely different approach from Snap and Flatpak. An AppImage is a single executable file that contains everything the application needs — no installation required at all. You download the file, make it executable, and run it directly.
Using an AppImage:
$ chmod +x application.AppImage
$ ./application.AppImageThat is literally all that is required. The AppImage runs from wherever you downloaded it, requires no root privileges, and leaves no system-wide traces. To “uninstall” an AppImage, you simply delete the file.
AppImage is popular for distributing applications that users might want to run without installation, for running specific versions of software alongside a distribution-packaged version, or for software whose developers want to provide a simple single-file distribution.
Advantages: No installation needed, no root required, portable (carry on a USB drive), clean removal (just delete the file).
Disadvantages: No automatic updates, no automatic dependency sharing (each AppImage is fully self-contained), no system integration (application does not appear in your menu unless you use an AppImage integration tool like AppImageLauncher).
Installing Software Directly from .deb or .rpm Files
Occasionally, software is distributed as a .deb or .rpm file downloadable directly from a vendor’s website (rather than through a repository). This is how Google Chrome distributes its Linux version on the download page.
Installing a .deb file on Ubuntu/Debian:
$ sudo dpkg -i package.debIf the installation fails due to missing dependencies, fix them with:
$ sudo apt install -fA cleaner alternative that handles dependencies automatically:
$ sudo apt install ./package.debInstalling an .rpm file on Fedora:
$ sudo dnf install package.rpmDNF handles dependencies automatically when installing from a local file.
Practical Software Installation Examples
Here are step-by-step examples of installing several popular applications, demonstrating the different methods:
Installing VLC media player on Ubuntu:
$ sudo apt update
$ sudo apt install vlcInstalling VS Code on Ubuntu (official repository method):
$ sudo apt install wget gpg
$ wget -qO- https://packages.microsoft.com/keys/microsoft.asc | gpg --dearmor > packages.microsoft.gpg
$ sudo install -D -o root -g root -m 644 packages.microsoft.gpg /etc/.apt/keyrings/packages.microsoft.gpg
$ sudo sh -c 'echo "deb [arch=amd64,arm64,armhf signed-by=/etc/.apt/keyrings/packages.microsoft.gpg] https://packages.microsoft.com/repos/code stable main" > /etc/.apt/sources.list.d/vscode.list'
$ sudo apt update
$ sudo apt install codeInstalling GIMP on any distribution via Flatpak:
$ flatpak install flathub org.gimp.GIMPInstalling Spotify on Ubuntu via Snap:
$ sudo snap install spotifyInstalling htop (system monitor) on Fedora:
$ sudo dnf install htopBest Practices for Software Installation on Linux
A few habits will keep your Linux system clean, secure, and well-maintained:
Prefer official repositories. Software in your distribution’s official repositories has been tested for compatibility and is updated through your normal update process. Third-party repositories, PPAs, Snaps, Flatpaks, and AppImages are all legitimate options, but official packages are the most integrated and best supported.
Keep your system updated. Run your package manager’s update command regularly. Security vulnerabilities are discovered in software constantly, and packages in official repositories are patched quickly. Outdated software is a significant security risk.
Read what will be installed. Before confirming an installation, read APT or DNF’s summary of what will be installed and removed. If an installation is going to remove a package you use, investigate why before proceeding.
Know how to undo installations. Every installation through a package manager can be reversed with the remove command. If you install something and decide you do not want it, removing it is as simple as installing it was.
Audit your installed software periodically. Use apt list --installed, dnf list installed, or your graphical software manager to review what is installed. Over time, systems accumulate software that is no longer needed — reviewing and removing unused packages keeps things tidy.
Conclusion: The Power of Centralized Software Management
Linux’s package management system represents a sophisticated answer to the problem of software installation and management. Instead of a chaotic ecosystem of individual installers from different websites with inconsistent behaviors, Linux provides a unified, trustworthy, and powerful system that handles everything through a small set of commands.
Once you internalize the APT, DNF, or Pacman workflow — depending on your distribution — you will find software installation faster and more reliable than on any other operating system. The ability to install complex software with a single command, keep everything updated with two commands, and cleanly remove anything you no longer need represents a genuinely better model of software management.
The newer universal formats — Snap, Flatpak, and AppImage — complement the traditional package manager by extending what is available and providing sandboxed alternatives for applications from outside the official repositories. Understanding all of these options gives you flexibility to install virtually any Linux software in the way that best suits your needs.
With software installation mastered, the next article in this series covers sudo — the mechanism that grants you temporary administrator privileges for installation and system configuration commands, and one of the most important concepts to understand correctly for Linux security.