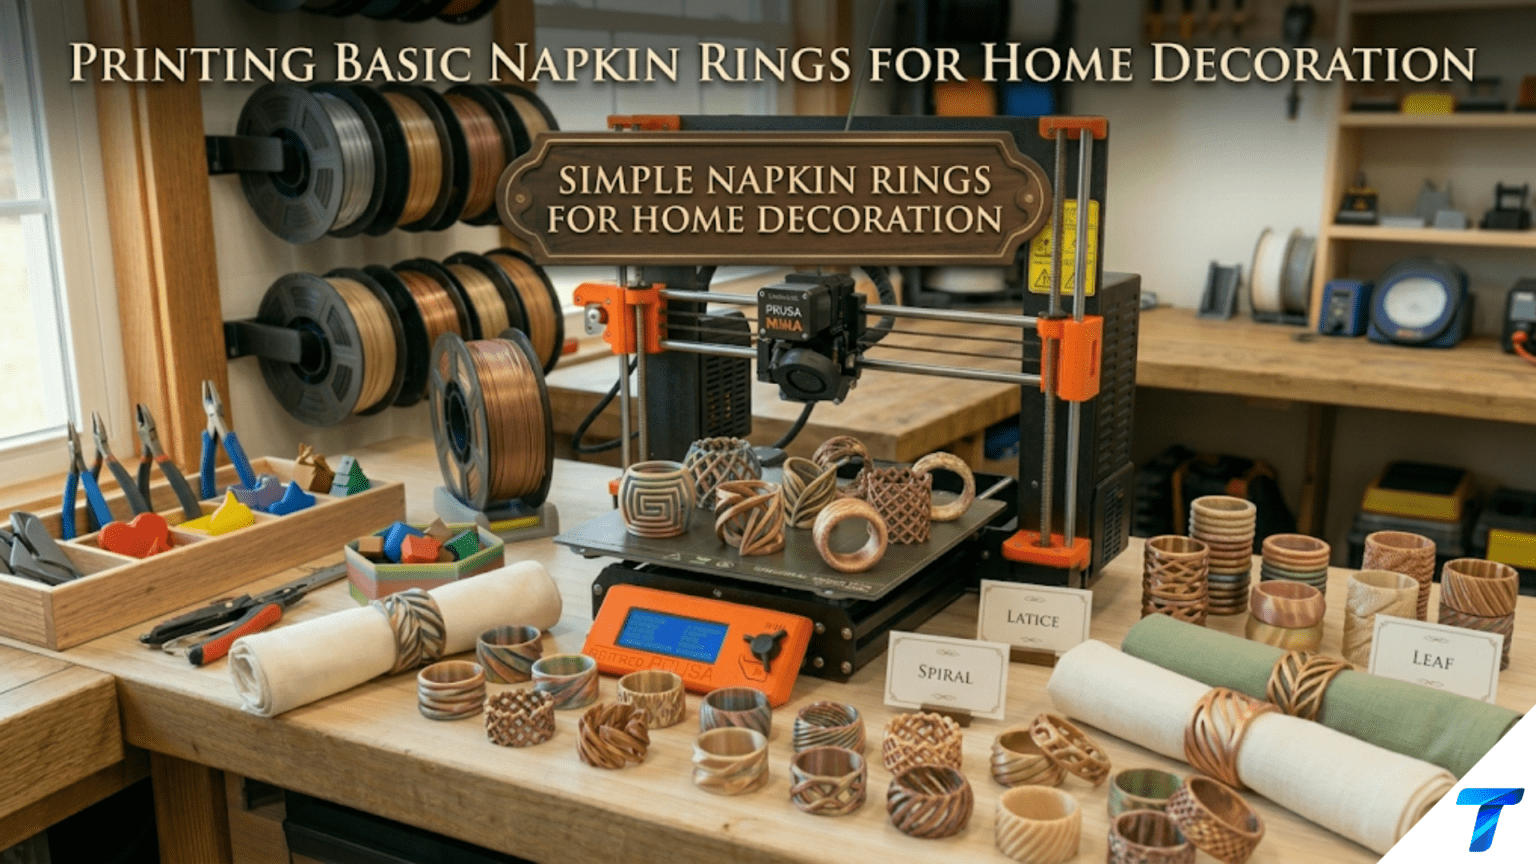
3D printed napkin rings are decorative cylindrical or shaped holders that keep cloth napkins neatly rolled or folded for table settings, and they are among the most approachable decorative home projects a beginner can print. Napkin rings combine simple geometry — essentially a hollow tube or band — with enormous opportunity for surface decoration, personalization, and creative design, making them an ideal project for learning how surface detail, layer quality, and finishing techniques transform a basic shape into a genuinely beautiful table accessory.
Introduction: Small Objects, Big Impact
There are objects in a home that individually seem minor but collectively define the character of a space. A thoughtfully set dinner table is one of the most powerful of these — the difference between a table set with care and intention and one assembled from whatever was convenient is immediately visible and immediately felt by anyone who sits down at it.
Napkin rings are among the smallest elements of a table setting, but their presence signals something specific: that someone thought about the table, considered the details, and wanted the meal to feel like an occasion rather than just a necessity. Restaurants use napkin rings to elevate the dining experience. Households use them for holiday dinners, celebrations, and the kind of family meals that people remember.
For 3D printer owners, napkin rings represent a particularly satisfying category of project. They are geometrically simple — a hollow cylinder or a band is the basic form — which means they are accessible to beginners. But they reward investment in surface detail, personalization, and finishing in a way that makes them as interesting for advanced makers as for beginners. A plain cylinder becomes a set of heirloom-quality table accessories with the addition of surface texture, a name, a decorative pattern, or a hand-painted finish.
They also print quickly. A single napkin ring typically takes 20–40 minutes depending on complexity. A set of 6–8 for a dinner table takes a few hours in total — an afternoon project that produces something immediately useful and genuinely beautiful.
This guide covers everything you need to know about designing, printing, and finishing napkin rings: the dimensions that work, the design variations worth exploring, material choices for different aesthetics, slicer settings for clean decorative surfaces, finishing and painting techniques, and creative directions for every occasion from everyday family dinners to formal holiday celebrations.
Understanding Napkin Ring Dimensions
Before designing or choosing a napkin ring, understanding the dimensional requirements ensures the rings actually work — napkins should roll and insert easily, stay in place during the meal, and slide out cleanly when unfolded.
Standard Napkin Ring Dimensions
| Dimension | Typical Range | Notes |
|---|---|---|
| Inner diameter | 40–55mm | Standard cloth napkins fold to 35–45mm; add 5–10mm clearance |
| Outer diameter | 50–70mm | Determines wall thickness and visual weight |
| Width (length of the tube) | 35–55mm | Narrower looks delicate; wider looks substantial |
| Wall thickness | 3–6mm | Thinner for elegant look; thicker for sturdy feel and surface detail |
Why Inner Diameter Matters Most
The inner diameter determines whether the napkin ring actually works. Too small and the rolled napkin won’t fit through without struggling; too large and the napkin slides out during use.
Standard cloth dinner napkins (typically 50cm × 50cm square) roll to a diameter of approximately 35–42mm depending on the thickness of the fabric and how tightly they are rolled. A napkin ring with a 45–50mm inner diameter accommodates most cloth napkins comfortably, allowing easy insertion and removal while holding the napkin securely during a meal.
For thicker napkins (linen, heavy cotton) or for napkins folded rather than rolled, use the larger end of the range — 50–55mm inner diameter. For thin napkins or napkin paper rings, 40–45mm is fine.
Practical tip: Before printing a full set, print a single test ring in your designed dimensions, roll one of your actual napkins to its typical dinner table form, and test the fit. This takes 20 minutes and saves the frustration of printing a complete set that’s slightly too tight or too loose.
Wall Thickness and Visual Weight
The wall thickness of a napkin ring — the difference between inner and outer diameter — determines both its structural strength and its visual character:
Thin walls (3–4mm): Elegant, lightweight, delicate appearance. Good for fine china and formal table settings. Requires more careful printing (thin walls are more challenging than thick ones). Less room for surface decoration.
Medium walls (4–5mm): The most versatile range. Good structural integrity, adequate room for surface decoration, balanced visual weight. Recommended for most beginners.
Thick walls (5–7mm): Substantial, heavy feel. More room for intricate surface decoration, deep debossing, or carved-looking relief designs. More rustic or bold aesthetic. Easier to print reliably.
Napkin Ring Design Approaches
Approach 1: Plain Band (Minimalist)
The simplest possible napkin ring: a perfect hollow cylinder with flat ends. This design is clean, modern, and elegant in the right context — particularly in matte white, matte black, or metallic filaments where the material itself provides visual interest.
Plain band rings benefit most from premium filaments — a silk gold PLA plain band looks like a polished metal accessory; a matte concrete-grey PETG ring looks like carved stone. The design is intentionally minimal; the material does the aesthetic work.
Ideal for: Modern minimalist table settings, Scandinavian-inspired decor, settings where material quality speaks for itself.
Approach 2: Textured Band
A plain cylinder with surface texture applied — geometric patterns, wood grain, knurling, cross-hatching, woven appearance, or other repeating surface treatment. The texture creates visual interest and tactile engagement without changing the fundamental ring geometry.
Geometric textures (diamond pattern, hexagonal grid, chevron) create a modern, designed feeling. These textures print cleanly and are visually striking.
Organic textures (wood grain, bark, stone) create a natural, handcrafted feeling. Wood-grain textured rings in a wood-fill PLA can be genuinely difficult to distinguish from turned wooden napkin rings.
Woven textures (basket weave, twill pattern) create a textile-inspired feeling appropriate for casual dining.
In all cases, the texture is embossed (raised above the surface) or debossed (pressed into the surface). For napkin rings that will be handled regularly, embossed texture (raised) is more durable — it’s less likely to accumulate food residue or be difficult to clean.
Approach 3: Personalized Name or Initial Rings
Each ring in a set personalized with a different household member’s name or initial. These are immediately practical (everyone knows which napkin is theirs), charming as gifts, and introduce text design to the ring’s surface.
Design considerations for named rings:
- Character height: 8–12mm for names; 15–20mm for single initials
- Font: Bold sans-serif for clean readability (see article 76 guidance on font selection for 3D printed text)
- Text treatment: Debossed text is most elegant for napkin rings — the recessed letters fill with shadow and paint easily
- Position: Centered on the ring’s exterior, parallel to the ring’s axis
Personalized name rings are particularly popular as gifts for housewarmings, weddings, and family celebrations. A set of 6–8 rings each with a family member’s name makes a genuinely thoughtful and practical gift that gets used at every family dinner.
Approach 4: Decorative Relief Pattern
More elaborate decorative designs — floral motifs, geometric relief work, architectural patterns, animal silhouettes — on the ring exterior. These designs treat the napkin ring as a small decorative object in its own right, similar to how fine china rings often feature elaborate painted or embossed patterns.
Design sources: Community platforms (Printables, Thingiverse) have many beautifully designed napkin rings with elaborate surface decoration. Search “napkin ring” on either platform for a wide range of options from simple to highly decorative.
Design challenge: Relief decoration on a curved surface requires that the design wraps correctly around the cylinder. Many design files on community platforms handle this correctly. For custom designs in Tinkercad, surface decoration on curved objects requires some design skill — flat pattern elements don’t automatically conform to curved surfaces.
Approach 5: Themed Seasonal Rings
Different ring designs for different times of year or occasions:
- Christmas: Holly leaves, snowflakes, stars, geometric winter patterns
- Thanksgiving: Autumn leaves, corn, harvest-themed designs
- Spring/Easter: Flowers, eggs, rabbits, botanical motifs
- Summer: Nautical themes, citrus slices, tropical patterns
- Halloween: Pumpkins, bats, spooky geometric patterns
Seasonal napkin rings are a popular project because a full themed set can be printed in a single afternoon, they store easily between uses, and they provide a highly visible table decoration that sets the seasonal mood for any meal.
Approach 6: Geometric Statement Rings
Bold geometric forms that go beyond the simple cylinder — faceted polyhedra-inspired cross-sections, twisted bands, interlocked rings, geometric cutout patterns. These are more complex designs that treat the napkin ring as a design object foremost and a functional holder second.
Examples include twisted band rings (the ring wall twists 90° around its circumference — a striking visual effect), hexagonal cross-section rings (the exterior profile is a hexagon rather than a circle), and latticework rings (the wall is an open geometric lattice rather than a solid surface).
These designs are generally beyond Tinkercad beginner capability but are well-represented in the community design libraries. Many are available as ready-to-print files for those who want the aesthetic without the design complexity.
Materials for Napkin Rings
Napkin rings are table accessories that will be handled, washed occasionally, and displayed prominently. Material choice affects appearance, durability, and cleanability.
| Material | Appearance | Durability | Notes |
|---|---|---|---|
| Standard PLA | Slight gloss, wide color range | Fair | Acceptable for display; avoid dishwasher |
| Matte PLA | Flat, refined surface | Fair | Excellent aesthetic; hides fingerprints |
| Silk/Metallic PLA | Shimmery, premium appearance | Fair | Outstanding for formal table settings |
| Wood-fill PLA | Natural wood appearance | Fair | Sands and finishes like real wood |
| Stone/Concrete PLA | Industrial texture | Fair | Distinctive; heavy feel |
| PETG | Slight gloss | Good | More moisture resistant than PLA; better for washing |
| Glow-in-Dark PLA | Glows in darkness | Fair | Novel; appealing for children’s table settings |
Why PETG Is Worth Considering for Napkin Rings
Unlike many decorative objects that stay in one place, napkin rings get handled at every meal, occasionally get food residue on them, and need to be wiped or washed periodically. PETG’s better moisture resistance compared to PLA means it stands up to occasional washing more reliably — PLA can absorb moisture over time and may develop surface cloudiness with repeated exposure.
For a set of napkin rings intended for regular use at family meals (rather than a single special occasion set), PETG is the better material choice. It prints with nearly the same ease as PLA and comes in a wide range of colors including matte and silk varieties.
For special occasion rings used a few times per year (holiday table settings, for example), PLA is perfectly adequate — they’re not getting washed frequently enough for the moisture resistance difference to matter.
Specialty Filaments for Beautiful Napkin Rings
Silk and metallic PLA deserves special emphasis for napkin rings because the aesthetic result is dramatically different from standard PLA:
Silk gold PLA napkin rings look like cast metal — at a glance across a dinner table, they can be mistaken for purchased brass or gold-plated metal rings. For formal table settings, the visual effect is genuinely impressive.
Silk rose gold or copper PLA creates a warm metallic tone that works beautifully with natural wood tables and earth-tone tableware.
Wood-fill PLA can be sanded and stained to create napkin rings that are indistinguishable from lathe-turned wooden rings — a particularly appealing aesthetic for farmhouse, rustic, or natural style table settings.
Slicer Settings for Napkin Rings
Napkin rings are decorative objects handled at close range. Surface quality is paramount — every visible surface will be examined at arm’s length or less during a dinner.
| Setting | Recommended Value | Notes |
|---|---|---|
| Layer Height | 0.1–0.15mm | Fine layers are critical for smooth cylindrical surfaces |
| Print Speed | 35–45 mm/s | Moderate for clean outer walls |
| Outer Wall Speed | 20–25 mm/s | Very slow outer walls eliminate visible layer lines |
| Perimeters/Walls | 3–4 | Adequate for ring structure |
| Infill | 20–30% | Rings don’t need high infill |
| Top/Bottom Layers | 4 | Clean end faces |
| Support | None | Well-designed rings never need support |
| Bed Adhesion | Brim (3–5mm) | Small brim; rings have limited base area |
| Cooling | 100% | Full cooling for smooth layer lines |
| Seam Position | Rear | Place seam on the interior if possible |
| Ironing | Consider for flat surfaces | Not applicable to cylindrical exteriors |
Layer Height Is the Critical Variable
For cylindrical objects like napkin rings, layer height is the single most important setting for surface quality. At 0.3mm layer height, the individual layers are clearly visible as horizontal bands running around the ring — this can look intentional in a rustic context but often looks rough at close inspection. At 0.2mm, the bands are finer but still visible in raking light. At 0.15mm or 0.1mm, the surface approaches smoothness that requires close inspection under direct light to detect.
For napkin rings that will be seen and handled at a dinner table — where the lighting is typically flattering but the viewing distance is close — 0.15mm layer height produces excellent results. For maximum quality (particularly for photographed sets or gifts), 0.1mm is worth the additional print time.
The Seam Challenge on Cylinders
Cylindrical napkin rings present the seam problem that every cylindrical print faces: the nozzle must start and stop each layer somewhere on the circumference, creating a visible seam line that runs vertically up the ring. On a napkin ring, this seam is visible from many angles during use.
Options for managing the seam:
Aligned seam at the rear position: Set seam position to “Rear” and orient the ring so the rear faces away from the primary viewing direction at the table. Consistent seam placement looks more intentional than random.
Random seam placement: Distributes the seam artifact around the entire circumference, producing small random dimples rather than one continuous line. This option produces the cleanest appearance when the ring is viewed from all angles, at the cost of slightly more visible per-layer artifacts.
Outer wall wipe: Enable “outer wall wipe” in your slicer (available in PrusaSlicer as “Seam Painting” or in Cura). This technique moves the nozzle slightly past the seam start point to apply slight pressure to the seam, reducing its visibility.
Vase mode for seamless results: For plain band rings without surface decoration, vase mode (continuous spiral printing) produces a completely seamless surface. The ring must be a simple hollow cylinder with no features that vase mode can’t handle (no closed top, no surface decorations added as separate features). The result is the cleanest possible surface — truly seamless with no visible layer start/stop artifacts.
Vase Mode for Plain Band Rings
For a plain band napkin ring, vase mode is worth considering:
Advantages: Completely seamless exterior surface; faster print; translucent effect with appropriate filaments.
Disadvantages: Single-wall construction (typically 0.4mm wall for a 0.4mm nozzle); no possibility of infill; limited structural rigidity for very thin walls; the ring ends are open (no top/bottom surface layers).
For a plain band napkin ring intended for a formal table setting in silk or metallic PLA, the seamless vase mode surface can be genuinely spectacular. The wall can be made thicker by adjusting the extrusion multiplier or by using a wider nozzle (0.6mm or 0.8mm).
Designing Your Own Napkin Ring in Tinkercad
Creating a custom napkin ring in Tinkercad takes approximately 15–25 minutes and produces a perfectly fitted, personally designed ring. Here’s the complete workflow.
Step 1: Create the Outer Cylinder
From the basic shapes panel, drag a Cylinder onto the workplane. Set its dimensions:
- Diameter: 60mm (this is the outer diameter of the ring)
- Height: 45mm (this is the width of the ring)
Step 2: Create the Inner Cylinder (the Hollow)
Drag a second Cylinder onto the workplane. Set it as a “Hole.” Set dimensions:
- Diameter: 50mm (60mm outer − 2 × 5mm wall = 50mm inner)
- Height: 50mm (slightly taller than the outer cylinder to ensure clean subtraction)
Step 3: Align and Group
Select both cylinders. Use the Align tool to center the inner hole cylinder perfectly inside the outer cylinder. The hole should be concentric with the outer cylinder. Group both shapes — the inner hole subtracts from the outer cylinder, producing a hollow ring.
Step 4: Add Surface Decoration (Optional)
For debossed text: Create a text object with the desired name or initial. Position it on the exterior surface of the ring, set to “Hole,” and group with the ring body. The text sinks into the surface.
For embossed pattern: Import an SVG of your desired pattern (or build it from basic shapes), extrude it slightly, position it on the ring exterior, keep it as “Solid,” and group with the ring body. The pattern stands above the surface.
For a simple recessed band: Create a thin rectangular torus (or a flat ring shape) sized to sit in the middle of the ring exterior. Set it as “Hole” and group to create a decorative groove running around the ring’s circumference. Multiple parallel grooves create a banded design.
Step 5: Add End Chamfers (Optional Refinement)
Sharp flat ends look clean and simple. For a more refined look, add a slight chamfer (angled transition) at each end of the ring. In Tinkercad, approximate this by creating a torus shape at each end of the ring at a 45° angle, setting it as a hole, and grouping.
Step 6: Export and Print
Click Export, select STL, download, import into your slicer, apply settings, and print.
Finishing and Post-Processing Techniques
Finishing transforms a good print into a beautiful one. For napkin rings that will be used at the dinner table and seen at close range, finishing investment is highly worthwhile.
Sanding for Smooth Surfaces
Even with fine layer height settings, cylindrical surfaces have visible layer lines under close inspection. Sanding removes these:
- 180-grit: Remove the most prominent layer step ridges and any surface artifacts
- 320-grit: Smooth the surface to a consistent finish
- 600-grit: Near-smooth surface; appropriate for most painted finishes
- 1200-grit (wet): Ultra-smooth surface approaching polished; ideal before metallic or gloss paint
Wet sanding (with water) produces a cleaner result than dry sanding on cylindrical surfaces. Wrap the sandpaper around your finger or a small dowel to maintain consistent contact with the curved surface.
Painting for Contrast and Color
The most impactful finishing technique for decorated napkin rings is contrast painting of debossed text or surface decoration:
- Print the ring in a base color (dark: black, navy, dark green; or light: white, cream, light grey)
- Apply a contrasting paint color (gold, silver, white, black) over the entire ring surface
- Wait 30–45 seconds for slight tack
- Wipe off excess with a dry cloth, leaving paint in the debossed recesses
- The text or decoration appears in the contrasting color against the base
This technique — identical to the contrast enhancement method described in the sign-making articles — transforms a single-color print into a two-color piece with dramatic visual impact.
Metallic Dry Brushing
For rings printed in a dark base color, dry brushing metallic paint over raised surfaces creates an antique or highlighted effect:
- Load a brush with metallic gold, silver, or copper paint
- Wipe nearly all paint off on a paper towel (brush should be nearly dry)
- Lightly drag the brush over raised surface features (text, embossed pattern, ring edges)
- The metallic paint catches on the highest points while leaving recesses dark
- The result: metallic highlights on raised features with dark recesses — a carved and gilded appearance
Clear Coat Protection
Always finish painted napkin rings with 2–3 coats of clear coat (matte or satin depending on your aesthetic preference). This protects the paint from wear, makes the surface easier to wipe clean, and unifies the finish across the entire ring.
Step-by-Step: A Complete Dinner Party Napkin Ring Set
Let’s walk through creating a complete set of 8 personalized napkin rings for a formal dinner.
Step 1: Plan the Set
Decide:
- Ring dimensions: 60mm outer × 50mm inner × 45mm wide (standard fit, comfortable wall thickness)
- Design: Name rings — each with a guest’s name debossed on the exterior
- Material: Matte black PETG
- Finish: Gold metallic paint in the debossed name text
Step 2: Design or Source the Template
In Tinkercad, create the base ring using the workflow above. Add a text hole for the first name, positioned and sized appropriately. Export as STL.
Duplicate the Tinkercad design 7 times (for 8 total), changing the text in each copy to the corresponding guest’s name. Export all 8 STLs.
Step 3: Slice
Import all 8 STL files into your slicer. Arrange them on the build plate. A 220mm × 220mm printer can typically fit 4 rings lying flat per batch.
Settings:
- 0.15mm layer height
- Outer wall speed: 22 mm/s
- 3 perimeters
- 25% Grid infill
- 4 top and bottom layers
- 100% cooling
- 3mm brim
- Seam: Random
Step 4: Print in Two Batches
Print 4 rings in the first batch, 4 in the second. Total estimated print time: 3–4 hours for all 8.
Step 5: Post-Process
For each ring:
- Remove brim
- Light sand exterior with 320-grit to smooth layer lines
- Apply gold metallic craft paint over entire exterior
- Wipe with dry cloth after 40 seconds
- Allow to dry 20 minutes
- Apply 2 coats of clear matte spray coat
Step 6: Arrange and Use
Place each ring beside the corresponding place setting, with the guest’s name facing upward or toward the guest’s seat. The personalized rings add a host’s attention to detail that guests notice and appreciate.
A Year of Napkin Ring Projects
Napkin rings suit every meal occasion throughout the year:
Everyday family use: A simple set of 4–6 in a neutral color (white, cream, natural wood-look) for daily meals. Each family member’s initial keeps napkins sorted.
Holiday Christmas table: Red and gold silk PLA rings with holly or snowflake surface decoration. Print a set specifically for the holiday season and store with Christmas decorations.
Thanksgiving dinner: Warm autumn colors — burnt orange, deep red, harvest gold — with leaf or harvest motifs. A set of 8–10 for the extended family gathering.
Easter or spring brunch: Pastel colors with floral or botanical motifs. Light and cheerful for a spring table.
Summer outdoor entertaining: Bright, durable PETG rings in vivid summer colors — turquoise, coral, sunshine yellow — that can be wiped clean after outdoor use.
Formal dinner parties: Elegant matte black with gold-painted text, or silk gold plain bands that look like purchased metal rings.
Children’s table at family gatherings: Bright colors with each child’s name. Fun, practical, and makes children feel included in the occasion.
Creative Napkin Ring Variations Worth Trying
Napkin Ring Place Card Combination
A napkin ring with an integrated card holder — a small slot or clip on the ring that holds a printed or written place card. This combines two table setting functions into one printed object.
Napkin Ring Bud Vase
A taller, wider ring with a sealed bottom and a narrow cylinder in the center that accepts a single flower stem — the napkin sits around the outside and a single flower is displayed in the center. A whimsical and elegant combination piece.
Animal Shape Rings
Rings shaped like animals in cross-section — the napkin passes through the body of a stylized cat, rabbit, elephant, or other animal silhouette. These are popular for children’s tables and themed parties. Well-represented in the community library on Printables.
Interlocking Pair Rings
Two small rings that link together — perhaps with intertwined or connected designs — intended as a pair for a couple’s place settings. Popular as wedding gifts and anniversary table decorations.
Napkin Ring with Weight Insert
A ring with a recess in the base that accepts a metal washer or small steel ball bearing as a weight, adding substantial heft that makes the ring feel more like a premium metal accessory. The weight is simply placed in the recess and held by gravity or a small bead of glue.
Troubleshooting Common Napkin Ring Issues
Visible Seam Line on the Ring Exterior
Cause: Standard seam placement creates a continuous vertical line on the ring exterior.
Solution: Set seam position to “Random” for the cleanest overall appearance from all angles. Alternatively, set to “Rear” and orient the ring during use so the seam faces away from the primary view direction. For seamless results, use vase mode on plain band designs.
Ring Has Visible Layer Lines That Look Rough
Cause: Layer height too high for the close viewing distance of table use.
Solution: Reduce layer height to 0.15mm or 0.1mm. Sand with 320-grit then 600-grit sandpaper. Apply a light coat of clear coat which optically fills minor surface variation.
Text Is Hard to Read After Printing
Cause: Insufficient text depth, font too thin, or text too small for the viewing distance.
Solution: Increase deboss depth to 1.2–1.5mm. Use a bold sans-serif font. Increase character height to 10–12mm. Apply contrasting paint to the text recesses using the contrast enhancement technique.
Ring Is Too Tight for My Napkins
Cause: Inner diameter is slightly smaller than the rolled napkin diameter, or FDM dimensional variation reduced the inner diameter slightly.
Solution: Test fit before printing the full set. If too tight, increase inner diameter by 2–3mm and reprint. For rings already printed that are marginally tight, careful sanding of the inner surface with 180-grit wrapped around a cylindrical object (a marker, a dowel) removes material and increases the effective diameter.
Ring Is Too Loose — Napkin Falls Out
Cause: Inner diameter is too large for the specific napkins being used.
Solution: For future rings, reduce inner diameter by 3–5mm. For existing rings, add a thin strip of felt or foam tape to the inside of the ring to reduce the effective inner diameter and add friction.
Conclusion: Elevating the Everyday Table
The napkin ring is among the smallest of table accessories, but its presence at a table setting communicates something that matters: that this meal is worth the effort of presentation, that the people seated at this table are worth the care of a properly set place.
A printed napkin ring communicates something more specific still: that the person who set this table has the tools to make beautiful, personalized objects, and chose to make these specifically for this table, these people, this meal.
That specificity — the fact that the ring might have a guest’s name on it, or a design chosen for the season, or a color matched to the tablecloth — is what elevates a simple tubular piece of plastic into something that makes a dinner feel like an occasion.
Print a set of napkin rings. Use them at your next dinner. Watch how people notice them, pick them up, turn them over, ask about them. Watch how the table feels different with them in place.
Then print seasonal sets, personalized sets for gifts, elaborate holiday sets for special occasions. Let the napkin ring collection grow with your printing skill.
It’s a small project in every technical sense. But its impact on the table — and on the people who gather at it — is anything but small.