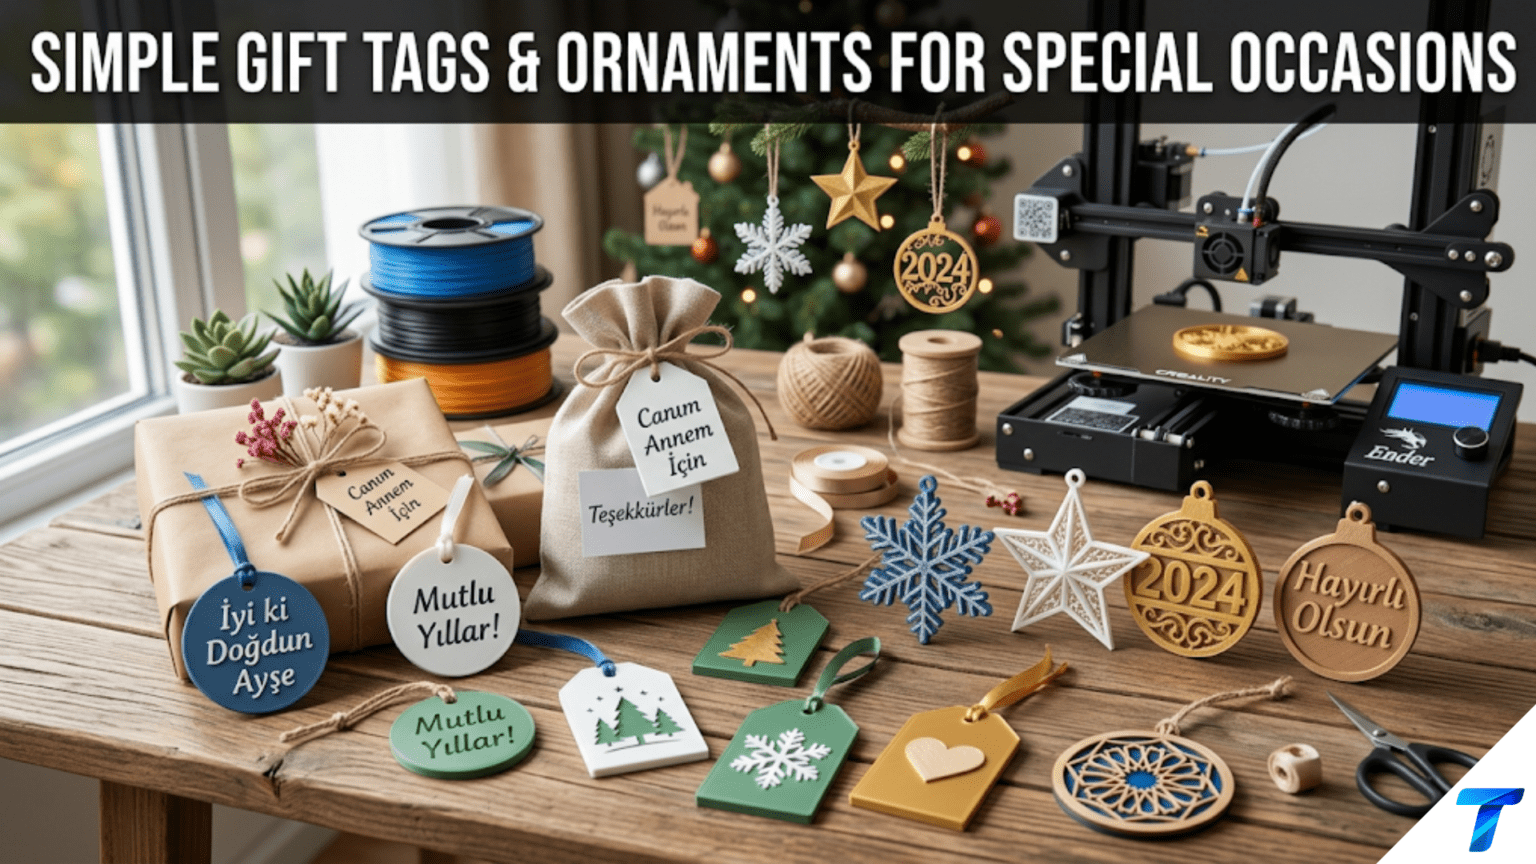
3D printed gift tags and ornaments are small, decorative items that add a personal, handcrafted dimension to gifts, holiday decorations, and celebrations. Gift tags are printed with custom text or graphics and attached to wrapped presents, while ornaments are three-dimensional decorative pieces hung on trees, garlands, or displayed as standalone decorations. Both are ideal beginner projects — they print in under an hour, require minimal material, introduce personalization through parametric text design, and produce results that feel genuinely special and thoughtful to the people who receive them.
Introduction: The Most Personal Prints You Can Make
There are 3D prints that demonstrate technical skill, prints that solve practical problems, and prints that fill functional needs. And then there are prints that make someone feel specifically seen and thought of — prints that carry the message “I made this for you, specifically, because I know what you love.”
Gift tags and ornaments belong firmly in this last category.
A gift tag with a recipient’s name, a meaningful date, a private joke, or a design that references their specific interests turns a generic wrapped present into something personal from the first moment it’s seen. A Christmas ornament shaped like a family’s dog, inscribed with the year, or decorated with a design that references a shared memory becomes a keepsake rather than just a decoration — something that will be brought out every holiday season for years or decades and will carry its meaning forward long after the person who made it might have forgotten the print settings they used.
This is some of the most emotionally resonant work your 3D printer can do, and it requires almost none of the technical complexity that other projects demand. A gift tag is a small flat object with text. An ornament is a simple geometric or decorative form with a hanging loop. The geometry is simple. The print time is short. The material cost is negligible.
What matters — almost entirely — is the thoughtfulness of the design. The choice of shape, the selection of text, the color that matches the recipient’s preferences, the size that’s appropriate for where it will live. These are human decisions, not technical ones. Your printer executes them, but you make them.
This guide walks you through everything you need to know about printing gift tags and ornaments: design approaches for both categories, personalization techniques, material choices for decorative items, finishing and painting methods that transform simple prints into genuinely beautiful objects, settings for small detailed prints, and a wide range of ideas for every occasion throughout the calendar year.
Part One: Gift Tags
What Makes a Great 3D Printed Gift Tag
A printed gift tag serves the same function as a paper tag — identifying who a gift is for and optionally who it’s from — but with the additional quality of being three-dimensional, durable, and genuinely surprising to receive on a gift.
The best printed gift tags balance several qualities:
Readability: The primary function is text communication. The recipient’s name or message must be clearly readable. This means adequate text size, sufficient contrast between text and background, and a font that reproduces cleanly at small scale in FDM printing.
Aesthetic appeal: A tag is a decorative object that the recipient will see before opening the gift. It should look attractive, not just functional — a well-designed tag builds anticipation and signals that care went into the entire gift experience.
Appropriate scale: Gift tags are small — typically 40–80mm in their longest dimension. This scale is small enough to be charming and tag-like, but large enough to carry readable text and some visual detail.
Attachment capability: A tag needs a way to attach to the gift — typically a small hole or loop through which a ribbon, twist tie, or string can pass.
Durability: Unlike paper tags, printed tags can be kept as mementos after the gift is opened. A well-printed tag in a durable material survives being handled, saved in a box, and rediscovered years later.
Gift Tag Design Approaches
Approach 1: Parametric Text Tags The simplest approach is a parametric tag design where you input your text and the shape is generated automatically. Many designs on Thingiverse and Printables accept custom text through their Customizer interface — you type the recipient’s name, select a font, choose a frame shape (oval, rectangle, star, heart, etc.), and download the custom STL.
This approach requires no 3D modeling skills and produces personalized results in minutes. It’s the fastest path from idea to printed tag.
Approach 2: Tinkercad Text Tags For more control over the design, Tinkercad’s text generator allows you to create custom text objects and combine them with frame or background shapes. The workflow:
- Create a background shape — a rectangle, oval, star, or any shape that serves as the tag body
- Create a text object with the recipient’s name or message
- Position the text on the background
- Set the text as a “Hole” to deboss it (recessed into the surface) for easier readability
- Add a small cylinder hole at the top for the attachment string
- Export and print
This workflow takes 15–25 minutes for a beginner and produces a fully custom, personalized tag.
Approach 3: Decorative Frame Tags Rather than purely text-focused tags, decorative frame tags combine visual imagery with text. Examples:
- A holly and berries frame with the recipient’s name in the center
- A birthday cake silhouette with an age number
- A snowflake frame with “To: [name]”
- A floral border with a personal message
These can be found as pre-designed files (search “gift tag” with a theme keyword on Printables) or created in Tinkercad by combining imported SVG images with text.
Tag Dimensions and Attachment Design
Standard gift tag dimensions:
- Small tags: 40mm × 25mm (appropriate for small gifts, minimalist aesthetic)
- Medium tags: 60mm × 40mm (most versatile — good text readability)
- Large tags: 80mm × 55mm (impressive presence on large gifts, room for longer messages)
- Thickness: 3–4mm (thin enough to be tag-like; thick enough to print reliably)
Attachment options:
- Simple hole: 3–4mm diameter hole near the top edge. Thread a ribbon, string, or twist tie through it.
- Integrated loop: A small printed loop extending from the top of the tag, allowing direct attachment without a separate fastener.
- Slot: A narrow slot (approximately 2mm × 8mm) near the top edge that accepts flat ribbons.
- Hanging tab: A wider tab with a hole, providing more material around the attachment point for durability.
For any attachment hole, ensure there is at least 3mm of material between the hole edge and the tag edge to prevent the hole from pulling through under the weight of the attached string or ribbon.
Text for Gift Tags: What Works at Small Scale
Text at gift tag scale — typically 5–10mm character height — is one of the more challenging printing tasks for beginners. FDM printing reproduces text well when certain guidelines are followed:
Font selection:
- Bold sans-serif fonts work best (Arial Bold, Helvetica Neue Bold, Roboto Bold). The thick, consistent stroke width of these fonts reproduces cleanly at small scale.
- Avoid thin or ornate fonts — the fine strokes of serif fonts, script fonts, and decorative typefaces become too thin to print reliably at small scale and either disappear or look ragged.
- Avoid very condensed fonts — overly narrow letters compress together and become unreadable at small scale.
Text depth:
- Debossed (recessed) text: Minimum 0.6mm depth (3 layers at 0.2mm). Deeper is better — 1.0mm debossed text reads clearly even in single-color prints because shadows fill the recesses.
- Embossed (raised) text: Minimum 0.8mm height above surface. Raised text can be painted a contrasting color for dramatic readability improvement.
Minimum character height:
- At 0.2mm layer height: Characters should be at least 5mm tall to be readable
- At 0.15mm layer height: Characters can be as small as 4mm tall with readable results
- For names: Most names read well at 6–8mm character height on a standard tag
Two-color approach for maximum readability: Print the tag body in one color, then carefully paint the debossed text with a contrasting paint color (use a fine brush and wipe excess off the flat surface). The contrast dramatically improves readability and gives the tag a premium, finished appearance.
Part Two: Ornaments
The Anatomy of a Printed Ornament
An ornament is fundamentally a decorative three-dimensional object designed to be displayed — hung, placed, or mounted in a visible location. Printed ornaments can be:
Flat (2.5D): A flat decorative shape with minimal thickness — essentially a thick version of a gift tag but designed for display rather than attachment to a gift. Snowflakes, stars, and silhouette designs are naturally flat ornaments.
Volumetric (3D): A fully three-dimensional form — a ball, a bell, a sphere, a geometric polyhedron, an animal figure — that presents differently from every viewing angle.
Hollow: A volumetric ornament printed as a shell rather than solid. Hollow ornaments are lighter (important for hanging on trees without bending branches), use less material, print faster, and can be translucent in some materials and orientations.
Relief: An ornament with a flat back for wall mounting and a detailed relief on the front — a carved-appearance plaque that hangs on a wall rather than a tree.
Every ornament needs one or more of the following for display:
- Hanging loop: An integrated loop at the top through which ornament hooks or string pass. This is the standard for Christmas tree ornaments.
- Flat bottom: A flat base that allows the ornament to be free-standing on a shelf or mantelpiece.
- Mounting hole: For wall-mounted ornaments or ornaments displayed on pegboards.
Ornament Design Categories
1. Classic Christmas Ornaments
The traditional round ball ornament is surprisingly well-suited to FDM printing. A hollow sphere with a small top cap hole for hanging, printed in vase mode or with very few perimeters, produces a lightweight ornament that catches light beautifully — especially in translucent or metallic filaments.
Variations on the basic ball form:
- Faceted geometric balls (icosphere, geodesic sphere, low-poly ball)
- Textured balls with ribbing, knurling, or pattern embossing
- Teardrop and elongated forms
- Bell shapes
- Snowglobe-style hollow balls with small internal structure visible through gaps
2. Snowflakes
Snowflake ornaments are among the most popular 3D printing projects and one of the most technically interesting — snowflake geometry involves thin, branching arms that test your printer’s fine-detail capability at low layer heights.
A good snowflake ornament design has:
- Arms that are at least 2mm wide at their narrowest for reliable printing
- A hanging loop or hole integrated at one tip
- Thickness of at least 3mm for rigidity
- Geometry that doesn’t require supports (most well-designed snowflakes are flat enough to print without supports)
3. Holiday-Themed Silhouettes
Flat silhouette ornaments in seasonal shapes — trees, stars, stockings, candy canes, reindeer, Santa hats, dreidels, menorahs, and hundreds of other holiday symbols — are fast, charming, and endlessly varied. These print in 20–45 minutes, use minimal filament, and can be made in batches.
4. Personalized Name and Date Ornaments
Ornaments incorporating a specific name, a year, a family name, or a meaningful date turn a generic decoration into a keepsake. “Baby’s First Christmas 2024,” “The Johnson Family,” “Married [year]” — these ornaments carry specific meaning for specific people and are consistently among the most appreciated gifts in the maker community.
Design approaches:
- Text as the primary visual element, on an ornament-shaped background
- Text integrated into a design (text in a wreath border, name on a stocking, year in a star)
- Small name tag ornament that hangs alongside other ornaments on a child’s tree branch
5. Geometric and Modern Ornaments
Not every ornament needs to be traditionally themed. Modern geometric ornaments — icosahedra, octahedra, interlocking rings, Möbius strips, mathematical surfaces, wireframe cubes — appeal strongly to people with minimalist or contemporary interior aesthetics. These are also excellent printing challenges, with complex geometry that tests your printer’s bridging and overhang capabilities.
6. Keepsake Ornaments
Ornaments designed to capture and commemorate specific moments:
- House ornaments shaped like a family’s first home (requires some modeling skill for the specific house shape)
- Baby handprint or footprint ornaments (requires scanning a hand or foot as a 3D surface — an intermediate project)
- Pet portrait ornaments (simplified silhouette of a specific pet shape)
- Custom coat-of-arms or family crest ornaments
- Ornaments incorporating a significant year or milestone
These are among the most personal and treasured prints possible, and while some require intermediate design skills, many are achievable with basic Tinkercad work.
7. Functional Ornaments
Some ornaments serve double duty as functional objects:
- Ornament with integrated tealight holder (the candle flame creates beautiful light effects through a perforated or translucent outer shell)
- Ornament that unscrews to reveal a small hidden compartment (for a tiny gift inside)
- Ornament hooks that are themselves decorative — printed S-hooks in star or spiral shapes
Material Selection for Gift Tags and Ornaments
Material choice for decorative items is primarily about appearance, with secondary consideration for durability. Unlike functional prints where mechanical properties dominate, the right material for ornaments is often simply the one that looks most beautiful.
| Material | Appearance | Best For |
|---|---|---|
| Standard PLA | Slight gloss, good color range | Basic tags and ornaments; good starting point |
| Matte PLA | Flat, refined finish | Tags and ornaments where the matte look suits the aesthetic |
| Silk/Metallic PLA | Shimmery, semi-gloss | Holiday ornaments, premium gift tags — transforms appearance |
| Translucent/Clear PLA | Semi-transparent | Snowflakes, geometric ornaments backlit by window or tree lights |
| Glow-in-Dark PLA | Glows green or blue in dark | Star, moon, and night-themed ornaments; magical for children |
| Color-Change PLA | Changes color with temperature | Interactive novelty ornaments |
| Glitter PLA | Sparkly surface | Holiday ornaments, gift tags for children |
| Wood-Fill PLA | Natural wood appearance | Rustic ornament aesthetic; stains and paints like wood |
| Metallic Copper/Gold PLA | Rich metallic appearance | Premium holiday ornaments, wedding keepsake tags |
The Case for Silk PLA for Holiday Ornaments
Silk PLA deserves special emphasis for holiday ornament printing. The metallic sheen of silk filament in gold, silver, copper, rose gold, and similar finishes produces ornaments that genuinely look like they could have been cast from metal or dipped in metallic paint — but without any post-processing.
A silk gold PLA Christmas ball ornament, a silk bronze star, or a silk silver snowflake looks dramatically more premium than the same design in standard PLA. For ornaments that will be displayed prominently and kept for many years, silk PLA is worth the slightly higher cost compared to standard filament.
Slicer Settings for Gift Tags and Ornaments
Small decorative prints have specific requirements: fine detail reproduction, smooth surfaces, and no wasted material. The settings below balance these priorities.
Settings for Gift Tags
| Setting | Recommended Value | Notes |
|---|---|---|
| Layer Height | 0.1–0.15mm | Fine layers for text detail reproduction |
| Print Speed | 30–40 mm/s | Slow for clean small features |
| Outer Wall Speed | 20–25 mm/s | Very slow outer walls for crisp edges |
| Perimeters/Walls | 3–4 | Solid walls for small tags |
| Infill | 40–50% | Higher infill for solid, heavy-feel tags |
| Top/Bottom Layers | 4–5 | Clean surfaces on both faces |
| Support | None | Tags should never need supports |
| Bed Adhesion | Brim (2–3mm) | Small brim for small parts |
| Minimum Layer Time | 10 seconds | Critical for small parts — prevents heat buildup |
| Cooling | 100% | Full cooling for clean small features |
| Hotend Temp (PLA) | 205°C | Standard PLA |
Settings for Ornaments
| Setting | Recommended Value | Notes |
|---|---|---|
| Layer Height | 0.15mm | Balance of detail and speed |
| Print Speed | 40–50 mm/s | Moderate for quality |
| Perimeters/Walls | 2–3 | Thin walls for lightweight hanging ornaments |
| Infill | 10–15% | Low infill for lightweight ornaments |
| Top/Bottom Layers | 3 | Standard closure |
| Support | As needed | Some 3D ornament forms need support |
| Bed Adhesion | Brim (3–5mm) | Standard |
| Cooling | 100% | Full cooling |
| Vase Mode | For simple hollow ornaments | Produces seamless, lightweight ornament shells |
Printing Flat Ornaments Without Warping
Flat ornaments — snowflakes, star silhouettes, flat name ornaments — share the warping risk of any flat print, but at a smaller scale. Because they’re smaller, they’re actually less susceptible to warping than large flat objects. However, thin features at the extremities of the design (snowflake arm tips, star points) can lift slightly.
Strategies for clean flat ornament printing:
- Use a brim of at least 5mm
- Ensure cooling is at 100% to solidify each layer quickly before contraction begins
- Print at moderate temperature (not excessively hot) to minimize warping tendency
- If printing multiple ornaments at once (recommended for efficiency), arrange them with adequate spacing to prevent travel string contamination
Batch Printing for Efficiency
Gift tags and small ornaments are ideal batch printing candidates. A full build plate of 10–20 gift tags prints in about the same total time as 3–4 individual tags, making batch production highly efficient.
For batch gift tag printing:
- Design a set of tags with different names, all the same overall shape and dimensions
- Import all tag STLs into the slicer simultaneously
- Use the “Arrange” function to distribute them evenly on the build plate
- Set minimum layer time to 10 seconds (critical for small parts in a batch)
- Enable retraction carefully — stringing between small parts is more noticeable than between large parts
Post-Processing and Finishing Techniques
The right post-processing transforms a good print into something that genuinely looks handcrafted and intentional. For decorative items like gift tags and ornaments, finishing is worth the investment.
Painting for Two-Color Contrast
The most impactful single finishing technique for gift tags and ornaments is adding a contrasting color to recessed or raised features:
For debossed text on tags:
- Apply a small amount of craft paint in a contrasting color (black text on white tag, gold on dark green, white on red, etc.) over the entire tag surface
- Wait 1–2 minutes for slight tack
- Wipe off the excess with a dry cloth or piece of card — the raised flat surface clears, but paint remains in the recessed text
- The result is dramatically more readable, contrasted text
For painted ornaments: Spray paint is the most efficient approach for covering entire ornaments:
- Light sand with 400-grit to smooth layer lines
- 2 coats of plastic primer (light sanding between coats)
- 2–3 thin coats of final color in spray or brush-applied craft paint
- Optional clear coat for protection and finish control
Metallic Highlight Painting
For ornaments and tags printed in plain PLA that you want to look more festive:
- Dry brush metallic gold, silver, or copper craft paint over raised features
- Technique: Load a brush with metallic paint, wipe most of it off on a paper towel until the brush is almost dry, then lightly drag it over raised surfaces
- The result: Metallic highlights on raised features with the base color showing in recessed areas — a professional-looking antiqued or highlighted effect
Glitter Application
For children’s ornaments and particularly festive tags:
- Apply a thin coat of Mod Podge or clear craft glue over the surface
- Immediately sprinkle fine craft glitter over the wet surface
- Shake off excess and allow to dry
- Apply another coat of Mod Podge over the glitter to seal it
The result is a glittery surface that doesn’t shed glitter during handling.
Sealing for Longevity
Any ornament or tag that will be stored and reused across multiple seasons benefits from a protective clear coat:
- Spray matte or gloss clear coat (depending on your preferred finish)
- Protects paint from chipping
- Protects PLA from UV degradation if stored in clear containers near sunlight
- Makes surfaces easier to wipe clean
Step-by-Step: Making a Complete Holiday Ornament Set
Let’s walk through designing and printing a set of 8 personalized Christmas ornaments — one for each member of a family (four adults, four children), each with their name and the year.
Step 1: Design Your Template
Create or find a base ornament template:
- Search Printables for “name Christmas ornament” and choose a design with clear text input capability, OR
- Design in Tinkercad: Create a circle (60mm diameter, 5mm thick), subtract a smaller circle for a frame effect, add a hanging loop at the top, add a text hole for the name
The template should have:
- A hanging loop or hole
- A defined text area for the name (8mm character height minimum)
- A secondary text area or integrated year somewhere in the design
- Total size approximately 60–80mm diameter
Step 2: Generate Individual Files
For each of the 8 family members, customize the template with their name. If using a Thingiverse Customizer design, generate each name’s STL individually and download all 8 files. If using Tinkercad, duplicate the template design 8 times and change the text in each copy.
Name a file clearly for each person — “ornament_sarah.stl”, “ornament_tom.stl”, etc. — to avoid confusion during printing.
Step 3: Choose Filament Colors
Decide on your color approach:
- All the same color: Unified, clean aesthetic. A silk gold or silk red works beautifully.
- Each person’s favorite color: More personal; requires more filament changes.
- Two-color family palette: Adults in one color, children in another.
For this example, use silk gold PLA for all ornaments — a single color change, elegant, and seasonally appropriate.
Step 4: Slice and Batch Where Possible
Import all 8 ornament STLs into your slicer. Arrange them on the build plate. With 60mm ornaments, a 220mm × 220mm build plate can fit all 8 in a single batch or split into two batches of 4.
Apply ornament settings:
- 0.15mm layer height
- 3 perimeters
- 15% infill
- Minimum layer time: 10 seconds
- Full cooling
- 5mm brim
- Seam position: Sharpest corner (position the seam at the top loop area, which will be less visible when hanging)
Step 5: Print
Run the batch print. Monitor the first layer to ensure all ornaments are adhering. Watch the hanging loop feature as it prints — this is often the first area of potential concern on ornament designs.
Estimated print time for 8 ornaments at 0.15mm layer height: 3–5 hours for the full batch.
Step 6: Post-Processing
For each ornament:
- Remove brim carefully
- If any rough areas, light sand with 400-grit
- Apply contrasting paint to text recesses if desired (gold or copper on the recessed text areas creates beautiful contrast)
- Thread a 15cm length of thin gold ribbon or baker’s twine through the hanging loop
- Optionally, tie each ribbon in a loop and add a small bow
Step 7: Wrap and Include with Gifts
If these ornaments are gifts themselves (a personalized ornament is a wonderful Christmas gift), wrap each individually. If they’re being used as gift tags, attach them to the corresponding wrapped gift with ribbon through the hanging hole.
The ornament serves double duty: it’s both the gift tag identifying whose present it is and a keepsake gift in its own right that the recipient takes home and hangs on their tree.
A Year of Occasions: Tags and Ornaments for Every Season
Gift tags and ornaments aren’t limited to Christmas. Here’s a calendar of occasions where printed tags and ornaments add personal value:
January:
- New Year ornaments with the new year’s number for a mantelpiece display
- “New Chapter” tags for January birthday gifts
February:
- Heart-shaped gift tags for Valentine’s Day
- Valentine ornaments with personalized messages for partners or children
March/April:
- Easter egg ornaments in bright colors for egg hunts
- Spring flower tags for spring birthday gifts
May:
- Mother’s Day tags incorporating a child’s name or handprint-like design
- Graduation ornaments with graduation year and name
June:
- Father’s Day tags with tools, sports, or hobby themes
- Wedding ornaments for June weddings — personalized with couple’s names and wedding date
July:
- Independence Day star and flag ornaments for patriotic decor
- Summer birthday tags with beach or outdoor themes
September:
- Back-to-school tags for pencil cases and lunch boxes
- Fall leaf ornaments for autumn decor
October:
- Halloween ornaments (jack-o-lanterns, ghosts, bats) for Halloween trees
- Spooky gift tags for Halloween party favors
November:
- Thanksgiving turkey and harvest ornaments for seasonal decor
- Gratitude tags inscribed with what you’re thankful for
December:
- The full range of Christmas ornaments covered throughout this guide
- Hanukkah menorah and Star of David ornaments
- New Year countdown ornaments with the incoming year’s number
Creative Ornament Projects Worth Exploring
Advent Calendar Number Tags
Print 24 small number tags (1–24) to attach to advent calendar pouches, boxes, or doors. Matching design and color across the full set creates a beautiful, cohesive advent calendar system. These can also be made as small ornaments hung in order along a garland.
Birth Announcement Ornament
A keepsake ornament made to commemorate a new baby — incorporating the baby’s name, birth date, weight, and length. This is an extraordinarily treasured gift for new parents and can be reprinted annually with the same design for “Baby’s First Christmas,” “First Birthday,” etc.
Wedding Memory Ornament
An ornament incorporating a couple’s names, wedding date, and optionally the city where they married. A classic keepsake that will be displayed every holiday season and become more meaningful with each passing year.
Teacher Appreciation Tags
End-of-year gift tags printed with the teacher’s name and a personalized message from the student. These make the standard gift card or small present feel significantly more thoughtful and personal.
Pet Memorial Ornament
A hanging ornament incorporating a beloved pet’s name, species, and the years they lived. For families who have lost a pet, this type of keepsake ornament provides a way to include the pet in annual holiday traditions.
Travel Souvenir Ornaments
Ornaments representing places you’ve traveled — a Eiffel Tower silhouette from Paris, a bridge outline from San Francisco, a mountain form from a hiking destination. These are wonderful alternatives to commercial souvenir ornaments and tell a more personal story of actual travel experiences.
Troubleshooting Common Tag and Ornament Issues
Text Is Not Readable at Tag Scale
Cause: Font too thin or decorative, text depth too shallow, character height too small, or layer height too high for the detail level required.
Solution: Switch to a bold sans-serif font. Increase deboss depth to at least 1.0mm. Increase character height to 7–8mm. Reduce layer height to 0.12mm for maximum text detail. Apply contrasting paint to the text recesses for immediate readability improvement.
Hanging Loop Breaks When Ornament Is Hung
Cause: Loop is too thin, not enough perimeters, or PLA brittleness at a stress concentration point.
Solution: Redesign the loop to be at least 3mm thick at its narrowest point. Ensure 4 perimeters pass through the loop. Switch to PETG for better toughness. As a quick fix, reinforce a cracked loop with cyanoacrylate glue.
Flat Ornament Tips Are Lifting Off Bed
Cause: Sharp tips and extremities of flat ornament designs are the first areas to lift during thermal contraction.
Solution: Increase brim. Print at slightly lower temperature. Reduce cooling to 80% (slightly slower cooling reduces thermal differential). If a specific tip keeps lifting, consider adding a small mouse ear brim specifically at that point (a small circular brim at the problematic tip).
Ornament Has Obvious Seam Line on Front Face
Cause: Seam position set to an undesirable location.
Solution: For ornaments, set seam position to “Rear” or “Sharpest Corner” and orient the model in your slicer so that any sharp corners are on the back or top (hidden when hanging). For ball ornaments with no natural sharp corners, use “Random” seam placement or manually place the seam at the hanging loop where it’s least visible.
Batch Print Has Extensive Stringing Between Tags
Cause: Travel moves between small closely-spaced parts produce stringing, especially at the tag scale where even short strings are very noticeable.
Solution: Increase retraction by 0.5mm increments. Reduce temperature by 5°C. Enable “Combing” in Cura (keeps travel moves within the part footprint). Increase spacing between tags to 10mm. If stringing remains, a brief pass with a heat gun from a distance or careful cleanup with tweezers removes strings cleanly from finished parts.
Conclusion: Making Memory
The most powerful use of any technology is the creation of something that matters to a specific person — something that carries your intention, your knowledge of them, and your desire to give them something they’ll value.
A printed gift tag with someone’s name, a Christmas ornament inscribed with a year that mattered, a keepsake bearing the name of a beloved child or pet — these objects are small in size and simple in geometry, but they carry an outsized emotional weight. They tell the person who receives them: you were thought of specifically, you were worth the extra effort, you are known.
That’s not a technical achievement. It’s a human one, made possible by the technology you’ve invested in learning.
Print tags for your gifts this season. Make ornaments for the people you love. Give them something that will live on a tree or a shelf or in a memory box long after the gift they came with has been used up or worn out.
Your printer can make that possible. Use it for something that matters.