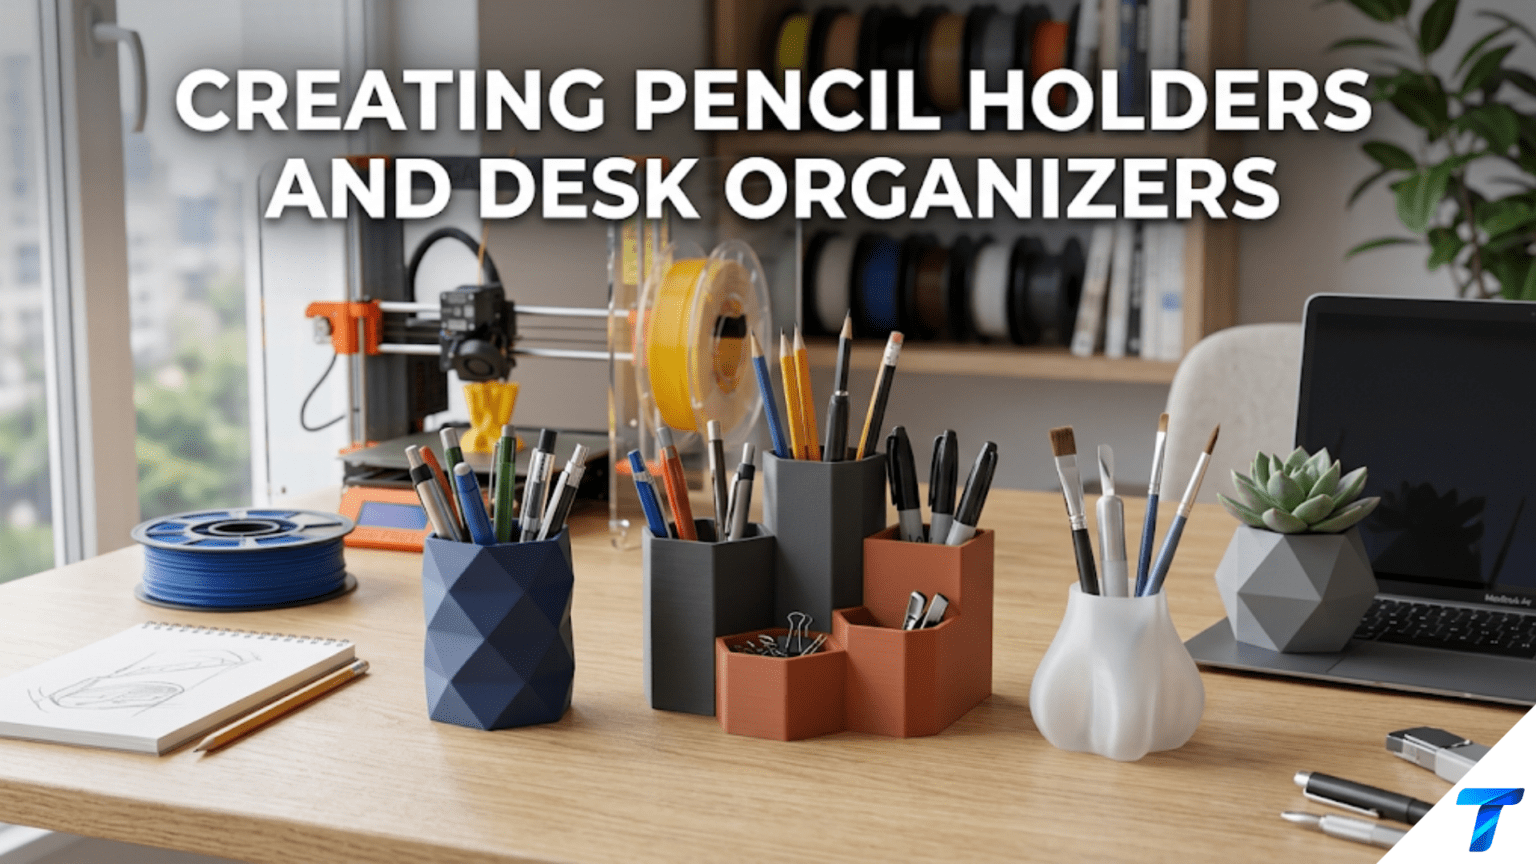
3D printed pencil holders and desk organizers are custom-designed containers that keep pens, pencils, scissors, rulers, and other desk tools neatly sorted and immediately accessible on any work surface. They are among the most popular beginner printing projects because they are geometrically simple — essentially cylinders and boxes — yet offer extensive opportunities for personalization in size, shape, compartment layout, color, and surface texture, making them ideal for learning how print parameters affect the appearance and function of everyday objects.
Introduction: The Most Visible Print on Your Desk
Of all the places in your home where 3D printed objects can live, your desk is the most watched. It’s where you spend productive hours, where visitors can see your setup, and where the quality and character of every object is visible under direct light throughout the day.
A printed phone stand, a printed cable clip, a printed key holder — these are noticed occasionally. But a pencil holder or desk organizer sits front and center on your workspace, in direct view, handling objects dozens of times per day. If it looks good, it elevates your entire desk. If it looks mediocre, it’s a constant reminder of a missed opportunity.
This makes the desk organizer one of the most rewarding categories in 3D printing — because getting it right, achieving that clean, confident look of a well-made object that happens to be exactly the right size for your tools and your space, is genuinely satisfying. And unlike a commercial pencil holder that you bought because it was the best available option among limited choices, a printed desk organizer was made specifically for your tools, your desk dimensions, and your aesthetic preferences.
The desk organizer also sits at an interesting creative intersection. It’s simple enough for beginners — a cylinder or a box, essentially — but rich enough in variation that experienced makers still find new approaches worth trying. The geometric simplicity means that material choice, color, surface finish, and proportion become the primary design variables, teaching you how much these factors matter when the geometry itself isn’t doing the heavy lifting.
This guide covers everything you need to know: the types of desk organizers worth printing, design approaches from basic to modular, the Gridfinity desk ecosystem, material selection for desk use, slicer settings that produce excellent surface quality on visible desktop objects, post-processing techniques for a professional finish, and a comprehensive collection of creative ideas that will keep you designing and printing desk accessories for years.
Understanding What Makes a Good Desk Organizer
Before jumping into designs and settings, it’s worth spending a few minutes thinking about what actually makes a desk organizer work well. This is functional design thinking applied to one of the most common household objects — and the insights apply to virtually every organizer you’ll ever design or choose.
Ergonomic Reach and Access
The fundamental job of a desk organizer is to make frequently used tools immediately accessible without searching. This seems obvious, but many organizer designs — including commercially sold ones — fail at it by making tools too difficult to retrieve, too easy to knock over when reaching for adjacent tools, or positioned at an inconvenient distance or angle.
For pencil holders specifically, the geometry should allow you to pick up any single pen or pencil without needing to lift others out of the way. This means:
- Diameter considerations: A single-slot cylinder that’s tightly packed makes every retrieval a search-and-extract operation. A wider cylinder or compartmentalized holder keeps tools separated enough for easy individual access.
- Height considerations: A holder that’s too tall buries pen caps below the rim, making identification difficult. A holder that’s too short lets pens fall over. The sweet spot is roughly the length of a standard pen’s cap or grip section above the nozzle — about 80–100mm for standard pens.
- Opening considerations: Wide openings (larger diameter than strictly necessary) allow tools to be grabbed at a natural angle without precise aim. Tight openings require more deliberate retrieval, which accumulates as minor friction throughout the day.
Stability Under Load
A desk organizer full of pens has a higher center of gravity than an empty one. The heavier and taller the tools inside, the more the organizer will tend to tip if nudged from the side — which happens constantly during normal desk use.
Wide, heavy bases resist tipping. Narrow, light bases tip easily. For a standard-height pencil holder (90–120mm), the base diameter should be at least equal to the holder height and ideally 120–150% of it. A 100mm tall holder needs at least a 100mm base diameter, and 120–130mm is more stable.
Alternatively, a weighted base (either a thick solid base or a recess filled with a heavy material like a metal washer set) dramatically improves stability without requiring a large footprint.
Visual Proportion
Desk organizers are aesthetic objects as well as functional ones. The visual proportions of a well-designed organizer — the ratio of height to width, the thickness of walls relative to the overall dimensions, the relationship between different compartment sizes in a multi-compartment holder — determine whether it looks refined or clunky.
There are no absolute rules for proportion, but a few guidelines:
- Wall thickness of 2–3mm looks refined; thicker than 4mm looks chunky unless it’s intentionally a design feature
- Height-to-diameter ratio between 1:1 and 2:1 looks balanced for most single-cylinder holders
- Multi-compartment holders look most balanced when the compartments vary in size but share a consistent visual rhythm (all the same height, regular spacing, etc.)
These proportional sensibilities come naturally with exposure to well-designed objects and with the experience of printing and looking at many organizers over time. Being aware of them accelerates the learning process.
Types of Desk Organizers Worth Printing
1. Single Cylinder Pencil Holder
The simplest possible desk organizer: a cylinder with a flat base and an open top. Despite its simplicity, a well-made cylinder pencil holder is genuinely elegant — particularly in vase mode (single-wall spiral printing) or with a decorative surface texture.
Design specifications:
- Outer diameter: 80–120mm (larger allows more pens; smaller saves desk space)
- Height: 90–120mm (standard for most pen/pencil lengths)
- Wall thickness: 2–3mm for clean, refined look
- Base thickness: 4–5mm for stability
- Optional: drainage holes in base for aesthetic (not functional) variation
Printing approach options:
- Standard multi-wall: 3 perimeters, moderate infill for the base, no top layers (open top). Good structural integrity, easy to print.
- Vase mode: Single-wall spiral printing. Faster, more translucent with appropriate filament, seamless. Requires simple closed-surface geometry.
Best for: Someone who primarily uses standard pens and pencils and wants a clean, minimal desk aesthetic.
2. Multi-Compartment Organizer Tray
A rectangular tray divided into multiple compartments of different sizes for different tool types. This is the Swiss Army knife of desk organizers — it holds pens in one section, scissors in another, sticky notes in a third, small electronics accessories in a fourth.
Design specifications:
- Overall dimensions: Match available desk space — common sizes are 150–200mm wide, 100–150mm deep, 60–80mm tall
- Compartment layout: Design based on the tools you actually have (measure your tools)
- Wall thickness between compartments: 2mm is thin enough to save space while strong enough to hold shape
- Common compartment set: One wide section (80–100mm wide) for scissors/ruler, two medium sections (40–50mm each) for pens and markers, one or two small sections for clips and erasers
Printing notes: Large rectangular trays are more prone to warping than cylinders. Use a generous brim (10–12mm), slightly elevated bed temperature, and reduced cooling fan speed.
Best for: Organized workers who use a variety of tools and want everything in one dedicated footprint.
3. Modular Component System
Rather than one large tray, a set of smaller modular containers that can be arranged, rearranged, and added to over time. Each module holds a specific category of items and can be moved independently as your desk layout changes.
Design approaches:
- Standalone modules: Individual cups, trays, and holders that sit independently. Simple to print, easy to arrange. No interface geometry required.
- Interlocking modules: Modules with tongue-and-groove or peg-and-hole connections that link together into a unified configuration. More elegant when assembled; requires precise dimensional design.
- Gridfinity desk system: Use the Gridfinity standard (covered below) for a modular desk organizer that’s compatible with the enormous community ecosystem of modules.
Best for: People whose desk tools and workflow change regularly, or who want to build up a system gradually over many prints.
4. Wall-Mounted Organizer
Rather than occupying desk surface, a wall-mounted organizer attaches to the wall near your desk and holds tools vertically above or beside the work surface. These free up significant desk space and can organize tools in a highly accessible format.
Design approaches:
- Pegboard-mounted: Hooks and holders designed for standard pegboard holes that mount to a pegboard panel above the desk
- Direct wall mount: A backing plate with screw holes that mounts directly to the wall, with integrated or attached pen holders and compartments
- Monitor-mounted: A hook or bracket that drapes over or attaches to a monitor frame, creating storage that hovers in front of the monitor
Design considerations: Wall-mounted organizers must be designed with print orientation in mind for structural strength — the mounting bracket needs to resist the downward pull of full pen cups, and layer lines must run in the appropriate direction.
Best for: Minimal-footprint desk setups, sit-stand desks where items need to be accessible at both heights, creative spaces where overhead storage is practical.
5. Specialty Tool Holders
Holders designed for specific tools rather than generic collections:
- Brush holder: Cylinders sized for art or makeup brushes (wider opening, variable depth compartments for different brush lengths)
- Ruler holder: A slot or tube sized for a standard 30cm ruler
- Scissors holder: A cup with a wide opening and dividers to keep blades separated and safe
- Stylus/tablet pen holder: Small, precise cups for thin digital drawing tools
- Exacto knife holder: Safe storage for craft knives with the blades protected
Best for: Specialists — artists, crafters, architects, engineers — who have specific tool sets that generic organizers don’t accommodate well.
The Gridfinity Desk Ecosystem
The Gridfinity system introduced in the previous article (Article 71) has particularly rich applications on the desk surface. Because many desk tools are relatively standard sizes, the community has developed an enormous variety of Gridfinity modules specifically for desk use.
Setting Up a Gridfinity Desk System
Unlike workshop applications where Gridfinity goes inside drawers, desk applications often sit openly on the surface — which means aesthetics matter as much as function.
Step 1: Determine your baseplate area
Decide how much desk space you want to dedicate to organized tool storage. Common desk baseplate sizes:
- Small: 2×3 units (84mm × 126mm) — for minimal setups
- Medium: 3×4 units (126mm × 168mm) — for standard desk setups
- Large: 4×5 units (168mm × 210mm) — for heavily tool-dependent work
Step 2: Print the baseplate
Gridfinity baseplates for desk surfaces are often printed in a lighter-weight open style (with holes between grid positions) rather than the solid style used inside drawers. This creates an attractive grid pattern visible on the desk surface.
For a desk-visible baseplate, consider printing in a color that complements your desk surface:
- Black baseplate on a light wood desk
- White or light grey on a dark desk
- Matching your desk color for an integrated look
Step 3: Build your module collection
Standard Gridfinity desk modules to print first:
- 1×1 bin (3 units tall): For pens and pencils — print 2–3
- 1×2 bin (2 units tall): For markers, rulers, or wide tools
- 2×2 bin (2 units tall): For scissors, tape, or larger items
- 1×1 small bin (1 unit tall): For paper clips, binder clips, small accessories
- Specialty modules: SD card holder, USB drive slots, cable management, business card holder
The community advantage: Rather than designing all these modules yourself, the Gridfinity community has already designed thousands of compatible modules for specific tools. Search “Gridfinity pen holder,” “Gridfinity SD card,” “Gridfinity business card” on Printables and you’ll find extensively tested designs ready to print.
Gridfinity Desk Aesthetics
Because Gridfinity desk modules are visible rather than hidden in drawers, color coordination becomes important. Consider printing:
- All modules in one color for a unified look
- Modules in two complementary colors (baseplate in one, bins in another)
- Modules matching specific content categories (blue for writing tools, green for art supplies, grey for tech accessories)
Design Your Own: A Tinkercad Pencil Holder Tutorial
Creating a custom pencil holder in Tinkercad teaches you exactly the right skills for beginner functional design. Here’s a complete walkthrough.
Step 1: Open Tinkercad and Create a New Design
Navigate to tinkercad.com (free, no download required), log in or create an account, and start a new 3D design.
Step 2: Create the Outer Cylinder
From the basic shapes panel, drag a Cylinder onto the workplane. Set its dimensions:
- Diameter: 90mm
- Height: 100mm
Step 3: Create the Inner Cylinder (the Hollow)
Drag a second Cylinder onto the workplane. Set it as a “Hole” using the menu that appears when the shape is selected. Set dimensions:
- Diameter: 84mm (6mm smaller than outer = 3mm wall thickness on each side)
- Height: 96mm (4mm shorter than outer = 4mm base thickness)
Step 4: Center and Align
Select both cylinders. Use Tinkercad’s align tool to center the inner cylinder perfectly inside the outer one. Ensure both are touching the workplane (bottom aligned). Verify the inner cylinder is 2mm above the workplane (so the base is solid) by adjusting its height position.
Step 5: Group
Select both shapes and click “Group.” The inner hole cylinder subtracts from the outer solid cylinder, producing a hollow tube with a solid base.
Step 6: Optional — Add Surface Decoration
To add ribbed texture:
- Create a thin rectangular box: 2mm wide, 2mm deep, 98mm tall
- Position it touching the outside of the cylinder
- Duplicate it (Ctrl+D) and rotate the duplicate around the center
- Repeat to create a series of vertical ribs around the circumference
To add embossed text:
- Use Tinkercad’s text generator to create your name or a label
- Position it on the outside surface of the cylinder
- Keep it as “solid” to make it raised (embossed) text
Step 7: Export and Print
Click “Export” in the top right, select STL format, and download. Import into your slicer, apply settings, and print.
This workflow produces a completely custom pencil holder with your exact desired dimensions in about 20 minutes — a great introduction to functional 3D design.
Material Selection for Desk Organizers
Desk organizers are in a uniquely visible, handled location. Material choice affects both how they look and how they feel in daily use.
| Material | Desk Suitability | Key Properties for Desk Use |
|---|---|---|
| Standard PLA | Excellent | Easy to print; wide color range; good rigidity; avoid near direct sunlight (heat) |
| Matte PLA | Highly recommended | Premium matte finish hides fingerprints; more refined appearance than glossy PLA |
| Silk/Metallic PLA | Excellent for show | Shimmery, premium appearance; looks like glazed ceramic or polished metal |
| PETG | Good | Better toughness and moisture resistance; slightly less dimensional accuracy than PLA |
| Wood-fill PLA | Very attractive | Natural wood appearance; sands and stains like wood; unique desk aesthetic |
| Stone/Concrete PLA | Very attractive | Industrial concrete aesthetic; heavy feel; unique |
| PLA+ | Good | Tougher than standard PLA; marginal improvement for desk use specifically |
| Glow-in-dark PLA | Specialty | Fun novelty; practical for finding pens in low light |
The Case for Matte PLA on Desk Accessories
Standard PLA has a slightly glossy finish that shows fingerprints clearly — particularly noticeable on a pencil holder that gets picked up and moved regularly. Matte PLA (available from several manufacturers including Prusament, eSun, and others) produces surfaces with a flat, non-reflective finish that:
- Hides fingerprints and smudges
- Looks more like premium commercial products
- Photographs better for those who share their setups online
- Feels more tactilely sophisticated
The print characteristics of matte PLA are nearly identical to standard PLA — same temperature range, same settings, same bed adhesion behavior. The only difference is the surface appearance. For desk accessories that will be prominently displayed and frequently handled, matte PLA is often the superior choice.
Specialty Filament Effects for Desk Organizers
Because desk organizers are display objects, the aesthetic properties of specialty filaments are more relevant here than for most functional prints:
Silk PLA produces surfaces that look like glazed ceramic or polished metal — a bronze silk PLA pencil holder can be genuinely mistaken for a cast metal accessory at a glance. This filament type prints with the same ease as standard PLA but transforms the appearance of finished pieces dramatically.
Wood-fill PLA (PLA infused with wood fiber) sands and stains like real wood. A wood-fill pencil holder can be sanded with progressively finer sandpaper and finished with wood stain or varnish to produce a piece that’s genuinely difficult to distinguish from turned wood. For desks with wood surfaces, this creates beautiful material continuity.
Marble-fill or stone-fill PLA produces surfaces that look like polished concrete or stone. These filaments require slightly higher print temperatures and more aggressive retraction settings to manage the increased viscosity of the mineral-filled material, but the aesthetic results are striking.
Slicer Settings for Desk Organizers
Desk organizers need excellent surface quality on their vertical and top surfaces, since these are directly visible during daily use. The settings below are optimized for surface appearance with adequate structural integrity.
Settings for Maximum Surface Quality
| Setting | Recommended Value | Notes |
|---|---|---|
| Layer Height | 0.15mm | Finer layers significantly improve side wall quality |
| Print Speed | 40–50 mm/s | Moderate for clean outer walls |
| Outer Wall Speed | 25–30 mm/s | Slower outer walls for best surface quality |
| Perimeters/Walls | 3–4 | 3 adequate; 4 for thicker walls |
| Infill | 15–20% | Grid; desk organizers are not load-bearing |
| Top Layers | 0 (open top) | Open containers have no top |
| Bottom Layers | 4–5 | Solid, stable base |
| Support | None | Basic organizer shapes never need support |
| Bed Adhesion | Brim (5–8mm) | Especially for taller, narrower cylinders |
| Hotend Temp | 205–210°C (PLA) | Standard or slightly warm for PLA |
| Cooling | 90–100% | Full cooling for clean outer walls |
| Seam Position | Sharpest Corner / Rear | Hide seam on least visible side |
| Ironing | Enable on any solid top surfaces | Not applicable for open containers |
Vase Mode Settings for Single-Cylinder Holders
For clean single-cylinder pencil holders using vase mode:
| Setting | Recommended Value | Notes |
|---|---|---|
| Layer Height | 0.1–0.15mm | Finer for smoother spiral |
| Mode | Spiralize Outer Contour (Cura) / Spiral Vase (PrusaSlicer) | Enable vase mode |
| Bottom Layers | 4–5 | Solid base before spiral begins |
| Print Speed | 40–50 mm/s | Standard vase mode speed |
| Cooling | 100% | Full cooling for single-wall |
| Smooth Spiralized Contours | Enabled (Cura) | Removes transition artifacts |
The Outer Wall Speed Setting
One of the most impactful settings for desk organizer surface quality that beginners often overlook is the dedicated outer wall speed setting. This is separate from the overall print speed setting and applies only to the outermost perimeter — the surface you can see and touch.
By slowing the outer wall significantly (25–30 mm/s) while keeping inner walls and infill at normal speed (50–60 mm/s), you get nearly the surface quality benefit of a very slow print at a fraction of the total print time. The outer wall is only a small fraction of the total print volume, so slowing it down has a modest effect on total print time but a dramatic effect on surface quality.
In Cura, this is the “Outer Wall Speed” setting. In PrusaSlicer, it’s the “External Perimeters” speed setting under Print Settings → Speed.
Surface Finish Post-Processing
For desk objects that will be prominently displayed, post-processing can elevate a good print to a truly impressive one.
Sanding Progression
Light sanding on exterior surfaces creates a more consistent, smooth finish than the printed surface alone:
- 220-grit: Remove any print artifacts, seam line, and elephant foot at the base. Apply with light circular motion, checking frequently.
- 400-grit: Smooth the surface further. The finish after this step should be significantly more even than the printed surface.
- 800-grit: For a near-polished surface. Use wet sanding (with water) for best results.
- 1200-grit+: For an ultra-smooth surface approaching polished. At this point, only fine scratches remain.
After sanding, wipe with a clean cloth and isopropyl alcohol to remove sanding dust before any coating.
Spray Primer and Paint
For desk organizers that you want to look exactly like premium commercial products:
- Apply 2 light coats of plastic primer (specifically formulated for plastic surfaces — available at hardware stores)
- Lightly sand with 400-grit between coats
- Apply 2–3 light coats of your chosen spray paint in the desired color or finish
- Optionally, apply a clear coat for protection and gloss/matte finish control
This full painting treatment completely hides the 3D printed origin of the piece and produces results indistinguishable from injection-molded products.
Acetone Vapor Smoothing (ABS Only)
If you print desk organizers in ABS (a tougher but more challenging material), acetone vapor smoothing dissolves the surface layer slightly, completely eliminating layer lines and producing a smooth, semi-glossy surface. This is the most dramatic surface transformation available in FDM post-processing.
Important safety note: Acetone vapor smoothing requires careful safety protocols — adequate ventilation, no ignition sources (acetone is highly flammable), appropriate containers. It is not appropriate for enclosed spaces or for beginners unfamiliar with the safety requirements.
Step-by-Step: Building a Complete Desk Organizer Set
Let’s walk through designing and printing a complete 5-piece desk organizer set that covers most desktop tool storage needs.
The Set Design
Piece 1 — Pen/Pencil Cup: Single cylinder, 90mm diameter, 100mm tall. Vase mode or 3 walls. For standard writing implements.
Piece 2 — Wide Tool Cup: Single cylinder, 120mm diameter, 80mm tall. For scissors, rulers, and wide markers.
Piece 3 — Small Items Tray: Rectangular tray, 120mm × 80mm × 50mm, with 3 internal compartments. For paper clips, sticky notes, small accessories.
Piece 4 — Card Holder: Slim rectangular holder, 100mm × 30mm × 80mm. For business cards, sticky note pads.
Piece 5 — Phone Stand (Optional): A simple angled stand compatible with the set’s aesthetic. Height and angle matching your desk setup.
Step 1: Source or Design Files
For each piece, either find an existing design on Printables that matches these specifications, or design your own in Tinkercad. The cylinders are easily created in Tinkercad using the cylinder subtraction method described earlier. The tray is a box with inner subtracted boxes for each compartment.
Step 2: Choose Your Filament
Choose one filament in one color for the entire set. The visual coherence of a matched set is significantly more elegant than mixing colors. For a first attempt, matte black, matte white, or a warm grey PLA are excellent neutral choices that complement almost any desk aesthetic.
Step 3: Slice All Pieces
Import all pieces into your slicer (you can have multiple files in a single session even if they’ll be printed in separate batches). Apply consistent settings across all pieces:
- 0.15mm layer height throughout
- 3 perimeters for cylinders, 3 for tray
- Outer wall speed: 30 mm/s
- Cooling: 100%
- Seam position: Sharpest corner (and ensure it’s positioned toward the back when the piece is in its intended orientation)
Step 4: Print in Sequence
Print pieces from largest to smallest to identify any setting adjustments needed early. If the first (widest) cylinder prints beautifully, you can be confident the narrower pieces will too. If there’s an issue, you discover it on the first piece before wasting time on the rest.
For the tray, watch the first layer carefully — large flat surfaces need good bed adhesion across their full area.
Step 5: Post-Processing for Cohesive Appearance
For a truly professional result, lightly sand all exterior surfaces with 400-grit sandpaper. This creates a consistent matte surface that looks identical across all five pieces, regardless of any minor variation in print quality between individual prints.
If the set will be painted, apply primer and paint to all five pieces simultaneously to ensure color consistency.
Step 6: Assemble and Evaluate
Place all five pieces on your desk in your planned arrangement. Evaluate:
- Is the footprint appropriate for your desk space?
- Are the tools you reach for most in the most accessible positions?
- Does the visual arrangement look balanced?
- Are any pieces missing or redundant?
Adjust the arrangement, then use the set for a week before making any changes. Real daily use often reveals needs and preferences that aren’t apparent from theoretical planning.
Creative Desk Organizer Ideas Worth Exploring
Integrated Charging Station
A desk organizer with a built-in routing channel for a USB-C or MagSafe charging cable. The phone rests in an angled slot while charging, and the cable is managed through an internal channel that exits through a small hole in the base of the organizer.
Themed Organizer Sets
Organizers in thematic styles that complement the desk’s character:
- Industrial style: Hexagonal cross-section cups in matte black with visible infill pattern as texture
- Art Deco: Tall cylindrical cups with geometric vertical fluting
- Minimalist: Perfectly proportioned thin-wall cylinders in pure white or natural PLA
- Brutalist: Thick-walled rectangular forms with rough surface texture
- Botanical: Organic, irregular forms that look like carved wood or stone
Ruler and Template Holder
A flat tray with slots designed for rulers, T-squares, set squares, and drawing templates — for architectural, drafting, or art desks where these tools need organized access.
Dual-Use Organizer and Planter
A desk organizer that holds pens in one half and a small succulent or air plant in the other — a combination piece that brings a small piece of nature to the workspace alongside organized tools.
Cable-Managed Desk Hub
A multi-compartment organizer with integrated cable management — pens in the front compartments, cables routed through internal channels to a central hub at the back, the entire assembly looking clean and unified from the front view.
Rotating Carousel Organizer
A multi-compartment holder that rotates on a bearing base, allowing all compartments to be accessed by spinning rather than reaching around the organizer. Requires printing a bearing mechanism (or embedding a commercial lazy Susan bearing), but produces a very practical result for desks with limited reach depth.
Organizing Your Entire Desk With Printed Accessories
The pencil holder and desk organizer are often the beginning of a broader desk organization project. A fully organized desk uses printed accessories for multiple purposes:
Vertical organization:
- Monitor stand with integrated storage shelf
- Monitor-mounted peripheral storage
- Wall-mounted supply panels
Horizontal organization:
- Desk mat with printed corner guides
- Modular Gridfinity surface system
- Dedicated zones for different activity types (computer work, writing, crafting)
Cable management (covered in Article 65):
- Cable clips along desk edges
- Cable drop clips for charging cables
- Under-desk cable spine
Small item management:
- Key hooks at desk edge
- Headphone hook on monitor side
- Business card holder
- Sticky note holder
Reference material:
- Book stand/document holder
- Tablet stand
- Phone stand for video calls
When all of these elements are printed in the same filament color, the result is a desk that looks designed rather than assembled from whatever was available. The visual coherence of matching materials throughout creates a workspace that feels professional, personal, and carefully considered.
Troubleshooting Common Desk Organizer Issues
Cylinder Has Visible Seam Line on Side Wall
Cause: The nozzle start/stop point for each layer creates a slight surface artifact visible as a vertical line.
Solution: Set seam position to “Sharpest Corner” — the slicer places the seam at the most geometrically sharp point (back of the cylinder if there is one, or a consistent rear position). For a true cylinder with no sharp corners, use “Random” seam placement to distribute the seam irregularity around the circumference rather than concentrating it in one line. Alternatively, enable ironing-adjacent techniques or light sanding of the seam area.
Organizer Tray Warping at Corners
Cause: Large flat base contracting during cooling, lifting corners.
Solution: Increase brim to 12mm. Increase bed temperature to 65°C (PLA) or 80°C (PETG). Reduce cooling fan to 70%. Print in PETG which typically warps less than PLA for large flat parts.
Surface Has Visible Layer Lines Despite Fine Settings
Cause: Layer height still too high, or cooling too aggressive causing slight sagging between lines.
Solution: Reduce layer height to 0.1mm for visible surfaces. Ensure outer wall speed is set to 25–30 mm/s. Lightly sand with 400-grit sandpaper and consider a thin coat of matte spray varnish to unify the surface.
Vase Mode Cylinder Has Uneven Wall Thickness
Cause: Filament flow variation during the continuous spiral, or slight temperature fluctuation affecting extrusion consistency.
Solution: Dry your filament — moisture causes inconsistent extrusion. Calibrate your flow rate using a single-wall cube test. Ensure print temperature is stable (if temperature graphs in OctoPrint or similar show fluctuation, check thermistor connection).
Multi-Compartment Tray Walls Are Thin and Flex When Loaded
Cause: Internal divider walls are too thin or too few perimeters.
Solution: Increase internal wall thickness in the design to at least 2.5–3mm. In the slicer, increase perimeter count to 4. For existing prints, reinforce weak walls with a thin bead of cyanoacrylate (super glue) applied along the inside corner where wall meets base.
Bottom of Organizer Not Flat (Slight Bow)
Cause: Uneven bed leveling, slight warping during print, or insufficient bottom layers.
Solution: Increase bottom layers to 5–6. Level bed more carefully before the next print. Apply a thin cork sheet to the bottom of the organizer as both a non-slip surface and a leveling compensator for any slight bow.
Conclusion: Your Desk as a Canvas
The desk is the most personal physical environment most people spend time in. It’s where work gets done, where projects are started and finished, where the artifacts of your interests and responsibilities accumulate. The quality of how that space is organized — and how the organizational tools look — affects how you feel about being there and how effectively you work.
Printed pencil holders and desk organizers are, in the grand scheme, small objects. But in the context of the desk they inhabit, they’re highly visible declarations of intention — of care for the space, of preference for things that are personal rather than generic, of the satisfaction of having made something rather than simply bought it.
Print your pencil holder. Design it to hold exactly your tools in exactly the configuration that serves your workflow. Print it in a color that makes your desk look like the kind of place where good work happens.
Then fill it with your pens and pencils, set it where you can see it throughout the day, and notice how much you appreciate having made it.
SEO Title: 3D Printing Pencil Holders and Desk Organizers: Beginner’s Guide
Meta Description: Learn how to 3D print custom pencil holders and desk organizers. Discover designs, Gridfinity integration, materials, settings, and tips for a perfectly organized workspace.
Focus Keyphrases: 3D printed pencil holder, desk organizer 3D print, 3D printed desk accessories
SEO Slug: creating-pencil-holders-and-desk-organizers-3d-printing