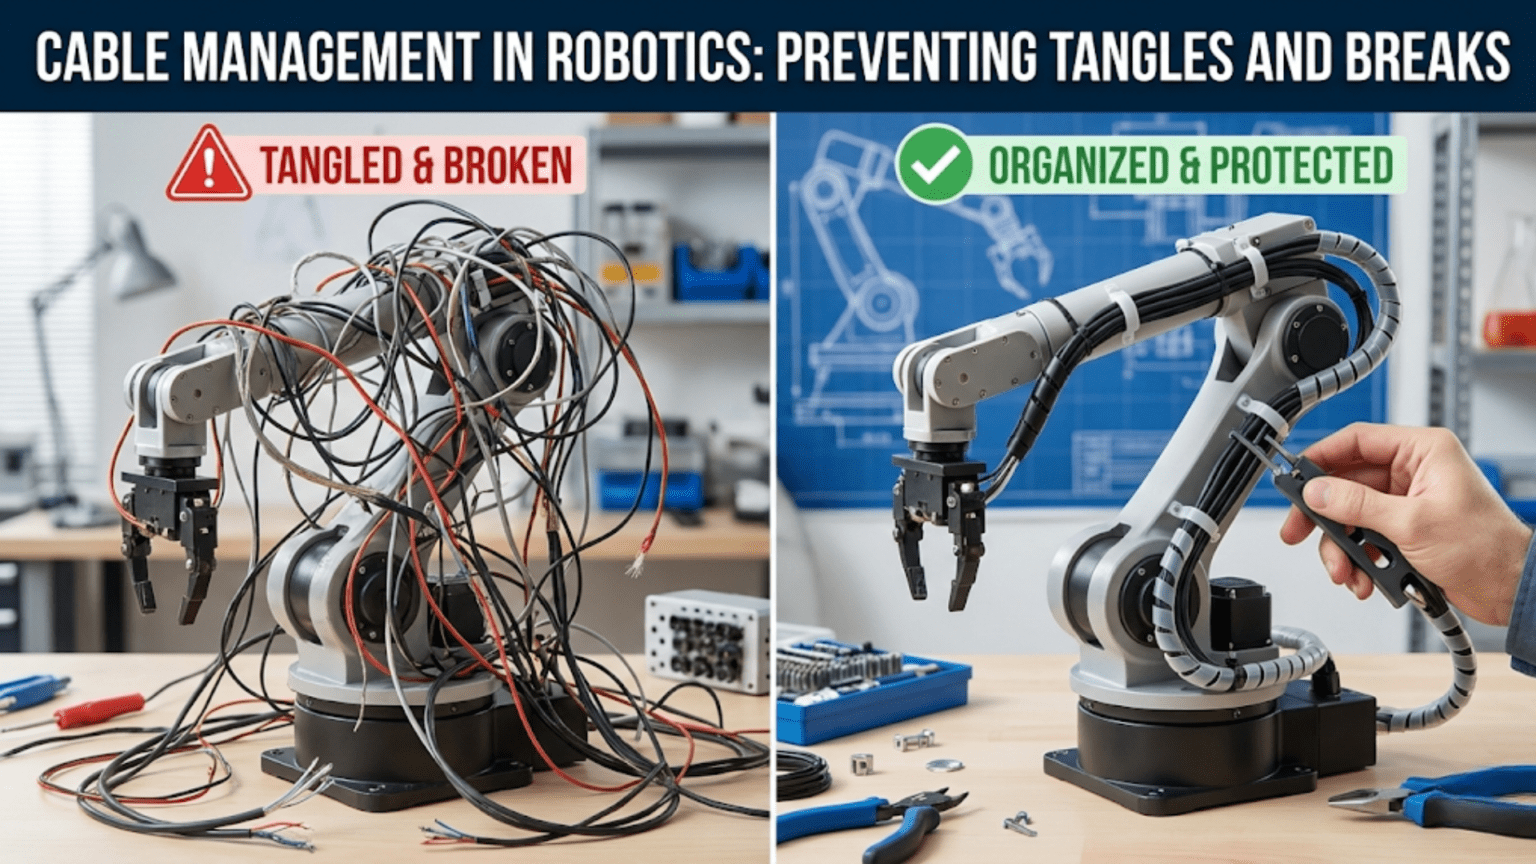
Cable management in robotics is the systematic practice of planning, routing, securing, and protecting every electrical wire and connector in a robot so that cables don’t tangle, chafe, fatigue, or disconnect during operation—covering everything from selecting appropriate wire gauges and connector types to designing strain relief, routing cables away from pinch points, and labeling every connection for fast troubleshooting and maintenance. Poor cable management is one of the leading causes of intermittent faults, robot downtime, and frustrating debugging sessions in both hobbyist and professional robotics, while good cable management makes robots dramatically more reliable, serviceable, and professional in appearance.
Introduction
Your robot has worked flawlessly on the bench for hours. You’re confident it’s ready. You place it on the competition floor, press start, and it drives three meters—then stops dead. After twenty minutes of debugging, you discover that a motor connector half-pulled out when the chassis flexed over a bump, creating an intermittent connection that the robot can’t distinguish from a software fault. You reinsert the connector, zip-tie it in place, and the robot works again. For exactly two more minutes, until a wire chafing against a chassis edge develops a short circuit that permanently destroys the motor driver.
If this scenario sounds painfully familiar, you’ve experienced what bad cable management costs in practice. It costs competition runs. It costs hours of debugging time chasing “mysterious” faults that are actually entirely mechanical. It costs hardware—motors, controllers, and sensors destroyed by shorts and disconnections. And it costs confidence in systems that are fundamentally sound but mechanically unreliable.
Cable management is the unglamorous but essential discipline that separates robots that work consistently from robots that work when they feel like it. It encompasses every decision about how wires are selected, routed, secured, protected, and documented—decisions that collectively determine whether a robot is reliable over thousands of operating hours or fails during its second test session.
This article gives you the complete framework: the physical principles behind cable failures, the tools and techniques for preventing them, and the systematic approach to wiring any robot for maximum reliability and serviceability.
Understanding How Cables Fail
Before learning how to prevent cable failures, it’s worth understanding the specific mechanisms by which cables and connectors fail in robotics. This knowledge makes the prevention techniques feel logical rather than arbitrary.
Conductor Fatigue from Repeated Bending
Every time a wire bends, the individual copper strands inside experience mechanical stress. A single bend causes no damage—copper is highly ductile and recovers elastically from small deformations. But repeated bending at the same point causes metal fatigue: microscopic cracks form in the copper crystal structure at stress concentrations, and with each additional bending cycle the cracks propagate further until individual strands break. Enough broken strands and the wire develops high resistance; eventually the last strand breaks and the circuit opens completely.
This mechanism explains why wires most commonly fail at points of constraint—where a zip tie holds them tightly against a chassis edge, where they exit a connector housing, or where they loop around a corner. The constraint prevents the bend radius from distributing along the wire’s length, concentrating all the bending deformation at the constraint point instead.
The solution is strain relief: a gradual transition that forces the wire to bend over a large radius rather than kinking at a point. Professional cable assemblies build strain relief directly into connector housings. In DIY robot wiring, strain relief is added with heat-shrink tubing, cable clamps, or routing through curved guides.
Chafing and Abrasion
Anywhere a wire runs near a sharp edge, rough surface, or moving part, the wire’s insulation is vulnerable to chafing—gradual abrasion that eventually cuts through the insulation and exposes the conductor. Once a conductor is exposed, it either shorts to an adjacent conductor or to a grounded chassis structure, potentially causing immediate component damage.
Chafing is particularly dangerous because it develops invisibly. The wire looks normal until the insulation is fully worn through, at which point the robot fails dramatically. By the time the fault is detected, the damage is done.
Prevention requires routing wires away from all sharp edges and moving parts, adding protective sleeving over vulnerable sections, and using grommets wherever wires pass through holes in metal chassis panels. A bare hole drilled through aluminum sheet has sharp internal edges that will cut through wire insulation in minutes of vibration—a grommet converts that sharp edge into a smooth, protected passage.
Connector Failures
Connectors are the most failure-prone elements in any wiring system, for several reasons:
Partial disconnection: A connector that isn’t fully mated—seated 90% of the way but not clicked fully home—may work intermittently, passing current when pressed together and opening when vibration slightly separates the contacts. These faults are extremely difficult to diagnose because the robot appears to work normally in the lab but fails under operating vibration.
Contact corrosion: Moisture, humidity, and contamination cause corrosion at contact surfaces, increasing contact resistance. High-resistance contacts cause voltage drops, heat generation at the connection, and eventual failure.
Contact fretting: Vibration causes micro-motion between mated connector contacts, gradually wearing away the contact surface plating and creating oxidized debris that increases resistance. Fretting is particularly destructive in gold-plated contacts and leads to intermittent connections that appear and disappear with robot movement.
Mechanical damage: Pulling a connector by its wire (rather than the housing) bends the internal contacts and strains the wire-to-contact crimp. Eventually the wire breaks at the crimp or the contact deforms enough to lose reliable electrical contact.
Incorrect mating force: Some connectors require significant force to mate fully. If the builder assumes it’s “close enough” when the connector is half-mated, it will fail under vibration.
Wire Gauge Mismatch and Thermal Damage
Every wire has a current-carrying capacity determined by its cross-sectional area, insulation temperature rating, and the thermal environment. Exceeding this capacity causes resistive heating in the wire, which in mild cases causes gradual insulation degradation and in severe cases melts the insulation or starts a fire.
Common mistake: using the same thin signal wire (28 AWG, typically rated for 0.5A maximum) for both sensor signals and motor power connections. A motor drawing 2A through a 28 AWG wire causes significant heating—enough to melt the insulation and potentially short to adjacent wires.
The solution is matching wire gauge to current requirements with appropriate safety margin, covered in detail in the wire selection section below.
Wire Selection: The Right Gauge for Every Job
Selecting appropriate wire is the foundation of good cable management. Using the wrong gauge creates either unnecessarily heavy, stiff wiring harnesses (too thick) or dangerous thermal and voltage-drop issues (too thin).
American Wire Gauge (AWG) Basics
The AWG system is counterintuitive: larger AWG numbers correspond to thinner wire. AWG 28 is a thin signal wire; AWG 12 is heavy power cable. Each three AWG steps doubles the cross-sectional area approximately.
The current-carrying capacity of a wire depends on gauge, conductor material (copper vs. aluminum), insulation temperature rating, and ambient temperature. For robotics use (copper wire, standard silicone or PVC insulation, moderate ambient temperature), approximate capacity guidelines are:
AWG 28:  0.5A   — Sensor signals, I2C, SPI, UART (low-current signals only)
AWG 26:  1.0A   — Servo signal wires, light sensor wiring
AWG 24:  2.0A   — Small servo power, light motor signal leads
AWG 22:  3.0A   — Small motor power (N20 gearmotors, micro servos)
AWG 20:  5.0A   — Medium motor power (TT motors, standard servos)
AWG 18:  7.5A   — Large hobby motors, high-current servo buses
AWG 16:  10A    — Drive motors for 1–3 kg robots
AWG 14:  15A    — Drive motors for larger robots, main power bus
AWG 12:  20A    — High-power drive systems, main battery leads
AWG 10: 30A — Heavy robot main power, high-current battery systemsThese are approximate guidance figures, not absolute ratings. Always verify against the specific wire’s datasheet and add a 25–50% safety margin. A wire rated for 5A should not be used for a 5A load; use a wire rated for 7.5A or more.
Silicone vs. PVC Insulation
Wire insulation material matters more than most beginners realize.
PVC insulation is the most common and least expensive. It’s stiff at low temperatures, becomes brittle over time with heat and UV exposure, and has moderate temperature rating (60–80°C typically). PVC wire is adequate for most static wiring but performs poorly in applications with repeated flexing—the stiff insulation cracks at flex points.
Silicone insulation is significantly more flexible (feels almost rubber-like), has excellent temperature resistance (typically 200°C), and maintains flexibility across wide temperature ranges. Silicone-insulated wire is the standard choice for any wiring that will experience repeated flexing—servo leads, motor wires through joints, battery cables in mobile robots. It’s more expensive than PVC but the reliability improvement is substantial for any dynamic application.
PTFE (Teflon) insulation offers the highest temperature resistance, excellent chemical resistance, and very thin wall thickness (allowing smaller overall diameter for the same conductor size). Used in aerospace and high-performance robotics applications where weight and diameter matter most.
For general robotics advice: use silicone-insulated wire for all power and signal leads that experience any bending during operation. Use PVC only for completely static wiring that is mechanically constrained throughout its life.
Stranded vs. Solid Core Wire
Stranded wire consists of multiple thin copper strands twisted together. It flexes far better than solid wire—the individual strands slide past each other as the cable bends, distributing the bending strain without fatiguing individual strands as quickly. Stranded wire is almost universally used in robotics for its flexibility and fatigue resistance.
Solid core wire is a single copper conductor. It’s stiffer, less expensive, easier to use in breadboards, and holds its shape once bent. It fatigues quickly under repeated bending and should never be used for wiring that will flex during operation. Solid core is acceptable for permanent, static wiring inside a fixed chassis but is a poor choice for any wire that moves.
For robotics: always use stranded wire for wiring that may flex. Use solid core only for prototype breadboard work or completely static chassis wiring where no movement is expected.
Connector Selection: Choosing the Right Mating System
Connectors are both the most convenient and most vulnerable elements of a robot wiring system. The right connector choice significantly affects reliability, serviceability, and build quality.
The Key Connector Properties
Current rating: Each connector has a rated maximum current per contact. Exceeding it causes contact overheating, resistance increase, and eventual failure. Motor power connectors must be rated for the stall current of the motor, not just its running current.
Mating cycles: Connectors have a rated number of mating cycles—how many times they can be connected and disconnected before contacts wear out. Connectors that are frequently disconnected (battery connectors, field-replaceable module connectors) need higher cycle ratings than permanent internal connections.
Retention force: How firmly the connector holds when mated. Connectors with positive latch mechanisms (audible click when mated, requiring deliberate release to disconnect) are far more vibration-resistant than friction-fit connectors.
Contact plating: Gold plating provides the best corrosion resistance and lowest contact resistance but is more expensive. Tin plating is adequate for most robotics applications. Avoid bare brass or copper contacts in any environment with humidity.
Polarization: Connectors that can only mate in one orientation prevent accidentally reversed connections—which can destroy electronics instantly in power connections. Any connector that carries polarity-sensitive power should be polarized.
Common Connector Types in Robotics
JST connectors (PH 2.0mm, XH 2.5mm, GH 1.25mm series) are the standard for small robot signal and low-power connections. Used extensively for battery connections in small robots, sensor wiring, and servo leads. They click positively when mated, are polarized, and come in 2 to 8 pin versions. Current ratings range from 1A (GH 1.25mm) to 3A (XH 2.5mm) per contact.
XT30 and XT60 connectors are gold-plated, high-current connectors rated for 30A and 60A respectively. Originally designed for RC aircraft LiPo connections, they’ve become standard for robot battery and motor power connections. They require significant insertion force to mate (providing good retention) but have no latch, relying on friction and mechanical robustness. XT60 is the standard for most battery connections in medium and large robots.
Anderson Powerpole connectors are genderless (identical halves that mate with each other), stackable, and rated to 30A (15, 30, and 45A housings available). Widely used in amateur radio, power tools, and robotics for their robustness and ability to create custom pin configurations.
Dupont connectors (2.54mm pitch, used on Arduino headers) are the standard breadboard and development connector. They have very low retention force (wires pull out easily) and minimal current capacity (1A maximum per contact). Acceptable for signal connections in prototype robots but poor choices for power or any application involving vibration.
Aviation plugs (GX16, GX20) are circular connectors with screw-on locking collars—the collar threads onto the mating socket and physically cannot vibrate loose. Available in 2 to 10 pin versions, rated for 5A per pin typically. Excellent for panel-mount connections, waterproof variants exist. Used extensively in professional robotics for modular robot assembly connections.
XT150 and AS150 connectors are heavy-duty versions for very high currents (150A+). Used for main power connections on large, high-power robots.
Connector Selection Guide for Common Applications
Application                     Recommended Connector
────────────────────────────────────────────────────────
Battery to main power bus       XT60 (medium robots), XT90/AS150 (large)
Small LiPo battery (< 5A)       JST XH or XT30
Motor controller to motor       XT30 (small motors), XT60 (large motors)
Servo signal + power            JST XH 3-pin or standard servo connector
Sensor signal (I2C, UART)       JST GH or PH (low vibration) / Molex Micro-Fit (high vibration)
Module-to-chassis connections   Aviation plug GX16 (2–6 pin versions)
Breadboard prototype work       Dupont (acceptable — not for permanent builds)
High-vibration power            Anderson Powerpole 30A or XT60
Waterproof applications IP67 aviation plug or Deutsch DT seriesRouting Principles: Planning the Path of Every Wire
Wire routing is the spatial art of planning where every cable travels from its source to its destination. Good routing decisions prevent the majority of chafing, tangling, and mechanical failure problems before they can occur.
The Seven Routing Rules
Rule 1: Route power and signal wires separately when possible. High-current motor wires create electromagnetic interference that can corrupt sensor signals and communication lines running in parallel. Where separation isn’t possible, cross power and signal wires at 90° rather than running them parallel—crossing introduces much less crosstalk than parallel routing.
Rule 2: Keep all wires away from moving parts. Identify every component that moves: wheels, gears, rotating shafts, actuating joints, sliding mechanisms, vibrating motors. No wire should be able to reach a moving part, even at the extremes of the robot’s motion range. Plan routes that maintain at least 10 mm clearance from every moving component in all robot configurations.
Rule 3: Route wires through the structure, not across it. Wires draped across the outside of a chassis are vulnerable to snagging, being stepped on, and being caught in mechanisms. Route wires through chassis openings, along frame members, and through dedicated wire channels. A wire running inside a T-slot extrusion channel is completely protected; the same wire lying across the top of the chassis is exposed to every hazard.
Rule 4: Plan for the shortest route that provides adequate slack. Excess wire length creates loops that tangle and catch. Insufficient wire length creates taut wires that pull connectors apart under chassis flex or component movement. The right wire length has 10–20% slack—enough to accommodate chassis flex and connector mating without creating large loops.
Rule 5: Separate wires by function into logical harnesses. Group related wires together: all motor wires in one harness, all sensor wires in another, power distribution in a third. This separation makes tracing individual wires much easier during troubleshooting and prevents mixing signal and power wire bundles.
Rule 6: Route for serviceability, not just for neatness. A beautifully routed wire harness that must be completely disassembled to replace one sensor is a serviceability failure. Plan routes that allow individual wires or groups to be replaced without disturbing unrelated wiring.
Rule 7: Document the routing plan. For any robot more complex than a simple two-motor platform, document where each wire travels with a wiring diagram and, ideally, a physical route map on the chassis layout drawing. This documentation is invaluable when debugging intermittent faults six months after the robot was built.
Cable Routing for Moving Joints
The most challenging routing scenario is wires that must cross a moving joint—a robot arm joint, a pan-tilt head, a rotating sensor platform. These wires flex with every joint movement, making fatigue the dominant failure mode.
Design principles for joint-crossing wires:
Maximize bend radius: Route the wire in a large loop around the joint rather than a tight bend through it. A wire bent in a 50mm radius loop experiences far less stress per bend cycle than one bent in a 5mm radius kink.
Use appropriate wire: Silicone-insulated stranded wire is mandatory for joint-crossing cables. PVC wire will crack at flex points within days or weeks of operation.
Allow adequate slack: The wire must not become taut at any point in the joint’s motion range. Calculate the maximum separation between cable attachment points at the joint’s extreme positions, and ensure the wire is long enough to span this distance with 20% additional slack.
Use cable carrier systems (drag chains): For robot axes that travel through repeated linear or rotary motion, plastic cable carriers (often called drag chains or energy chains) provide guided, protected cable routing. The carrier constrains the cables to a large minimum bend radius throughout the motion, dramatically extending cable life.
Drag chain selection:
- Chain inner height: wire bundle diameter × 1.5 (minimum)
- Chain inner width: wire bundle width × 1.2 (minimum)
- Minimum bend radius: manufacturer specified; typically 3–5× chain height
- Fill factor: maximum 60% of chain cross-section to allow wire movementRoute cables along the joint axis where possible: Cables routed along the joint’s rotation axis (rather than transverse to it) experience torsion rather than bending as the joint rotates. Well-stranded cables tolerate torsion better than poorly-stranded ones.
Strain Relief: The Most Important Protection Technique
Strain relief is the practice of preventing tensile and bending forces from being transmitted to the electrical connection at a connector or solder joint. It is the single most impactful cable management technique in terms of reliability improvement.
Why Strain Relief Matters
At any solder joint, crimp termination, or connector contact, the transition from flexible wire to rigid terminal is the point of maximum stress concentration. Every time the wire bends or is pulled, the deformation is concentrated at this rigid-to-flexible transition. Without strain relief, this point experiences 100% of the bending and pulling stress—and it’s also exactly where the conductor is most difficult to repair if damaged.
With proper strain relief, the wire is clamped some distance from the terminal, and any pulling or bending force is absorbed by the clamp before reaching the electrical connection. The terminal itself sees only the force needed to flex the short, constrained wire between the clamp and the terminal—a fraction of the total applied force.
Strain Relief Techniques
Heat-shrink tubing over the connector exit: The simplest strain relief. Apply heat-shrink over the wire-to-connector transition, sized to grip the wire firmly while smoothing the exit angle. This prevents kinking at the connector and provides basic tensile strain relief.
Heat-shrink strain relief process:
1. Select heat-shrink 1.5× the wire diameter (before shrinking)
2. Slide onto wire before making the connection
3. Make the electrical connection (crimp or solder)
4. Position heat-shrink to cover 10mm of connector housing + 20mm of wire
5. Apply heat evenly; the shrunk tube grips both housing and wire
6. For extra strength: use adhesive-lined heat-shrink that bonds to surfacesCable clamp at connector: A physical clamp (often built into professional connector housings) grabs the wire’s outer jacket or braid at a specific distance from the contacts. Pulling the wire loads the clamp, not the contacts.
90° strain relief fittings: Used where space is constrained and the wire must exit perpendicular to the connector axis. These fittings redirect the wire smoothly through 90° immediately after the connector, preventing direct axial pulling.
Chassis cable anchor points: For wires that travel a long distance before reaching a moving section, anchor the wire to a fixed chassis point near the start of the moving section. This ensures that any jerking or pulling on the wire is absorbed by the anchor, not transmitted to the connector or joint-crossing section.
Zip tie strain relief: A zip tie placed around a wire bundle, against a chassis bracket, creates a simple but effective pull-stop. The zip tie catches the bracket before the force reaches the connector. Inexpensive, universal, and easily relocatable.
Zip tie strain relief installation:
1. Route wire to connector
2. Place zip tie on wire 20–30mm from connector
3. Loop wire around a chassis post, through a bracket hole,
   or over a dedicated anchor point before the zip tie
4. Tighten zip tie firmly but not so tight it crushes wire insulation
5. Trim zip tie tail flush (sharp zip tie tails cut hands and adjacent wires)Securing Methods: Keeping Cables in Place
Once routed and strain-relieved, cables must be secured along their routes to prevent movement, vibration-induced chafing, and gradual migration into dangerous positions.
Zip Ties
Zip ties (cable ties) are the universal wire-securing solution in robotics. They’re inexpensive, fast to apply, available in many sizes, and hold firmly. Use properly:
- Never overtighten zip ties on wires—excessive tension crushes stranded conductors, increasing resistance and creating fatigue points. Tighten until snug, not until the wire deforms visibly.
- Trim tails flush immediately. Untrimmed zip tie tails are viciously sharp and will cut hands, adjacent wires, and insulation over time.
- Use the correct size. Large zip ties on small wire bundles leave the tie loose and ineffective; small ties on large bundles cut the insulation.
- Space zip ties at 50–80mm intervals along a wire route for consistent support.
Cable Clamps and P-Clips
Plastic cable clamps and metal P-clips screw to the chassis, providing a permanent, adjustable anchor point for wire bundles. Better than zip ties for wires that need occasional repositioning—unscrew the clamp, reposition the wire, rescrew. Ideal for the main harness runs along a chassis frame.
Adhesive Cable Mounts
Self-adhesive cable tie mounts stick to flat chassis surfaces, providing a zip tie anchor point without drilling or tapping. Adequate on clean, flat surfaces; eventually loosen on curved, dirty, or vibrating surfaces. Use with caution—adhesive mounts that fail during operation leave wires unsecured.
Braided Sleeving and Corrugated Split Loom
Braided cable sleeving bundles multiple wires into a neat, flexible tube. It looks professional, protects against minor chafing, and makes wire bundles easier to handle. It doesn’t provide strong mechanical retention on its own—use zip ties or clamps over the sleeving to secure the bundle to the chassis.
Corrugated split loom (the black corrugated plastic tubing commonly used in automotive wiring) provides stronger mechanical protection than braided sleeving. The split runs the length of the tube, allowing wires to be inserted without threading. Use for high-vibration sections, areas near moving parts, or anywhere wires need extra protection from abrasion.
Grommets for Chassis Penetrations
Every time a wire passes through a hole in a metal chassis panel, a grommet must be installed. Metal hole edges—even edges that seem smooth—will cut through wire insulation given enough vibration and time. Rubber grommets convert the sharp hole edge into a smooth, protected passage:
Grommet selection:
- Grommet inner diameter = wire bundle diameter + 2mm
- Grommet outer diameter must fit snugly in the hole
- Grommet groove depth = panel thickness ± 0.5mm
- Material: rubber or silicone (not plastic—plastic hardens and cracks)
- For waterproof applications: use sealed grommets with integrated membranesLabeling and Documentation: Wiring You Can Understand Later
A robot wiring system that is mechanically perfect but undocumented becomes a mystery after six months. Labeling and documentation transform wiring from an opaque tangle into a clear, legible system that can be debugged, modified, and repaired efficiently.
Wire Labeling Methods
Heat-shrink label sleeves: Print labels on paper, slide into clear heat-shrink tubing, and shrink over the wire near the connector. Durable, professional, permanent. This is the standard in professional robotics.
Flag labels: Small adhesive labels wrapped around the wire, with one end extending as a visible flag. Quick to apply, highly visible, but may peel off over time. Use flag labels for temporary identification during assembly and installation; replace with heat-shrink sleeves for permanent labeling.
Connector pin labeling: Mark connector housings with a fine-tip permanent marker or apply small adhesive labels. Label both halves of each connector pair with matching identifiers—”M1A” on the motor wire connector and “M1A” on the motor driver output connector leaves no ambiguity.
Color coding: Use wire color deliberately and consistently. Industry conventions:
Red:    Positive power (5V, 12V, VCC)
Black:  Ground (GND, negative)
Yellow: Logic/signal (or motor+/servo signal in some conventions)
Blue:   Logic/signal (or motor-/sensor in some conventions)
White:  Signal (common for servo signal wire in standard servo cables)
Green:  Signal/sensor
Orange: PWM signal (used by some manufacturers)Be consistent within your own builds, even if you don’t follow industry conventions exactly. Inconsistency across a build is worse than having a personal convention that differs from industry standards.
Wiring Documentation
For any robot with more than about six wires, create a wiring diagram before building and update it as the design evolves. The diagram should show:
- Every component with its power connections (voltage, current, polarity)
- Every signal connection between components (pin numbers, signal names)
- Wire colors and gauges used for each connection
- Connector types at each connection point
Even a hand-drawn diagram photographed with a phone is far better than no documentation. Ideal documentation is a schematic created in a tool like KiCad (free), Fritzing (free, beginner-friendly), or draw.io (free, web-based).
Minimum wiring documentation for a robot:
- Power tree: battery → main switch → distribution → each load
- Motor connections: motor driver → each motor (polarity marked)
- Sensor connections: each sensor → microcontroller pin (with signal name)
- Communication bus: I2C or SPI connections with device addresses

Even as bullet-point notes rather than a formal schematic, this
documentation saves hours during debugging.Common Cable Management Mistakes and How to Fix Them
| Mistake | Consequence | Fix |
|---|---|---|
| No strain relief at connectors | Wire breaks at connector over time | Add heat-shrink over all connector exits; anchor wire near connector |
| Wires touching moving parts | Insulation abraded; short circuit | Re-route with 10mm+ clearance; add protective sleeving |
| Wrong wire gauge for current | Wire overheats; insulation melts | Calculate current requirements; select gauge with 50% safety margin |
| Untrimmed zip tie tails | Cut hands; cut adjacent wire insulation | Always trim tails flush immediately after tightening |
| PVC wire at flex points | Cracked insulation; broken conductors | Replace with silicone-insulated wire at all flex points |
| No grommets at chassis holes | Metal edge cuts through insulation | Install rubber grommets at every chassis penetration |
| Solid core wire in moving harness | Wire breaks at flex points quickly | Replace with stranded wire throughout |
| Unlabeled connectors | Hours wasted tracing wires during debugging | Label both halves of every connector before final assembly |
| No wiring documentation | Robot becomes unmaintainable after time | Create wiring diagram during build; photograph before closing chassis |
| Wires zip-tied too tightly | Conductor damage; high resistance spot | Re-apply with appropriate tension; never crush wire with zip tie |
| Battery connector accessible from top only | Battery replacement requires full disassembly | Redesign battery bay with side or rear access |
| Power and signal wires bundled together | Motor interference corrupts sensor readings | Separate motor power harness from sensor/signal harness |
Building a Wiring Harness: A Practical Walkthrough
For a robot with multiple motors, sensors, and communication interfaces, building a proper wiring harness—rather than wiring point-to-point during assembly—produces a far more reliable and manageable result.
Step 1: Create the Wiring Plan
Before cutting a single wire, list every connection the robot requires. Group connections into functional harnesses:
Example harness plan for a differential drive robot:

POWER HARNESS (red/black, 16 AWG silicone):
- Battery → Main switch → Power distribution board
- Distribution board → Left motor driver (12V)
- Distribution board → Right motor driver (12V)
- Distribution board → 5V regulator (logic power)

MOTOR HARNESS (16 AWG silicone, color-coded per motor):
- Left motor driver output → Left motor (XT30 connectors)
- Right motor driver output → Right motor (XT30 connectors)

LOGIC HARNESS (24 AWG silicone):
- 5V regulator → Arduino (barrel jack or JST)
- 5V regulator → Raspberry Pi (USB-C or JST)

SENSOR HARNESS (26 AWG silicone):
- Arduino → Left encoder (JST 3-pin)
- Arduino → Right encoder (JST 3-pin)
- Arduino → Front ultrasonic sensor (JST 4-pin)
- Arduino → Rear ultrasonic sensor (JST 4-pin)
- Arduino/RPi → IMU (JST 4-pin, I2C)
- RPi → Camera (dedicated camera cable)Step 2: Measure and Cut Wires
With the chassis available (or accurate dimensional drawings), measure each wire route with a string, then add 15–20% for service loops and routing curves. Cut all wires for a given harness at once.
Step 3: Terminate Connectors
Install connector contacts on all wires before routing. For crimp connectors, use the correct crimp tool for the connector series—wrong-size crimp tools produce unreliable connections. For solder connections, use quality flux, adequate heat, and proper solder flow.
After crimping, perform a pull test on each contact: grip the wire and the connector housing separately and pull firmly. A properly crimped contact should not pull out of the housing at reasonable hand force.
Step 4: Test Continuity Before Installing
Connect the power supply (or continuity tester) to the harness and verify every connection before installing it in the robot. Finding a miswired connection at this stage takes seconds; finding it after installation takes potentially hours of disassembly and diagnosis.
Step 5: Install with Strain Relief and Securing
Route each harness along its planned path, installing strain relief at every connector and securing the harness with zip ties or clamps at 50–80mm intervals. Install grommets before threading wires through chassis holes.
Step 6: Final Documentation
Photograph the completed wiring from multiple angles before closing any covers. Update the wiring diagram to match the as-built configuration. Label every connector with its identifier.
Summary
Cable management is the invisible infrastructure of a reliable robot. Done well, it prevents the intermittent faults, surprise shorts, and mysterious disconnections that consume enormous debugging time and destroy hardware. Done poorly, it guarantees that the robot will fail unpredictably, usually at the worst possible moment.
The systematic approach to good cable management has five elements: selecting the right wire and connectors for each application (correct gauge, insulation type, and current rating), routing cables away from hazards (moving parts, sharp edges, heat sources), applying strain relief at every connector and flex point, securing cables at regular intervals with appropriate fasteners, and documenting every connection with labels and a wiring diagram.
None of these practices is difficult or expensive. The materials—silicone wire, appropriate connectors, heat-shrink tubing, zip ties, grommets, label sleeves—cost a few dollars more than the cheapest alternatives. The time invested in proper cable management during construction is repaid many times over in reduced debugging time, eliminated field failures, and robots that keep working session after session.
The next article examines battery technologies—the power source that drives every other system in the robot—covering the chemistry, characteristics, and selection criteria for NiMH, LiPo, and other battery types used in modern robotics.