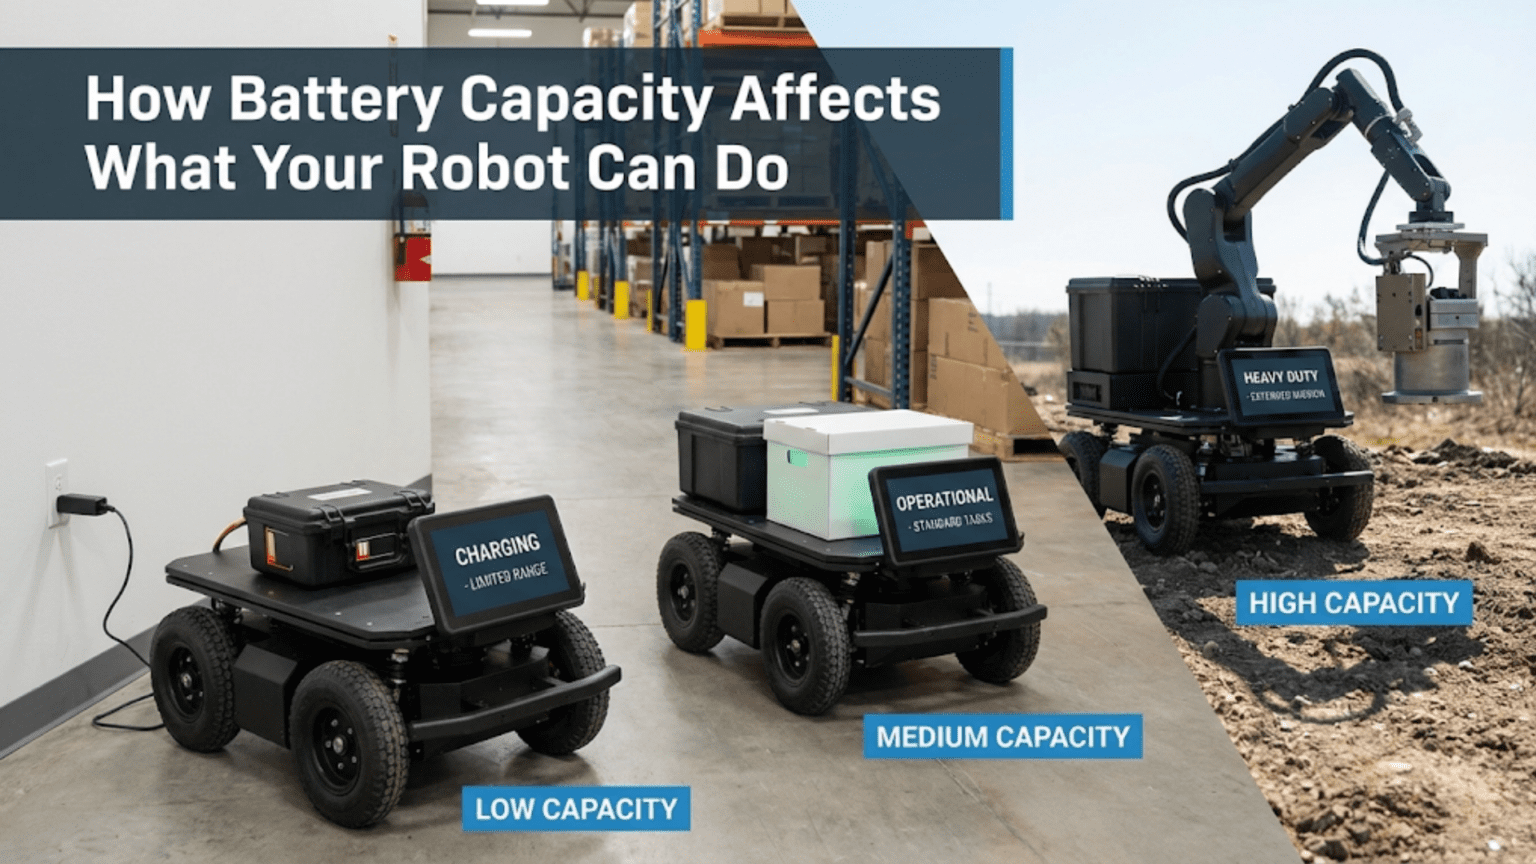
Battery capacity, measured in amp-hours (Ah) or milliamp-hours (mAh), determines how long your robot can operate before requiring a recharge by defining the total electrical charge the battery can deliver. A battery’s capacity directly limits your robot’s runtime, maximum speed, payload capability, and operational complexity—making battery selection one of the most critical decisions in robot design that balances performance against size, weight, and cost constraints.
Your robot is perfectly designed. The motors provide exactly the right torque, the sensors capture detailed environmental data, the control algorithms execute flawlessly, and the mechanical structure handles all expected loads with ease. You excitedly power it on for its first real-world test, and it performs beautifully—for exactly three minutes before the battery dies, leaving it motionless and useless. Or perhaps it runs for an acceptable duration but moves frustratingly slowly because you chose a battery that can’t deliver the current your motors demand. Or it works perfectly on flat surfaces but the battery voltage drops too low under load when climbing slopes, causing unexpected shutdowns.
These scenarios illustrate a fundamental truth in robotics: your battery doesn’t just power your robot—it fundamentally determines what your robot can do, how long it can do it, and how well it performs while doing it. Battery capacity affects every aspect of robot operation, from obvious factors like runtime to subtle effects on motor performance, sensor reliability, and control system behavior. Understanding these relationships transforms you from someone who randomly selects batteries and hopes for the best into someone who deliberately engineers power systems matched to robot requirements.
In this comprehensive guide, you’ll learn what battery capacity actually means, how to calculate your robot’s power consumption, how to predict runtime accurately, and how to select batteries that enable rather than limit your robot’s capabilities. Whether you’re building a simple line-following robot for a school project or designing a sophisticated autonomous platform, mastering battery capacity calculations and selection represents an essential skill that directly impacts your project’s success.
Understanding Battery Capacity: What the Numbers Actually Mean
Battery specifications can seem cryptic at first—numbers like “2200 mAh” or “11.1V 3S 5000mAh 30C” appear on labels without clear explanations. Understanding what these values represent and how they relate to real-world performance is essential for making informed battery choices.
Amp-Hours and Milliamp-Hours: The Fundamental Measure
Battery capacity quantifies how much electrical charge the battery stores, expressed in amp-hours (Ah) or milliamp-hours (mAh). One amp-hour means the battery can theoretically deliver one ampere of current for one hour, or equivalently, 0.5 amperes for two hours, or 2 amperes for 30 minutes.
The relationship is simple:
Runtime (hours) = Capacity (Ah) ÷ Current Draw (A)
A 2000 mAh (2 Ah) battery powering a device drawing 500 mA (0.5 A) will last:
Runtime = 2 Ah ÷ 0.5 A = 4 hours
This straightforward relationship forms the foundation of all battery runtime calculations. However, several real-world factors complicate this ideal scenario, which we’ll explore throughout this article.
Converting between amp-hours and milliamp-hours is simply a matter of decimal places:
- 1 Ah = 1000 mAh
- 2500 mAh = 2.5 Ah
- 0.8 Ah = 800 mAh
Most small batteries (for robots, RC vehicles, portable electronics) are rated in mAh because the numbers are more convenient—2200 mAh sounds more substantial than 2.2 Ah, even though they’re identical.
Voltage: The Energy Dimension
While capacity tells you how much charge flows, voltage determines the energy per unit of charge. The total energy stored in a battery combines both:
Energy (Wh) = Capacity (Ah) × Voltage (V)
A 2 Ah battery at 7.4V stores: Energy = 2 Ah × 7.4V = 14.8 watt-hours (Wh)
A 1 Ah battery at 14.8V also stores 14.8 Wh—half the capacity but double the voltage yields the same total energy.
This distinction matters because robots care about power (watts), which combines current and voltage:
Power (W) = Current (A) × Voltage (V)
A motor requiring 10 watts could draw:
- 1 A at 10V, or
- 2 A at 5V, or
- 0.5 A at 20V
The same power requirement demands different currents depending on operating voltage. This is why battery voltage selection matters independently of capacity—you need both the right voltage for your components and sufficient capacity for desired runtime.
C-Rating: Discharge Capability
Many batteries, especially lithium polymer (LiPo) batteries popular in robotics, include a “C-rating” specification like “20C” or “30C.” This indicates the maximum safe continuous discharge rate relative to the battery’s capacity.
The maximum current a battery can deliver safely is:
Max Current (A) = Capacity (Ah) × C-rating
A 2000 mAh (2 Ah) battery rated at 20C can deliver: Max Current = 2 Ah × 20 = 40 A continuously
The same battery rated at 10C could only deliver 20 A. C-rating essentially tells you how “fast” you can drain the battery without damage or excessive voltage drop.
For robotics applications, you need a battery whose C-rating supports your peak current demands. If your robot’s motors draw 15 A total during aggressive maneuvers, a 2000 mAh 10C battery (20 A max) provides marginal safety margin, while a 2000 mAh 20C battery (40 A max) offers comfortable overhead.
Some batteries list both continuous and burst C-ratings—for example, “20C continuous, 40C burst.” The burst rating applies to short peaks (typically under 10 seconds), while continuous rating applies to sustained loads. Design for continuous ratings with burst capability as safety margin, not as primary operating condition.
Calculating Your Robot’s Power Consumption
Accurately predicting how much power your robot consumes is essential for selecting appropriately sized batteries and estimating runtime. This requires understanding what components consume power and how their consumption varies with operating conditions.
Motor Power: The Dominant Consumer
In most mobile robots, motors account for 60-90% of total power consumption. Motor power varies dramatically based on load and speed, making accurate estimation more art than science without testing.
Motors draw current proportional to torque demand. At no load (spinning freely), a motor draws minimal current—perhaps 10-20% of its stall current. Under maximum load (stalled), it draws full stall current and produces maximum torque but zero mechanical power (all energy becomes heat). Useful operation occurs between these extremes.
A reasonable estimation method:
- Find the motor’s stall current (I_stall) from its datasheet
- Estimate your typical operating load as a percentage of stall torque
- Motor current ≈ I_stall × load percentage
For example, a motor with 2 A stall current operating at 30% of maximum torque draws approximately:
I_motor ≈ 2 A × 0.30 = 0.6 A
For a robot with four such motors, total motor current ≈ 4 × 0.6 A = 2.4 A
This estimation is crude but provides a starting point. For better accuracy, measure actual current consumption during typical operations using a multimeter or power analyzer in series with the battery.
Controller and Electronics Power
Microcontrollers, motor drivers, and sensor electronics typically consume far less power than motors but still contribute to total draw:
Microcontrollers (Arduino, Raspberry Pi, etc.):
- Arduino Uno: ~40-50 mA at 5V
- Arduino Nano: ~20-30 mA at 5V
- Raspberry Pi 4: ~600-800 mA at 5V (idle), up to 1200 mA (under load)
- ESP32: ~80-160 mA at 3.3V (active), ~5-10 mA (sleep modes)
Motor Drivers: These draw minimal current for their own operation (typically 10-50 mA) but pass through motor current. The driver’s power consumption comes from inefficiency—if a driver is 90% efficient and passes 2 A to motors, it dissipates 10% as heat, effectively drawing an additional 0.2 A.
Sensors:
- Ultrasonic sensors: ~15-30 mA during ranging pulses
- Infrared distance sensors: ~30-50 mA
- Camera modules: ~100-300 mA
- IMU sensors: ~5-15 mA
- LIDAR sensors: ~100-500 mA (depending on model)
Sum all component currents for total electronics consumption. For a typical beginner robot:
- Arduino Uno: 45 mA
- Motor driver overhead: 50 mA
- Three ultrasonic sensors: 60 mA (20 mA each, average)
- LED indicators: 20 mA
Total electronics: ~175 mA = 0.175 A
Voltage Regulators and Conversion Losses
If your robot uses voltage regulators to convert battery voltage to different levels (e.g., 12V battery to 5V for Arduino), these regulators waste power through inefficiency.
Linear regulators (like 7805) have poor efficiency when voltage drop is large. Efficiency approximately equals:
Efficiency = V_out ÷ V_in
For 12V to 5V: Efficiency = 5V ÷ 12V ≈ 42%
If your 5V electronics draw 0.2 A (1 W), the regulator draws from the battery:
Battery current = 1 W ÷ 12V ÷ 0.42 ≈ 0.2 A
About 58% of power becomes heat in the regulator!
Switching regulators (buck converters, boost converters) achieve 80-95% efficiency regardless of voltage ratio:
Battery current = (output power ÷ efficiency) ÷ battery voltage Battery current = (5V × 0.2A ÷ 0.90) ÷ 12V ≈ 0.09 A
Much better! Always use switching regulators for significant voltage conversions or high current loads.
Total Power Calculation Example
Let’s calculate total power for a complete robot:
Configuration:
- Four motors, 2 A stall current each, operating at 30% load = 0.6 A each
- Arduino Uno = 45 mA
- Motor driver overhead = 50 mA
- Sensors and electronics = 125 mA
- 12V battery
- Buck converter (90% efficient) providing 5V for electronics
Motor power: Current: 4 × 0.6 A = 2.4 A at 12V Power: 2.4 A × 12V = 28.8 W
Electronics power (at 5V): Current: 45 + 50 + 125 = 220 mA = 0.22 A Power: 0.22 A × 5V = 1.1 W
Battery load from electronics: Current: (1.1 W ÷ 0.90) ÷ 12V = 0.102 A at 12V
Total battery current: 2.4 A (motors) + 0.102 A (electronics) = 2.5 A
Total power consumption: 2.5 A × 12V = 30 W
Estimating Runtime: Theory Meets Reality
With power consumption calculated, estimating runtime should be straightforward—simply divide battery capacity by current draw. Reality introduces several complications that make actual runtime shorter than this ideal calculation predicts.
The Ideal Runtime Calculation
Using our previous example with 2.5 A total consumption and a 3000 mAh (3 Ah) battery:
Runtime = 3 Ah ÷ 2.5 A = 1.2 hours = 72 minutes
This represents the theoretical maximum—what you’d achieve if every factor were ideal.
Real-World Derating Factors
Several factors reduce actual runtime below the theoretical value:
Battery efficiency (90-95%): Batteries don’t deliver 100% of their rated capacity due to internal resistance and chemical limitations. A 3000 mAh battery typically delivers only 2700-2850 mAh in practice. Apply a 0.90-0.95 multiplier.
Discharge rate effects (varies): Batteries deliver less capacity when discharged quickly. The same battery might provide 3000 mAh at 0.3 A (10-hour discharge) but only 2400 mAh at 6 A (0.4-hour discharge). High-quality batteries minimize this effect; cheap batteries suffer more. Apply a 0.80-0.95 multiplier for moderate discharge rates.
Temperature effects (varies): Cold temperatures reduce battery capacity significantly. LiPo batteries might lose 20-30% capacity at 0°C compared to 25°C. Warm temperatures (up to 40°C) can slightly increase capacity but accelerate degradation. For indoor room-temperature operation, ignore this; for outdoor robots, apply a 0.70-0.90 multiplier in cold conditions.
Voltage cutoff (5-15%): You shouldn’t fully discharge batteries—doing so damages them and reduces lifespan. Most battery chemistries have a minimum safe voltage. The capacity between full charge and this cutoff voltage represents usable capacity, typically 85-95% of total capacity. Apply a 0.85-0.95 multiplier.
Variable load (varies): Your calculated consumption represents average load. Real robots experience varying loads—higher during acceleration, climbing, or turning; lower during cruise or idle. This variance makes your average estimate less accurate. If your calculation uses peak loads, actual runtime will exceed estimates. If using cruise loads, peaks will drain the battery faster than predicted. Apply a 0.85-0.95 multiplier for load variation uncertainty.
Realistic Runtime Calculation
Applying conservative derating factors (0.90, 0.85, 0.90, 0.90, 0.90) to our theoretical 72-minute runtime:
Realistic runtime = 72 min × 0.90 × 0.85 × 0.90 × 0.90 × 0.90 Realistic runtime = 72 min × 0.56 ≈ 40 minutes
Our 3000 mAh battery will realistically provide about 40 minutes of operation, not the theoretical 72 minutes. This significant difference explains why beginners often find their batteries drain much faster than calculations predicted.
For quick estimation without detailed analysis, apply a blanket 0.60-0.70 multiplier to theoretical runtime. This empirically accounts for combined real-world effects:
Quick estimate = (Capacity ÷ Current) × 0.65 Quick estimate = (3 Ah ÷ 2.5 A) × 0.65 = 0.78 hours ≈ 47 minutes
This approximates our detailed calculation and provides reasonable accuracy for planning purposes.
Battery Chemistry Comparison: Choosing the Right Type
Different battery chemistries offer distinct characteristics affecting capacity, voltage, discharge rate, weight, cost, and safety. Selecting appropriate chemistry for your robot requires balancing these factors against your requirements.
Nickel-Metal Hydride (NiMH)
Characteristics:
- Nominal voltage: 1.2V per cell
- Typical capacities: 600-3000 mAh for AA-size cells
- Discharge rate: Moderate (1C-2C typical, some up to 5C)
- Weight: Moderate (heavier than LiPo, lighter than lead-acid)
- Cycle life: 300-500 cycles
- Self-discharge: Moderate to high (standard), low (low self-discharge variants)
Advantages:
- Safer than lithium batteries (lower fire risk)
- More environmentally friendly
- Can be recharged hundreds of times
- Widely available in standard sizes (AA, AAA, etc.)
- Tolerant of abuse (overcharge, overdischarge less damaging)
Disadvantages:
- Lower energy density (larger/heavier for same capacity)
- Memory effect (though minimal in modern cells)
- Requires specific chargers
- Voltage sag under load more pronounced than lithium
Best for:
- Beginner robots where safety is paramount
- Educational settings with young users
- Robots using standardized battery sizes
- Budget-conscious projects
Lithium Polymer (LiPo)
Characteristics:
- Nominal voltage: 3.7V per cell (4.2V fully charged, 3.0V cutoff)
- Typical capacities: 500-10,000+ mAh in various sizes
- Discharge rate: High (20C-100C available)
- Weight: Light (best energy density)
- Cycle life: 200-400 cycles (proper care extends this)
- Self-discharge: Low
Advantages:
- Highest energy density (most capacity per weight/volume)
- High discharge rates support powerful motors
- Flexible form factors (can be shaped to fit spaces)
- Maintains voltage well under load
- Available in multi-cell packs (2S=7.4V, 3S=11.1V, 4S=14.8V, etc.)
Disadvantages:
- Requires careful handling (fire risk if damaged or overcharged)
- Must use specialized chargers with balancing
- Strict voltage limits (overdischarge permanently damages cells)
- More expensive than NiMH
- Degrades if stored fully charged
Best for:
- Performance-oriented robots requiring high power
- Weight-sensitive applications (drones, racing robots)
- Competition robots
- Experienced builders who understand safety protocols
Lithium-Ion (Li-ion)
Characteristics:
- Nominal voltage: 3.6-3.7V per cell
- Typical capacities: 1800-3500 mAh for 18650 cells
- Discharge rate: Moderate to high (5C-20C typical)
- Weight: Light (similar to LiPo)
- Cycle life: 500-1000 cycles
- Self-discharge: Very low
Advantages:
- Higher cycle life than LiPo
- Rigid cylindrical format more durable
- Good energy density (slightly less than LiPo)
- More stable than LiPo
- Widely available in standard formats (18650, 21700, etc.)
Disadvantages:
- Lower peak discharge rates than LiPo (though sufficient for most robots)
- Cylindrical format less space-efficient than flat LiPo packs
- Still requires careful charging and protection circuitry
- Can be damaged by overdischarge or overcharge
Best for:
- Robots requiring long cycle life
- Applications where standard cell formats are advantageous
- Balance between performance and safety
- Projects using battery management systems (BMS)
Lead-Acid and Sealed Lead-Acid (SLA)
Characteristics:
- Nominal voltage: 2V per cell (common 6V, 12V configurations)
- Typical capacities: 1-100+ Ah in larger formats
- Discharge rate: Low to moderate (0.2C-1C typical)
- Weight: Very heavy
- Cycle life: 200-500 cycles
- Self-discharge: Low
Advantages:
- Very inexpensive per watt-hour
- Highly standardized (6V, 12V ubiquitous)
- Very safe (no fire risk)
- Can deliver high currents despite low C-rating (large capacity compensates)
- Readily available
Disadvantages:
- Extremely heavy (worst energy density)
- Large physical size
- Limited cycle life
- Voltage drops significantly as battery drains
- Environmental concerns (lead disposal)
Best for:
- Large stationary robots where weight doesn’t matter
- Budget projects requiring high capacity
- Robots with ample space
- Applications where safety is absolutely critical
Battery Configuration: Series, Parallel, and Combinations
Batteries can be connected in various configurations to achieve desired voltage and capacity combinations, expanding your design options beyond single cells.
Series Connection: Increasing Voltage
Connecting batteries in series (positive of one to negative of the next) adds voltages while keeping capacity constant:
- Two 3.7V 2000mAh cells in series = 7.4V 2000mAh
- Three 3.7V 2000mAh cells in series = 11.1V 2000mAh
- Four 1.2V 2000mAh cells in series = 4.8V 2000mAh
Series connections allow you to match your robot’s voltage requirements. If your motors need 12V and you have 3.7V LiPo cells, use three in series (11.1V nominal) or four in series (14.8V nominal, though this exceeds 12V, most 12V motors tolerate it).
Important: Series cells must have identical capacity and be at the same state of charge. Mismatched cells lead to uneven charging/discharging, potentially damaging the weakest cell.
Parallel Connection: Increasing Capacity
Connecting batteries in parallel (all positives together, all negatives together) adds capacities while keeping voltage constant:
- Two 3.7V 2000mAh cells in parallel = 3.7V 4000mAh
- Three 3.7V 2000mAh cells in parallel = 3.7V 6000mAh
Parallel connections extend runtime proportionally. Double the parallel cells, double the runtime.
Important: Parallel cells should be matched in voltage before connecting. Connecting cells at different voltages causes rapid current flow from higher to lower voltage cells, potentially dangerous with lithium batteries.
Series-Parallel Combinations
Complex battery packs combine series and parallel connections:
- Four 3.7V 2000mAh cells in 2S2P (two parallel groups, connected in series):
- Each parallel group: 3.7V 4000mAh
- Groups in series: 7.4V 4000mAh total
This configuration is common in high-performance applications, providing both adequate voltage and extended capacity. LiPo battery packs labeled “3S2P” or “4S3P” use these configurations.
Battery Pack Notation
Standard notation describes configurations:
- 1S: Single cell (3.7V for LiPo)
- 2S: Two cells in series (7.4V for LiPo)
- 3S: Three cells in series (11.1V for LiPo)
- 4S: Four cells in series (14.8V for LiPo)
Some packs include parallel configuration:
- 3S2P: Three series groups, each containing two parallel cells
Voltage Sag: Why Battery Voltage Drops Under Load
Battery voltage isn’t constant—it drops during discharge and particularly under heavy loads. Understanding voltage sag prevents unexpected robot shutdowns and helps you design appropriate power systems.
Internal Resistance: The Culprit
All batteries have internal resistance—opposition to current flow inside the battery itself. When current flows, this resistance causes voltage drop according to Ohm’s law:
Voltage drop = Current × Internal_Resistance
Under load, the voltage your robot sees is:
V_actual = V_nominal – (I_load × R_internal)
A fresh 3.7V LiPo cell might have 0.01-0.03 Ω internal resistance. Drawing 10 A creates voltage drop:
V_drop = 10 A × 0.02 Ω = 0.2V
Actual voltage = 3.7V – 0.2V = 3.5V
This 0.2V drop might not seem significant, but in a 3S pack (three cells in series), each cell drops 0.2V, giving total drop:
Total drop = 3 × 0.2V = 0.6V Pack voltage = 11.1V – 0.6V = 10.5V
Your 11.1V battery provides only 10.5V at 10 A load—a 5% drop that can affect motor performance and might trigger low-voltage cutoffs in your speed controller.
State of Charge Effects
Internal resistance increases as batteries discharge. A LiPo at 50% charge might have twice the internal resistance of the same battery fully charged. This creates a vicious cycle—as the battery drains, voltage sag worsens, making motor performance degrade progressively.
Additionally, nominal voltage decreases with discharge:
- LiPo: 4.2V full → 3.7V nominal → 3.0V empty (per cell)
- NiMH: 1.4V full → 1.2V nominal → 1.0V empty (per cell)
Combine these effects: a 3S LiPo (11.1V nominal) at 20% charge might sag to 9.0-9.5V under heavy load—a 15-20% voltage drop that severely impacts robot performance.
Implications for Robot Design
Design robots to handle voltage variation:
Motor selection: Choose motors rated for voltage ranges that encompass full battery range. If using 3S LiPo (9-12.6V range), motors should tolerate this entire range.
Voltage regulation: Use regulators with wide input ranges. A regulator requiring 10-15V input won’t work well with a 3S battery that can drop to 9V under load.
Battery monitoring: Implement low-voltage detection to stop operation before damaging overdischarge. For LiPo, 3.0V per cell (9.0V for 3S) is absolute minimum; 3.3V per cell (9.9V for 3S) is a safer cutoff with margin.
Capacity reserves: Don’t design for 100% battery utilization. Leave margin so you operate primarily in the battery’s better-performing charge range (80%-20% charge) rather than draining to empty.
Practical Battery Selection Strategy
Selecting the right battery for your robot involves balancing multiple competing factors. This systematic approach helps you make informed decisions.
Step 1: Determine Voltage Requirements
List all components and their voltage requirements:
- Motors: typically 6V, 12V, or 24V
- Microcontroller: 5V (sometimes 3.3V)
- Sensors: usually 3.3V or 5V
- Motor drivers: wide range, often matches motor voltage
Select a battery voltage that directly supplies major components or can be regulated efficiently:
Example:
- Motors: 12V
- Arduino: 5V (will regulate from battery)
- Sensors: 5V (will regulate from battery)
Battery choice: 3S LiPo (11.1V nominal, 9-12.6V range) works well. Motors tolerate voltage range, and efficient buck converter provides 5V for electronics.
Step 2: Calculate Power Requirements
Use the methods described earlier to determine:
- Peak current (maximum instantaneous draw)
- Average current (typical operating consumption)
- Operating duration required
Example calculation:
- Peak: 8 A (motors at max torque)
- Average: 2.5 A (typical operation)
- Duration: 30 minutes desired
Step 3: Determine Minimum Capacity
From average current and duration:
Capacity_minimum = Current × Duration × Safety_factor
Safety factor accounts for real-world derating (use 1.5-2.0):
Capacity = 2.5 A × 0.5 hours × 1.7 = 2.125 Ah = 2125 mAh
Choose next standard size up: 2200 mAh or 2500 mAh
Step 4: Verify C-Rating Sufficiency
With peak current and capacity known:
Required_C_rating = Peak_current ÷ Capacity
Required_C_rating = 8 A ÷ 2.5 Ah = 3.2 C
Any battery rated 5C or higher suffices. Most LiPo batteries offer 20C+, so this requirement is easily met. For high-power robots with large peak draws, this verification prevents selecting batteries that can’t deliver required current.
Step 5: Consider Physical Constraints
Check battery dimensions against available space in your robot. Battery weight affects center of mass and total robot weight (requiring more powerful motors). Connector types must match or be adaptable to your robot’s wiring.
Step 6: Balance Cost and Performance
Higher-capacity, higher-discharge-rate batteries cost more. Balance performance needs against budget:
- Competition robot: invest in premium high-discharge LiPo
- Learning project: mid-range NiMH or basic LiPo suffices
- Proof-of-concept: cheapest battery meeting minimum requirements
Step 7: Plan for Safety and Maintenance
LiPo batteries require specialized charging, storage, and handling. NiMH batteries are more forgiving. Factor in charger cost and safety equipment (LiPo safety bags, fire extinguisher) when selecting chemistry.
Comparison Table: Battery Chemistry Characteristics
| Battery Type | Energy Density | Discharge Rate | Cycle Life | Safety | Cost | Best Applications |
|---|---|---|---|---|---|---|
| NiMH | Moderate (60-120 Wh/kg) | Moderate (1-5C) | 300-500 | Excellent | Low | Beginner robots, education, standardized formats |
| LiPo | High (130-200 Wh/kg) | Very High (20-100C) | 200-400 | Requires care | Moderate-High | Performance robots, racing, drones, competition |
| Li-ion | High (120-170 Wh/kg) | Moderate-High (5-20C) | 500-1000 | Good | Moderate | Long-life robots, consumer products, portable power |
| Lead-Acid | Low (30-50 Wh/kg) | Low-Moderate (0.2-1C) | 200-500 | Excellent | Very Low | Stationary robots, large platforms, extreme budgets |
| Alkaline | Low (80-110 Wh/kg) | Low (0.2-0.5C) | Single use | Excellent | Low | Single-use, emergency backup, ultra-simple projects |
Advanced Battery Considerations
Beyond basic capacity and voltage selection, several advanced topics affect battery performance in robotics applications.
Battery Management Systems (BMS)
Lithium batteries increasingly include integrated Battery Management Systems—electronics that:
- Monitor cell voltages
- Balance cells during charging
- Protect against over/under voltage
- Limit discharge current
- Monitor temperature
Quality BMS circuits significantly extend battery life and improve safety. When selecting lithium batteries, prefer those with integrated BMS, especially for complex multi-cell packs.
Fast Charging and Charge Rates
Batteries can be charged at various rates, typically expressed in C-rating similar to discharge:
- 1C charge: full capacity in 1 hour
- 0.5C charge: full capacity in 2 hours
- 2C charge: full capacity in 30 minutes
Faster charging is convenient but:
- Generates more heat
- May reduce cycle life
- Requires compatible charger
- Increases safety risks (especially for lithium)
For maximum battery life, charge at 0.5C-1C. Reserve fast charging for situations where time constraints justify the trade-offs.
Temperature Management
Batteries perform best in moderate temperatures (15-30°C):
Cold temperatures (below 10°C):
- Reduced capacity (20-30% loss at 0°C)
- Increased internal resistance
- Reduced discharge capability
- Risk of damage if charging below 0°C (lithium)
Hot temperatures (above 40°C):
- Accelerated degradation
- Safety risks (thermal runaway in lithium)
- Slightly increased capacity (but life reduction)
For outdoor robots in extreme climates, consider:
- Insulation to moderate temperature swings
- Heating pads for cold operation
- Active cooling for hot environments
- Battery chemistry selection (NiMH more temperature-tolerant than lithium)
Cycle Life and Degradation
Batteries degrade with use. Understanding degradation patterns helps you plan maintenance and replacement:
Factors accelerating degradation:
- Deep discharge cycles (discharging to empty)
- High discharge rates
- Storage at full charge (lithium)
- Elevated temperatures
- Physical damage or abuse
Maximizing battery life:
- Avoid discharging below 20% capacity
- Store lithium at 40-60% charge
- Use moderate charge/discharge rates when time permits
- Keep batteries cool
- Handle carefully (avoid drops, punctures, crushing)
Track battery cycles and performance. When capacity drops to 70-80% of original, replacement is advisable for critical applications.
Swappable Battery Systems
For robots requiring extended operation beyond single-battery capacity:
Hot-swappable systems: Allow battery replacement without shutting down robot. Requires:
- Dual battery configuration with automatic switching
- Capacitors or secondary battery to maintain power during swap
- Complex but enables continuous operation
Quick-swap systems: Robot shuts down briefly during battery exchange. Requires:
- Easy-access battery compartment
- Secure but quickly releasable battery mounting
- Multiple charged batteries available
- Simpler, suitable for most applications
Commercial robots often use quick-swap. Hot-swap is reserved for applications where downtime is unacceptable (industrial inspection, security patrols).
Real-World Examples: Battery Selection in Practice
Examining concrete examples demonstrates how battery capacity affects robot capabilities and how to make appropriate selections.
Example 1: Line-Following Robot for Competition
Requirements:
- Must complete course in under 2 minutes
- Course includes sharp turns requiring aggressive acceleration
- Robot must be lightweight (weight penalty in scoring)
- Cost is minor concern (competition robot)
Analysis:
- Short duration needs minimal capacity
- High acceleration demands high discharge rate
- Weight critical favors high energy density
- Budget allows premium batteries
Selection:
- 2S LiPo (7.4V) 1500 mAh 30C
- Provides ample discharge (45 A capability)
- Lightweight (approximately 100g)
- Runtime: ~10 minutes (far exceeds 2-minute requirement)
- Cost: ~$25
Result: Battery enables aggressive performance without weight penalty. Capacity exceeds needs but next smaller size (1000 mAh) wouldn’t meet discharge requirements.
Example 2: Educational Robot for Classroom Use
Requirements:
- Must survive hour-long class periods
- Used by students with varying skill levels
- Safety paramount
- Budget conscious
- Simple charging (no specialized equipment)
Analysis:
- Long duration needs substantial capacity
- Student use requires forgiving chemistry
- Safety eliminates high-energy lithium
- Budget constraint favors low cost
- Charging simplicity favors common formats
Selection:
- 6xAA NiMH 2500 mAh (7.2V total)
- High capacity provides full class period plus margin
- NiMH tolerates student abuse
- Standard AA chargers widely available
- Cost: ~$15 for batteries, ~$20 for charger
- Runtime: 90+ minutes under typical use
Result: Battery meets all requirements with good safety margin. Higher cost per watt-hour than lithium is offset by safety and simplicity benefits.
Example 3: Autonomous Lawn-Mowing Robot
Requirements:
- Must operate 60+ minutes per charge
- Navigates slopes and rough terrain
- High motor loads (cutting blades plus drive)
- Weatherproof operation
- Cost-sensitive consumer product
Analysis:
- Extended duration needs high capacity
- High loads demand substantial discharge capability
- Outdoor use requires weather tolerance
- Consumer market drives cost minimization
- Runtime directly affects mowing coverage
Selection:
- 4S Li-ion (14.4V) 5000 mAh (18650 cells with BMS)
- High capacity provides 75+ minute runtime
- Good discharge rate (15-20C typical for quality 18650s)
- Li-ion more durable than LiPo for outdoor use
- Cylindrical format easier to waterproof than pouch LiPo
- Cost: ~$50-60 for battery pack with BMS
- Runtime: 70-80 minutes under heavy load
Result: Battery provides target runtime with margin. Li-ion chemistry balances performance, durability, and cost better than alternatives for this application.
Example 4: Miniature Exploration Robot
Requirements:
- Must fit through 5cm diameter tube
- Operates 20-30 minutes per mission
- Moderate power requirements (small motors)
- Research platform (cost less critical)
Analysis:
- Severe size constraint dominates selection
- Moderate duration and power needs
- Small size eliminates many battery options
- Custom solution likely required
Selection:
- 2S LiPo 500 mAh 25C (compact flat pack)
- Minimal volume (approximately 30mm × 35mm × 12mm)
- Adequate capacity for 25-30 minute operation
- High discharge rate provides power headroom
- Cost: ~$15-20
Result: Battery fits size constraint while providing necessary runtime. Custom geometry selected for specific robot dimensions. Higher cost per watt-hour accepted due to size requirements.
Troubleshooting Battery-Related Problems
Recognizing battery issues and understanding their solutions helps you maintain optimal robot performance.
Problem: Shorter Runtime Than Expected
Symptoms: Battery drains much faster than calculations predict; robot operates for fraction of expected duration.
Possible Causes:
- Calculation errors: Underestimated power consumption
- Battery degradation: Old battery has reduced capacity
- Excessive loads: Motors drawing more current than designed
- Voltage cutoff: Protection circuits stopping operation prematurely
- Internal resistance: Poor battery can’t deliver rated capacity at load
Diagnosis:
- Measure actual current draw during operation (should match calculations within 20%)
- Test battery capacity with charger (should achieve 80%+ of rated capacity)
- Monitor voltage under load (excessive sag indicates poor battery or overload)
- Check cutoff voltage settings (too conservative reduces usable capacity)
Solutions:
- Recalculate power requirements with measured values
- Replace degraded battery
- Reduce loads (lower motor power, reduce weight, improve efficiency)
- Adjust voltage cutoff to manufacturer recommendations
- Upgrade to higher-quality battery with better discharge characteristics
Problem: Motors Running Slower Than Expected
Symptoms: Robot moves sluggishly; motors don’t reach expected speeds; performance degrades as battery drains.
Possible Causes:
- Voltage sag: Battery can’t maintain voltage under load
- Insufficient C-rating: Battery cannot deliver required current
- Battery depleted: Voltage too low for motor requirements
- Poor connections: Resistance in wiring causing voltage drop
Diagnosis:
- Measure battery voltage under load (compare to no-load voltage)
- Calculate actual discharge rate vs. battery C-rating
- Check battery state of charge
- Measure voltage at motor terminals (compare to battery terminals)
Solutions:
- Upgrade to higher C-rating battery
- Increase battery capacity (higher capacity provides same current at lower C)
- Recharge or replace battery
- Improve wiring (larger gauge, better connections)
- Add capacitors near motors to buffer current peaks
Problem: Battery Gets Hot During Operation
Symptoms: Battery warm or hot to touch after use; performance degradation during operation; battery swelling (lithium).
Possible Causes:
- Excessive discharge rate: Drawing current beyond safe limits
- Internal damage: Degraded cells with high resistance
- Poor thermal management: Inadequate cooling
- Defective battery: Manufacturing defect or damage
Diagnosis:
- Calculate actual discharge rate vs. rated limits
- Feel for hot spots (indicate specific failed cells)
- Measure internal resistance (higher than spec indicates problems)
- Inspect for physical damage (swelling, punctures, dents)
Solutions:
- Reduce loads to lower discharge rate
- Replace battery immediately if swollen or damaged
- Add cooling (ventilation, heat sinks for battery mounting)
- Upgrade to higher-capacity battery (provides same current at lower rate)
SAFETY WARNING: Hot lithium batteries present fire risk. If battery is swelling, hissing, or smoking, immediately move to safe location away from flammables and allow to cool. Do not attempt to charge damaged lithium batteries.
Problem: Battery Won’t Hold Charge
Symptoms: Freshly charged battery immediately shows low voltage; capacity drains rapidly even with robot off; won’t reach full charge.
Possible Causes:
- End of life: Battery has reached cycle life limit
- Overdischarge damage: Battery discharged below safe minimum
- Cell imbalance: Multi-cell pack has failed cells
- Self-discharge: Defective or old battery
Diagnosis:
- Check battery age and cycle count (compare to rated life)
- Measure individual cell voltages (look for outliers)
- Measure voltage immediately after charging and after 24 hours (quantify self-discharge)
- Attempt recovery charge (some chargers have special modes)
Solutions:
- Replace battery if at end of life
- Balance charge multi-cell packs (may recover some capacity)
- Retire batteries showing cell imbalance
- Use low self-discharge batteries for intermittent-use robots
Conclusion: Powering Your Robot’s Potential
Battery capacity isn’t just a number on a label—it’s a fundamental constraint that shapes what your robot can accomplish. Understanding how capacity, voltage, discharge rate, and chemistry interact allows you to make informed decisions that enable rather than limit your robot’s capabilities. The difference between a robot that barely completes its mission and one that performs with power to spare often comes down to appropriate battery selection and power system design.
The skills you’ve developed in this article—calculating power consumption, estimating runtime, selecting battery chemistry, configuring cells, and troubleshooting battery issues—apply across all robotics domains. Whether you’re building hobby projects, competition robots, commercial products, or research platforms, these fundamentals remain constant. The specific numbers change (milliamp-hours versus amp-hours, watts versus kilowatts), but the principles and calculations stay the same.
Start every robot project by carefully considering power requirements and battery selection. Calculate expected consumption, choose appropriate capacity and chemistry, and verify that voltage and discharge capabilities match your needs. This upfront analysis prevents the frustrating discovery that your perfect mechanical and electronic design is hobbled by inadequate power supply.
Test and measure actual performance. Your calculations provide estimates, but real robots in real conditions often differ from theoretical predictions. Measure current draw during typical operations, monitor battery voltage under load, and track actual runtime. Use this empirical data to refine designs and adjust battery selection for future projects.
Maintain your batteries properly to maximize lifespan and reliability. Follow charging guidelines, avoid overdischarge, store appropriately, and replace degraded batteries before they cause problems. Quality batteries represent significant investment—proper care extends their useful life and improves robot performance.
Accept that battery selection involves trade-offs. The highest capacity battery might be too heavy. The safest chemistry might lack discharge capability. The most convenient form factor might cost more. Perfect solutions rarely exist—instead, you make informed compromises that best serve your specific application’s priorities.
Most importantly, remember that battery capacity fundamentally determines your robot’s operational envelope. Insufficient capacity doesn’t just mean shorter runtime—it can prevent your robot from accelerating adequately, climbing slopes successfully, or executing time-critical tasks. Design power systems with appropriate margins. The difference in cost between a marginal battery and an adequate one is usually small compared to the performance improvement and reliability gain.
Your robot’s battery is more than just an energy storage device—it’s the foundation that enables every other system to function. Choose wisely, calculate carefully, test thoroughly, and maintain properly. Master these battery fundamentals, and you’ll build robots that perform reliably throughout their missions rather than disappointingly running out of power at the worst possible moments.