Introduction
Imagine being able to turn a digital design on your computer screen into a real, physical object you can hold in your hands within just a few hours. This remarkable capability is exactly what three-dimensional printing makes possible, and it represents one of the most significant technological shifts in how we manufacture and create objects since the industrial revolution began transforming workshops centuries ago.
Three-dimensional printing, commonly shortened to 3D printing, allows you to build physical objects directly from digital files by adding material layer upon layer until the complete form takes shape. Think of it as the opposite of traditional manufacturing methods like carving or cutting, where you start with a block of material and remove what you do not need. With 3D printing, you start with nothing and build up exactly what you want, adding material only where it belongs.
This guide will walk you through everything you need to understand about 3D printing as a complete beginner. You will learn what the technology actually is, how the fundamental process works, why it matters in today’s world, and what makes it different from the manufacturing methods we have relied upon for generations. By the end of this article, you will have a solid foundation for understanding this transformative technology, even if you have never seen a 3D printer in action.
Understanding the Basic Concept
At its most fundamental level, 3D printing is a process that creates three-dimensional objects by depositing material in carefully controlled layers, one on top of another, until the complete object emerges. Each individual layer is extremely thin, typically between one-tenth and three-tenths of a millimeter in height, which means even a small object might contain hundreds of separate layers stacked together.
The process begins in the digital realm. Someone creates a three-dimensional model using computer-aided design software, or they download an existing design from online repositories where creators share their work. This digital model contains all the geometric information needed to describe the object’s shape, including every curve, angle, and surface detail. Once you have this digital blueprint, specialized software slices the three-dimensional model into those hundreds of horizontal cross-sections, essentially creating a complete roadmap for how each layer should appear.
The 3D printer then follows these instructions with remarkable precision. For each layer, the machine deposits material in exactly the right locations to match that particular cross-section of the design. After completing one layer, the build platform moves down slightly, and the printer begins working on the next layer directly on top of the previous one. This pattern continues, layer after layer, until the entire object stands complete.
What makes this approach so powerful is that the printer can create shapes that would be extremely difficult or even impossible to manufacture using traditional methods. Consider a hollow sphere with intricate geometric patterns on its surface and a small object suspended freely inside the hollow interior. Traditional manufacturing would struggle to create this, but a 3D printer can build it in a single printing session because it constructs the object from the inside out, layer by layer, supporting each portion as needed during the build process.
The Principle of Additive Manufacturing
The formal term for 3D printing technology is additive manufacturing, and this name reveals something important about how the process differs from conventional production methods. Traditional manufacturing is largely subtractive, meaning you start with more material than you need and remove the excess through cutting, drilling, grinding, or carving until the desired shape remains. When a machinist creates a metal component on a lathe, they begin with a solid cylinder of metal and cut away everything that does not belong to the final part.
Additive manufacturing flips this paradigm completely. Instead of removing material, you add it only where needed, building the object up from nothing. This fundamental difference carries significant implications for how we design and produce objects. With subtractive methods, you must always consider how cutting tools will reach every surface that needs machining, which places constraints on what shapes are feasible to manufacture. Complex internal geometries or parts with overhanging features can become prohibitively difficult or expensive to produce.
Additive manufacturing liberates designers from many of these constraints. Because the printer builds the object layer by layer from the ground up, it can create internal cavities, undercuts, and complex geometries that would stump traditional manufacturing approaches. This freedom opens up entirely new possibilities for how we design functional objects, allowing engineers to optimize parts for performance rather than manufacturability.
The additive approach also offers another substantial advantage in terms of material efficiency. When you machine a complex part from solid metal stock, the chips and shavings that are cut away might represent seventy or eighty percent of the starting material. These scraps can sometimes be recycled, but the process requires additional energy and resources. With additive manufacturing, you use nearly all the material that goes into the printer, with minimal waste generated during the building process. For expensive materials or applications where material conservation matters significantly, this efficiency provides real economic and environmental benefits.
How the Printing Process Actually Works
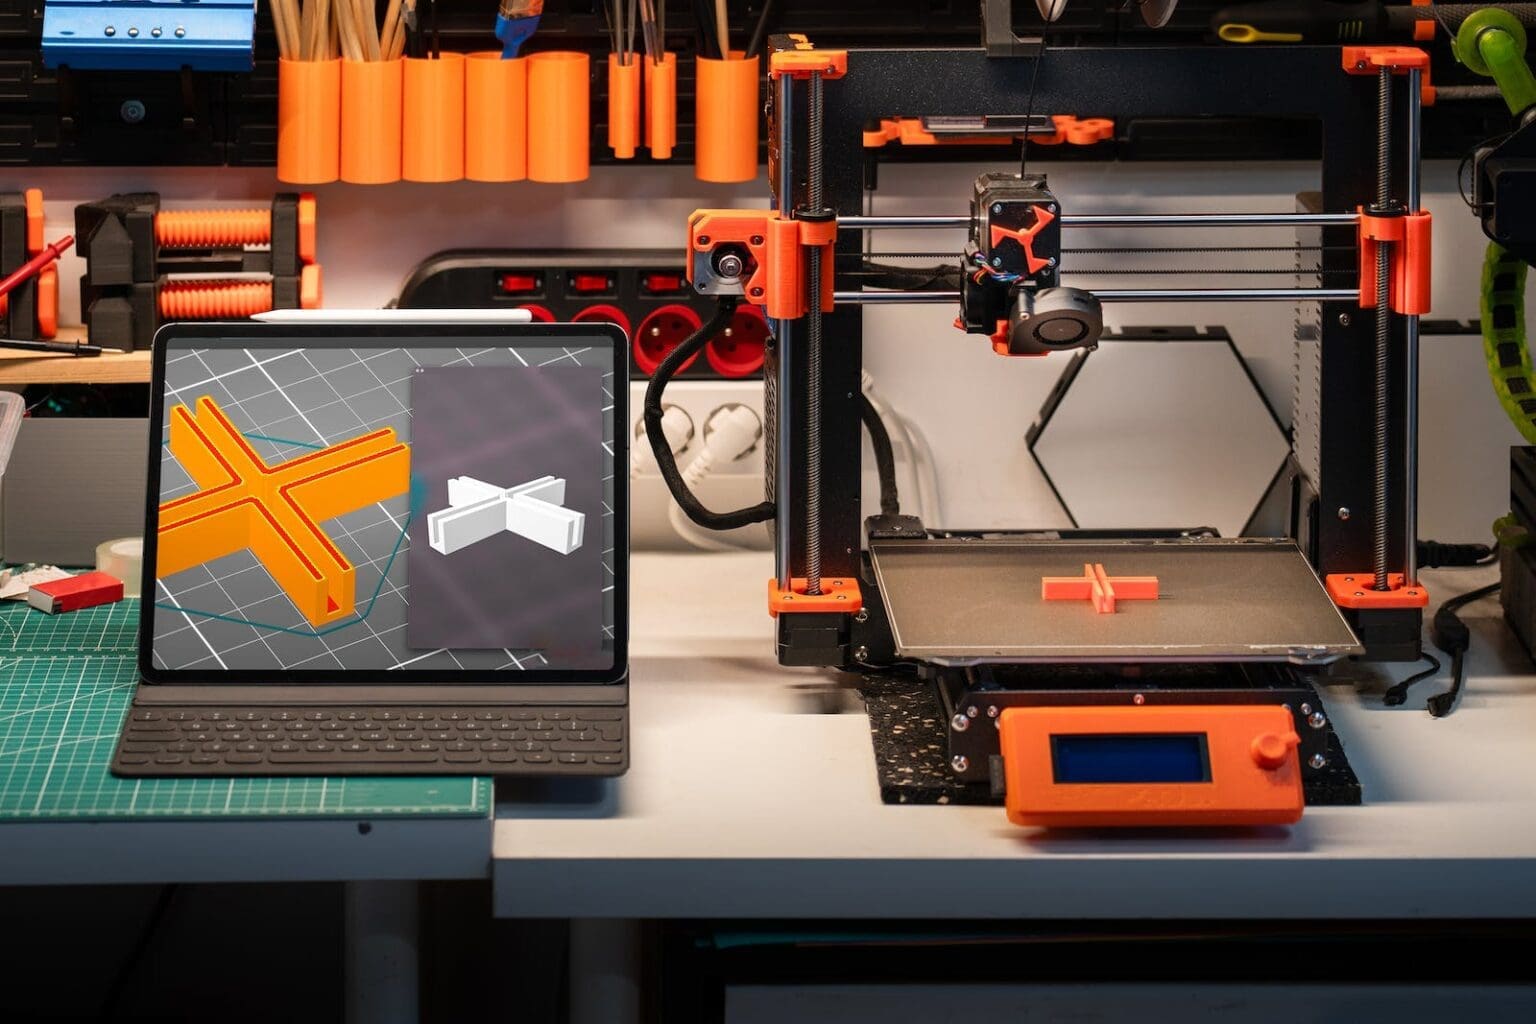
To understand how a 3D printer transforms digital information into physical reality, it helps to follow the complete workflow from concept to finished object. The journey begins with creating or obtaining a digital three-dimensional model. Many people use computer-aided design software to model their ideas from scratch, much like an architect uses specialized software to design buildings. These programs allow you to define precise dimensions, create complex geometric shapes, and visualize how different components fit together before anything physical exists.
If you do not want to design something yourself, extensive online libraries contain thousands of ready-to-print models created by other enthusiasts and designers. These repositories cover an enormous range of objects, from practical household items to decorative sculptures, replacement parts for appliances, educational models, toys, and tools. Downloading a model that someone else designed gives you immediate access to printable objects without requiring any design skills.
Once you have your digital model, you need to prepare it for printing using specialized software called a slicer. This program earned its name from its primary function, which is slicing your three-dimensional model into hundreds of thin horizontal layers. But slicing is just the beginning of what this software accomplishes. The slicer also generates the specific movement instructions that will guide your printer during the build process, determining exactly where material should be deposited for each layer and calculating the optimal path the printer should follow to create each cross-section efficiently.
The slicer gives you extensive control over numerous parameters that affect how your object prints. You decide how thick each layer should be, with thinner layers producing smoother surfaces but requiring more time to complete. You specify how fast the printer should move, balancing speed against quality. You determine how solid the interior of your object needs to be, because most printed objects are not completely solid throughout. Instead, they feature an internal honeycomb-like structure called infill that provides strength while conserving material and reducing print time. You can choose different infill patterns and densities depending on whether your object needs maximum strength or whether lighter weight matters more.
The slicer also handles one of the trickier aspects of 3D printing, which is supporting overhanging portions of your design. Remember that the printer builds objects layer by layer from bottom to top, placing each new layer on top of the previous one. This works perfectly for portions of your model that grow wider or stay the same width as they build upward, but what happens when part of your design needs to extend outward into empty air with nothing beneath it to support the new layer? The slicer can automatically generate temporary support structures that hold up these overhanging sections during printing. After your object finishes printing, you remove these supports, leaving the finished part behind.
When the slicing software completes its work, it produces a file containing thousands of individual movement commands written in a programming language called G-code. This file serves as the complete instruction manual for your printer, specifying every movement, every temperature change, and every operation needed to build your object. You transfer this G-code file to your printer, either by inserting a memory card, connecting via USB cable, or sending it wirelessly over your network.
With the instructions loaded, the printer begins its work. First, it heats up the components that need to reach specific operating temperatures. Then it performs an initial calibration routine to ensure everything is positioned correctly. Finally, it starts building your object, following the G-code instructions precisely. Depending on the size and complexity of what you are printing, along with the quality settings you chose, the process might take anywhere from thirty minutes to many hours or even days for particularly large or detailed objects.
Throughout the printing process, the machine works with remarkable consistency. The print head moves back and forth across the build area, depositing material in the exact pattern needed for each layer. After completing one layer, the build platform typically moves downward by the height of one layer, positioning the just-completed surface at exactly the right height for the next layer to be deposited on top. This cycle repeats hundreds or thousands of times until your object stands complete.
Different Types of 3D Printing Technologies
While the general principle of layer-by-layer additive manufacturing remains consistent across all 3D printing technologies, several different approaches exist for actually depositing and solidifying material. Each technology has particular strengths that make it suitable for specific applications, and understanding these differences helps explain why 3D printing has found success in such diverse fields.
The most common and accessible form of 3D printing is called Fused Deposition Modeling, typically abbreviated as FDM or sometimes called Fused Filament Fabrication. This is the technology you will find in most consumer and hobbyist 3D printers, and it works with plastic filament that looks like a thick strand of wire wound onto a spool. The printer feeds this filament into a heated nozzle that melts the plastic to a semi-liquid state. The nozzle then moves precisely across the build platform, depositing the melted plastic in thin lines that quickly cool and solidify. As each layer cools, it fuses to the layer beneath it, eventually building up the complete three-dimensional object.
FDM printing has become so popular partly because the equipment is relatively affordable and the process is straightforward to understand and operate. The materials are also reasonably inexpensive and come in a wide variety of types with different properties. Some plastics are rigid and strong, others are flexible like rubber, some can withstand high temperatures, and certain specialized filaments even contain wood fibers or metal particles to create unique surface finishes.
Another significant technology is Stereolithography, commonly called SLA printing. This approach uses liquid resin instead of solid plastic filament. The resin sits in a vat, and the printer uses a precisely controlled light source, either a laser or a specialized projector, to solidify the resin in specific locations for each layer. When ultraviolet light hits the liquid resin, it triggers a chemical reaction that causes the exposed areas to harden into solid plastic. After one layer cures, the build platform moves slightly, allowing a fresh layer of liquid resin to flow over the previous layer, and the light source solidifies the next cross-section.
SLA printing typically produces smoother surfaces and finer details than FDM because it can create much thinner layers and does not rely on depositing material through a nozzle. This makes SLA particularly popular for applications that demand high detail and smooth finishes, such as jewelry design, dental applications, and miniature models. The trade-off is that SLA printers and their liquid resin materials tend to be more expensive than FDM equivalents, and the resin requires careful handling because it can be messy and may cause skin irritation before it cures.
Selective Laser Sintering, abbreviated as SLS, represents a more industrial approach to 3D printing. This technology works with fine powder rather than liquid or solid filament. The powder might be plastic, metal, or even ceramic, depending on the application. The printer spreads a thin layer of powder across the build area, then uses a powerful laser to selectively melt and fuse together the powder particles in the locations that correspond to that layer’s cross-section. After one layer completes, the platform lowers, a new layer of powder spreads over the top, and the laser fuses the next layer. The surrounding loose powder that does not get melted by the laser actually serves as support material, holding up overhanging portions of the design, which means SLS prints do not need separate support structures.
SLS printing can produce extremely strong parts and can work with materials that other technologies cannot easily handle, including various metals. However, SLS equipment is considerably more expensive than consumer FDM or SLA printers, which has traditionally kept this technology in professional and industrial settings rather than home workshops.
Digital Light Processing, or DLP, works on similar principles to SLA by using light to cure liquid resin. The key difference is that while SLA printers typically use a laser that must trace out each layer point by point, DLP printers use a digital projector to flash an entire layer’s image all at once. This can make DLP printing faster than SLA for some objects, though both technologies produce similar quality results.
Real-World Applications and Why 3D Printing Matters
The true significance of 3D printing becomes clear when you examine how this technology has begun transforming various industries and making new capabilities accessible to individuals. The applications span an enormous range, from rapid prototyping in product development to manufacturing end-use parts, from medical devices customized for individual patients to educational tools that help students visualize complex concepts.
In product development and engineering, 3D printing has revolutionized the prototyping process. Before this technology became widespread, creating a physical prototype of a new product design often required expensive tooling, machining, or mold-making that could take weeks and cost thousands of dollars. Now, engineers can design a component in the morning, print it in the afternoon, and test it by the end of the day. If the design needs refinement, they can modify the digital model and print a revised version the next day. This rapid iteration cycle dramatically accelerates the development process and allows companies to explore more design variations before committing to expensive production tooling.
The medical field has embraced 3D printing for numerous applications that leverage the technology’s ability to create custom objects. Surgeons use 3D printed models of patients’ anatomy to plan complex procedures, allowing them to practice and visualize the surgery before entering the operating room. Dental laboratories print custom crowns, bridges, and aligners tailored precisely to each patient’s teeth. Researchers are even exploring the frontier of bio-printing, where specialized 3D printers deposit living cells to create tissue structures, though this remains largely experimental.
Prosthetics represents another medical area where 3D printing makes a significant impact. Traditional prosthetic limbs are expensive to manufacture and require extensive customization for each individual. With 3D printing, prosthetists can scan a patient’s residual limb, design a custom socket that fits precisely, and print it for a fraction of the cost of traditional manufacturing methods. This has proven particularly valuable in developing regions and for creating prosthetics for children, who quickly outgrow devices and need frequent replacements.
Manufacturing has begun incorporating 3D printing not just for prototypes but for actual production parts, especially in industries where customization, complexity, or small production volumes make traditional manufacturing less economical. Aerospace companies print lightweight structural components with internal geometries that would be impossible to create through conventional methods. Automotive manufacturers use 3D printing for custom tooling and fixtures on assembly lines. Consumer product companies print limited-run specialty items or offer customers the ability to personalize products.
In education, 3D printing provides powerful hands-on learning opportunities. Students can design solutions to problems and immediately see their ideas take physical form. Science classes print molecular structures or anatomical models. History students can examine replicas of artifacts. Engineering students learn computer-aided design by creating functional objects. The technology makes abstract concepts tangible and allows students to iterate through the complete design-build-test cycle that engineering professionals use.
Hobbyists and makers have enthusiastically adopted 3D printing for countless personal projects. People print replacement parts when something breaks rather than discarding the entire appliance. They create custom organizers perfectly sized for their drawers. They produce unique gifts and decorations. They build components for other hobbies, from custom enclosures for electronics projects to specialized tools for woodworking. The technology has enabled a new level of personalization and self-sufficiency that was not practical before.
Artists and designers use 3D printing to create forms that would be difficult or impossible through traditional sculpting or fabrication methods. The technology allows for intricate detail, perfect symmetry when desired, and the ability to work at scales from tiny jewelry to large installations. Some artists combine 3D printing with traditional techniques, using printed elements as part of mixed-media works.
What Makes 3D Printing Different and Valuable
Several characteristics distinguish 3D printing from traditional manufacturing and explain why the technology has generated such enthusiasm and found adoption across so many diverse fields. Understanding these differentiating factors helps clarify when 3D printing offers genuine advantages and when traditional methods might remain superior.
Perhaps the most significant advantage is the elimination of many traditional manufacturing constraints. When you design a part to be machined or molded, you must consider how the manufacturing process itself imposes limitations on possible shapes. Machined parts need tool access. Molded parts need draft angles so they can be removed from molds. Assembled products require that components can be physically brought together during assembly. These constraints have shaped how engineers design objects for as long as manufacturing has existed.
3D printing removes many of these restrictions. You can create parts with internal cavities and channels that have no openings to the outside. You can print moving assemblies that emerge from the printer already linked together, without requiring assembly. You can build hollow structures with complex internal support architectures that provide strength while minimizing weight. This design freedom allows engineers to optimize parts for performance rather than manufacturing convenience.
The ability to customize each object at no additional cost represents another transformative aspect of the technology. In traditional manufacturing, creating unique variations of a product typically requires different tooling or extensive manual labor, both of which carry substantial costs. Every part that comes out of an injection mold is identical because the mold itself defines the shape. With 3D printing, the digital model defines the shape, and changing that model costs nothing beyond the time required to modify the design file. Each printed object can differ from the previous one without affecting the printing time or material cost.
This mass customization capability has particular value in fields where individualization matters. Medical devices can perfectly fit each patient. Consumer products can be personalized with names or custom features. Spare parts can be printed on demand rather than maintaining expensive inventories of components that might never be needed.
The low barrier to entry for getting started with 3D printing has democratized manufacturing in meaningful ways. A complete hobbyist-grade 3D printer now costs less than many consumer electronics devices, and the skills required to operate one can be learned through experimentation and online resources. This accessibility means that individuals and small businesses can prototype and produce objects without the capital investment that traditional manufacturing requires. A student with an idea can design and print a working prototype in their bedroom. A small startup can iterate through design variations without contracting with machine shops or toolmakers.
3D printing also offers advantages for low-volume production. Traditional manufacturing achieves economic efficiency through economies of scale. The expensive tooling, setup time, and specialized equipment required for conventional production only make financial sense when amortized across large production runs. If you only need ten copies of something, the per-unit cost through traditional manufacturing might be prohibitively expensive. With 3D printing, the first part costs the same as the hundredth part because there is no tooling to amortize. This makes the technology particularly valuable for spare parts, specialty items, and any situation where production volumes are small.
The speed of going from concept to physical object compresses development timelines significantly. In traditional product development, each iteration through the design-prototype-test cycle might take weeks or months, limited by how quickly prototypes can be manufactured. With 3D printing, designers can iterate multiple times in a single week. This acceleration allows for more exploration of design space and faster convergence on optimal solutions.
Understanding the Limitations
While 3D printing offers remarkable capabilities, maintaining realistic expectations requires understanding where the technology currently has limitations compared to traditional manufacturing methods. These constraints do not diminish the value of 3D printing, but they do help clarify which applications benefit most from additive manufacturing and where conventional techniques remain superior.
Production speed represents one of the most significant limitations for many applications. Building objects layer by layer simply takes time, and while the printer works, it occupies the machine exclusively for that build. A moderately complex object might require several hours to print, whereas traditional manufacturing methods like injection molding can produce thousands of identical parts in the same timeframe once the mold exists. This makes 3D printing excellent for prototypes, custom items, and small production runs, but less suitable for mass-producing thousands of identical objects where traditional manufacturing’s economies of scale provide clear advantages.
The mechanical properties of 3D printed parts differ from those of parts produced through other methods, and these differences matter for engineering applications. The layer-by-layer building process inherently creates anisotropic properties, meaning the part’s strength varies depending on the direction of applied stress. A printed part will typically be weaker when forces try to pull the layers apart compared to forces that act parallel to the layer lines. Traditional manufacturing methods often produce more uniform material properties throughout the part.
Surface finish quality varies depending on the printing technology and layer height settings. FDM prints show visible layer lines that create a striated texture on surfaces. While post-processing can smooth these lines through sanding, chemical treatment, or coating, the as-printed surface finish lacks the smoothness of machined or molded parts. SLA and other resin-based technologies produce smoother surfaces, but even these may require finishing work for applications demanding optical clarity or specific surface characteristics.
Material selection, while expanding continuously, remains more limited than what traditional manufacturing offers. If you need a part made from a specific metal alloy, engineering plastic, or composite material, you may find that no 3D printing filament or resin matches those exact properties. Traditional manufacturing can work with the full range of materials that exist, while 3D printing materials represent a subset, though an increasingly comprehensive one, of available material options.
Size constraints also affect what you can print. Every 3D printer has a maximum build volume that limits the dimensions of objects it can produce. While large-format printers exist, they are considerably more expensive than standard machines. If you need to create something larger than your printer’s build volume, you must either print it in sections and assemble them afterward, or find a service bureau with larger equipment, or consider that traditional manufacturing might handle the project more effectively.
Precision and dimensional accuracy, while impressive for additive manufacturing, still typically fall short of what precision machining can achieve. A hobbyist FDM printer might hold tolerances of plus or minus two-tenths of a millimeter, whereas CNC machining can routinely achieve tolerances ten times tighter. This matters significantly for applications like mating mechanical parts that must fit together precisely or components that interface with existing hardware.
Getting Started with 3D Printing
If this introduction to 3D printing has sparked your interest in exploring the technology hands-on, you have several pathways available for gaining experience and determining whether 3D printing fits your needs. The learning curve exists but is manageable, and the community of practitioners is generally welcoming and helpful toward newcomers.
Before investing in equipment, consider gaining initial exposure through makerspaces, libraries, or educational institutions that offer public access to 3D printers. Many public libraries have added 3D printers to their services, allowing patrons to learn the basics and print small projects for minimal cost. Community makerspaces typically offer training classes and access to equipment for members. Universities and technical schools often have fabrication labs where students and sometimes community members can use 3D printing equipment. These environments provide supervised access to equipment and knowledgeable people who can answer questions as you learn.
If you decide to acquire your own printer, starting with a consumer-grade FDM machine provides the most accessible entry point. These printers have become remarkably affordable and capable, with many reliable models available at modest prices. When selecting a first printer, prioritize reliability and community support over advanced features. A simpler machine with extensive documentation and an active user community will serve beginners better than a feature-rich printer with sparse support resources.
Learning to use 3D printing software represents an important part of the skill development process. Slicer programs like Cura, PrusaSlicer, and Simplify3D offer free or affordable options with extensive features. These programs may seem overwhelming initially with their numerous settings and parameters, but starting with default profiles and gradually experimenting with adjustments allows you to build understanding organically. Online tutorials, video guides, and documentation help newcomers understand what different settings control and how they affect print results.
For creating your own designs, computer-aided design software ranges from beginner-friendly options to professional-grade tools. Programs like Tinkercad offer intuitive interfaces perfect for learning basic 3D modeling concepts. As your skills develop, you might graduate to more capable tools like Fusion 360, which offers free licenses for hobbyists and includes powerful parametric modeling capabilities. Blender serves well for artistic and organic designs. The key is choosing software that matches your current skill level and intended applications, then investing time in learning its tools through tutorials and practice.
Before designing custom models, explore the extensive libraries of existing designs available online. Websites like Thingiverse, Printables, and MyMiniFactory host millions of free models shared by designers worldwide. Downloading and printing existing designs teaches you about file preparation, printer operation, and troubleshooting without requiring design skills. Examining how other designers structured their models also provides valuable lessons for when you begin creating your own designs.
Expect to encounter challenges and failures as you learn. First layer adhesion problems, stringing, warping, and other print quality issues are common experiences for beginners. Rather than viewing these as frustrations, treat them as learning opportunities that build your troubleshooting skills. The 3D printing community maintains extensive documentation about common problems and their solutions. Online forums, social media groups, and community websites connect you with experienced users who often willingly help newcomers diagnose issues.
Conclusion
Three-dimensional printing represents a fundamental shift in how we can transform ideas into physical reality. By building objects layer upon layer from digital designs, this technology eliminates many constraints that traditional manufacturing imposed on what shapes are possible and practical to create. The ability to customize each object at no additional cost, the low barriers to entry for getting started, and the speed of iterating through design variations have made 3D printing valuable across applications ranging from industrial prototyping to personal hobby projects.
Understanding that 3D printing is additive manufacturing, building up rather than cutting away, helps clarify both the capabilities and limitations of the technology. The freedom to create complex geometries, internal structures, and customized variations opens possibilities that did not exist before, while considerations around production speed, material properties, and surface finish mean that traditional manufacturing still holds advantages for certain applications.
For beginners approaching this technology, the key insight is that 3D printing has become accessible and practical for individual enthusiasts, not just industrial users. The equipment has reached price points that hobbyists can afford, the materials are widely available, and the knowledge base exists to support learning. Whether your interest lies in solving practical problems, exploring creative projects, learning about digital fabrication, or preparing for careers in fields that increasingly rely on this technology, 3D printing offers tangible rewards for the time invested in developing skills.
The transformation from digital model to physical object that happens inside a 3D printer captures something almost magical about modern technology. What once required factories, specialized equipment, and teams of skilled workers can now happen on a desktop machine in your home or workshop. That democratization of manufacturing capability, more than any specific technical feature, explains why 3D printing continues to capture imaginations and find new applications across so many different domains. As you begin exploring this technology, you join a worldwide community of makers, engineers, artists, and problem-solvers who are discovering what becomes possible when anyone can manufacture objects limited only by imagination and the laws of physics.