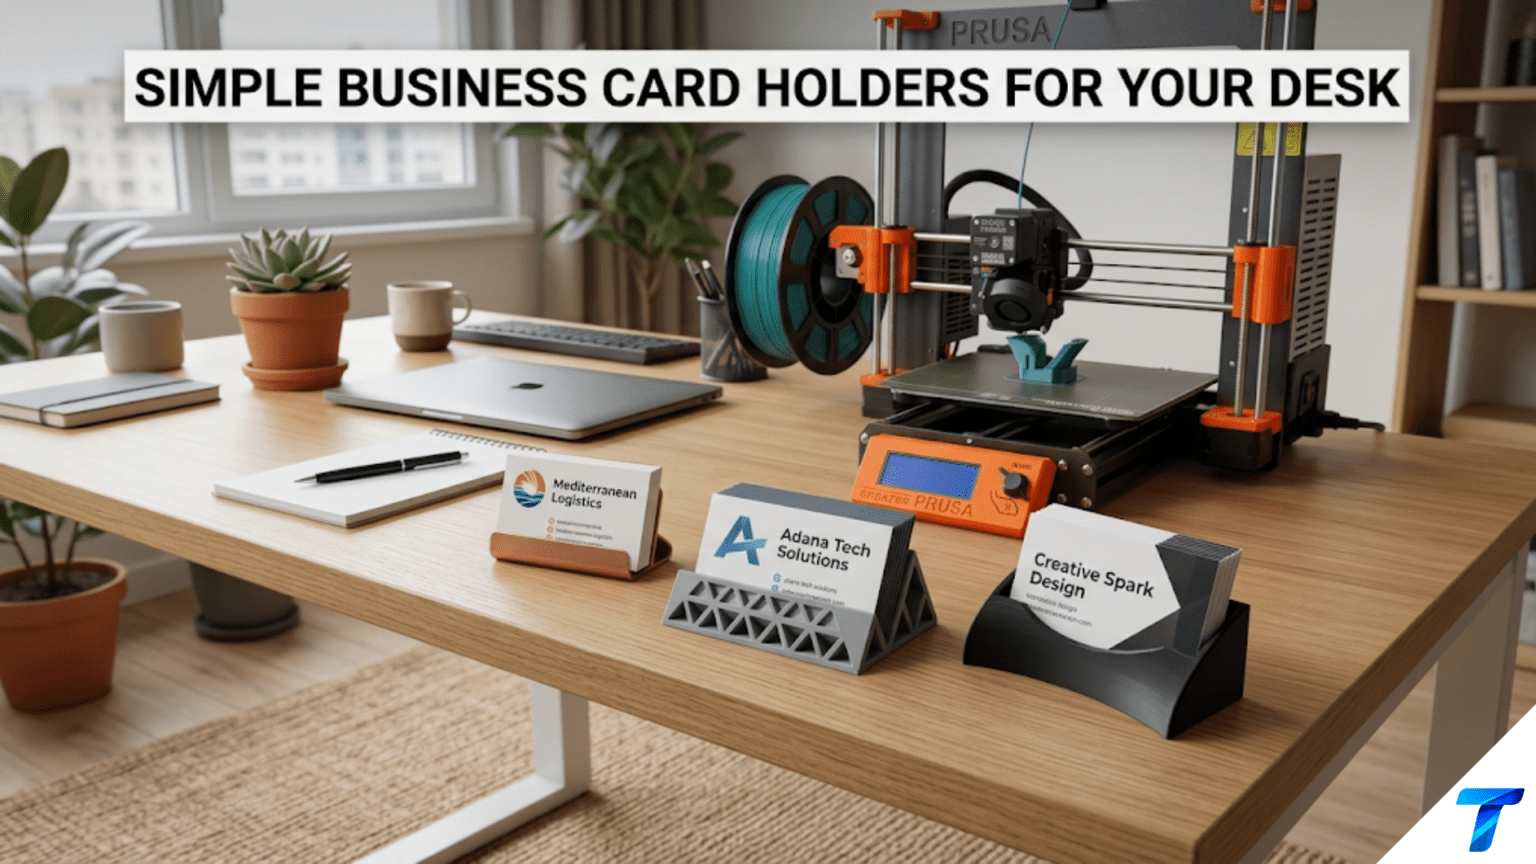
3D printed business card holders are custom-designed desk accessories that display or store business cards in an organized, accessible format — from fanned display holders that showcase one card prominently to stacked storage holders that keep a supply of cards neat and ready to hand out. They are quick, practical beginner projects that teach precise dimensional design (business cards have standardized dimensions that must be matched exactly), introduce display angle geometry, and produce a highly visible professional desk accessory that reflects the care and capability of its maker.
Introduction: The Professional Desk Detail That Speaks Volumes
In a professional context, the details of a workspace communicate something about the person who occupies it. The organized desk signals competence. The thoughtfully arranged surface signals attention to detail. The custom-made accessory — the one that clearly wasn’t purchased from a generic office supply store — signals creativity, capability, and the willingness to invest in the quality of one’s own professional environment.
A business card holder sits at the intersection of all of these signals. It is a functional object — it holds cards, keeps them organized, presents them professionally. But in a professional meeting or at a trade show, the moment someone picks up your card from a holder that is clearly custom-made, it becomes a conversation starter. “Did you make that?” Yes. “On a 3D printer?” Yes. And suddenly the holder is doing professional work that extends well beyond simply holding cards.
Beyond the professional impression, business card holders are technically interesting projects because business cards are standardized. The ISO standard for business card dimensions (ISO/IEC 7810 ID-1) specifies 85.60mm × 54.00mm, and this standard is followed by virtually all business cards worldwide (with some regional variations). This standardization means you can design a holder to exact specifications and know it will work with any standard business card — the geometry is a design constraint, not a variable, which teaches the discipline of designing to specification.
This guide covers the full range of business card holder designs: display holders for professional desks, storage holders for keeping a supply on hand, wall-mounted and portable variants, material selection for professional appearance, slicer settings for a clean desk accessory, finishing for maximum professional impact, and creative variations that make the humble card holder a showcase piece.
Business Card Dimensions: Designing to Specification
Before any design work, understanding the dimensional specifications that every business card holder must accommodate is essential.
Standard Business Card Dimensions
| Dimension | Standard (ISO) | US Standard | Notes |
|---|---|---|---|
| Width | 85.60mm | 89mm (3.5″) | ISO used internationally; US slightly wider |
| Height | 54.00mm | 51mm (2″) | ISO slightly taller than US standard |
| Thickness | 0.3–0.5mm (single card) | 0.3–0.5mm | Varies by card stock quality |
| Stack of 20 cards | ~7–10mm | ~7–10mm | Depends on card stock thickness |
| Stack of 50 cards | ~18–25mm | ~18–25mm | Common “refill” quantity |
The critical design implication: Any slot, channel, or recess in a business card holder must accommodate the card’s width and height. The ISO standard (85.60mm × 54.00mm) is dominant globally; the US standard (89mm × 51mm) is wider and slightly shorter. If you design for the ISO standard, most US cards will also fit (they’re narrower). If you design specifically for US cards, some international cards may be slightly narrow and wobble in the slot.
Recommended approach: Design for 90mm × 56mm interior dimensions — 4.4–5mm wider than ISO standard and 2mm taller. This provides clearance for both standard sizes, accounts for FDM dimensional variation, and ensures cards slide in and out smoothly without binding.
Card Stack Depth
For storage holders (designed to hold a supply of cards), the stack depth is a critical dimension:
- A single business card is approximately 0.3–0.5mm thick
- 20 cards ≈ 7–10mm stack height
- 50 cards ≈ 18–25mm stack height
- 100 cards ≈ 35–50mm stack height
For a standard desk holder intended to hold the cards you hand out, a 50-card capacity (20–25mm stack depth) is practical. For a trade show holder intended to hold many cards, 100-card capacity (40–50mm depth) is useful.
Types of Business Card Holders
Type 1: Single-Card Display Holder (Fanned Display)
A holder designed to display one or a small fan of cards prominently — the classic “take a card” holder on a desk or at a reception. The card(s) sit at an angle, tilted toward the visitor for easy reading and pickup.
Design specifications:
- Card slot: 90mm wide × 2–4mm deep (holds 5–12 cards depending on depth)
- Display angle: 60–75° from horizontal (cards nearly vertical but tilted slightly toward viewer)
- Viewing clearance: The top portion of the card (with the name and title) should project clearly above the slot — typically 35–40mm of card height visible
- Base depth: Sufficient to prevent tipping — minimum 50mm front-to-back for stability
- Base width: 100–120mm (slightly wider than the card for visual grounding)
Tipping prevention: A card holder with cards in it has its center of gravity elevated. Apply the stability calculation from the frame stand article: base depth ≥ card height × tan(display angle from vertical). For a 60° from horizontal (30° from vertical) display: Base depth ≥ 54mm × tan(30°) = 54 × 0.577 = 31mm minimum. With comfortable margin: 50–60mm base depth.
Type 2: Stacked Storage Holder
A rectangular box or tray that holds a supply of cards in a stacked, horizontal orientation. Cards lie flat on top of each other and can be fanned out or taken from the top. This is the “supply holder” form — appropriate for keeping cards organized at your desk rather than displaying them to visitors.
Design specifications:
- Interior dimensions: 90mm × 56mm (card footprint + clearance)
- Stack capacity depth: 20–25mm for 50-card capacity; 40–50mm for 100 cards
- Wall thickness: 2.5–3mm
- Optional: Angled floor (cards at a slight angle for easier access), finger notch in one wall for easier card removal, lid for dust protection
Design refinement — angled floor: Rather than a flat bottom, angle the holder floor slightly (5–10°) so cards slide toward the front of the holder under their own weight. As cards are removed from the front, the remaining cards slide forward, keeping a supply always available at the front of the holder.
Type 3: Combined Display and Storage
A two-section holder: a deep back section for the card supply and a shallower angled front section that displays the top card prominently. Cards are loaded from the back, the front display section always shows the top card(s) at the right angle.
This is the most functional design for desk use — it holds a full supply (50+ cards) while always displaying cards ready to hand out.
Design: Think of it as a deep storage box (50-card capacity) with an angled display section extending from the front. The cards in the storage section feed into the display section, which holds them at the display angle.
Type 4: Wall-Mounted Card Holder
A holder that mounts to a wall or door — for reception areas, trade show booths, information displays, or office walls. Cards are displayed prominently and visitors help themselves.
Design specifications:
- Mounting plate: 6–8mm thick, screw holes for wall mounting
- Card display section: Angled at 60–70° from horizontal, holding 15–25 cards
- Lip: A small lip or ledge at the bottom of the card display section prevents cards from sliding out
- Visual frame: Optional decorative border that makes the holder look like an intentional display element rather than a utilitarian clip
Type 5: Portable / Travel Card Holder
A compact, closed holder that protects cards during travel — in a bag, pocket, or briefcase. This is more like a protective case than a display holder.
Design specifications:
- Tight fit: Interior dimensions just slightly larger than card dimensions (90mm × 55mm × card stack height + 2mm)
- Closure: A snap-fit lid, sliding cover, or friction-fit top
- Material: PETG for durability during travel; consider TPU for a soft-touch feel
- Thickness: As thin as possible while protecting cards — 3–4mm walls for the body, 2mm for lid
Design Workflow: Creating a Display Holder in Tinkercad
Let’s walk through designing a classic single-card display holder from scratch.
Step 1: Plan the Dimensions
Based on the specifications above:
- Base: 110mm × 65mm × 15mm (wide enough for card plus margins, deep enough for stability, flat base)
- Back wall height: 60mm (tall enough to support the card slot structure)
- Card slot: 90mm wide × 3mm deep × runs through the full base thickness
Display angle: 70° from horizontal (cards nearly vertical, slightly tilted toward viewer).
Step 2: Create the Base Body
In Tinkercad:
- Create a box: 110mm × 65mm × 15mm — this is the base
- Create another box: 110mm × 10mm × 60mm — this is the back wall, positioned at the rear of the base
- Create a sloped body between the front and back using Tinkercad’s “Wedge” shape or by constructing it from a box and two wedge subtractions
The challenge in Tinkercad is creating the angled card slot. The simplest approach: create a wedge-shaped body that represents the slot at the desired angle, set it as a “Hole,” and group with the main body. The wedge hole creates the angled channel for the cards.
Step 3: Add the Card Slot
Create a box: 90mm wide × (base depth + 5mm) long × 3mm thick. Rotate this box to the display angle (70° from horizontal = 20° from vertical). Position it so the bottom of the slot sits at the top of the base and the slot runs diagonally through the body at the correct angle. Set as “Hole” and group.
Step 4: Add Finishing Details
- Round all exterior corners and edges for a refined appearance
- Optional: Add a company name, initials, or decorative pattern embossed on the front face
- Optional: Add a small recessed area at the base front for a business card label showing whose holder it is
Step 5: Export and Print
Orient for printing: base flat on the build plate. The card slot (which runs at an angle through the body) may require support material — preview in slicer and adjust support settings to avoid support inside the slot if possible.
Advanced Design: The Parametric Approach
Rather than designing a fixed-dimension holder in Tinkercad, a parametric approach allows quick generation of holders for different card sizes, capacities, or display angles. This is covered in Thingiverse Customizer where many parametric card holder designs already exist.
Search terms on Printables/Thingiverse:
- “parametric business card holder”
- “customizable card holder”
- “business card display stand”
Parametric designs allow you to input:
- Card dimensions (for regional standard variations)
- Capacity (number of cards)
- Display angle
- Wall thickness
- Optional features (lid, name label recess, wall mounting holes)
For a first business card holder, a parametric design from the community is faster and more reliable than designing from scratch in Tinkercad. Use the community design for your first print, then design your own custom version once you understand the geometry.
Material Selection for Professional Desk Accessories
A business card holder will be seen by professional contacts — at your desk during meetings, at trade shows, when you hand someone a card. The material choice communicates something about your professional aesthetic.
| Material | Professional Appearance | Durability | Recommendation |
|---|---|---|---|
| Standard PLA | Adequate | Good | Acceptable for home office; slightly cheap appearance |
| Matte PLA | Refined, flat finish | Good | Excellent for modern/minimalist professional contexts |
| Matte Black PETG | Sleek, professional | Very good | Outstanding for tech and creative professionals |
| Silk/Metallic PLA | Premium, executive | Good | Best for executive desks and formal professional settings |
| Wood-fill PLA | Warm, natural | Good | Excellent for designers, consultants, traditional settings |
| Transparent PETG | Minimal, architectural | Very good | Very modern; cards visible through holder |
| Stone-fill PLA | Architectural, substantial | Good | Premium feel; distinctive look |
The Matte Black Recommendation
For a business card holder that reads as professional and intentionally designed across the widest range of professional contexts, matte black PETG is the single strongest recommendation:
- Matte black is universally professional — appropriate in law offices, tech companies, creative studios, and traditional corporate settings
- The matte finish hides fingerprints (important for a frequently handled desk object)
- PETG’s slight sheen compared to PLA is tamed by the matte formulation, producing a surface that looks like a premium injection-molded product
- Black makes cards visible — any color card stands out clearly against a black background
Matching Holder to Desk Aesthetic
The card holder will live on your desk. Its material should complement the desk:
- Dark wood desk: Wood-fill PLA or warm-tone silk filament (bronze, copper)
- White/light desk: Matte white or light grey PLA; marble-fill for premium appearance
- Glass/metal minimal desk: Transparent PETG or matte black for clean contrast
- Industrial/tech desk: Matte black or dark grey PETG with geometric design elements
Slicer Settings for Business Card Holders
Business card holders are visible desk accessories handled regularly. Surface quality is important; strength is secondary.
| Setting | Recommended Value | Notes |
|---|---|---|
| Layer Height | 0.15mm | Fine layers for professional surface quality |
| Print Speed | 40–50 mm/s | Moderate |
| Outer Wall Speed | 22–28 mm/s | Slow for clean outer surfaces |
| Perimeters/Walls | 3–4 | Adequate for desk accessory |
| Infill | 20–25% | Grid; desk accessories don’t need high infill |
| Top/Bottom Layers | 5 | Clean, solid surfaces |
| Support | Minimize by design | Avoid support on visible surfaces |
| Bed Adhesion | Brim (5–8mm) | Standard |
| Cooling | 90–100% PLA / 80% PETG | Material-appropriate cooling |
| Ironing | Recommended for flat top surfaces | Significantly improves surface quality |
| Seam Position | Rear | Seam on least-visible face |
Support Strategy for Card Slot Geometry
The angled card slot in a display holder is the most likely geometry to require support material. Support inside the slot will leave rough marks that interfere with smooth card insertion and removal.
Strategies to minimize support impact:
- Design the slot to bridge cleanly: If the slot angle is steep enough (>45° from horizontal), the bridging distance across the slot is short enough to print without support in some designs.
- Print in two pieces: Design the holder as a base section and a back wall section that join together, eliminating the need for support inside the slot.
- Use tree supports: Tree supports have smaller contact points and are easier to remove cleanly from inside slot geometry.
- Rotate the model: In some holder designs, rotating the entire model 90° on the build plate changes where support is needed and may eliminate support from critical surfaces.
Check the layer preview in your slicer carefully for any support material inside the card slot before printing.
Finishing for Professional Appearance
A business card holder that will represent you professionally deserves the same finishing attention as the signage projects.
Surface Preparation
- Sand the visible faces with 320-grit then 600-grit sandpaper. Work along the layer lines (not across them) on vertical surfaces. The front face and any visible angled surfaces benefit most from sanding.
- Clean with isopropyl alcohol after sanding to remove dust.
- Apply plastic primer (1–2 thin coats) for paint adhesion. Even if you’re not painting, primer fills minor surface variation and creates a unified appearance.
Paint or Clear Coat Options
Option 1 — Single color with clear coat: For holders printed in the final desired color (matte black PETG, wood-fill PLA), simply apply 2 coats of matte or satin clear coat after sanding. This protects the surface and creates a consistent, professional finish without the complexity of painting.
Option 2 — Metallic accent painting: Print the holder body in a dark base color (black or dark grey), then dry-brush a metallic paint (gold, silver, bronze) over the raised edges and any embossed design elements. The metallic highlights create a premium executive look with minimal effort.
Option 3 — Full paint: Prime, base coat in final color, apply any accent colors, clear coat. Full control over the final appearance at the cost of more time investment.
Adding Name or Logo
A personalized business card holder — with your name, initials, company name, or logo embossed or debossed on the front — is a more impressive piece than a plain holder. Design these elements into the 3D model (see the name plate and sign articles for guidance on text design) rather than adding them as printed labels or stickers.
For debossed text with contrasting paint in the recesses, follow the contrast enhancement technique from Article 76: apply the contrast color over the entire surface, allow slight tack, wipe clean, leaving the contrast color in the recesses only.
Step-by-Step: A Professional Desk Card Holder Set
Let’s walk through creating a coordinated desk set consisting of a display holder and a matching storage holder.
The Set
Piece 1 — Display holder: Single-card fanned display, holds 15–20 cards at 70° display angle. Dimensions: 110mm × 65mm base, 60mm tall back section.
Piece 2 — Storage holder: Rectangular box holder, holds 50 cards stacked flat. Dimensions: 95mm × 58mm × 30mm interior.
Both pieces in matte black PETG.
Step 1: Source Files
Search Printables for “business card holder” and “business card storage box.” Find designs that:
- Have specified dimensions matching the targets above
- Show photos of the actual printed pieces
- Have positive user feedback mentioning card fit and quality
Alternatively, design both pieces in Tinkercad following the workflows above.
Step 2: Slice Both Pieces
Apply settings:
- 0.15mm layer height
- 3 perimeters
- 22% Grid infill
- 5 top/bottom layers
- Ironing enabled on flat top surfaces
- Outer wall speed: 25mm/s
- PETG at 238°C / 80°C bed
- 80% cooling
- Seam position: Rear
Check the display holder for support requirements inside the card slot.
Step 3: Print in Sequence
Print the display holder first (more complex geometry, more likely to reveal any setting issues). After successful print, print the storage holder.
Total estimated print time: 2–3 hours for both pieces.
Step 4: Post-Process for Matched Appearance
- Sand both pieces with 320-grit then 600-grit on all visible surfaces
- Apply 2 thin coats of matte clear coat to both pieces simultaneously — this ensures identical finish across the set
- Allow full cure before loading cards
Step 5: Load and Display
Load cards into the display holder at the correct orientation (standard convention: card faces toward the visitor, name readable from the visitor’s perspective). Load backup supply into the storage holder.
Place the matched set on your desk. The coordinated appearance of two matching pieces in the same material and finish creates a more deliberate, designed impression than a single holder.
Creative Business Card Holder Projects
Integrated Desk Accessories
A card holder designed as part of a larger integrated desk accessory — for example, a combined card holder and pen cup that shares a base and design language. When all desk accessories share the same aesthetic, the desk communicates intentionality that individual pieces cannot achieve.
Conference and Trade Show Display
A larger, more prominent holder designed specifically for conference tables and trade show booths. Higher capacity (100+ cards), more dramatic display angle, possibly with a branded element or company name integrated into the design. Print in larger format with a wide, stable base.
Two-Sided Card Exchange Stand
A holder with card display slots on both sides — your cards on the front, a collection slot on the back for cards you receive. The collection slot holds cards received during a networking event for organization and later reference.
Rotating Card Carousel
A multi-slot card holder on a rotating base — several slots arranged radially around a central axis, each holding a different card type (personal, professional, photography business, freelance work). Spin to present the appropriate card. This requires a simple rotation mechanism (a bearing or smooth-turning pivot) integrated into the print.
Folding Travel Card Holder
A flat card holder that folds to a compact form for travel and unfolds to a display form for use. Uses the hinge techniques from Article 80 — a print-in-place or separated pin hinge allows the display section to fold flat against the base for easy packing.
Novelty Themed Holders
Holders designed around a specific theme that reflects the cardholder’s profession or personality: an architect’s card holder shaped like a building section; a programmer’s card holder styled like a circuit board; a photographer’s card holder shaped like a camera body; an audio engineer’s card holder styled like a mixing board fader section.
Business Card Holder as Part of a Professional Brand
For professionals who hand out many cards, the business card holder is part of the professional presentation. Consider the complete card presentation experience:
The card itself should be high quality — thick stock, good printing, clear design.
The holder should complement the card’s aesthetic — a minimalist modern card on a clean matte black holder; a warm-toned natural material card on a wood-fill holder.
The presentation gesture — picking a card from a thoughtfully made holder and handing it to someone — communicates more than just handing a card from your pocket. It says the card was prepared and organized for this purpose.
When someone asks about the holder (“Did you make that?”), the answer is an opportunity to demonstrate capability and to start a conversation about your work. For professionals in design, engineering, technology, or any creative field, a custom-made desk accessory is itself a portfolio piece — evidence of the capability you’re trying to communicate.
Troubleshooting Common Card Holder Issues
Cards Won’t Slide Into Slot Smoothly
Cause: Slot dimensions too tight; FDM dimensional variation made the slot narrower than designed; support material left rough surfaces inside the slot.
Solution: For existing holders, sand the inside of the slot with 320-grit wrapped around a card (or a flat block); this widens the slot slightly and smooths any rough areas. For future designs, increase slot width to 92mm and verify no support material is required inside the slot.
Holder Tips Forward When Cards Are Loaded
Cause: Base depth insufficient for the height and angle of the loaded cards; center of gravity falls in front of the base footprint.
Solution: Print a new version with base depth increased by 15–20mm. Alternatively, add weight to the rear of the base (a metal washer in a recess at the back of the base, secured with epoxy) to shift the center of gravity backward.
Visible Layer Lines on Front Face Affect Professional Appearance
Cause: Layer height too high; insufficient outer wall passes; ironing not enabled.
Solution: Reduce layer height to 0.12mm. Enable ironing on the front face top surface. Sand front face with 400-grit then 600-grit. Apply matte clear coat which optically fills minor surface variation.
Card Slot Is Too Deep — Card Sinks Too Low
Cause: Slot depth designed for excessive capacity; individual cards sit too low in the slot.
Solution: Print with a shallower slot. As a quick fix, cut a thin piece of foam or cardboard to fill the bottom of the slot, raising the effective floor and positioning cards higher.
Two-Piece Set Has Noticeably Different Surface Appearance
Cause: Different print settings or conditions between the two prints; different position on build plate leading to different thermal conditions; different slicer settings applied inconsistently.
Solution: Print both pieces simultaneously in the same print job if they fit the build plate together. Apply identical settings to both. Process both with the same sanding sequence and the same clear coat application in one session.
Conclusion: The Card Holder That Works for You
A business card holder is, in the most reductive accounting, a small box with a slot. The geometry is simple. The print time is short. The material cost is negligible.
But in the context of a professional desk — where it will be seen by clients, colleagues, and contacts throughout a career — it is something considerably more than that. It is a declaration of how seriously you take the details. It is evidence of capability. It is the kind of thing that makes someone say “you made that?” and then listen with slightly more attention to what you do.
Print the holder that fits your desk, your cards, your professional identity. Finish it properly. Load it with your best cards.
Then put it on your desk and let it do its quiet professional work.