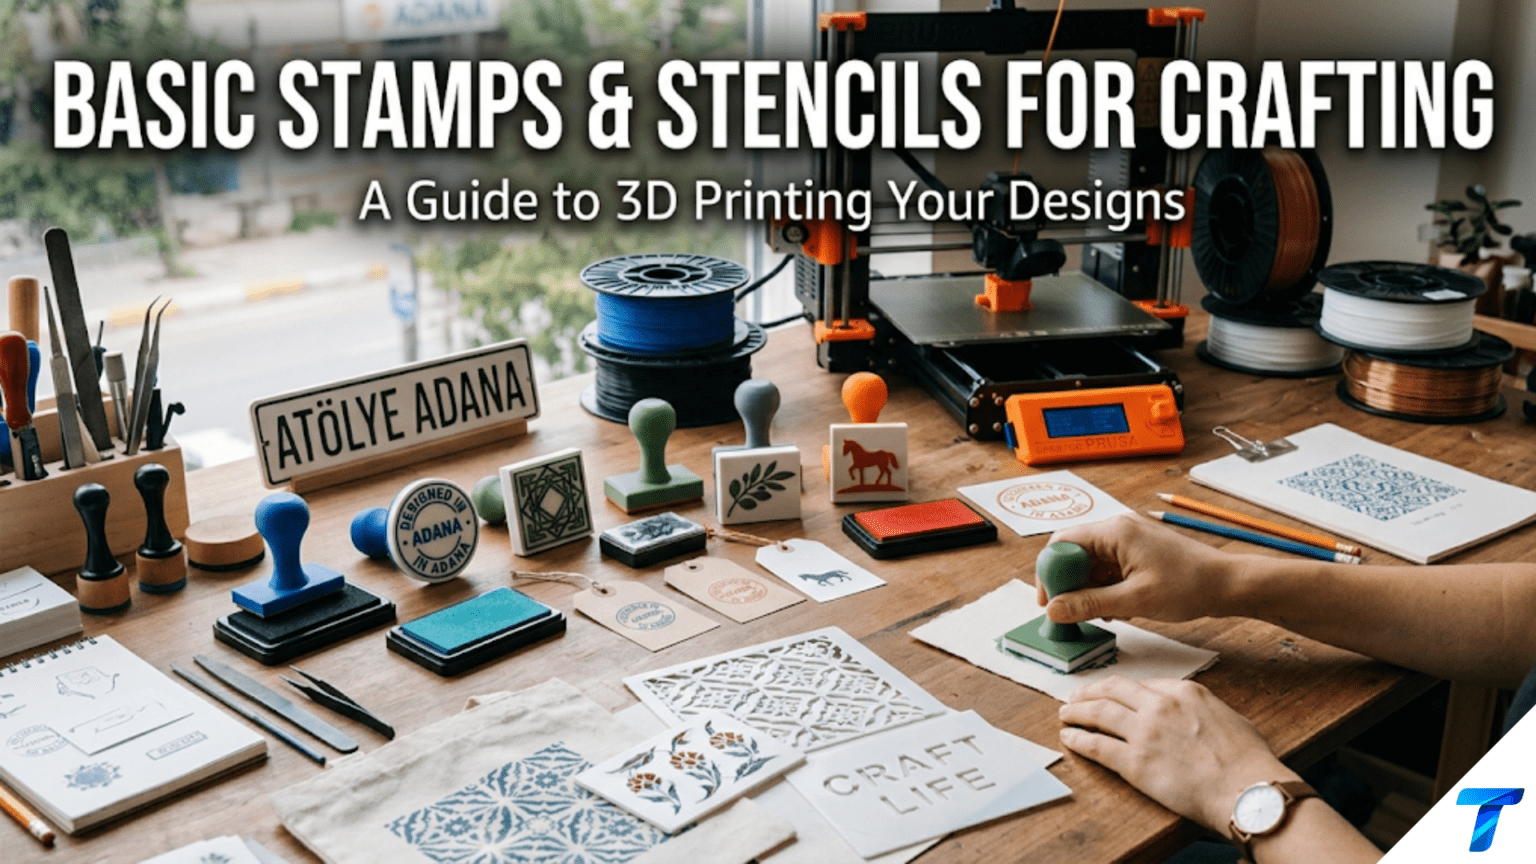
3D printed stamps and stencils are custom-made crafting tools that transfer designs, patterns, and images to paper, fabric, wood, and other surfaces. Stamps use raised relief printed in flexible TPU filament to apply ink patterns, while stencils are flat perforated templates printed in rigid PLA or PETG through which paint or ink is applied. Both are excellent beginner projects that introduce flexible material printing for stamps and intricate flat geometry for stencils, and both produce tools with immediate creative value for scrapbooking, card-making, fabric decoration, and artistic projects.
Introduction: Making the Tools That Make Art
Every crafter and artist knows the satisfaction of a perfectly stamped image — the clean impression of a design transferred precisely to a surface, ready to be colored, layered, or left as the focal element of a card or page. Commercial stamps are beautiful, but they exist in whatever designs the manufacturer decided to produce. If you need a specific motif — a company logo, a child’s drawing turned into a stamp, a specific botanical illustration, a custom monogram — commercial stamps offer nothing.
3D printing changes this. A custom stamp can be designed and printed in a few hours. A stencil for a specific pattern can be produced overnight. The tools of visual creativity can themselves be created with creative intention — not purchased as generic products, but designed and made for specific artistic purposes.
Stamps and stencils also introduce a category of 3D printing that beginner makers often discover last but appreciate deeply: flexible material printing. A functional stamp requires a printing surface that compresses slightly against the substrate to make even contact and transfer ink uniformly. Rigid PLA makes a terrible stamp — it can’t compress evenly and produces uneven, patchy impressions. TPU (thermoplastic polyurethane) — the flexible filament introduced in the phone case article — prints a stamp face that behaves like a commercial rubber stamp, compressing evenly under pressure and releasing cleanly.
Stencils, by contrast, are most effective in rigid or semi-rigid materials. A floppy stencil shifts during use and produces blurry edges. A stiff, flat stencil holds its position and produces crisp lines. The choice between flexible and rigid materials for stamps and stencils respectively is one of the clearest illustrations in this article series of how material properties determine function.
This guide covers the complete workflow for printed stamps and stencils: the design principles that determine whether a stamp impression comes out clean, the material requirements for each, how to design for the negative space that stencils require, the inks and paints that work best with printed tools, practical craft applications, and troubleshooting the specific challenges of small, detailed craft tool printing.
Part One: Stamps
How a Stamp Works
A stamp transfers ink from a raised relief surface to a substrate (paper, fabric, wood, etc.) through direct contact and pressure. For this transfer to be clean and complete, several conditions must be met:
Uniform contact: Every part of the stamp’s raised relief surface must contact the substrate simultaneously under the applied pressure. If any part of the stamp is higher than others, those high points transfer ink while low points don’t — producing an uneven, patchy impression.
Appropriate compliance: The stamp surface must be slightly compressible — able to conform to minor surface irregularities in both the stamp face and the substrate. A completely rigid stamp surface cannot compensate for even small variations; a slightly flexible surface makes contact everywhere.
Clean release: After inking and pressing, the stamp must release from the substrate cleanly without smearing or tearing. This requires the stamp face material to have appropriate surface energy and the ink to be compatible with the stamp material.
These requirements determine material choice: Rigid PLA or PETG cannot provide uniform contact or appropriate compliance. TPU — which is flexible, slightly compressible, and has good release characteristics — is the right material for stamp faces.
Stamp Design Principles
Positive vs. Negative Design
The most fundamental stamp design concept: the design on the stamp face is the mirror image of the design that will appear on the substrate. Design your stamp as if you were looking at it in a mirror — text must be reversed, asymmetric designs must be flipped.
Text stamps specifically: Any text in a stamp must be mirrored horizontally in the design. If you design a stamp that reads “HELLO” normally, the impression will read backwards. In your design software (Tinkercad, Fusion 360, or whatever tool you use), mirror the text before extruding it as the raised stamp relief.
Visual check: Hold your phone or a mirror up to the stamp face before printing. What you see in the mirror is what will transfer to the substrate.
Relief Height: The Most Critical Dimension
The height of the raised relief elements — how far the design stands above the non-printing background surface — determines print quality more than any other design factor.
Too shallow (under 0.8mm): The raised design barely clears the background. Ink applied to the stamp will bleed into the recessed areas and transfer background ink to the substrate, producing a muddied, unclear impression with unwanted fill between design elements.
Optimal (1.0–2.0mm): The raised design clearly separates from the background. Ink stays on the raised relief and transfers cleanly without background contamination. This is the target range for most stamp designs.
Too deep (over 3.0mm): The deep relief makes fine details at the top of the raised elements more dimensionally accurate, but the tall walls between raised elements may print with slight bowing or dimensional inaccuracy at FDM scale. For most applications, 1.5–2.0mm relief is optimal.
Rule of thumb: Design stamps with 1.5mm relief height as the standard starting point. Adjust based on the complexity and size of the design.
Minimum Feature Size
FDM printing with a 0.4mm nozzle has a minimum feature size of approximately 0.8–1.0mm — features smaller than this either disappear or print with significantly reduced quality. For stamps, this means:
- Lines in the stamp design: minimum 1.2mm wide to print reliably
- Text: minimum 5–6mm character height for legible stamp impressions
- Small decorative details: minimum 1.5mm in any dimension
- Gaps between raised elements: minimum 1.0mm to prevent bridging and ink bleed
Fine art stamps with very detailed designs require either a 0.25mm nozzle (achieves finer detail) or are better suited to resin (SLA) printing, which produces significantly finer detail than FDM at the same scale.
Stamp Background Surface
The background of the stamp — the area surrounding the raised relief elements — should be recessed significantly below the relief (1.5–2.0mm) to ensure only the design elements contact the substrate.
Additionally, the background surface benefits from having a slightly textured or rough quality (which naturally occurs with FDM layer lines) to prevent the background from accidentally contacting and inking the substrate during edge cases. A flat, perfectly smooth background can sometimes contact the substrate if even pressure is applied; a slightly textured background reduces this risk.
Handle Design
A stamp needs something to grip — a handle that allows comfortable pressure application and clean lifting without touching the inked surface.
Simple block handle: A rectangular or cylindrical block on the back of the stamp. Height 25–40mm for comfortable grip. Width and depth matching or slightly smaller than the stamp face for good control.
Ring handle: A hollow ring above the stamp face that the fingers slip through for a different grip style.
Combined stamp and handle (one piece): The entire stamp — face and handle — printed as one object. This is the simplest and most common approach. Print the handle in one material (rigid PLA or PETG) and the stamp face in another (TPU).
Two-material stamps: The handle and backing in rigid PLA for stability and comfortable grip; the stamp face in TPU for flexibility and ink transfer quality. This requires a filament change during printing (pause and swap at the layer where the handle material transitions to the stamp face) or bonding separate pieces together.
Types of Stamps Worth Printing
Simple Geometric Stamps
The easiest stamp designs to begin with: circles, squares, triangles, hexagons, stars, and other geometric forms. These can be made in sets of various sizes, used for pattern-making, card decoration, or abstract design work.
Design: A flat backing plate (10–15mm thick, including handle), with the geometric shape raised 1.5mm above the surrounding surface. The entire assembly is one STL file.
Printing: Flat on the build plate, stamp face upward. This ensures the stamp face (the most critical surface) prints as the final top layers — the cleanest and most accurate layers in a typical FDM print.
Initial and Monogram Stamps
A single letter or monogram — excellent for personalizing stationery, envelopes, handmade cards, and craft projects. The letter is reversed in the design and raised 1.5–2.0mm.
Font choice for stamps: Bold, simple fonts work best. Fine serif details at small scale are difficult for FDM to reproduce cleanly, and they tend to print with ragged edges that transfer as blurry impressions. Use bold sans-serif or bold slab-serif fonts. Minimum character height 15mm for clean impressions; 20mm+ for best results.
Pattern Repeat Stamps
Stamps designed for creating repeating patterns — pressed multiple times in a grid or offset arrangement to tile a design across a surface. Examples: a small floral motif for repeating across a card, a geometric unit that tiles into a seamless pattern, a vine or branch element repeated to create a border.
Design consideration: The edges of a repeat stamp must be designed to align when the stamp is pressed adjacent to previous impressions. For a geometric tile, the design should be symmetric and the stamp face edges clean so alignment is straightforward.
Image Stamps
Stamps based on illustrations, icons, or simplified images: animals, objects, plants, abstract forms. These are the most visually interesting stamps but require the most careful design for FDM reproduction.
Design process for image stamps:
- Start with a clear, simplified image (SVG format works best — convert to SVG from any source)
- Import the SVG into Tinkercad or your design tool
- Extrude the design to 1.5mm height (this creates the raised relief)
- Create a backing plate larger than the design on all sides (5–10mm border)
- Mirror the entire design horizontally
- Add the handle to the back
Simplification is key: FDM cannot reproduce photographic-quality detail in stamp form. Simplify complex images to their essential shapes and outlines before printing. Remove all detail smaller than 1.5mm. Think in silhouette rather than gradient.
Texture Stamps
Stamps that transfer texture rather than a specific image — wood grain, basket weave, linen texture, stone pattern. These stamps are pressed into soft media (clay, soft wax, fresh paint) as much as used for ink transfer.
Design: A repeating surface texture on the stamp face — generated in a 3D modeling tool that can produce the texture directly, or built from repeated geometric elements.
Materials for Stamps
| Material | Stamp Quality | Ink Compatibility | Print Difficulty | Recommendation |
|---|---|---|---|---|
| TPU 95A | Good | Good | Moderate | Good for beginners |
| TPU 87A | Excellent | Excellent | Moderate | Best for quality stamps |
| TPU 82A | Excellent | Excellent | Challenging | Best results; harder to print |
| PLA | Poor | Poor | Easy | Not functional for stamps |
| PETG | Poor | Poor | Easy | Not functional for stamps |
Why only TPU works for stamps: As described, stamps require a slightly compressible, flexible face that makes uniform contact with the substrate. PLA and PETG are far too rigid — they produce uneven contact and patchy impressions. For a genuinely functional stamp, TPU is the only appropriate material in the standard FDM filament range.
Shore A hardness for stamps: Softer TPU (82A–87A) produces more even impressions because it compresses more readily to fill surface variations. Harder TPU (95A) produces stiffer stamps that transfer less evenly but are easier to print. For a first stamp, 87A–95A provides a good balance of print ease and stamp quality.
Handle material: Print the handle and backing in PLA or PETG (easy to print, rigid, comfortable grip). Swap to TPU for the stamp face layer. Or print the entire stamp in TPU — the handle in TPU is comfortable to hold and the entire stamp is flexible.
Ink Compatibility with TPU Stamps
Not all inks work equally well with TPU surfaces. Before investing time in a stamp project, test ink compatibility:
Works well with TPU:
- Water-based pigment stamp inks (Versacolor, Memento, Colorbox)
- Craft ink pads (Ranger Archival Ink, Stampin’ Up inks)
- Fabric inks designed for stamping
- Acrylic craft paint (apply with a brayer or foam applicator)
Works less well with TPU:
- Dye-based stamp inks (tend to bleed into TPU surface over time)
- Solvent-based inks (may attack TPU over extended contact)
- Oil-based paints (poor release from TPU surface)
Testing approach: Before a large crafting session, make a few test impressions with the ink you plan to use. The impression should be crisp, complete, and clean. If ink bleeds between letters or design elements, the ink is too liquid for the stamp face relief height. If impressions are patchy, the ink viscosity is too high or the stamp pressure is uneven.
Slicer Settings for Stamps
Stamp printing has unique requirements driven by the TPU material and the need for an accurate, flat stamp face.
| Setting | Recommended Value | Notes |
|---|---|---|
| Layer Height | 0.15–0.2mm | Finer for better relief detail |
| Print Speed | 20–25 mm/s | Critical for TPU — slow for consistent extrusion |
| Outer Wall Speed | 15–20 mm/s | Very slow for accurate relief geometry |
| Infill Speed | 20–25 mm/s | Keep all TPU speeds consistent and slow |
| Perimeters/Walls | 3–4 | Adequate for stamp thickness |
| Infill | 30–40% | Moderate infill for flexible but supportive stamp face |
| Top/Bottom Layers | 5–6 | Dense top surface for even ink transfer |
| Support | None | Flat stamps never need support |
| Retraction | 1–1.5mm | Reduced retraction for TPU |
| Combing | Enable | Keeps travel moves inside the part |
| Cooling | 50–60% | Moderate cooling for TPU |
| Print Orientation | Stamp face UP | Critical — stamp face as final top layers |
Print orientation is critical: Orient the stamp with the stamp face (the raised design) pointing upward on the build plate. The handle sits on the build plate. This ensures:
- The stamp face is the final layers printed (generally the most accurate)
- Layer lines run parallel to the stamp face, providing good compression behavior
- Any first-layer elephant foot effect affects the handle bottom, not the stamp face
Part Two: Stencils
How a Stencil Works
A stencil is a flat template with cutout openings that define a design. Paint, ink, or medium is applied over the stencil; the openings allow the medium to reach the substrate while the stencil body blocks it from the surrounding areas. Remove the stencil and the design appears on the substrate.
For a stencil to produce clean results:
- The stencil must lie flat against the substrate (no gaps under the stencil edges)
- The stencil must be rigid enough not to flex and shift during application
- The openings must have clean, sharp edges
- The material must be easily cleaned after use
Stencil Design Principles
The Bridge Problem
The most critical design challenge for stencils is the bridge problem: enclosed areas within a stencil design that would become separate, disconnected pieces if the stencil were cut out as drawn.
Classic example: The letter “O” — if you cut the inside of the O from a stencil, you have a ring with a circular hole. The inner circle is a separate piece that falls away. The resulting stencil produces an “O” impression that is just a filled circle, not a ring.
Solution — bridges: Add thin bridges connecting enclosed interior elements to the outer stencil body. For the letter “O,” add two thin bridges (2–3mm wide) connecting the inner oval to the outer stencil frame. These bridges produce small uncoated lines in the impression, but this is the standard stencil aesthetic — accepted as part of the medium.
Designing bridges in Tinkercad: After creating the stencil openings as holes (subtracting them from the stencil body), identify any enclosed areas that would become disconnected. Add small rectangular solid elements crossing from the enclosed opening to the stencil perimeter. These bridges reconnect the isolated elements.
Standard bridge width: 2–3mm for small stencils; 3–5mm for larger stencils. Narrower bridges are less visible in the final impression but are more fragile; wider bridges are more robust but more noticeable.
Material: Flat, Stiff, Cleanable
Stencil requirements are nearly opposite to stamp requirements:
- Flat: Must lie flush against the substrate surface
- Stiff: Must not flex or shift during paint application
- Cleanable: Must release paint easily for reuse
PLA is an excellent stencil material — easy to print flat, rigid, available in thin dimensions, and paint releases well with prompt cleaning.
PETG is slightly flexible (which can be an advantage for stencils used on curved surfaces) and more chemical resistant, making it easier to clean after paint application.
Avoid TPU for stencils — its flexibility causes edges to lift during paint application, producing blurry, undefined edges.
Stencil Thickness
The optimal stencil thickness balances rigidity (requiring more thickness) with gap minimization (requiring less thickness).
Thick stencils (3–5mm): Very rigid, maintain flat position well, but the stencil walls create a thick barrier between the opening and the substrate. When painting, the thick walls can trap paint on their sides and cause bleed when the stencil is lifted. Better for sponge or dry brush techniques where minimal wet paint is used.
Thin stencils (1.0–2.0mm): Less rigid but the openings are closer to the substrate, reducing bleed. Better for standard brush painting. The challenge is printing cleanly at thin dimensions.
Recommended thickness: 1.5–2.0mm for most craft stencils. This balances rigidity, cleanability, and gap minimization.
Bridge-Free Stencil Design
For designs without enclosed areas, stencils are simpler to design — no bridge problem at all. Abstract patterns, border designs, geometric forms (squares, triangles, stars), and many botanical and animal designs can be created without enclosed elements.
When designing stencils, consciously choose or modify designs to eliminate enclosed areas wherever possible. A bird silhouette can be designed without the eye detail (which would require a bridge). A flower can be designed as petals only, without enclosed center detail.
Stencil Frame and Registration Marks
For stencils intended to be used repeatedly in alignment with a previous layer (multi-layer stencil art), add registration marks — small crosses or notches at the stencil corners that align with matching marks on the substrate. This allows multiple stencil layers to be applied in precise alignment.
A stencil frame (a border extending 15–20mm beyond the design openings) prevents paint from being applied outside the intended area and provides grip handles for positioning and lifting the stencil.
Types of Stencils Worth Printing
Border and Frame Stencils
Long stencils used for creating borders on cards, pages, and surfaces. Repeating motifs (waves, diamonds, leaves, geometric chains) applied along an edge to create a decorative border.
Design: A long rectangular stencil with the repeating motif cut out along one edge. Length can be any size the build plate accommodates (up to ~200mm for most printers).
Alphabet and Number Stencils
A complete set of letter and number stencils for applying text to surfaces — useful for labeling, signage, crafts, and art projects.
Bridge consideration: Most letters require bridges: A, B, D, O, P, Q, R have enclosed areas. K, L, M, N (in most fonts) do not. Design with clear, bold fonts and visually integrate bridges as part of the letter aesthetic.
Useful font choices for stencil alphabets: Bold, blocky fonts (Impact, Rockwell Extra Bold, Tungsten) where bridges look natural. Stencil-specific fonts (available free online) are specifically designed with built-in bridge positions that look intentional.
Mandala and Geometric Pattern Stencils
Circular mandala patterns for decorating papers, canvases, and fabric. These are among the most popular craft stencil designs — they produce impressive, complex-looking results that are achieved with a single stencil application.
Design source: SVG files of mandala designs are widely available online. Import into Tinkercad or directly into a slicer that supports SVG import (PrusaSlicer can import SVG and extrude it directly as a 3D model). The mandala design becomes the cut-out openings in the stencil.
Custom Logo or Image Stencils
Stencils based on specific logos, custom illustrations, or simplified photographs. Useful for business branding, custom gift decoration, and one-of-a-kind craft projects.
Simplification process: Convert the source image to high-contrast black and white. Remove all gradient and detail. Identify any enclosed areas and plan bridges. Import as SVG and extrude as the stencil.
Slicer Settings for Stencils
| Setting | Recommended Value | Notes |
|---|---|---|
| Layer Height | 0.15mm | Fine layers for clean opening edges |
| Print Speed | 35–45 mm/s | Moderate |
| Outer Wall Speed | 20–25 mm/s | Crisp opening edges |
| Perimeters/Walls | 3 | Standard |
| Infill | 25–30% | Standard |
| Top/Bottom Layers | 4–5 | Solid, flat stencil faces |
| Support | None | Flat stencils never need support |
| Cooling | 100% | Maximum cooling for dimensional accuracy |
| Bed Adhesion | Brim (5mm) | Flat, thin stencils benefit from brim |
| Ironing | Recommended | Smooth stencil faces reduce paint bleed |
Ironing for stencils: Enabling ironing in the slicer produces a smoother top surface on the stencil. A smoother stencil face lies flatter against the substrate, reducing the gap under the stencil edges that causes paint bleed. This is particularly valuable for thin stencils (1.5–2.0mm) where the flat contact is critical.
Step-by-Step: Creating a Custom Initial Stamp Set
Let’s design and print a set of initial stamps — one stamp for each family member’s initial — as a coordinated crafting gift set.
Step 1: Plan the Set
Four family initials: E, M, J, A. Each stamp:
- Overall size: 40mm × 40mm × 35mm (stamp face + handle)
- Stamp face: 40mm × 40mm × 3mm (flat base, 1.5mm raised letter)
- Handle: 30mm × 20mm × 32mm (sits centered above the stamp face)
- Letter: 22mm character height, bold sans-serif, mirrored horizontally
Step 2: Design in Tinkercad
For each letter:
- Create the stamp backing plate: 40mm × 40mm × 3mm
- Create the handle: 30mm × 20mm × 32mm, positioned centered on the back of the plate
- Create the letter text object: 22mm height, chosen bold font, mirrored horizontally
- Position the letter centered on the stamp face, raised 1.5mm above the plate surface
- Keep letter as “Solid” (embossed/raised above the plate)
- Group all elements
Note: the plate surface around the letter is recessed below the letter top by 1.5mm — this is the negative background area that doesn’t transfer ink.
Step 3: Slice with TPU Settings
For each stamp STL, apply TPU settings:
- Layer height: 0.2mm
- All speeds: 22mm/s
- 4 perimeters
- 35% Grid infill
- Retraction: 1.5mm
- Combing: enabled
- Cooling: 55%
- Print orientation: stamp face upward (handle on the build plate)
Step 4: Print All Four Stamps
Print one at a time (small prints, no efficiency advantage to batch printing TPU pieces at close spacing — heat management for TPU is better with more spacing). Each stamp: approximately 35–45 minutes.
Step 5: Test Impressions
Before packaging as a gift or using in production:
- Apply ink evenly to the stamp face using a stamp pad or foam applicator
- Press firmly and evenly onto test paper
- Lift cleanly straight up
- Evaluate the impression: Is it complete? Is the letter clear? Are there patchy areas?
If patchy: Apply more ink and press more firmly. Ensure the entire stamp face contacts the paper. If bleeding: Apply less ink. Allow ink to dry between layers if using multiple applications.
Step-by-Step: Creating a Botanical Border Stencil
Step 1: Source a Design
Find a botanical border SVG online — search “botanical border SVG free” and find a simple vine or leaf repeat pattern. Verify it doesn’t have problematic enclosed areas (leaves with visible interior ribs would need bridges; simple leaf silhouettes do not).
Step 2: Prepare the SVG
Open in Inkscape (free):
- Select all elements and combine into a single path if needed
- Set the design width to 180mm (fits a standard build plate)
- Set height to 30–40mm (a typical border height)
- Export as SVG
Step 3: Import to Design Software
In PrusaSlicer: Import SVG directly, extrude to 2mm height. The SVG design becomes the stencil openings as holes in a solid plate.
In Tinkercad: Create a solid rectangle (180mm × 40mm × 2mm). Import the SVG design as a separate object. Scale to fit within the rectangle. Set as “Hole” and group — creates stencil openings.
Step 4: Add Stencil Frame and Grip Handles
Add a 15mm border extending beyond the design on all sides. Add two “handle” extensions (20mm × 25mm × 2mm flaps) at each end of the stencil with rounded edges for comfortable holding.
Step 5: Check for Enclosed Areas
Review the design carefully. If any part of the design creates an isolated island in the stencil, add a 2mm bridge connecting it to the frame. For a simple vine/leaf pattern, this should not be necessary.
Step 6: Slice with Stencil Settings
- Layer height: 0.15mm
- 3 perimeters
- Ironing: enabled
- PLA at standard settings
- 100% cooling
- 6mm brim along long sides to prevent warping
Step 7: Print and Evaluate
After printing:
- Verify the stencil lies perfectly flat
- Check that all openings are fully clear (no bridging material blocking openings)
- Test paint application: secure the stencil to paper with low-tack tape, apply acrylic paint with a light dabbing motion (stippling), lift the stencil, evaluate edge sharpness
Creative Stamp and Stencil Projects
Personalized Stationery Kit
A complete matched set of stamps for personalized stationery: an address stamp, a decorative initial stamp, a thank-you stamp, and a border stamp. All sized to work together on standard card stock and envelopes. Package as a gift for someone who does a lot of handwritten correspondence.
Custom Fabric Stamping Set
Stamps designed for fabric decoration — printing on tote bags, tea towels, napkins, pillow covers. Fabric stamping uses textile-specific inks (Jacquard, Pébéo) that are heat-set to become permanent. The stamps must be slightly larger than paper stamps (fabric compresses more and spreads ink slightly).
Children’s Activity Stamps
A set of simple, bold stamps for children — animals, vehicles, shapes, numbers — in large, chunky designs suitable for small hands. Print handles sized for children’s grip (smaller diameter, shorter height). Use washable water-based inks for easy cleanup.
Multi-Layer Art Stencils
A set of 2–3 stencils designed to be applied in sequence, each layer adding depth and color to the composition. Layer 1: background shapes. Layer 2: midground detail. Layer 3: foreground accents. Each stencil has registration marks to ensure perfect alignment. This technique produces professional-looking layered art from simple stencil applications.
Brand and Logo Stamping Kit
A stamp set for a small business or side project — the logo, a tagline, a “handmade by” marker, social media handles. Used for marking packaging, stamping thank-you cards, personalizing products. Creates a cohesive branded look at minimal cost compared to commercial stamps.
Wax Seal Stamps
A stamp specifically designed for pressing into sealing wax — creating a decorative wax seal on envelopes and packages. The stamp is pressed firmly into hot wax and held for a few seconds while the wax sets, then lifted to reveal the impression.
Material note: Wax seal stamps experience heat from the molten wax (typically 70–90°C). PLA can deform at these temperatures. Use PETG for the stamp face of wax seal stamps — its higher heat resistance (approximately 80°C) better tolerates the wax application temperature. The stamp face for wax seal stamps does not require flexibility (the wax is soft), so PETG is both temperature-appropriate and functional.
Troubleshooting Common Stamp and Stencil Issues
Stamp Impressions Are Patchy or Incomplete
Cause: Insufficient ink on the stamp; uneven pressure during stamping; stamp face not flat (warped during printing).
Solution: Apply ink more generously and evenly (use a foam applicator or ink pad with consistent coverage). Apply pressure evenly across the full stamp face — press straight down with consistent force, don’t rock the stamp. If the stamp face is visibly warped, print with a wider brim and ensure flat cooling.
Ink Bleeds Between Stamp Design Elements
Cause: Too much ink applied; relief height too shallow (under 0.8mm); ink viscosity too low for the relief height.
Solution: Apply less ink — the stamp face should be lightly coated, not flooded. Increase relief height to 1.5–2.0mm. If using a very fluid ink, try a more viscous ink (pigment-based rather than dye-based). Allow each layer to dry before applying the next.
TPU Stamp Has Stringing Across the Relief Surface
Cause: TPU stringing between raised elements during travel moves.
Solution: Enable Combing mode (prevents travel over open areas). Reduce temperature by 5°C. Reduce retraction travel speed. Increase retraction slightly (1.5–2.0mm). Remove any strings before using the stamp — a brief pass with a heat gun at 15cm distance or careful trimming with scissors eliminates most stringing.
Stencil Paint Bleeds Under the Edges
Cause: Stencil not lying flat against the substrate; too much wet paint applied at once; brush movement at stencil edges pushing paint underneath.
Solution: Secure the stencil with low-tack spray adhesive or painter’s tape before painting. Use a stippling (dabbing straight up and down) motion rather than brush strokes at stencil edges. Apply multiple thin layers of paint rather than one heavy coat. Enable ironing on the stencil surface for a flatter contact face.
Stencil Openings Have Bridging Material Partially Blocking Them
Cause: Small stencil openings (under 3mm) print with bridging material partially filling the gap; cooling insufficient for the bridge to solidify before the next layer is deposited.
Solution: Increase cooling to 100%. Use 0.15mm layer height for better bridging capability. Ensure minimum layer time is 8 seconds. For openings under 2mm, use a sharp craft knife to clean out any blocking material after printing — these tiny openings are at the FDM minimum and may always need slight cleanup.
Stencil Warps and Doesn’t Lie Flat
Cause: Thin flat print warping during cooling; insufficient brim; material thermal contraction.
Solution: Increase brim to 10mm along long edges. Reduce cooling to 80% for PETG stencils. Allow extended cooling time on the bed (10+ minutes) before removing. For stencils that still warp, store flat under a heavy book overnight — PLA’s slight flexibility when warm can be gently corrected by flat storage while residual heat dissipates.
Conclusion: Making the Tools That Make
There is something particularly satisfying about making the tools that you then use to make other things — a second-order creativity where the printer produces the instruments and the instruments produce the art. A stamp you designed yourself, inked for the first time, pressed onto paper, and lifted to reveal a clean impression of your own design: this is a specific kind of satisfaction that purchased tools simply cannot offer.
Stamps and stencils introduce flexible material printing in a context where the material properties directly determine the object’s function — a stamp that doesn’t flex doesn’t work, and this is immediately obvious in the first impression you make. It’s one of the clearest illustrations in all of 3D printing of how material choice is a design decision with functional consequences.
Print your first stamp in TPU. Make your first stencil in PLA. Use them to create something — a card, a decorated bag, a stamped notebook. Notice how the tool you made extends your creative capability in a direction it couldn’t go before.
Then design the next tool.