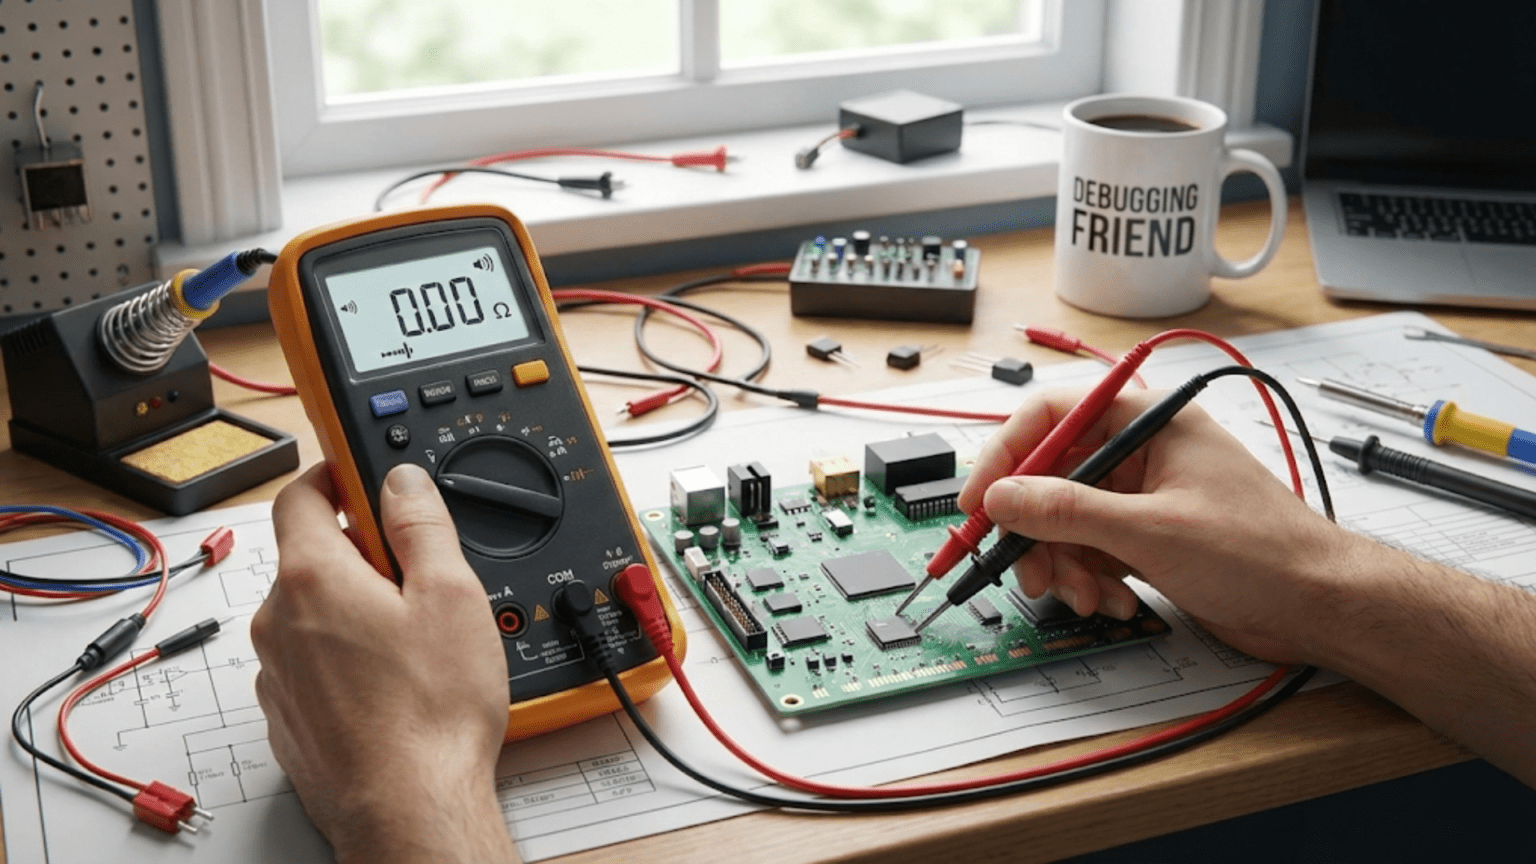
Introduction
Continuity testing represents perhaps the single most useful multimeter function for troubleshooting electronics problems because it provides instant audible feedback indicating whether electrical paths exist between two points, transforming the tedious process of checking hundreds of connections by reading resistance values into a rapid systematic verification where you listen for beeps indicating good connections rather than watching displays showing numerical readings. This simple function that beeps when resistance between the probes is very low enables checking that wires are not broken, verifying that solder joints actually conduct electricity, confirming that breadboard connections are properly made, testing cables for internal breaks, and quickly identifying where circuits are continuous versus where unwanted opens prevent current flow. The speed advantage of audible feedback over visual resistance reading cannot be overstated when checking dozens or hundreds of connections during circuit assembly verification or fault diagnosis, with continuity testing often revealing assembly problems in seconds that might take minutes to discover through resistance measurements requiring you to read and interpret numerical values for each connection.
For beginners learning to troubleshoot electronics, continuity testing provides a remarkably simple yet powerful diagnostic technique because it reduces complex questions about circuit connectivity to simple yes-or-no answers indicated by the presence or absence of a beep. Does current have a complete path from the battery positive terminal through all components back to the negative terminal? Touch one probe to positive and the other to negative and listen for a beep—no beep means an open circuit exists somewhere preventing current flow. Is this solder joint actually conducting electricity or merely providing mechanical connection without electrical continuity? Touch probes to both sides of the joint—a beep confirms good electrical connection while silence indicates a cold solder joint or other conduction problem. These binary pass-fail tests using audible feedback make continuity testing accessible even to complete beginners who might struggle with interpreting numerical resistance or voltage readings.
The fundamental principle underlying continuity testing is the same resistance measurement used in normal ohmmeter operation, but with two important modifications that make it more useful for connection verification. First, the meter activates an audio indicator—typically a beep, buzz, or tone—when measured resistance falls below a threshold typically set around ten to one hundred ohms, providing audible feedback that allows testing without watching the display. Second, some meters use higher test current during continuity testing compared to normal resistance measurement, enabling detection of high-resistance faults that might carry just enough current to appear connected on resistance measurements but insufficient current for proper circuit operation. This combination of audible feedback and enhanced fault detection makes continuity testing far superior to resistance measurement for verifying connections and finding opens.
The practical value of continuity testing extends throughout the entire electronics workflow from initial circuit assembly where it verifies that breadboard or soldered connections are properly made, through component installation where it confirms components are actually connected to the intended circuit nodes, to systematic troubleshooting where it traces signal paths identifying where signals should flow and where opens prevent conduction. A breadboard circuit that fails to operate might have dozens of connections any of which could be loose or improper, but systematic continuity testing verifying each connection from power source through components to ground quickly identifies the problematic connection. A cable that stopped working might have internal breaks anywhere along its length, but continuity testing from one end to the other immediately reveals whether the cable maintains electrical continuity or has failed open somewhere inside its insulation.
This comprehensive guide will build your understanding of continuity testing from basic concepts through practical applications, examining what continuity testing measures and why it differs from resistance measurement, how to activate and use continuity test mode on multimeters, interpreting continuity test results correctly, systematic strategies for using continuity testing to verify circuit assembly and troubleshoot faults, common mistakes that produce misleading results and how to avoid them, and advanced continuity testing techniques for special situations including testing complex cables, verifying printed circuit board traces, and diagnosing intermittent connection problems. By the end, you will understand continuity testing thoroughly enough to use it confidently and systematically for circuit verification and troubleshooting, dramatically accelerating your ability to identify and fix connection problems that would otherwise require tedious investigation.
What Continuity Testing Is and How It Works
Understanding the principles underlying continuity testing clarifies what it measures, why it works differently from normal resistance measurement, and when to use it instead of other measurement types.
The Concept of Electrical Continuity
Electrical continuity means an unbroken conductive path exists between two points allowing current to flow with very low resistance, typically below a few dozen ohms. Continuous paths include wires without breaks, closed switches making metal-to-metal contact, properly soldered joints creating metallic bonds between components and pads, and breadboard connections where spring contacts grip component leads. These continuous paths allow current to flow essentially unimpeded with voltage drops so small that they are negligible for most purposes, enabling circuits to operate as designed with current flowing through all necessary paths.
The opposite of continuity is an open circuit where no conductive path exists or where resistance is so high that negligible current flows, preventing circuit operation. Opens result from broken wires, cold solder joints that appear connected but have insulating oxidation preventing conduction, loose breadboard connections where component leads do not make contact with spring clips, disconnected terminals, or failed components that have developed internal breaks. These opens prevent current flow through the affected path, causing circuits to malfunction in ways that often manifest as complete lack of operation rather than degraded performance, making them prime candidates for continuity testing that quickly identifies where current paths are broken.
The threshold between continuity and open circuit varies depending on context and meter settings, but typical multimeters set continuity thresholds between ten and one hundred ohms. Resistance below this threshold triggers the audible indicator confirming continuity, while resistance above the threshold produces silence indicating insufficient conductivity for continuity. This threshold serves most practical purposes well because good connections typically measure well below one ohm while opens measure infinite resistance, creating clear distinction between these two states with the threshold set anywhere in the middle range.
How Continuity Testing Differs from Resistance Measurement
Continuity testing uses the same basic technique as resistance measurement—applying test current and measuring resulting voltage to calculate resistance—but presents results differently by activating an audio indicator rather than merely displaying numerical resistance values. This audible feedback provides several advantages over numerical resistance display when checking multiple connections or verifying circuit paths. You can listen for beeps without looking at the meter, allowing you to focus visual attention on circuit boards and connections while performing tests. The binary nature of beep versus no beep simplifies interpretation eliminating the need to read and evaluate numerical values for each measurement. The testing speed increases dramatically because you can rapidly touch probe pairs to connection points listening for beeps rather than waiting for stable resistance readings and noting numerical values.
Some multimeters additionally use different test currents for continuity testing versus resistance measurement, applying higher current during continuity tests to better detect high-resistance faults that might not be obvious from normal resistance measurements. A marginal connection with ten ohms resistance might appear satisfactory on a resistance measurement but would fail to conduct sufficient current for circuit operation. The higher test current during continuity testing forces more current through such marginal connections, potentially developing enough voltage drop to keep the continuity indicator silent or revealing the high-resistance problem that normal measurement would miss. This enhanced fault detection makes continuity testing superior to resistance measurement for connection verification even beyond the convenience of audible feedback.
The continuity threshold setting determines what resistance qualifies as continuity versus open circuit. Lower thresholds like ten ohms provide stricter standards requiring very low resistance for continuity confirmation, identifying marginal connections that might cause problems despite technically conducting. Higher thresholds like one hundred ohms or more allow higher-resistance connections to qualify as continuous, potentially missing marginal connections that meet the continuity threshold but still cause circuit problems. Most meters use factory-set thresholds around twenty to fifty ohms balancing strict standards against avoiding false negative results from wire resistance in long cable runs or component lead resistance in large components.
When to Use Continuity Testing Versus Resistance Measurement
Continuity testing excels for verifying that connections exist and identifying opens in circuits and cables where you need to know whether current paths are continuous rather than measuring exact resistance values. Applications include checking that breadboard jumper wires actually connect between intended points, verifying that solder joints conduct electricity, testing cables for internal breaks, confirming that switches make contact when closed, and tracing printed circuit board traces to verify they are not broken or damaged. In all these cases, you care whether paths are continuous rather than knowing their precise resistance, making continuity testing with its fast audible feedback ideal.
Resistance measurement is preferable when you need actual resistance values rather than merely pass-fail continuity information. Applications include verifying resistor values match color codes or specifications, measuring combined resistance of parallel components, checking component values for circuit calculations, and any situation where numerical resistance values provide diagnostic information beyond simple continuity verification. The numerical display provides quantitative information that continuity testing’s binary beep-or-silence cannot convey, though at the cost of slower testing and visual attention required to read displays.
For comprehensive circuit verification or troubleshooting, using both functions in combination provides complete diagnostic capability. Continuity testing quickly verifies that necessary connections exist, while resistance measurements on specific components or circuit sections provide detailed information when continuity testing reveals anomalies requiring further investigation. The rapid continuity verification identifies where to focus detailed resistance measurements, dramatically reducing the time required for systematic circuit analysis compared to using resistance measurements alone.
Using Continuity Test Mode on Your Multimeter
Activating and using continuity test mode correctly ensures reliable results and prevents common mistakes that produce misleading indications.
Activating Continuity Test Mode
Most multimeters include continuity test as a separate function selected through the selector dial or function buttons. The continuity function typically appears adjacent to the resistance function on the dial, often sharing one dial position with resistance measurement but distinguished by a diode symbol and sound wave symbol indicating the audible feedback capability. Some meters require pressing a function select button to toggle between resistance and continuity modes when the dial is in the combined resistance-continuity position, while others provide separate dial positions for each function.
Look for symbols indicating continuity mode including a speaker or sound wave symbol representing the audible indicator, sometimes combined with a diode symbol because continuity mode and diode testing often share function positions since both provide audible feedback for specific measurement criteria. The meter manual clarifies exactly how to activate continuity mode if symbols are ambiguous or if the meter uses non-standard control arrangements. Once activated, the meter typically beeps briefly when you first select the function confirming that the audio indicator is working, or might display a continuity symbol on the screen indicating the mode is active.
Auto-ranging meters automatically select appropriate test current and threshold values for continuity testing when you activate the mode, eliminating manual range selection. Manual ranging meters might provide different continuity thresholds on different range positions though most provide a single continuity range with factory-set threshold appropriate for general connection testing. Verify your specific meter’s operation by touching the probes together which should trigger the audio indicator, confirming the continuity function is active and working properly.
Probe Connections and Power Off Requirements
Continuity testing uses the same probe connections as resistance measurement with the black probe in the COM jack and the red probe in the voltage-resistance jack marked with V and omega symbols. This is the same configuration used for voltage and resistance measurements, distinguishing continuity from current measurement which requires moving the red probe to current input jacks. The consistent jack configuration for voltage, resistance, and continuity simplifies switching between these functions requiring only dial adjustment without moving probes.
Like resistance measurement, continuity testing requires circuits to be completely powered off before testing because voltage sources in powered circuits interfere with the test current and voltage, producing false continuity indications or preventing proper continuity detection. The meter’s small test current and voltage would be overwhelmed by circuit voltages, making continuity testing unreliable in powered circuits. Always disconnect batteries, unplug power supplies, and allow capacitors to discharge before performing continuity tests, following the same power-off procedures used for resistance measurement.
For circuits that were recently powered, waiting several seconds after power removal allows time for capacitors to discharge to safe levels where they will not interfere with continuity testing. Large capacitors might retain charge for minutes, so exercising patience or actively discharging capacitors through resistors ensures clean measurements without contamination from residual charge. This power-off discipline prevents false positives where charged capacitors create temporary continuity through discharge current, or false negatives where circuit voltages oppose the meter’s test current preventing continuity detection.
Step-by-Step Continuity Testing Procedure
Following systematic procedures ensures accurate continuity testing and prevents mistakes that produce misleading results.
Step 1: Verify Circuit Power Is Off
Before beginning continuity testing, absolutely confirm that all power sources are disconnected and circuit voltages have decayed to zero. Remove batteries from battery-powered circuits, disconnect power supply cables from AC outlets, and switch off all power switches ensuring no voltage sources remain active. This verification prevents the incorrect continuity indications that result from testing powered circuits where circuit voltages interfere with meter test signals.
Visual inspection of disconnected power sources provides concrete confirmation beyond merely trusting switch positions or circuit state. Physically observing that battery terminals are separated, power cables are unplugged, or circuit boards are isolated from supplies ensures no hidden power paths remain active. For circuits with large capacitors that might retain charge after power removal, allow adequate discharge time or measure voltage across power rails confirming voltage has decayed below one volt before proceeding with continuity tests.
Step 2: Configure the Multimeter
Set the selector dial or function buttons to activate continuity test mode, indicated by speaker or sound wave symbols possibly combined with diode symbols. Verify that test probes are connected with the black probe in COM and the red probe in the voltage-resistance jack. Test the audio indicator by touching the probe tips together which should trigger an immediate beep, buzz, or tone confirming the continuity function is active and the audio indicator is working properly.
If the meter does not beep when probes touch together, verify you have actually activated continuity mode rather than regular resistance mode which displays numerical values without audio feedback. Check the meter manual if you are uncertain how to activate continuity mode on your specific meter model. Verify that meter batteries have adequate charge because weak batteries can affect audio indicator operation or meter sensitivity, replacing batteries if the low battery indicator appears or if the meter behaves erratically.
Step 3: Touch Probes to Test Points
Touch one probe to each of the two points where you want to verify continuity, ensuring firm metal-to-metal contact with no oxidation or contamination preventing conduction. For testing connections between circuit nodes, touch one probe to each node. For testing component continuity like verifying a wire is not broken, touch probes to each end of the component. For testing solder joints, touch probes to both sides of the joint confirming electrical connection exists through the solder.
Maintain steady contact during the test avoiding movement that creates intermittent connections. The meter typically responds very quickly—within a fraction of a second—either beeping to indicate continuity or remaining silent to indicate open circuit. Some meters require a brief settling time if internal averaging is active, but most modern meters provide essentially instantaneous indication allowing rapid sequential testing of multiple connection points.
Step 4: Interpret the Results
A beep, buzz, or tone indicates continuity exists between the probe points with resistance below the meter’s continuity threshold, confirming a conductive path suitable for current flow. Silence indicates open circuit or resistance exceeding the continuity threshold, suggesting no connection exists or connection resistance is too high for reliable current conduction. These binary results make interpretation straightforward compared to numerical measurements requiring evaluation of specific values.
For marginal cases where the beep is very brief or inconsistent, the connection resistance likely sits near the continuity threshold indicating a questionable connection that might cause circuit problems despite technically meeting continuity criteria. Investigate these marginal indications with resistance measurements determining exact resistance values, then decide whether the connection is adequate for the application or requires improvement to ensure reliable operation.
If testing produces unexpected results—for example, showing continuity where none should exist suggesting a short circuit, or showing no continuity where a connection should exist suggesting an open—carefully verify probe placement confirming you are testing the correct points and that probes make good contact with clean metal surfaces. Retest to confirm repeatable results before concluding that unexpected continuity indications represent actual circuit problems rather than measurement errors.
Step 5: Document and Continue Testing
For systematic circuit verification or troubleshooting, record continuity test results documenting which connections passed and which failed continuity tests. This documentation prevents having to retest previously verified connections and creates a systematic record of circuit condition useful for identifying patterns in connection failures or tracking down intermittent problems. Simple check marks on a circuit diagram indicating tested and verified connections provide adequate documentation for most purposes.
Continue testing systematically through all connections requiring verification, moving methodically through the circuit following planned test sequences that ensure complete coverage without missing connections. Systematic approaches like testing all power distribution first, then all ground connections, then signal paths from input to output prevent the random testing that might miss critical connections or waste time testing the same connections repeatedly.
Practical Applications and Debugging Strategies
Understanding how to apply continuity testing strategically in common situations accelerates troubleshooting and enables efficient circuit verification.
Verifying Breadboard Connections
Breadboard circuits depend entirely on proper insertion of component leads into holes creating contact with internal spring clips, but these connections can fail when leads do not fully insert, when spring clips are damaged or loose, or when component leads are too thin or rough to make reliable contact. Continuity testing systematically verifies breadboard connections, checking that jumper wires actually connect between intended rows, that component leads make contact with breadboard internal connections, and that power and ground rails distribute properly throughout the circuit.
Test each jumper wire by touching one probe to one end and the other probe to the opposite end, listening for beeps confirming the wire provides continuous conduction. Test component connections by touching one probe to the component lead and the other to another point in the same breadboard row that should connect to that component, verifying that breadboard internal connections properly grip the component lead. Test power rail distribution by touching probes to rails at both ends of the breadboard confirming continuity along the entire rail length, identifying split rails that require jumper connections to extend power to both sections.
The rapid audible feedback makes breadboard verification dramatically faster than visual inspection or voltage measurements which require power to be applied and often miss connection problems until the circuit fails to operate. Continuity testing before applying power identifies connection problems immediately, preventing the confusion of troubleshooting circuit operation when the real problem is simply improper assembly.
Testing Cables and Wires for Breaks
Cables and wires can develop internal breaks from flexing, pulling, or physical damage while maintaining intact external insulation that hides the internal failure. Continuity testing quickly identifies these hidden breaks by testing from one cable end to the other, with continuity beeps confirming unbroken conductors and silence indicating internal breaks requiring cable replacement.
For multi-conductor cables like USB cables, audio cables, or ribbon cables, test each conductor individually touching probes to corresponding pins at each cable end and listening for beeps confirming each conductor maintains continuity. Document which conductors pass and which fail, identifying cables with single broken conductors versus cables with multiple failures. Sometimes cables can be repaired by cutting back to undamaged sections and resoldering connectors, while severely damaged cables require complete replacement.
For very long cable runs where wire resistance might approach or exceed the continuity threshold causing intermittent or absent beeps despite actually continuous conductors, use resistance measurement instead of continuity testing to get numerical resistance values that distinguish between truly open conductors showing infinite resistance and merely high-resistance conductors showing perhaps tens or hundreds of ohms from long wire runs.
Verifying Solder Joint Quality
Visual inspection of solder joints confirms that solder has flowed and wetted surfaces properly, but cannot guarantee electrical conductivity because cold solder joints can appear visually acceptable while providing only mechanical connection without electrical conduction due to oxidation or contamination preventing metallurgical bonding. Continuity testing verifies that solder joints actually conduct electricity by testing from both sides of the joint, with beeps confirming proper electrical connection and silence indicating cold joints requiring rework.
Test each critical solder joint by touching probes to both sides—the component lead on one side and the circuit board pad or connecting wire on the other side—listening for beeps confirming the joint conducts properly. For complex circuits with dozens or hundreds of solder joints, prioritize testing of power and ground connections first since these are most critical for circuit operation, then test signal connections if time permits or if specific problems suggest connection issues.
Cold solder joints revealing themselves through continuity testing should be reflowed by reheating with proper soldering technique, adding fresh solder and flux if necessary to create proper metallurgical bonds. After rework, retest to confirm the repaired joints now show continuity, verifying the rework succeeded before moving to the next problem area.
Tracing Circuit Paths and Identifying Opens
When circuits fail to operate, continuity testing helps identify where current paths are broken preventing normal operation. Start by verifying continuity from the power supply positive terminal through the entire circuit path to ground, listening for a beep confirming complete continuity from source to load. No beep indicates an open somewhere in the current path, requiring more detailed testing to narrow down the break location.
Systematically divide the circuit path into sections, testing continuity across each section from its input to its output. The section showing no continuity contains the open, focusing investigation on that specific area. Within the failed section, test individual components and connections until you identify the specific open connection, component, or solder joint causing the break. This binary search approach efficiently narrows fault location through successive subdivision of the circuit into smaller sections until the fault is isolated to a specific component or connection.
For complex circuits with parallel paths and multiple current routes, draw current flow diagrams showing all paths that should conduct, then systematically verify each path with continuity testing. Identifying which paths show continuity and which do not reveals patterns in the failure mode—perhaps all paths through a specific connector fail suggesting connector problems, or all paths requiring a particular component fail suggesting that component has failed open.
Common Mistakes and How to Avoid Them
Understanding typical continuity testing errors prevents wasted time troubleshooting non-existent problems or missing actual faults due to measurement mistakes.
Testing Powered Circuits
Attempting continuity testing on powered circuits produces unreliable results because circuit voltages interfere with the meter’s test signals, potentially showing false continuity from current flow through powered devices or missing actual continuity that circuit voltages obscure. The most common manifestation is testing a circuit that someone recently used without verifying power is off, producing confusing results that seem to show continuity where circuit operation suggests opens exist.
Always visually confirm power sources are disconnected before beginning continuity testing, making this verification a conscious habit rather than assuming circuits are off. For circuits with capacitors that might retain charge after power removal, allow discharge time or actively discharge capacitors before testing. This discipline ensures clean measurements reflecting actual circuit continuity rather than artifacts from residual power or charged components.
Confusing Continuity with Resistance Value
Continuity testing provides binary pass-fail indication of whether resistance is below threshold, not numerical resistance values. A continuity beep confirms low resistance but does not indicate whether resistance is zero point one ohms or ten ohms, while silence indicates high resistance but does not indicate whether resistance is one hundred ohms or one megohm. This limited information suffices for verifying connections exist but not for determining exact resistance values needed for component verification or detailed circuit analysis.
When numerical resistance values matter—such as verifying resistor values or measuring combined resistance of parallel components—use resistance measurement mode rather than continuity testing. Continuity testing’s speed and audible feedback make it ideal for connection verification, but resistance measurement’s quantitative results are necessary when exact values affect circuit operation or when detailed diagnostic information is needed.
Missing Intermittent Connection Problems
Continuity testing at a single moment in time reveals only whether continuity exists at that instant, potentially missing intermittent connections that conduct sometimes and fail other times depending on mechanical stress, temperature, vibration, or other variables. A solder joint that conducts when stationary might open when the circuit board flexes, or a crimp connection might work when cold and fail when heated. These intermittent faults are notoriously difficult to diagnose because they may not manifest during static testing.
For suspected intermittent problems, perform continuity testing while mechanically stressing the suspect area—flexing circuit boards, wiggling connectors, heating or cooling components—watching for continuity beeps that come and go indicating intermittent connections. These dynamic tests reveal failures that static testing misses, though they require careful attention and sometimes require repeated testing before the intermittent fault manifests during observation.
Conclusion: Continuity Testing as Your First Troubleshooting Step
Continuity testing deserves its reputation as the best debugging friend because it provides fast reliable verification of electrical connections using audible feedback that requires no visual attention to meter displays, enabling rapid systematic verification that identifies connection problems far faster than resistance or voltage measurements alone could achieve. The simple binary nature of beep versus silence makes results instantly interpretable without requiring judgment about whether numerical values are acceptable, while the speed of audible feedback allows testing dozens of connections in the time required to perform a few resistance measurements requiring display observation and value interpretation.
Understanding when to use continuity testing versus resistance measurement ensures you select the appropriate function for each diagnostic task. Continuity testing excels for verifying that connections exist and identifying opens in circuits, cables, and assemblies where you need pass-fail connection verification rather than exact resistance values. Resistance measurement provides quantitative information when numerical values matter, complementing continuity testing in comprehensive diagnostic workflows that use each function for its strengths.
The systematic application of continuity testing following logical sequences that verify power distribution, ground connections, and signal paths transforms random troubleshooting into efficient debugging that methodically identifies connection problems without wasting time on unproductive testing. Documenting continuity test results creates records of circuit condition that aid pattern recognition and prevent redundant testing of previously verified connections.
Time invested mastering continuity testing pays immediate dividends in faster circuit assembly verification that catches connection problems before they cause confusing operational failures, and in accelerated troubleshooting that quickly identifies open circuits that would otherwise require extensive investigation. Whether you are building your first breadboard circuit or troubleshooting complex systems, continuity testing provides rapid diagnostic capability that makes it truly your best debugging friend.