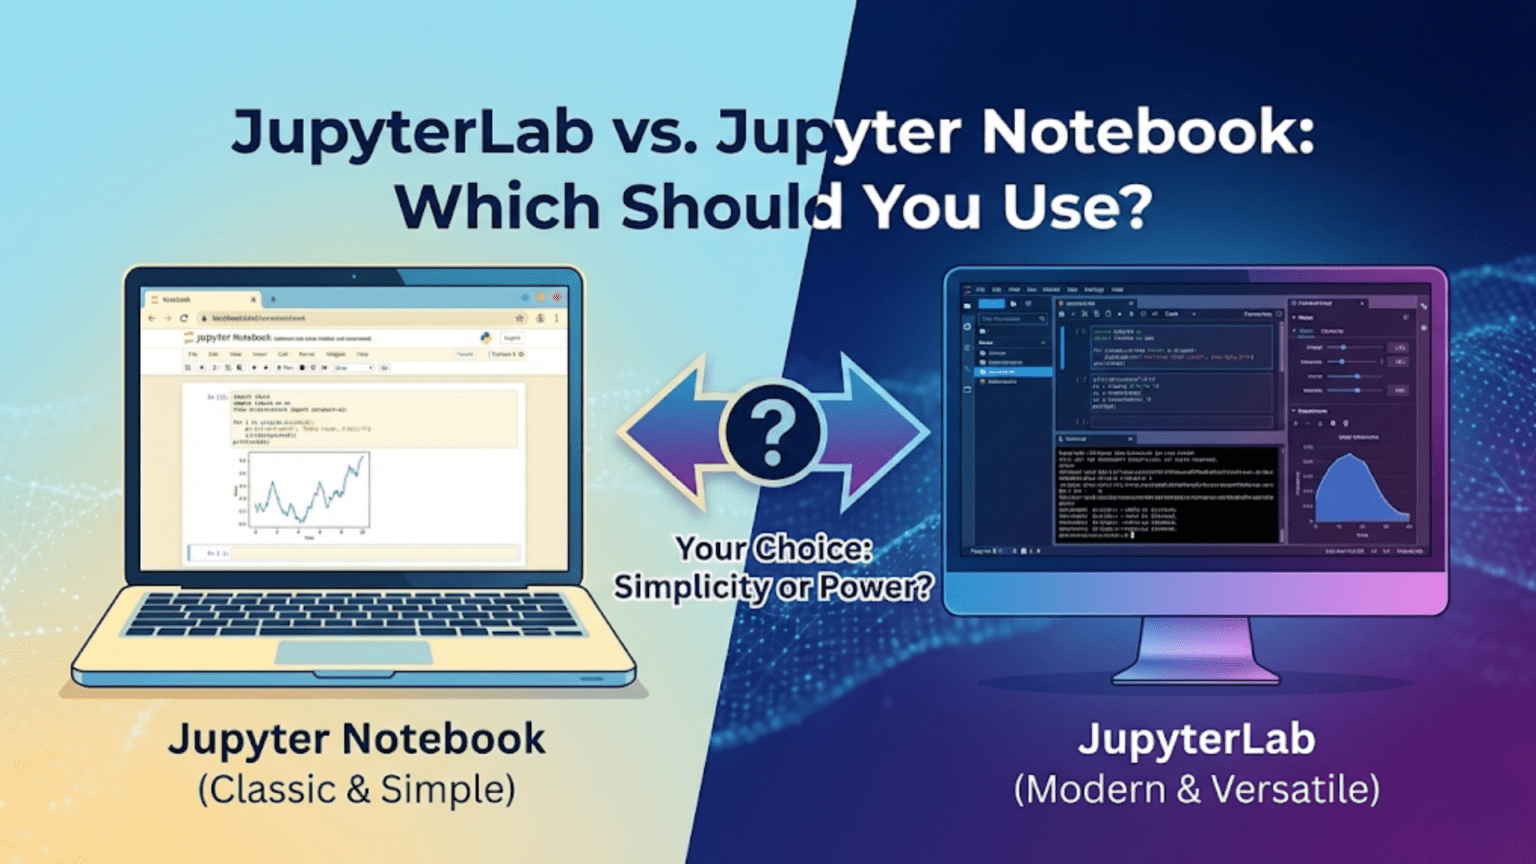
JupyterLab is the next-generation, full-featured IDE-like interface that can display multiple notebooks, terminals, text editors, and file browsers simultaneously in a flexible tabbed layout. Jupyter Notebook (Classic) is the original, simpler single-document interface best suited for beginners and focused single-analysis work. Both use identical .ipynb files and kernels — the difference is entirely in the interface and surrounding workflow tools.
Introduction: Two Interfaces, One File Format
If you have installed Jupyter recently through Anaconda or pip, you may have noticed that you have two commands available: jupyter notebook and jupyter lab. Both open in your browser, both let you run Python code in .ipynb files, and both look superficially similar. Yet experienced data scientists have clear opinions about when to use each, and understanding the distinction will help you choose the right tool for the right job from day one.
The confusion arises because most Jupyter tutorials focus on the classic Jupyter Notebook interface, while most modern data science environments default to JupyterLab. Some beginners end up using whichever one launched first without understanding what they are working with. Others try JupyterLab briefly, find it overwhelming compared to the simpler classic interface, and retreat to Jupyter Notebook without realizing what they missed.
This article gives you a complete, honest comparison. You will understand what each interface offers, what its limitations are, and which one fits your current situation. The answer is not always “use JupyterLab” — there are genuine reasons to prefer the classic interface, and there are situations where JupyterLab’s additional complexity is entirely worth it.
1. A Brief History: How JupyterLab Came to Be
Jupyter Notebook (Classic), originally called IPython Notebook, was released in 2011. It quickly became the dominant tool for interactive data science because it combined code execution, rich output rendering, and prose documentation in a single document. By 2015, it was the de facto standard environment for data scientists, researchers, and educators worldwide.
However, the classic interface had architectural limitations. It was designed to show one notebook at a time in one browser tab. Switching between notebooks required new tabs. There was no integrated terminal. No side-by-side editing. No file previews. No way to view a CSV alongside the notebook analyzing it. As data science workflows grew more complex, these limitations became friction.
JupyterLab was first released as a stable version in 2018, designed from the ground up as a complete, extensible development environment built on top of the same kernel and file system as Jupyter Notebook. It was explicitly intended to be the “next-generation” replacement, offering a flexible, modular workspace where you can arrange multiple notebooks, terminals, text editors, and viewers simultaneously.
Today, Project Jupyter officially recommends JupyterLab as the primary interface. However, the classic Jupyter Notebook is still maintained, still widely used, and still the better choice in several specific situations.
2. Interface Overview: What Each Looks Like
2.1 Classic Jupyter Notebook Interface
When you run jupyter notebook, you see:
The Dashboard — A file browser at localhost:8888. From here you navigate folders, open existing notebooks, and create new ones. It looks like a simple list of files with icons.
The Notebook View — When you open a notebook, it fills the entire browser tab. The interface is intentionally minimal: a menu bar, a toolbar with a few buttons, and the linear sequence of cells below. Nothing else competes for your attention.
┌─────────────────────────────────────────────────────┐
│  File  Edit  View  Insert  Cell  Kernel  Help       │
├─────────────────────────────────────────────────────┤
│  [▶] [+] [✂] [⎘] [⧉] [↑] [↓] | Code ▼ | Python 3 ● │
├─────────────────────────────────────────────────────┤
│                                                     │
│  In [1]:  import pandas as pd                       │
│           df = pd.read_csv('data.csv')              │
│           df.head()                                 │
│                                                     │
│  Out[1]:  [DataFrame displayed as HTML table]       │
│                                                     │
│  In [2]:  df.describe()                             │
│                                                     │
└─────────────────────────────────────────────────────┘The classic interface is immediately understandable. There is nowhere to get lost. Everything visible relates directly to the one notebook you are working on.
2.2 JupyterLab Interface
When you run jupyter lab, you see a significantly more complex workspace:
The Left Sidebar — Contains a file browser, running kernels and terminals list, table of contents for the current notebook, extension manager, and more. Each section is accessed via icons on the far left.
The Main Work Area — A flexible, resizable panel system where you can open multiple documents simultaneously, arrange them in tabs or side-by-side splits, and drag panels to create custom layouts.
The Menu Bar — More comprehensive than classic Jupyter, with additional options for View, Run, Kernel, Tabs, Settings, and Help.
The Status Bar — At the bottom, shows kernel status, cursor position, and other contextual information.
┌──┬───────────────────────────────────────────────────────┐
│  │  File  Edit  View  Run  Kernel  Tabs  Settings  Help  │
│📁│────────────────────────────────────────────────────── │
│⌚│  analysis.ipynb  ×  │  data.csv  ×  │  terminal  ×    │
│🔍│────────────────────────┬──────────────────────────────│
│  │                        │  A  B  C                     │
│  │  In [1]:               │  1  4  7                     │
│  │  import pandas as pd   │  2  5  8     ← CSV preview   │
│  │  df = pd.read_csv(...) │  3  6  9                     │
│  │                        │                              │
│  │  Out[1]: [table]       ├──────────────────────────────│
│  │                        │  $ python --version          │
│  │  In [2]:               │  Python 3.11.5               │
│  │  df.describe()         │  $                ← terminal │
│  │                        │                              │
└──┴────────────────────────┴──────────────────────────────┘The JupyterLab interface can display a notebook, a CSV preview, and a terminal simultaneously. This is the core power of JupyterLab — and also the source of its initial complexity for beginners.
3. Feature-by-Feature Comparison
3.1 Multi-Document Workspace
Jupyter Notebook: Each notebook occupies its own browser tab. Working with multiple notebooks means managing multiple tabs. You cannot see two notebooks side by side.
JupyterLab: The main work area supports tabs and split panels. You can drag any document — notebook, terminal, text file, CSV, image — and snap it to the left, right, top, or bottom of any other panel. Some common arrangements:
- Notebook on the left, terminal on the right
- Two notebooks side by side for comparison
- Notebook above, CSV viewer below
- Three notebooks in a grid layout
This is genuinely transformative for complex workflows where you need to reference one document while editing another.
3.2 Integrated Terminal
Jupyter Notebook: No integrated terminal. You need a separate terminal window running alongside your browser.
JupyterLab: Open as many terminal tabs as you need directly from File → New → Terminal. These terminals run in the same working directory as your notebooks and share the same Python environment. You can install packages, run scripts, check git status, and inspect files without switching windows.
# In JupyterLab: open a terminal tab
# Then run alongside your notebook:

# In terminal:
$ pip install xgboost
$ git status
$ python train_model.py --epochs 100

# In notebook (simultaneously):
# Monitor training progress, inspect results3.3 File Browser and Previews
Jupyter Notebook: The file browser is the Dashboard — a separate page you navigate back to when needed. No file previews.
JupyterLab: The left sidebar contains a persistent file browser accessible at all times. You can:
- Double-click any
.ipynbto open it in a new tab - Double-click a
.csvto preview it as a table - Double-click an image to view it
- Double-click a
.py,.md, or.txtto open it in the text editor - Right-click files for rename, move, copy, download options
This makes the JupyterLab file browser feel much more like a real IDE’s project explorer.
3.4 Text Editor
Jupyter Notebook: No integrated text editor. Editing Python scripts requires a separate application.
JupyterLab: A full-featured text editor is built in. Open any text file — Python scripts, Markdown, configuration files, JSON — and edit it with syntax highlighting directly inside JupyterLab. This is invaluable when you have a mixture of notebooks and utility scripts in your project.
3.5 Table of Contents
Jupyter Notebook: No built-in table of contents (requires an extension in the classic interface).
JupyterLab: The left sidebar contains a live Table of Contents panel that automatically generates a navigable outline from all Markdown headings in the open notebook. Click any heading to jump directly to that section — extremely useful for long notebooks.
Table of Contents:
▼ 1. Setup and Imports
▼ 2. Data Loading
  ▷ 2.1 Load Raw Data
  ▷ 2.2 Validate Schema
▼ 3. Exploratory Analysis
  ▷ 3.1 Distributions
  ▷ 3.2 Correlations
▼ 4. Modeling3.6 Multiple Kernels and Consoles
Jupyter Notebook: One kernel per notebook, period.
JupyterLab: You can attach multiple documents to the same kernel, or open a separate Console connected to a notebook’s kernel. The console is like a REPL that shares state with your notebook — useful for quick experiments without cluttering the notebook with throwaway cells.
# In JupyterLab: Right-click a notebook → "New Console for Notebook"
# The console shares the exact same kernel and variables as the notebook

# In notebook:
df = pd.read_csv('data.csv')
model = train_model(df)   # Expensive computation

# In console attached to same kernel:
model.feature_importances_   # Quick inspection without adding a notebook cell
model.get_params()3.7 Extension Ecosystem
Jupyter Notebook: Supports extensions (nbextensions), but the extension system is older and requires a separate package (jupyter_contrib_nbextensions). Installation is less seamless.
JupyterLab: Built from the ground up with a modern extension architecture. Extensions can add new file viewers, themes, Git integration, Jupyter AI (AI coding assistant), variable inspectors, and much more — all installable through the Extension Manager GUI or via pip/conda.
Popular JupyterLab extensions include:
# Git integration — view diffs, commit, push from within JupyterLab
pip install jupyterlab-git

# Variable inspector — see all variables in a side panel
pip install lckr-jupyterlab-variableinspector

# Code formatter — auto-format cells with Black or isort
pip install jupyterlab-code-formatter

# Jupyter AI — AI coding assistant powered by LLMs
pip install jupyter-ai

# System monitor — CPU/RAM usage in the status bar
pip install jupyter-resource-usage3.8 Notebook Diffing and Version Control
Jupyter Notebook: No built-in diff or version control integration.
JupyterLab: The jupyterlab-git extension adds a full Git panel to the sidebar — view file diffs, stage changes, commit, push, pull, and switch branches without ever leaving JupyterLab. For teams working on shared analysis notebooks, this is a significant quality-of-life improvement.
4. The Full Comparison Table
| Feature | Jupyter Notebook | JupyterLab |
|---|---|---|
| Interface complexity | Simple, minimal | Rich, IDE-like |
| Learning curve | Low | Moderate |
| Multi-document workspace | No (one tab per notebook) | Yes (tabs + split panels) |
| Integrated terminal | No | Yes |
| File browser | Dashboard only | Persistent sidebar |
| File previews | No | CSV, image, Markdown |
| Integrated text editor | No | Yes, with syntax highlight |
| Table of Contents | Extension required | Built-in sidebar panel |
| Multiple kernels/consoles | One per notebook | Multiple + kernel sharing |
| Extension ecosystem | nbextensions (older) | Modern, GUI-managed |
| Git integration | No | Via jupyterlab-git |
| Cell drag-and-drop | No | Yes |
| Context menus | Limited | Rich right-click menus |
| Themes (dark mode) | Limited | Full theme support |
| Keyboard shortcut customization | Limited | Full customization |
| Mobile/tablet experience | Marginally better | Complex on small screens |
| Performance (startup) | Faster | Slightly slower |
| Official project status | Maintained | Actively developed (primary) |
| Best for | Beginners, focused work | Professional workflows |
5. When to Use Classic Jupyter Notebook
Despite JupyterLab’s many advantages, there are genuine situations where the classic Jupyter Notebook interface is the better choice:
5.1 You Are a Complete Beginner
When you are learning Jupyter for the first time, the classic interface’s simplicity is a genuine advantage. There is nothing extra to configure, no panels to accidentally close or resize, no extension system to navigate. Your cognitive load is entirely on learning Python and data science — not on learning an IDE. Start with classic Jupyter Notebook and migrate to JupyterLab once you feel comfortable with notebooks themselves.
5.2 You Are Running a Focused, Single-File Analysis
For a self-contained analysis that lives in one notebook file — exploratory work on a single dataset, a report for a client, a homework assignment — the classic interface’s focused, single-document view is not a limitation. It is a feature. The absence of other panels means your attention stays entirely on the analysis.
5.3 Teaching or Presenting to an Audience
When projecting your screen in a lecture, workshop, or presentation, the classic Jupyter Notebook interface is visually cleaner and less distracting. Students can focus on the code and output without sidebar panels and tab bars drawing their eyes away.
5.4 Low-Resource Environments
JupyterLab is a more complex web application with higher memory and CPU requirements than the classic interface. On older computers, shared servers with limited resources, or in Binder environments where resources are constrained, the classic interface runs more smoothly.
5.5 You Need Specific nbextensions
Some classic Jupyter Notebook extensions do not have exact JupyterLab equivalents. If you rely on specific nbextensions for your workflow, you may need to stay on the classic interface until those extensions are available for JupyterLab.
6. When to Use JupyterLab
JupyterLab’s additional complexity pays off clearly in these situations:
6.1 You Work with Multiple Files Simultaneously
If your workflow regularly involves comparing two notebooks, referencing a data dictionary CSV while writing analysis code, editing a utility script while testing it in a notebook, or monitoring a training run in a terminal while updating a results notebook — JupyterLab’s multi-panel workspace is transformative. The ability to see everything at once eliminates constant window switching.
6.2 You Do Regular Python Scripting Alongside Notebooks
Many real data science projects involve a mix of .ipynb notebooks for exploration and .py scripts for reusable functions, pipelines, and production code. JupyterLab’s integrated text editor makes it natural to work on both in the same environment — edit a utility function in utils.py, switch to the notebook, %run utils.py, and test the result, all without leaving JupyterLab.
6.3 You Want Git Integration Without Switching to a Terminal
The jupyterlab-git extension makes version control feel like a natural part of the data science environment rather than a separate discipline. Seeing file diffs, staging changes, and committing directly in JupyterLab reduces the friction of maintaining good version control habits.
6.4 You Work on Long, Complex Notebooks
For notebooks with many sections — 50+ cells, multiple analysis phases, detailed documentation — the built-in Table of Contents sidebar becomes essential for navigation. Jumping directly to any section by clicking its heading saves enormous time compared to scrolling.
6.5 You Are Building a Professional Data Science Practice
JupyterLab is the interface that professional data scientists use at companies like Netflix, Airbnb, and Spotify. If you are building skills for a career in data science, learning JupyterLab prepares you for the professional environment you will encounter. The investment in learning the interface pays back quickly.
6.6 You Want Dark Mode and Custom Themes
JupyterLab supports multiple themes including a dark mode that many developers prefer for extended coding sessions. Classic Jupyter Notebook has limited theming support.
7. Side-by-Side Workflow Comparison
Let us walk through a realistic data science task in both interfaces to illustrate the practical difference.
Task: Load a CSV file, explore it, write a cleaning function to a utility script, and test the cleaned data.
In Classic Jupyter Notebook:
1. Open terminal (separate window) → navigate to project folder → jupyter notebook
2. Dashboard opens in browser tab
3. Create new notebook
4. In notebook cell 1: import pandas as pd
5. In notebook cell 2: df = pd.read_csv('data.csv') → run → see DataFrame
6. Switch to terminal window → open text editor for utils.py
7. Write cleaning function in utils.py, save
8. Switch back to browser → in notebook: %run utils.py → test
9. Switch back to terminal to check file structure
10. Back to browser for more analysisWindow switching count: 5–8 switches between browser, terminal, and text editor.
In JupyterLab:
1. jupyter lab in terminal (which you then minimize)
2. JupyterLab opens in browser
3. Left sidebar file browser: double-click to open data.csv preview on the right
4. File → New → Notebook → analysis.ipynb opens on the left
5. Left sidebar: double-click utils.py → opens in text editor in a new tab
6. Arrange: notebook left panel, CSV preview right-top, utils.py right-bottom
7. Write and test code — everything visible simultaneously
8. File → New → Terminal → verify files, run commands
9. Everything in one browser window, no switching neededWindow switching count: 0 — everything is in one browser window.
8. Installing and Launching Both
Installation
Both are typically installed together with Anaconda. If you need to install separately:
# Install Jupyter Notebook (classic)
pip install notebook

# Install JupyterLab
pip install jupyterlab

# Install both (plus useful extensions)
pip install notebook jupyterlab jupyterlab-git jupyter-resource-usageLaunching
# Launch classic Jupyter Notebook
jupyter notebook

# Launch JupyterLab
jupyter lab

# Launch on a specific port (useful if default 8888 is taken)
jupyter lab --port=8889

# Launch without opening a browser (for remote servers)
jupyter lab --no-browser

# Launch at a specific directory
jupyter lab /path/to/projectSetting a Default Interface
If you consistently prefer one interface, you can set it as the default for notebook files:
# Make JupyterLab the default when double-clicking .ipynb files
# (varies by OS — on Mac, use 'Get Info' → 'Open With')

# Or configure via jupyter config
jupyter notebook --generate-config
# Edit ~/.jupyter/jupyter_notebook_config.py
# Add: c.NotebookApp.default_url = '/lab' (for JupyterLab)Switching Between Interfaces
You can switch between the classic interface and JupyterLab while running by changing the URL:
# If JupyterLab is running at:
http://localhost:8888/lab

# Switch to classic Notebook by changing /lab to /tree:
http://localhost:8888/tree

# And back to JupyterLab:
http://localhost:8888/labThis means you are never locked into one interface — you can open the same notebook in either interface at any time.
9. Getting Started with JupyterLab: The First 15 Minutes
If you decide to start with JupyterLab, here is a guided first session to get you oriented quickly:
Step 1: Explore the Left Sidebar Icons
The left sidebar has five key icons (from top to bottom in a typical installation):
- 📁 File Browser: Navigate your file system
- ⌚ Running Sessions: See active kernels and terminals
- 🔍 Table of Contents: Navigate by headings (when a notebook is open)
- 🧩 Extension Manager: Browse and install extensions
- 🔧 Settings: Quick access to preferences
Step 2: Open a Notebook and a Terminal Side by Side
1. Click 📁 to open the File Browser
2. Navigate to your project folder
3. Double-click a .ipynb file to open it (or File → New → Notebook)
4. File → New → Terminal
5. Drag the Terminal tab to the right panel to create a split view
6. You now have notebook + terminal side by sideStep 3: Customize the Layout
Right-click any tab → "New View for Notebook"  (open a second view of the same file)
Drag any tab to the bottom panel               (create a horizontal split)
View → Single-Document Mode (simplify to one-document focus)Step 4: Install Essential Extensions
# In the integrated terminal:
pip install jupyterlab-git
pip install jupyter-resource-usage
pip install lckr-jupyterlab-variableinspector

# Restart JupyterLab after installation
# Extensions appear in the sidebar automaticallyStep 5: Configure Settings
Settings → Settings Editor → Keyboard Shortcuts   (customize shortcuts)
Settings → Theme → JupyterLab Dark               (enable dark mode)
Settings → Settings Editor → Notebook → Code Cell Configuration10. A Note on VS Code and Other Alternatives
No comparison of Jupyter interfaces would be complete without acknowledging that many professional data scientists use neither the classic interface nor JupyterLab directly — they use VS Code with the Jupyter extension.
VS Code offers:
- Full Jupyter notebook support (
.ipynbfiles run natively) - Superior code intelligence (IntelliSense, linting, type checking)
- Integrated debugger with breakpoints
- Native Git integration
- A massive extension ecosystem
- Better performance on large files
- Seamless switching between notebooks and Python scripts
If you are already comfortable with VS Code, the Jupyter extension is worth exploring. However, for most beginners and for many experienced data scientists, Jupyter interfaces remain the gold standard for interactive analysis, especially because:
- They run in a browser — accessible from any machine, including remote servers
- The output rendering (especially for visualizations) is more consistent
- Cloud platforms like Google Colab, Kaggle, and AWS SageMaker use the Jupyter interface
- Many data science courses and tutorials assume the Jupyter environment
Conclusion: Start Simple, Graduate When Ready
The honest answer to “JupyterLab vs Jupyter Notebook: which should you use?” is: start with whichever feels comfortable, and migrate when the limitations of the simpler one start costing you time.
For most beginners, the classic Jupyter Notebook interface is the right starting point. Its simplicity removes one layer of complexity from the already challenging process of learning Python and data science. Once you have spent a few weeks working comfortably in the classic interface — running cells fluently, using keyboard shortcuts, writing Markdown documentation — the upgrade to JupyterLab becomes intuitive and immediately rewarding.
The key insight is that the two interfaces are not competing tools — they are the same tool with different workspaces. Your notebooks, kernels, and extensions all work in both. There is no data to migrate, no files to convert. You can use the classic interface today and JupyterLab tomorrow for the same project, and everything will work.
When you find yourself constantly switching between browser tabs to compare notebooks, or switching between your browser and a text editor to work on utility scripts, or wishing you could see a terminal and your notebook at the same time — that is the signal to switch to JupyterLab. At that point, its additional complexity will feel not like an obstacle but like exactly the workspace you needed.
In the next article, you will explore Google Colab — a cloud-based Jupyter environment that lets you run notebooks on powerful hardware without any local installation.
Key Takeaways
- Both JupyterLab and Jupyter Notebook use the same
.ipynbfile format, the same kernels, and the same magic commands — the difference is entirely in the interface and surrounding tools. - Classic Jupyter Notebook is simpler, faster to learn, and better suited for beginners, focused single-file analyses, and teaching environments.
- JupyterLab is a full IDE-like workspace with multi-panel layouts, an integrated terminal, file browser with previews, a text editor, built-in Table of Contents, and a modern extension ecosystem.
- You can switch between the two interfaces by changing the URL path from
/tree(classic) to/lab(JupyterLab) without any file changes or conversions. - The multi-panel workspace is JupyterLab’s killer feature — seeing a notebook, CSV preview, and terminal simultaneously eliminates constant window switching.
- The
jupyterlab-gitextension adds Git integration directly to the sidebar, making version control a natural part of the data science workflow. - JupyterLab’s Table of Contents sidebar makes navigation of long notebooks (50+ cells) dramatically easier with clickable heading links.
- The signal to migrate from classic Jupyter to JupyterLab is when you find yourself constantly switching windows to compare files, run terminal commands, or edit utility scripts.
- VS Code with the Jupyter extension is a third viable option that offers superior code intelligence and debugging but requires more configuration.
- Project Jupyter officially recommends JupyterLab as the primary interface for new users, but the classic interface is still actively maintained and widely used.