Firmware is the specialized software embedded in your 3D printer’s microcontroller that serves as the printer’s operating system, translating G-code commands from sliced files into precise hardware actions. It controls stepper motor movements, regulates temperatures through PID algorithms, manages safety features like thermal runaway protection, handles user interface operations, coordinates timing for all printer functions, and provides the essential bridge between the digital instructions in your print file and the physical movements that create your objects.
Introduction
If hardware represents your 3D printer’s body, firmware is unquestionably its brain. This invisible software layer running on the printer’s microcontroller makes the difference between a collection of motors, heaters, and sensors and a functioning additive manufacturing machine. Without firmware, your printer is just an expensive pile of parts that does nothing. With firmware, those same parts coordinate perfectly to transform digital designs into physical objects.
Yet firmware remains mysterious to many users. Unlike the slicer software you interact with directly or the physical components you can see and touch, firmware operates silently in the background. Most users never think about it until something goes wrong or they want to enable a new feature. The firmware’s complexity—thousands of lines of code managing real-time operations, safety systems, and precise coordination—intimidates beginners who assume they can’t possibly understand it.
This perception does firmware a disservice. While you don’t need to become a programmer to use your printer effectively, understanding what firmware does, how it works, and why certain settings matter transforms you from a passive operator to an informed user. You’ll understand why temperature fluctuations occur, what happens when you adjust acceleration settings, how safety features protect your printer, and when firmware updates might solve problems or enable new capabilities.
In this comprehensive guide, we’ll demystify 3D printer firmware, examining its core functions, exploring popular firmware options, understanding configuration and customization, and learning how firmware choices affect printing performance and capabilities.
The Core Functions of Firmware
Firmware handles dozens of critical tasks simultaneously, but several core functions define its essential role:
G-Code Interpretation and Execution
Your slicer software generates G-code files—text files containing thousands of individual commands that describe every movement and action needed to create your print. The firmware reads these commands sequentially and executes them.
A typical G-code line might read: G1 X50 Y30 E0.5 F3000
This command tells the printer to move in a straight line (G1) to X position 50mm and Y position 30mm while extruding 0.5mm of filament at a feed rate of 3000mm/min. The firmware must:
- Parse this text command to extract the movement parameters
- Calculate the required motor movements to achieve these positions
- Coordinate multiple motors to move simultaneously in the correct ratio (diagonal movement requires both X and Y motors moving together)
- Control the extruder motor at the correct rate relative to the movement speed
- Respect acceleration and jerk limits to prevent mechanical stress
- Execute the movement while simultaneously monitoring temperatures, checking for errors, and preparing to execute the next command
This happens for every single G-code line—potentially hundreds of thousands in a single print file. The firmware must process commands fast enough that the printer never pauses waiting for the next instruction, maintaining smooth continuous motion.
Motion Control and Kinematics
The firmware contains the mathematical algorithms that convert requested positions into specific motor movements. This involves sophisticated calculations:
Cartesian kinematics (most common in consumer printers) requires relatively straightforward math—X, Y, and Z motor movements correspond directly to X, Y, and Z position changes. However, the firmware must still calculate:
- The number of steps each motor must take to reach the target position
- The acceleration profile to reach desired speed smoothly
- Coordinated multi-axis movement so all axes arrive at the destination simultaneously
- Speed limits for each axis
- Deceleration timing to stop precisely at the target
CoreXY kinematics complicates this significantly. Both X and Y motors must work together for any movement—moving in X requires both motors turning in the same direction, while Y movement requires them turning opposite directions. The firmware calculates the correct motor commands to achieve the desired head position.
Delta kinematics involves even more complex trigonometry. The three vertical arms must calculate coordinated movements that position the suspended hotend at the correct XYZ coordinates. The math involves inverse kinematics calculations happening in real-time for every movement.
The firmware also implements motion planning algorithms that smooth movements, prevent excessive jerk, and optimize acceleration and deceleration to maintain quality while maximizing speed.
Temperature Control and Regulation
Maintaining stable temperatures at both hotend and heated bed requires constant attention from the firmware:
PID Control: The firmware implements PID (Proportional-Integral-Derivative) control algorithms for temperature regulation. These algorithms continuously compare current temperature (from thermistor readings) to target temperature and adjust heater power accordingly.
The PID controller evaluates:
- Proportional: How far is the current temperature from target? Apply more power for larger differences.
- Integral: Is there a persistent offset? Gradually adjust baseline power to eliminate it.
- Derivative: Is temperature changing rapidly? Adjust power proactively to prevent overshoot.
The firmware calculates new heater power levels many times per second (typically 10-20 Hz), maintaining temperatures within ±2°C of targets despite constantly introducing cool filament and exposing the hotend to cooling airflow.
Multi-Zone Management: The firmware manages multiple independent temperature zones—typically one for the hotend and one for the heated bed, sometimes more for multi-extruder systems or multi-zone beds. Each zone has its own PID controller, thermistor input, and heater output.
Temperature Monitoring: Beyond just control, firmware continuously monitors temperatures for anomalies. It detects:
- Thermistor failures (readings outside possible physical ranges)
- Heating failures (temperature not rising when heater activates)
- Thermal runaway (temperature exceeds target by excessive amounts)
- Cooling failures (temperature not dropping when heater deactivates)
These safety functions prevent fires, component damage, and print failures.
Safety and Error Detection
Firmware implements critical safety features that protect both the printer and the user:
Thermal Runaway Protection: If a thermistor disconnects or fails, the firmware might read normal temperatures while the heater runs uncontrolled, potentially reaching dangerous temperatures. Thermal runaway protection monitors whether temperatures respond correctly to heating commands. If the hotend heater activates but temperature doesn’t rise appropriately within a specified timeframe, the firmware triggers an emergency shutdown.
Similarly, if temperature exceeds the target by more than an allowed amount, indicating loss of control, the firmware cuts power immediately.
Endstop Monitoring: When homing axes, the firmware expects to trigger endstop switches within reasonable distances. If an axis moves the maximum expected distance without triggering its endstop, something is wrong—perhaps a disconnected switch or mechanical blockage. The firmware halts operation to prevent damage.
Min/Max Temperature Limits: The firmware enforces minimum and maximum temperature limits for both hotend and bed. You cannot command temperatures outside safe ranges defined in the configuration, preventing user errors that might damage components.
Movement Boundary Enforcement: The firmware knows the printer’s build volume and prevents commanded movements outside these boundaries. This protects against crashing the hotend into frame components or dragging the bed beyond its travel limits.
Power Loss Detection: Advanced firmware can detect power failures and save the current state to non-volatile memory. When power returns, the printer can resume from where it stopped, preventing complete print loss from power interruptions.
User Interface Management
The firmware manages all user interactions through the printer’s interface:
LCD Display: The firmware updates the display with current temperatures, print progress, menu systems, and status information. It refreshes the display continuously while simultaneously managing all other printer functions.
Encoder/Button Input: When you rotate an encoder knob or press buttons, the firmware detects these inputs, navigates menu systems, adjusts values, and triggers actions accordingly.
Menu Systems: The firmware provides menu structures for changing settings, initiating functions (heating, moving axes, loading filament), and accessing information. Well-designed firmware creates intuitive, responsive menus that make the printer accessible.
Status Reporting: During printing, the firmware calculates and displays useful information—print progress percentage, estimated time remaining, current layer, temperatures, and fan speeds.
Communication Handling
Firmware manages communication with external devices:
USB/Serial Communication: When connected to a computer, the firmware receives G-code commands over USB, executes them, and sends acknowledgments and status updates back. This bidirectional communication must happen reliably without interfering with ongoing print operations.
SD Card Management: The firmware reads G-code files from SD cards, allowing untethered printing without a connected computer. It manages file systems, lists available files, and streams G-code from the card during printing.
Network Communication: WiFi-enabled printers use firmware to manage network connections, receive commands over the network, and provide remote monitoring and control capabilities.
Protocol Implementation: The firmware implements communication protocols (like the Marlin protocol) that define command formats, response structures, and error handling. External software relies on these protocols to interact with the printer reliably.
Popular Firmware Options
Several firmware projects dominate the 3D printing landscape, each with different philosophies and capabilities:
Marlin Firmware
Marlin represents the most popular 3D printer firmware, running on the majority of consumer printers worldwide.
Architecture: Marlin runs directly on the printer’s mainboard microcontroller (typically ARM processors like the STM32 family or older AVR chips). It’s written in C++ and designed for real-time operation on resource-constrained hardware.
Strengths:
- Mature, extensively tested codebase with years of development
- Enormous user community providing support and documentation
- Compatible with vast range of hardware configurations
- Regular updates adding features and improvements
- Excellent safety features and thermal runaway protection
- Relatively straightforward configuration process
Configuration: Marlin uses configuration files (Configuration.h and Configuration_adv.h) that require editing and recompiling when making changes. This approach provides complete control but requires more technical knowledge than firmware with runtime configuration.
Performance: Marlin performs well for most applications, though it can struggle with extremely high speeds or complex motion planning on lower-powered 8-bit boards. The move to 32-bit boards has largely eliminated performance concerns.
Best For: General users, budget printers, users wanting proven reliability, those with standard printer configurations.
Klipper Firmware
Klipper takes a unique architectural approach that differentiates it from traditional firmware:
Architecture: Klipper splits processing between the printer’s microcontroller and a separate computer (typically a Raspberry Pi). The microcontroller handles real-time operations (motor stepping, temperature reading), while the more powerful external computer handles complex calculations, motion planning, and user interface.
Strengths:
- Exceptional motion control allowing very high print speeds
- Advanced features like input shaping to eliminate ringing artifacts
- Pressure advance implementation that excels with fast direction changes
- Runtime configuration—no need to recompile firmware for setting changes
- Superior motion planning compared to traditional firmware
- Excellent for very fast printing and high-acceleration applications
Requirements: Klipper needs an external computer (Raspberry Pi or similar) constantly connected to the printer. This adds cost and complexity compared to standalone firmware.
Configuration: Klipper uses text-based configuration files that update at runtime. Changes take effect after restarting the Klipper service without recompiling firmware. This makes configuration more accessible for non-programmers.
Performance: Klipper delivers superior performance in speed-oriented applications. The external computer’s processing power enables motion planning algorithms that would overwhelm the printer’s microcontroller.
Best For: Advanced users, speed-focused printing, users wanting cutting-edge features, those with Raspberry Pi already integrated, custom printer builds.
RepRapFirmware (RRF)
RepRapFirmware, developed primarily for Duet control boards, offers another sophisticated option:
Architecture: Designed specifically for more powerful 32-bit ARM processors, RRF takes full advantage of modern hardware capabilities.
Strengths:
- Exceptional web interface for control and monitoring
- Sophisticated motion planning and control algorithms
- Excellent networking capabilities
- Macro support for complex automated procedures
- Runtime configuration like Klipper
- Outstanding documentation and configuration tools
Hardware Dependency: RRF works best with Duet boards, which cost more than budget alternatives but provide integrated networking, superior processing power, and excellent expansion capabilities.
Configuration: Uses text-based configuration files (config.g and related files) with a macro language for automation. Very powerful but requires learning the RRF configuration syntax.
Best For: Users with Duet boards, those wanting excellent web control, networked printer farms, advanced users seeking sophisticated features.
Other Firmware Options
Several other firmware projects serve specific niches:
Smoothieware: Popular in CNC and laser cutter applications, also used in some 3D printers. Runs on 32-bit Smoothieboard controllers.
Repetier: Less common in modern printers but still maintained. Known for its server/host software that runs on external computers.
Sailfish: Specialized firmware for Makerbot and some other specific printer brands.
MK4duo: Fork of Marlin supporting more exotic configurations, particularly multi-extruder systems.
Firmware Configuration and Customization
Understanding firmware configuration helps you optimize your printer:
Essential Configuration Parameters
Regardless of firmware type, certain settings require correct configuration:
Steps per Millimeter: Defines how many motor steps move each axis one millimeter. Incorrect values cause dimensional inaccuracy. These depend on pulley sizes, lead screw pitch, and microstepping settings.
Build Volume: Maximum X, Y, and Z travel distances. Prevents the firmware from allowing movements outside the printer’s physical capabilities.
Temperature Settings:
- Thermistor type for hotend and bed
- PID tuning values for stable temperature control
- Maximum safe temperatures
- Minimum temperatures before allowing extrusion
Homing Configuration:
- Endstop positions (which end of each axis has switches)
- Homing direction
- Homing speeds
- Offset distances from endstops to printable area
Acceleration and Jerk Limits: Maximum acceleration rates and jerk (instantaneous speed changes) for each axis. These affect print speed and quality—too high causes artifacts and mechanical stress, too low limits printing speed unnecessarily.
Extruder Settings:
- Steps per millimeter for the extruder motor
- Maximum extrusion speed
- Maximum single-extrusion distance (prevents accidental massive extrusions from misconfigured software)
PID Tuning Process
PID tuning optimizes temperature control for your specific hardware:
Why Tune: Each printer has unique thermal characteristics—different heaters, thermistors, heat sinks, and cooling configurations respond differently. Generic PID values work but aren’t optimal.
Auto-Tune Procedure:
- Heat the hotend or bed to typical printing temperature
- Run the PID autotune command (M303 in Marlin)
- The firmware cycles the heater on and off, measuring temperature responses
- It calculates optimal P, I, and D values based on these measurements
- Store the new values in firmware configuration or EEPROM
Results: Properly tuned PID values maintain rock-steady temperatures, minimizing overshoot during heating and oscillation during printing. This improves print quality and reduces heater cycling wear.
Enabling and Disabling Features
Firmware contains many optional features that can be enabled or disabled:
Safety Features: Thermal runaway protection, minimum temperature enforcement, endstop checking. These should remain enabled except in very specific circumstances.
Advanced Motion Features:
- Linear/pressure advance for better corner quality
- Junction deviation for smoother motion
- S-curve acceleration for reduced vibration
- Input shaping (Klipper) for ringing elimination
Hardware Features:
- Auto bed leveling (various probe types)
- Filament runout sensors
- Power loss recovery
- Multi-color/multi-material support
User Interface Enhancements:
- Custom boot screens
- Additional menu items
- Status screen customization
Enabling features uses firmware storage and processing resources. Enable only features your hardware supports and you’ll actually use.
EEPROM Settings
Many firmware versions allow storing settings in EEPROM (non-volatile memory on the microcontroller):
Advantages: Settings persist through power cycles and firmware updates. You can adjust values without recompiling firmware.
Accessible Settings: Steps/mm, acceleration, jerk, PID values, probe offsets, and many other parameters can be stored in EEPROM and adjusted via G-code commands or menu systems.
Management: Commands like M500 (save to EEPROM), M501 (load from EEPROM), and M502 (load defaults) manage stored settings.
Caution: Corrupted EEPROM can cause mysterious problems. Know how to reset to defaults if issues arise.
How Firmware Affects Print Quality
Firmware settings and algorithms directly impact the quality of your prints:
Motion Planning and Smoothness
The firmware’s motion planning algorithm determines how smoothly the print head moves:
Look-Ahead Planning: Modern firmware looks ahead several G-code commands to plan smooth velocity profiles. This prevents harsh acceleration/deceleration cycles at every direction change, maintaining higher average speeds while producing smoother results.
Jerk Handling: Jerk settings control instantaneous velocity changes. Higher jerk allows faster direction changes but can cause ringing artifacts as the printer’s frame vibrates. Lower jerk produces smoother motion but reduces speed.
S-Curve Acceleration: Instead of linear acceleration (velocity increasing at a constant rate), s-curve smoothly ramps acceleration up and down. This reduces mechanical stress and vibration, improving quality on printers with less rigid frames.
Temperature Stability
Temperature fluctuations directly affect extrusion consistency:
Tight PID Control: Well-tuned PID keeps temperatures steady within ±2°C. This ensures consistent plastic viscosity, producing even extrusion and good layer adhesion.
Poor Temperature Control: Oscillating temperatures cause visible defects—over-extrusion when too hot, under-extrusion when too cool, rough surfaces from inconsistent flow.
The firmware’s PID implementation quality and tuning determine whether temperatures remain stable or oscillate.
Feature Support
Advanced firmware features can dramatically improve results:
Linear/Pressure Advance: Compensates for pressure dynamics in the hotend, improving corner quality and reducing oozing. Firmware implementation quality affects how well this works.
Input Shaping (Klipper): Actively cancels mechanical resonances that cause ringing artifacts. This allows much higher accelerations without quality degradation.
Arc Movement (G2/G3): Some firmware supports circular interpolation, allowing smoother curves than approximating them with many tiny straight-line segments.
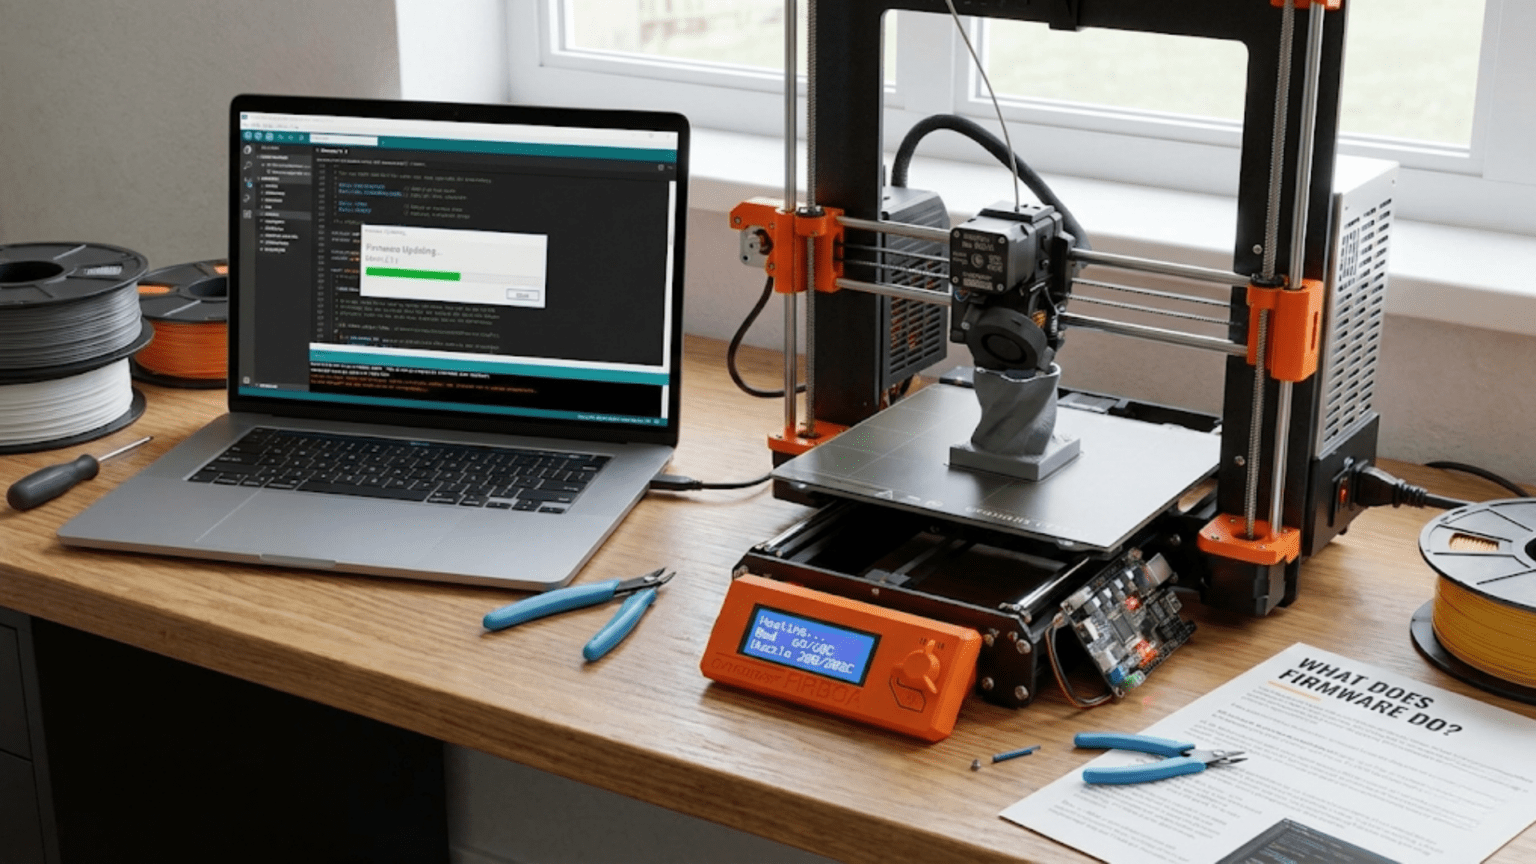
Firmware Updates and Maintenance
Keeping firmware current provides benefits:
When to Update
New Features: Updates add capabilities—new probe types, improved algorithms, better user interfaces. Update when you want access to these features.
Bug Fixes: Updates address discovered bugs. If you’re experiencing specific issues that update notes mention fixing, updating may resolve them.
Hardware Changes: Adding new components (different probe, second extruder, etc.) often requires firmware updates to support them.
Security: For networked printers, updates may address security vulnerabilities.
Update Process
The process varies by firmware type:
Marlin:
- Download latest source code
- Update configuration files with your settings (or merge changes if updating from previous version)
- Compile firmware using Arduino IDE or PlatformIO
- Upload compiled firmware to printer via USB
Klipper:
- SSH into Raspberry Pi
- Pull latest Klipper code from repository
- Recompile and flash to microcontroller
- Restart Klipper service
RepRapFirmware:
- Download firmware file
- Upload via web interface
- Install through interface
Backup Before Updating
Always backup current configuration before updating:
- Save EEPROM settings (M503 command outputs current settings)
- Copy configuration files
- Document any custom modifications
- Note current firmware version
If the update causes problems, you can revert to the known-working version.
Post-Update Verification
After updating, verify operation:
- Test homing on all axes
- Verify temperature control functions correctly
- Check that endstops trigger appropriately
- Run a small test print
- Verify dimensions match expectations
Firmware Troubleshooting Guide
| Problem | Possible Firmware Causes | Solutions |
|---|---|---|
| Temperature Oscillation | Poor PID tuning | Run PID autotune, save new values |
| Skipped Steps | Acceleration too high, current too low | Reduce acceleration, increase driver current |
| Layer Shifts | Firmware protection triggering, memory overflow | Check for error messages, update firmware, reduce complexity |
| Printer Won’t Home | Endstop configuration incorrect | Verify endstop type and logic in config |
| Thermal Runaway Error | PID control issues, actual thermal problem | Check connections, tune PID, verify heater/thermistor |
| Dimensional Inaccuracy | Steps/mm incorrect | Calibrate steps per mm empirically |
| Jerky Motion | Jerk settings too low, motion planning issues | Increase jerk cautiously, enable s-curve |
| Communication Errors | Baud rate mismatch, buffer overflow | Verify communication settings, reduce command frequency |
Advanced Firmware Concepts
For those seeking deeper understanding:
Real-Time Operating System (RTOS) Considerations
Some modern firmware (particularly RRF) uses RTOS principles:
Task Scheduling: Multiple concurrent tasks (temperature control, motion execution, communication handling) run with defined priorities and time allocations.
Interrupt Handling: Critical operations (stepper pulses, temperature readings) occur via interrupts that preempt normal processing for precise timing.
Resource Management: Memory, processing time, and peripheral access must be managed carefully to prevent conflicts and ensure real-time responsiveness.
Motion Planning Algorithms
The mathematics behind motion planning involves sophisticated algorithms:
Trapezoidal Motion Profiles: Traditional approach where velocity ramps up linearly (acceleration phase), maintains constant speed (cruise phase), then ramps down (deceleration phase). Simple to compute but can cause jerky motion.
Look-Ahead Planning: Analyzes upcoming movements to plan optimal velocity profiles. Can slow down before tight corners while maintaining speed through gentle curves.
Junction Deviation: Calculates how much speed can be maintained through direction changes based on the angle change and acceleration capabilities.
Buffer Management
Firmware maintains buffers of upcoming G-code commands:
Command Buffer: Holds parsed G-code commands waiting for execution. Prevents printer from running out of commands and pausing.
Motion Planning Buffer: Contains several upcoming movements for look-ahead planning algorithms to analyze.
Buffer Underruns: If the computer/SD card can’t supply commands fast enough, the buffer empties and the printer pauses briefly. This appears as hesitation or surface artifacts.
Conclusion
Firmware represents the invisible intelligence that transforms mechanical components into a coordinated 3D printing system. While you can use your printer successfully without deep firmware knowledge, understanding what happens inside that microcontroller helps you optimize performance, diagnose problems, and make informed decisions about configuration and upgrades.
The firmware interprets your digital designs, plans precise movements, maintains stable temperatures, protects against dangerous failures, and coordinates thousands of operations simultaneously—all while remaining invisible to the user during normal operation. This software layer handles complexities that would be impossible to manage manually, making accessible 3D printing possible.
Different firmware options—Marlin’s proven reliability, Klipper’s cutting-edge performance, RepRapFirmware’s sophisticated networking—serve different needs and preferences. Understanding their characteristics helps you choose the best option for your specific situation or appreciate what your current firmware provides.
Whether you stick with factory firmware settings or dive deep into configuration optimization, recognizing firmware’s role transforms your relationship with your printer. Problems become diagnosable rather than mysterious. Performance tuning becomes possible rather than random. Updates become opportunities rather than risks.
The firmware might be invisible, but its impact on every print you create is undeniable. It’s the brain that brings your printer to life, the intelligence that ensures safety, and the coordinator that turns digital imagination into physical reality. Understanding it, even at a basic level, makes you a more capable, more confident, and more successful 3D printing practitioner.