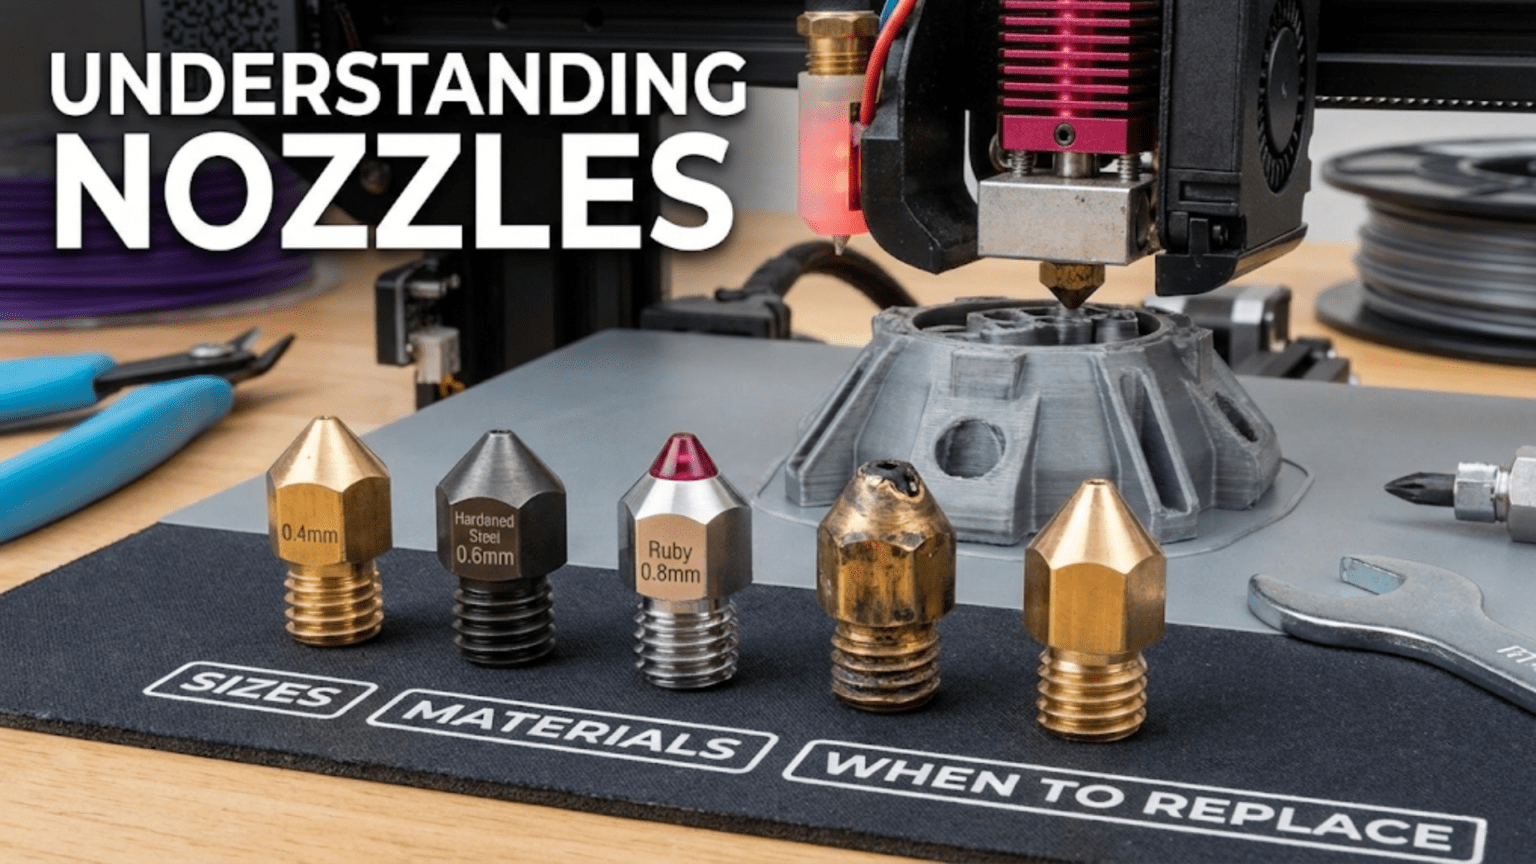
The nozzle is the final component in the hotend where molten plastic exits through a precision orifice to form printed layers, with its size, material, and geometry profoundly affecting print quality, speed, and material compatibility. Common nozzle sizes range from 0.2mm for fine details to 1.0mm+ for rapid large prints, while materials include brass (standard, excellent thermal conductivity), hardened steel (abrasion-resistant for filled filaments), stainless steel (moderate wear resistance), and ruby-tipped designs (maximum durability), with replacement necessary when clogs persist, print quality degrades, or visible wear appears.
Introduction
At the very tip of your 3D printer’s hotend, where molten plastic meets air and begins its transformation into solid form, sits one of the smallest yet most critical components in the entire machine: the nozzle. This tiny brass cone with its precisely machined orifice determines how much plastic flows, how fine your details can be, how fast you can print, and whether abrasive materials will work at all.
For such a small, inexpensive component, nozzles have an outsized impact on printing results. A 0.4mm nozzle and a 0.6mm nozzle might look nearly identical to the naked eye, but they create entirely different printing experiences. A brass nozzle and a hardened steel nozzle might appear the same externally, yet one wears out in hours with carbon fiber filament while the other lasts indefinitely.
Many beginners never think about nozzles beyond the one that came installed. They might struggle with prints that should be simple, never realizing a partially worn or clogged nozzle causes their problems. Or they might attempt detailed miniatures with a 0.4mm nozzle when a 0.2mm nozzle would make everything easier. Understanding nozzles—their sizes, materials, geometries, and when they need replacement—unlocks printing capabilities you might not know you were missing.
In this comprehensive guide, we’ll examine every aspect of 3D printer nozzles, from the physics of plastic flow through tiny orifices to the metallurgy of wear-resistant materials. You’ll learn how to choose the right nozzle for your needs, recognize when replacement is necessary, and optimize your nozzle selection for different applications.
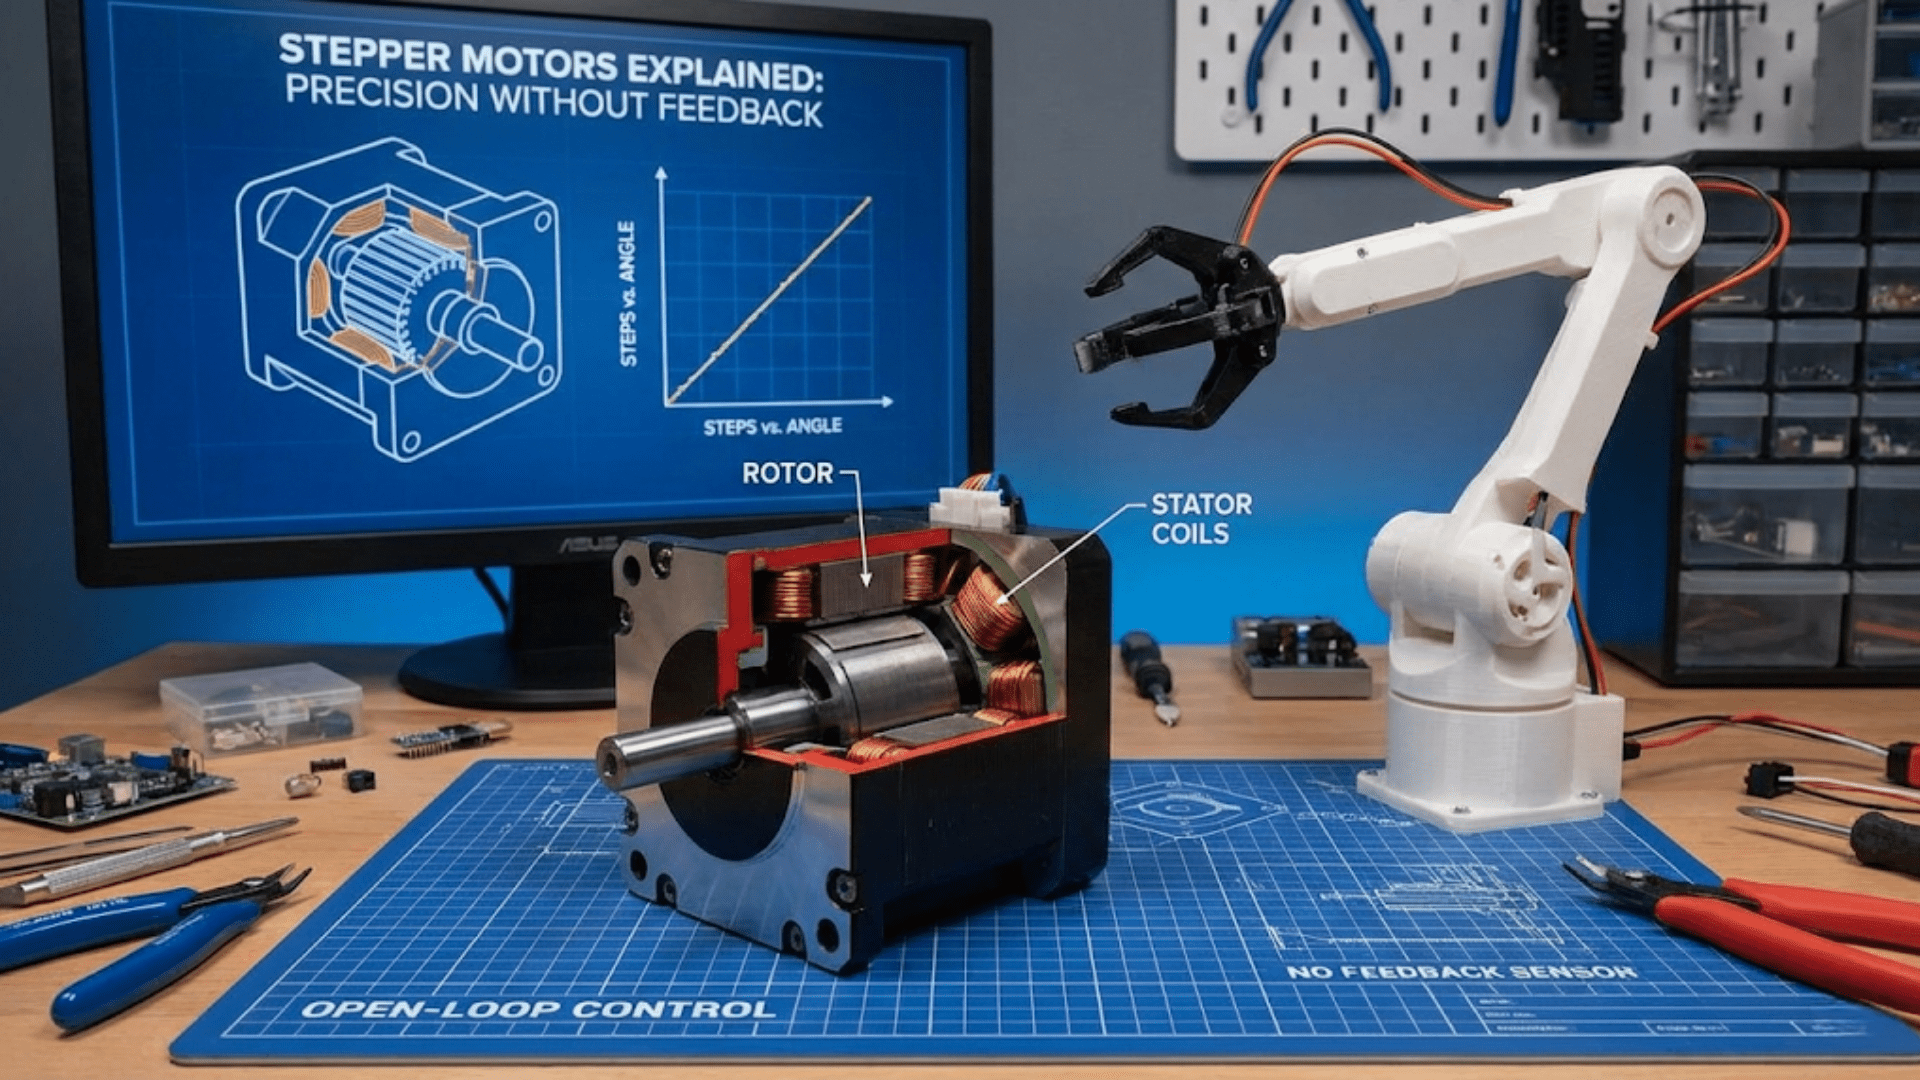
Nozzle Anatomy and Function
Understanding nozzle structure reveals how this simple component performs its critical function:
External Geometry
Threaded Connection: The nozzle’s upper portion features threads (commonly M6, sometimes M7) that screw into the heater block. These threads must seal properly to prevent plastic leaking from the junction.
Hex Flats: Most nozzles include a hexagonal section for wrench engagement during installation and removal. Common sizes are 6mm or 7mm across flats.
Cone Angle: The exterior tapers from the hex section down to the tip. This cone angle affects how close the nozzle can get to previously printed features—a steeper angle allows printing more aggressive overhangs before the nozzle body interferes.
Overall Length: Nozzle length must match the heater block design. Standard nozzles work with regular heater blocks, while Volcano nozzles extend longer to accommodate Volcano heater blocks.
Internal Passage
Entry Bore: The upper section has a bore diameter matching the filament size (1.75mm or 2.85mm typically). This section allows molten plastic to enter from the heat break above.
Transition Zone: The internal passage transitions from the entry bore down to the orifice. This transition geometry affects flow resistance and pressure drop through the nozzle.
Orifice: The smallest diameter section where plastic exits. This precisely machined opening defines the extrusion width and is the nozzle’s defining characteristic.
Surface Finish: The internal surfaces should be smooth. Rough spots or machining marks can cause flow inconsistencies or create opportunities for material to stick and accumulate.
The Melt Chamber
The space where the nozzle seats against the heat break creates the melt chamber:
Sealing Surface: The nozzle’s internal shoulder seats against the heat break’s lower end, creating a sealed chamber where the plastic melts fully before extrusion.
Chamber Volume: The melt chamber volume affects flow capacity and material dwell time at temperature. Larger chambers support higher flow rates but increase the time plastic spends at elevated temperature.
Thermal Mass: The nozzle’s mass contributes to the overall thermal mass of the melt zone, affecting temperature stability and recovery during high-flow printing.
Nozzle Sizes and Their Applications
Orifice diameter profoundly affects printing characteristics:
Standard 0.4mm Nozzles
The default choice for most printers balances versatility with performance:
Detail Capability: Can produce reasonably fine features. Minimum wall thickness around 0.4-0.5mm. Fine text and small details are possible though not optimal.
Print Speed: Moderate extrusion rates allow decent print speeds without requiring excessive hotend temperatures.
Layer Height Range: Works well with layer heights from 0.12mm to 0.28mm, covering most common applications.
Strength: Provides adequate layer bonding and part strength for general use.
Best For:
- General-purpose printing
- Learning and experimentation
- Mixed use across different model types
- When you’re unsure what you need
Fine Detail: 0.2mm and 0.3mm Nozzles
Smaller orifices enable exceptional detail:
0.2mm Nozzles:
- Minimum feature size around 0.2mm
- Excellent for miniatures, detailed models, fine text
- Very slow printing—half the speed of 0.4mm or slower
- Requires very well-tuned extruder and hotend
- More prone to clogs
- Layer heights typically 0.06-0.15mm
0.3mm Nozzles:
- Good compromise between detail and speed
- Finer than 0.4mm but not as slow as 0.2mm
- Suitable for models needing better detail without excessive time penalty
- Layer heights typically 0.08-0.2mm
Challenges:
- Back-pressure increases dramatically with smaller orifices
- Extruder must overcome higher resistance
- Temperature may need increase to maintain flow
- More sensitive to partial clogs
- Print times extend significantly
Large Volume: 0.6mm, 0.8mm, and Larger
Bigger nozzles prioritize speed and strength:
0.6mm Nozzles:
- 50% wider extrusion than 0.4mm
- Significantly faster printing for large objects
- Layer heights up to 0.4mm practical
- Stronger parts from thicker walls
- Less fine detail capability
0.8mm Nozzles:
- Double the width of 0.4mm
- Very fast printing for large, simple objects
- Layer heights up to 0.6mm possible
- Excellent strength from thick extrusions
- Poor fine detail reproduction
1.0mm+ Nozzles:
- Specialized applications—vases, large structural parts, rapid prototypes
- Extremely fast when combined with appropriate layer heights
- Requires hotend capable of melting plastic fast enough
- Very limited detail capability
Advantages:
- Much faster print times for large objects
- Stronger parts from thicker walls and more plastic bonding
- Better bridging due to more molten plastic available
- Less sensitive to minor clogs
Best For:
- Large functional parts where detail doesn’t matter
- Structural components
- Vases and containers
- Rapid prototyping when speed matters more than appearance
The Layer Height Relationship
Nozzle size constrains usable layer heights:
Minimum Layer Height: Approximately 25% of nozzle diameter
- 0.4mm nozzle: ~0.1mm minimum
- 0.2mm nozzle: ~0.05mm minimum
- 0.8mm nozzle: ~0.2mm minimum
Maximum Layer Height: Approximately 75-80% of nozzle diameter
- 0.4mm nozzle: ~0.3mm maximum
- 0.2mm nozzle: ~0.15mm maximum
- 0.8mm nozzle: ~0.6mm maximum
Operating outside these ranges causes problems:
- Too thin: Insufficient plastic extrudes to fill the layer
- Too thick: Nozzle can’t squish plastic adequately, poor adhesion
Nozzle Materials and Their Properties
Material selection dramatically affects durability and application suitability:
Brass Nozzles
The standard choice for most printing:
Advantages:
- Excellent thermal conductivity (200+ W/m·K)
- Easy to machine with precision
- Low cost—often $2-5 each
- Smooth surface finish possible
- Good for most common filaments
Thermal Properties: Brass conducts heat extremely well, helping maintain consistent temperature and recover quickly during high-flow printing.
Wear Characteristics: Relatively soft metal. Standard filaments (PLA, PETG, ABS) cause minimal wear—brass nozzles last hundreds of hours or longer with these materials.
Limitations:
- Wears quickly with abrasive filaments (carbon fiber, metal-filled, glow-in-dark)
- Can show visible wear grooves in just 10-20 hours with abrasive materials
- Worn nozzles extrude inconsistently, affecting quality
Best For:
- PLA, PETG, ABS, TPU, nylon (without additives)
- General printing where wear isn’t a concern
- Budget-conscious users
- Situations where thermal conductivity matters
Hardened Steel Nozzles
Designed specifically for abrasive materials:
Hardening Process: Tool steel undergoes heat treatment to achieve Rockwell hardness of 60+ HRC, creating extremely wear-resistant surfaces.
Abrasion Resistance: Resists wear from carbon fiber, metal particles, wood fillers, and other abrasive additives. A hardened steel nozzle might last hundreds of hours with materials that destroy brass in ten hours.
Thermal Conductivity: Much lower than brass (40-50 W/m·K), requiring temperature compensation. Typically need 5-15°C higher printing temperatures with hardened steel vs. brass.
Disadvantages:
- Higher cost ($15-30 typically)
- Lower thermal conductivity affects temperature stability
- Can be harder to achieve optimal print quality
- More sensitive to temperature calibration
Best For:
- Carbon fiber filled filaments
- Metal-filled filaments
- Glow-in-the-dark filaments (very abrasive)
- Wood-filled filaments
- Any material with hard abrasive particles
Stainless Steel Nozzles
A middle ground between brass and hardened steel:
Properties: Better wear resistance than brass, better thermal conductivity than hardened steel. Stainless typically offers 80-100 W/m·K thermal conductivity.
Wear Resistance: Moderate—better than brass with abrasive materials but not as durable as hardened steel.
Cost: Generally $8-15, between brass and hardened steel pricing.
Applications:
- Users printing occasional abrasive materials who don’t want to change nozzles constantly
- Compromise solution for mixed material usage
- Food-safe applications (certain stainless grades)
Plated Nozzles
Brass nozzles with surface treatments:
Nickel Plating: Adds corrosion resistance and makes surfaces easier to clean. Plastic residue wipes off more easily. Slightly harder than bare brass but not as wear-resistant as hardened steel.
Proprietary Coatings: Various manufacturers offer coatings claiming to combine brass thermal properties with improved wear resistance. Examples include “Nozzle X” and similar branded offerings.
Performance: Variable depending on coating quality. Good coatings provide moderate wear resistance improvement while maintaining thermal conductivity closer to brass.
Cost: Typically $10-20, more than brass but less than premium hardened steel.
Ruby-Tipped Nozzles
Premium solution for ultimate durability:
Construction: Industrial ruby (synthetic sapphire) insert at the orifice embedded in a brass body. The ruby provides the wear surface while brass provides thermal conductivity.
Durability: Essentially unlimited lifespan for any common filament, including highly abrasive materials. Ruby is one of the hardest materials (9 on Mohs scale).
Cost: Significant—$80-150 typically. The high cost creates a barrier but can be justified for heavy abrasive material use.
Thermal Performance: The brass body maintains good thermal conductivity. The tiny ruby insert doesn’t significantly affect heat transfer.
Best For:
- Professional or production environments with heavy abrasive filament use
- Users who want to eliminate nozzle changes
- Applications where nozzle wear creates quality concerns
Nozzle Material Comparison Table
| Material | Cost | Thermal Conductivity | Abrasion Resistance | Temp Adjustment | Lifespan (Standard) | Lifespan (Abrasive) | Best Use Case |
|---|---|---|---|---|---|---|---|
| Brass | $ | Excellent | Poor | None | 500+ hrs | 10-20 hrs | General printing, non-abrasive |
| Stainless Steel | $$ | Good | Moderate | +5°C | 800+ hrs | 100+ hrs | Mixed use, occasional abrasive |
| Hardened Steel | $$$ | Poor | Excellent | +10-15°C | 800+ hrs | 500+ hrs | Heavy abrasive use |
| Nickel Plated | $$ | Excellent | Fair | None | 600+ hrs | 30-50 hrs | Easy cleaning, moderate use |
| Ruby Tipped | $$$$ | Excellent | Extreme | None | Indefinite | Indefinite | Professional, continuous abrasive |
Flow Dynamics and Performance
Understanding how plastic flows through nozzles reveals performance limits:
Volumetric Flow Rate
The maximum rate plastic can flow through a nozzle depends on several factors:
Orifice Size: Larger orifices allow higher flow rates. Flow capacity roughly scales with orifice area (π × r²), meaning a 0.6mm nozzle has 2.25× the area of a 0.4mm nozzle.
Pressure Drop: Smaller orifices create higher back-pressure. The pressure needed to push plastic through increases dramatically as orifice size decreases.
Temperature: Higher temperatures reduce plastic viscosity, allowing easier flow. Each material has an optimal temperature range balancing flow rate against degradation.
Melt Capacity: The hotend must melt plastic fast enough to supply the demanded flow rate. This depends on heater power, thermal mass, and melt zone volume.
Typical Maximum Volumetric Flow:
- Standard hotend, 0.4mm nozzle: 10-15 mm³/s
- Standard hotend, 0.6mm nozzle: 15-20 mm³/s
- Volcano hotend, 0.4mm nozzle: 15-20 mm³/s
- Volcano hotend, 0.8mm nozzle: 30-40 mm³/s
Speed and Layer Height Interaction
Print speed and layer height together determine volumetric flow demand:
Formula: Volumetric flow = Layer height × Extrusion width × Print speed
Example with 0.4mm nozzle (0.45mm extrusion width):
- 0.2mm layers at 60mm/s: 5.4 mm³/s
- 0.2mm layers at 100mm/s: 9 mm³/s
- 0.3mm layers at 60mm/s: 8.1 mm³/s
- 0.3mm layers at 100mm/s: 13.5 mm³/s
When demanded flow exceeds hotend capacity, under-extrusion occurs. Higher speeds require either thinner layers or more capable hotends to maintain quality.
Nozzle Geometry Effects
Internal nozzle geometry affects flow characteristics:
Transition Taper: The angle of the transition from entry bore to orifice affects pressure drop and flow smoothness. Gradual tapers create less turbulence.
Orifice Length: The length of the final orifice section (the land) affects flow resistance. Shorter lands reduce resistance but may affect extrusion stability.
Surface Finish: Rough internal surfaces increase flow resistance and can create opportunities for material buildup.
Quality nozzles optimize these geometric factors for smooth, consistent flow.
When to Replace Nozzles
Recognizing replacement needs prevents quality problems:
Signs of Nozzle Wear
Visible Wear: Examine the nozzle tip with magnification. Wear appears as:
- Grooves or channels worn into the orifice
- Asymmetric opening (no longer perfectly circular)
- Enlarged orifice diameter
- Rough or pitted surfaces
Inconsistent Extrusion: Worn nozzles produce:
- Variable line widths
- Surface texture irregularities
- Over-extrusion in some areas, under-extrusion in others
- Stringing that persists despite tuning
Persistent Clogs: A nozzle that clogs repeatedly despite cleaning attempts may have:
- Internal damage creating catch points
- Carbonized material buildup that won’t clear
- Dimensional changes affecting flow
Abrasive Material Considerations
When printing abrasive materials with brass nozzles:
Replacement Schedule: Consider preventive replacement every:
- 10-15 hours with heavily filled materials
- 20-30 hours with moderately abrasive materials
- When quality degrades noticeably
Visual Inspection: Check the nozzle tip regularly. Visible wear grooves indicate replacement time even if quality hasn’t degraded obviously yet.
Cleaning vs. Replacement
Sometimes cleaning resolves issues:
Cold Pulls: Extract partially clogged material by heating the nozzle, inserting cleaning filament, cooling partially, then pulling firmly. Repeat until clean filament extracts.
Hot Pulls: Similar but performed at higher temperature to soften stubborn deposits.
Chemical Cleaning: Some users clean nozzles by soaking in acetone (for ABS residue) or other appropriate solvents.
Mechanical Cleaning: Acupuncture needles or specialized nozzle cleaning tools can clear orifices, but risk damaging brass nozzles if too aggressive.
When Cleaning Fails: If multiple cleaning attempts don’t restore quality, replacement is more cost-effective than continued troubleshooting. Nozzles are cheap compared to wasted filament and time.
Nozzle Installation and Maintenance
Proper installation ensures reliable operation:
Installation Procedure
Temperature Critical: Install nozzles at temperature—typically at printing temperature. Thermal expansion during heating can loosen cold-installed nozzles or create leaks.
Sequence Matters:
- Heat hotend to printing temperature (190-240°C depending on material)
- If replacing, unscrew old nozzle using wrench on hex flats
- Clean heater block threads if necessary
- Thread new nozzle into heater block by hand until resistant
- Back off nozzle 1/4 to 1/2 turn
- Ensure heat break is seated in heater block
- Tighten nozzle firmly (not excessive force)—it should seat against heat break interior, not bottom out in heater block
Sealing: The nozzle should seal against the heat break’s internal surface, creating the melt chamber. The nozzle threads should NOT bottom out against the heater block threads—a small gap should remain between nozzle shoulder and heater block.
Torque: Firm hand tightening with a wrench is sufficient. Excessive torque can damage threads or crack heater blocks. The thermal expansion when hot creates adequate sealing force.
Preventing Leaks
Proper Seating: Ensuring the nozzle seats against the heat break (not the heater block) prevents plastic leaking from the junction.
Temperature During Installation: Installing hot allows thermal expansion, then the nozzle tightens further as it cools, creating a secure seal.
Re-Tightening: After initial heat cycles, the nozzle may benefit from checking/re-tightening when hot as components settle.
Storage and Organization
Multiple Nozzles: Many users keep several nozzles on hand:
- Different sizes for different applications
- Spare brass for quick replacement
- Hardened steel for abrasive materials
- Dedicated nozzles for specific materials
Storage: Keep nozzles clean and organized:
- Labeled containers or cases
- Note size and material
- Protect threads from damage
- Store clean and dry
Specialty Nozzles
Beyond standard designs, specialty nozzles serve specific needs:
High-Flow Nozzles
Designed to maximize volumetric flow:
Internal Geometry: Optimized transitions and larger internal volumes reduce flow restriction.
Applications: Very high speed printing, thick layers, large nozzles.
Examples: CHT (Core Heating Technology) nozzles split the flow into multiple streams for increased heating surface area.
Wear-Resistant Integrated Designs
Some manufacturers offer complete wear-resistant hotend assemblies rather than separate nozzles, integrating the nozzle permanently into the heat break or heater block.
Food-Safe Nozzles
Specific stainless steel alloys certified for food contact:
- Used for creating cookie cutters, kitchen items
- Requires specific grades (often 304 or 316 stainless)
- Entire hotend path should be food-safe, not just nozzle
Multi-Material Nozzles
Special designs for multi-material or multi-color printing:
- May have different orifice geometries
- Optimized for material purging and transitions
- Sometimes include features reducing oozing during non-active periods
Optimizing Nozzle Selection
Choosing the right nozzle for specific applications:
Detail-Focused Printing
Miniatures and Models:
- 0.2mm or 0.3mm nozzle
- Brass for standard materials
- Accept slower print times for quality
Fine Text and Features:
- 0.2mm or 0.25mm nozzle
- Slower speeds
- Well-tuned retraction
Speed-Focused Printing
Large Functional Parts:
- 0.6mm or 0.8mm nozzle
- Brass for thermal performance
- Higher temperatures to support flow
- Larger layer heights
Rapid Prototyping:
- 0.6mm minimum
- Volcano or high-flow hotend
- Optimize for speed over appearance
Material-Specific Needs
Abrasive Materials:
- Hardened steel or ruby-tipped
- Size based on application (detail vs speed)
- Temperature compensation for steel
Multi-Material Use:
- Keep dedicated nozzles per material type
- Prevents cross-contamination
- Eliminates purging between materials
General Purpose
One-Nozzle Users:
- 0.4mm brass remains the best single choice
- Adequate detail for most applications
- Reasonable print times
- Works with all standard materials
- Replace when worn
Conclusion
The nozzle might be the smallest component you regularly interact with on your 3D printer, but its impact on print quality, speed, and material compatibility is enormous. Understanding how orifice size affects detail capability and print times, how material selection determines durability with abrasive filaments, and when replacement becomes necessary transforms nozzle selection from random choice to strategic decision.
A 0.4mm brass nozzle serves most users admirably for general printing. But knowing when to switch to a 0.2mm nozzle for fine details, a 0.8mm nozzle for fast large prints, or a hardened steel nozzle for carbon fiber filament opens new capabilities. Recognizing the signs of wear—inconsistent extrusion, persistent clogs, visible damage—prevents quality degradation from unnoticed nozzle deterioration.
Proper nozzle installation, ensuring the seal against the heat break rather than bottoming out in the heater block, prevents leaks and maintains reliable operation. Regular inspection, appropriate material selection, and timely replacement keep your prints looking their best.
The next time you load a new print file, consider whether your current nozzle is optimal for that specific application. That tiny brass cone might seem unchangeable, but it’s actually one of the easiest components to swap for dramatic performance improvements. Understanding nozzles—their sizes, materials, capabilities, and limitations—empowers you to match the tool to the task, achieving results limited only by your imagination rather than your equipment.