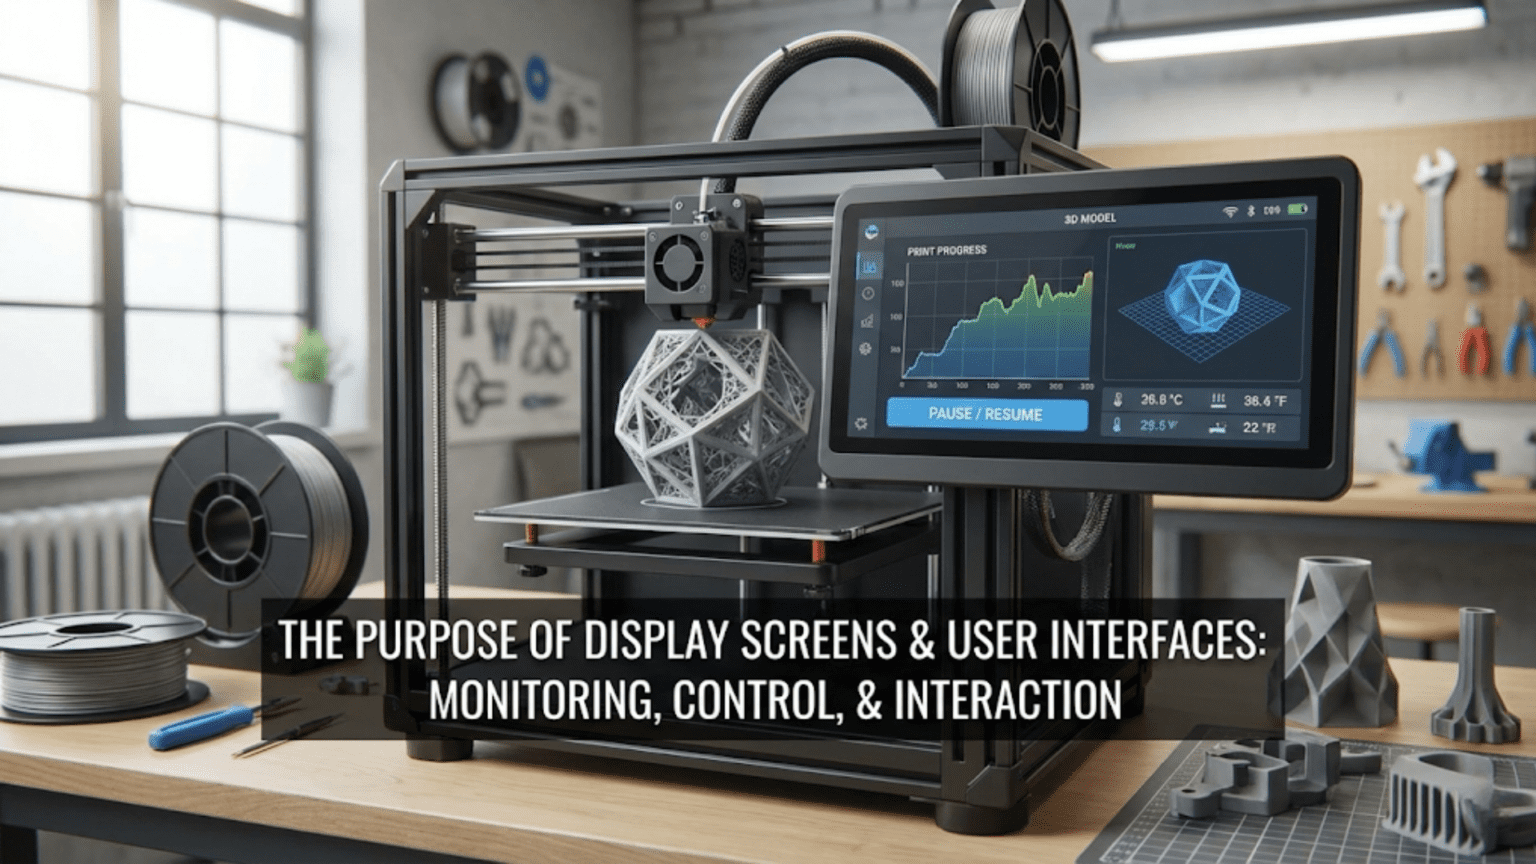
Display screens and user interfaces serve as the primary communication bridge between users and 3D printers, providing visual feedback on temperatures, print progress, and system status while enabling control through rotary encoders, buttons, or touchscreen inputs. Common display types include character LCDs (16×2 or 20×4 text displays), monochrome graphic LCDs (128×64 pixel screens allowing icons and menus), and color touchscreens (offering intuitive graphical interfaces), each connected to the mainboard and updated by firmware to facilitate printer operation without requiring a connected computer.
Introduction
Imagine trying to operate your 3D printer without any display or controls—no way to see temperatures, no indication of print progress, no ability to adjust settings or navigate menus. You’d be completely blind to what’s happening inside your printer, unable to interact except through a connected computer. This scenario describes early 3D printers before integrated displays became standard, and it highlights just how essential these user interfaces have become.
The display screen and its accompanying controls transform a collection of mechanical and electronic components into an accessible, user-friendly machine. Through this interface, you monitor temperatures in real-time, track print progress percentage by percentage, navigate menus to adjust settings, initiate critical functions like homing or bed leveling, and maintain oversight of your printer’s operation throughout hours-long prints.
Yet displays and interfaces vary enormously across printers. Simple character LCDs show basic text. Graphic displays add icons and visual elements. Color touchscreens provide tablet-like experiences. Each type offers different capabilities, requires different firmware resources, and creates different user experiences. Understanding these differences helps you evaluate printers, recognize upgrade possibilities, and appreciate the interface design that makes or breaks daily usability.
In this comprehensive guide, we’ll explore every aspect of 3D printer displays and interfaces, from the hardware technologies involved through the software driving them to the design principles that create intuitive or frustrating experiences.
The Core Functions of Display Interfaces
Before examining specific technologies, understanding what displays do reveals their importance:
Status Monitoring
The most fundamental function is providing real-time system information:
Temperature Display:
- Current hotend temperature
- Target hotend temperature
- Current bed temperature
- Target bed temperature
- Visual or numerical representation
- Multiple extruders shown separately in multi-extruder systems
Position Information:
- Current X, Y, Z coordinates
- Useful during manual positioning or troubleshooting
- Some displays show absolute position, others relative
Print Progress:
- Percentage complete (calculated from G-code file size or layer count)
- Elapsed time
- Estimated time remaining
- Current layer number
- Print speed multiplier
System Status:
- Heating status indicators
- Homing completion
- SD card detection
- Error messages and warnings
- Fan speeds
User Control and Input
Displays enable direct printer control without computers:
Menu Navigation:
- Browse settings and options
- Access printer functions
- Adjust parameters
- View information screens
Print Management:
- Select files from SD card
- Start/pause/stop prints
- Adjust printing parameters during operation
- Resume from power loss or pause
Maintenance Functions:
- Manual axis movement
- Filament loading/unloading
- Bed leveling procedures
- PID tuning initiation
- EEPROM settings management
Emergency Control:
- Emergency stop button
- Pause printing immediately
- Temperature safety override
- Quick access to critical functions
Feedback and Confirmation
Interfaces provide essential user feedback:
Action Confirmation:
- Visual/audible feedback when buttons pressed
- Menu selection highlighting
- Progress indicators for long operations
- Completion notifications
Error Reporting:
- Clear error messages
- Diagnostic information
- Guidance for resolution
- Warning indicators
State Communication:
- Heating in progress
- Homing sequence active
- Print paused vs. printing
- SD card reading
- Firmware busy vs. ready
Display Technologies
Several display types appear in 3D printers, each with distinct characteristics:
Character LCD Displays
The simplest display type shows text only:
Common Sizes:
- 16×2: 16 characters across, 2 rows (32 characters total)
- 20×4: 20 characters across, 4 rows (80 characters total)
Technology:
- Liquid crystal display with backlight
- Character ROM contains predefined character shapes
- Simple parallel or I²C interface to mainboard
- Very low processing overhead
Advantages:
- Very inexpensive ($5-15)
- Extremely low power consumption
- Simple firmware implementation
- Reliable and durable
- Easy to read in various lighting
Disadvantages:
- Limited information density
- No graphics or icons possible
- Crude progress indicators (text-based bars)
- Limited aesthetic appeal
- Can’t display complex information
Typical Information Displayed:
E:195/200 B:60/60
SD Print 45% 1:23(E = extruder, B = bed, temperatures shown as current/target, second line shows SD print status)
Best For:
- Budget printers
- Users wanting simple, reliable interfaces
- Situations where minimal is adequate
- Printers where cost is primary concern
Monochrome Graphic LCD Displays
A significant step up, these display pixels rather than just characters:
Common Resolution: 128×64 pixels (most standard)
Technology:
- Dot-matrix LCD with individual pixel control
- Typically monochrome (black pixels on light background or white on black)
- Backlight or reflective designs
- Serial (SPI) interface common
Advantages:
- Can display graphics, icons, progress bars
- More information on screen simultaneously
- Better visual organization
- Custom fonts possible
- Still relatively simple firmware
- Moderate cost ($15-30)
Disadvantages:
- More processing overhead than character LCD
- Still limited by monochrome and resolution
- Smaller text than character LCDs (to fit more info)
- More complex firmware requirements
Typical Display Elements:
- Temperature graphs showing history
- Print progress bar (actual graphical bar)
- Icons for status (SD card, heating, etc.)
- Menu trees with hierarchical navigation
- Multiple data points organized visually
Best For:
- Mid-range printers
- Users wanting better information density
- Balance of cost and capability
- Printers where moderate complexity is acceptable
Color TFT Touchscreen Displays
Modern printers increasingly use color touchscreens:
Common Sizes: 2.4″, 2.8″, 3.5″, 4.3″, 7″ (measured diagonally)
Technology:
- Thin-Film Transistor (TFT) LCD with full color
- Resistive or capacitive touch input
- Serial interface (often UART or SPI)
- Some use dedicated processors
Advantages:
- Intuitive touch interface (like smartphones)
- Rich visual presentation with colors and graphics
- Can display photos (print previews, thumbnails)
- Large amounts of information organized clearly
- Modern, appealing aesthetic
- Customizable interfaces possible
Disadvantages:
- Significantly more expensive ($30-100+)
- Higher power consumption
- More complex firmware implementation
- Can add processing load to mainboard
- Touch calibration sometimes needed
- Screens can be fragile
Interface Capabilities:
- Touch buttons (no physical encoder needed)
- Sliders for adjustments
- Color-coded status information
- Print preview images
- Graphical bed leveling visualizations
- Rich menus with icons and descriptions
Best For:
- Premium printers
- Users wanting modern, intuitive interfaces
- Situations where ease of use is priority
- Printers targeting less technical users
Input Methods
Displays pair with various input mechanisms:
Rotary Encoders
The most common input device for LCD screens:
Design:
- Rotary knob that turns infinitely
- Integrated push-button (press the knob)
- Quadrature output signals detect rotation direction
- Detent clicks provide tactile feedback
Operation:
- Turn clockwise/counterclockwise to navigate menus
- Press to select highlighted option
- Turn to adjust values
- Press and hold for secondary functions (sometimes)
Advantages:
- Simple, intuitive operation
- One control for navigation and selection
- Reliable with few failure modes
- Inexpensive
- Works well even while wearing gloves
Disadvantages:
- Limited to sequential navigation
- Can be slow for large menus or value ranges
- Requires two hands (one holds printer steady)
- Encoder quality varies significantly
Firmware Integration:
- Firmware monitors quadrature signals
- Detects rotation direction and speed
- Debounces button input
- Maps rotation to menu scrolling or value adjustment
Physical Buttons
Some interfaces use separate buttons:
Configurations:
- Up/down/left/right plus select (5 buttons common)
- Dedicated function buttons (home, pause, etc.)
- Membrane keypads or tactile switches
Advantages:
- Each button has clear purpose
- Can navigate in any direction directly
- Some users find this more intuitive than encoders
- Allows dedicated quick-access functions
Disadvantages:
- More components = more potential failures
- Requires more mainboard pins
- Can be visually cluttered
- More complex wiring
Touchscreen Input
Touch interfaces eliminate physical controls:
Resistive Touch:
- Detects physical pressure anywhere on screen
- Works with fingers, stylus, gloves
- Less precise than capacitive
- Cheaper but less durable
Capacitive Touch:
- Detects electrical properties of fingers
- More precise and responsive
- Doesn’t work with gloves or stylus (unless special)
- More expensive but more reliable
Interface Design:
- On-screen buttons replace physical controls
- Size and spacing critical for usability
- Can provide visual feedback (button press animation)
- Enables complex interfaces (keyboards, grids, etc.)
Calibration:
- Touch alignment sometimes drifts
- Firmware calibration routines may be needed
- Quality screens maintain calibration better
User Interface Design Principles
Good interfaces share common design characteristics:
Information Hierarchy
Primary Information: Most important data prominently displayed:
- Current temperatures (largest, always visible)
- Print status and progress
- Critical warnings or errors
Secondary Information: Important but not constant:
- Target temperatures
- Print time elapsed/remaining
- File name being printed
- Current coordinates
Tertiary Information: Available but not front-and-center:
- System settings
- Detailed statistics
- Diagnostic data
- Firmware version
Navigation Logic
Menu Organization:
- Logical grouping of related functions
- Not too deep (avoid 5+ levels of nesting)
- Consistent navigation patterns
- Clear indication of current location
Common Patterns:
- Main menu with major categories
- Sub-menus for specific functions
- Settings screens for adjustments
- Information screens for read-only data
Breadcrumb Navigation: Some interfaces show path:
Main > Prepare > Move Axis > Move ZResponsiveness
Immediate Feedback:
- Screen updates quickly (no lag)
- Actions acknowledged visually
- Button presses provide feedback
- Menu scrolling smooth
Progress Indication:
- Long operations show progress
- Busy indicators during processing
- Time estimates when possible
- Cancel option for lengthy operations
Error Handling
Clear Messages:
- Specific error descriptions (not cryptic codes)
- Guidance for resolution
- Indication of severity
- Easy dismissal when appropriate
Recovery Options:
- Clear path to resolve issues
- Emergency stop always accessible
- Resume capability where possible
- Reset to safe state options
Display and Interface Comparison
| Display Type | Cost | Info Density | Ease of Use | Firmware Load | Power Use | Best Use Case |
|---|---|---|---|---|---|---|
| 16×2 Character LCD | $ | Very Low | Moderate | Very Low | Very Low | Ultra-budget, minimal needs |
| 20×4 Character LCD | $ | Low | Moderate | Very Low | Very Low | Budget, basic functionality |
| 128×64 Graphic LCD | $$ | Moderate | Good | Low | Low | Mid-range, good balance |
| Color TFT (Small) | $$$ | High | Very Good | Moderate | Moderate | Premium, better UX |
| Color TFT (Large) | $$$$ | Very High | Excellent | High | Moderate-High | High-end, best experience |
| No Display (WiFi) | $ | N/A | Variable | Low | Very Low | Networked operation only |
Common Interface Problems
Display Issues
Blank Screen:
- No backlight: Check power, backlight enable signal, LED failure
- No communication: Verify connections, firmware configuration
- Wrong settings: Confirm display type in firmware matches hardware
Garbled Display:
- Communication errors: Check wiring, connection security
- Wrong interface type configured: Verify I²C vs. SPI vs. parallel
- Voltage issues: Ensure proper logic levels
Dim or Faded Display:
- Backlight aging: Replace display or backlight
- Contrast adjustment needed: Adjust potentiometer if available
- Power supply voltage drop: Check overall system power
Touch Not Working:
- Calibration drift: Re-calibrate touch
- Connector issues: Verify touch panel cable
- Controller failure: May require display replacement
Control Problems
Encoder Not Responding:
- Connection issues: Check wiring
- Mechanical failure: Encoder worn out, replace
- Firmware configuration: Verify pins set correctly
Erratic Encoder Behavior:
- Electrical noise: Shield encoder wiring, add filtering capacitor
- Mechanical issues: Clean encoder, check for obstructions
- Software debouncing: Adjust debounce settings in firmware
Buttons Stuck or Unresponsive:
- Mechanical problems: Clean or replace buttons
- Electrical issues: Test continuity, check connections
- Firmware problems: Verify input configuration
Upgrading Displays
Many users upgrade displays for better experiences:
When to Consider Upgrading
Usability Frustrations:
- Current display too limited
- Information hard to read
- Navigation cumbersome
- Want touchscreen convenience
Adding Features:
- Want print preview thumbnails
- Need more detailed status
- Desire better menu organization
- Want modern aesthetic
Repair Necessity:
- Current display failed
- Opportunity to upgrade during replacement
Upgrade Considerations
Compatibility:
- Connector type must match or be adaptable
- Firmware must support new display type
- Mainboard must have adequate processing power
- May require firmware recompilation
Physical Fit:
- Mounting holes alignment
- Bezel dimensions
- Cable length and routing
- Clearance in electronics enclosure
Firmware Configuration:
- Display type setting
- Pin assignments
- Touch calibration if applicable
- Menu system compatibility
Popular Upgrade Paths
Character to Graphic LCD:
- RepRapDiscount Full Graphic Smart Controller popular
- Moderate cost increase
- Significant usability improvement
- Usually straightforward installation
LCD to Touchscreen:
- Various TFT options available
- Check compatibility carefully
- May require firmware changes
- Dramatic interface improvement
BTT TFT Series:
- Popular upgrade touchscreens
- Multiple sizes
- Dual-mode (touchscreen + Marlin mode)
- Good documentation and support
Interface Design Examples
Marlin Default Menu (Graphic LCD)
Structure:
- Info Screen (default): Temps, progress, status
- Main Menu: Prepare, Control, Print from SD
- Prepare: Move axis, disable steppers, auto-home, bed leveling
- Control: Temperature, motion, filament, etc.
Navigation:
- Turn encoder to scroll
- Press to enter sub-menus
- Back option in each menu
- Timeout returns to info screen
Touch Interface Design
Home Screen Elements:
- Large temperature displays with touch to adjust
- Print progress bar
- Quick-access buttons (pause, stop, adjust)
- Menu access button
Touch Optimizations:
- Large touch targets (minimum 40×40 pixels)
- Visual feedback on touch
- Confirmation for destructive actions
- Keyboard for text entry when needed
Advanced Interface Features
Print Preview
Some interfaces show print thumbnails:
Implementation:
- G-code file includes embedded image
- Generated by slicer during file creation
- Displayed when selecting files
- Helps identify correct file visually
Benefits:
- Visual confirmation of model
- Easier file selection
- Professional appearance
- Prevents printing wrong file
WiFi/Network Interfaces
Web-based interfaces accessed via network:
Capabilities:
- Upload files remotely
- Monitor print progress
- View camera feed
- Adjust settings
- Start/stop prints
Examples:
- OctoPrint (Raspberry Pi-based)
- Duet Web Control
- Klipper’s Mainsail/Fluidd
Advantages:
- Access from any device
- Rich interfaces possible
- Remote monitoring
- No physical screen needed
Voice Control
Emerging capability in some systems:
Integration:
- Smart home platforms (Alexa, Google Home)
- Custom voice interfaces
- Voice commands for common functions
Limitations:
- Requires network connectivity
- Limited command set
- Not suitable for fine control
- Novelty more than necessity currently
Conclusion
Display screens and user interfaces bridge the gap between you and your 3D printer’s internal complexity. Through these interfaces, invisible processes become visible—temperatures you can monitor, progress you can track, controls you can manipulate. What happens inside the printer’s electronics translates into information you can understand and actions you can take.
The evolution from simple character LCDs to sophisticated color touchscreens reflects growing recognition that user experience matters. A printer that functions perfectly but frustrates users with a terrible interface fails to deliver its potential. Conversely, an intuitive interface makes even complex operations feel straightforward, encouraging experimentation and learning.
Understanding displays and interfaces—the technologies enabling them, the design principles creating usable experiences, and the tradeoffs between different approaches—helps you evaluate printers, recognize upgrade opportunities, and appreciate good interface design when you encounter it. The best interfaces disappear from consciousness, letting you focus on creating rather than navigating menus.
The next time you interact with your printer’s display, whether pressing a rotary encoder to start a print or tapping a touchscreen to adjust temperature, appreciate the engineering that makes it possible. That screen isn’t just showing information—it’s translating the complex language of electronics and firmware into the human language of visual feedback and intuitive controls, making 3D printing accessible to everyone willing to learn.