3D printed shower hooks and bathroom accessories are custom-designed functional items — including curtain hooks, towel holders, soap dishes, toothbrush holders, and wall-mounted organizers — made specifically for the high-humidity bathroom environment. They are among the most practically valuable home printing projects because bathrooms are full of organizational problems that commercial solutions address only approximately, and because printing for the bathroom introduces the critical skill of selecting and printing with moisture-resistant materials appropriate for the wet, humid conditions these accessories must endure.
Introduction: The Bathroom Deserves Better Solutions
Walk into any bathroom and you’ll find the same collection of compromises. The shower curtain rod has standard-size rings, but someone needs an extra ring to close a gap. The towel hook is on the wrong wall for how people actually move through the space. The shampoo shelf is the wrong size for the specific bottles being used, so they crowd together or fall. The toothbrush holder accommodates four brushes but this household has five people. The razor hook is designed for a razor profile that doesn’t match the one being used.
These are not dramatic problems. Each one is a minor friction, a small daily inconvenience, a thing that almost works. But multiplied across every interaction with the bathroom throughout a day — the shower routine, the morning preparation, the evening wind-down — they accumulate into a space that never quite feels optimized.
3D printing addresses bathroom optimization problems with unique capability because bathroom accessories have precise, specific requirements: a shower curtain hook must fit both the rod and the curtain grommet; a razor hook must fit the specific razor handle diameter; a soap dish must drain efficiently and fit the specific bar soap being used. Commercial solutions approximate these requirements. Printed solutions can match them exactly.
The bathroom also introduces one of the most important material concepts in functional printing: moisture resistance. The bathroom is persistently humid, frequently wet, and home to water and soap exposure that challenges materials in ways that dry environments do not. Understanding which materials survive bathroom conditions — and which don’t — is essential knowledge for any bathroom project and transfers to many other practical printing applications.
This guide covers the complete spectrum of bathroom printing: the moisture and material considerations that come first, the specific accessories worth printing, design principles for bathroom applications, mounting systems for wet and humid environments, slicer settings for functional bathroom parts, and a wide range of creative bathroom organization projects.
The Bathroom Environment: Material Requirements
Before selecting any material for a bathroom print, understanding what the bathroom environment actually requires is essential. The bathroom is defined by three conditions that affect printed materials differently:
Persistent Humidity
Even between uses, a bathroom maintains significantly higher ambient humidity than other rooms — typically 50–80% relative humidity after showers, compared to 30–50% in other rooms. Over weeks and months, some materials absorb moisture from the air, which can cause:
- Dimensional changes (moisture-absorbing materials swell slightly)
- Surface cloudiness or whitening
- Reduction in mechanical properties (particularly in Nylon, which is highly hygroscopic)
- Gradual degradation of material structure
Direct Water Contact
Shower hooks, soap dishes, and other items in the shower zone experience direct water contact — water flowing over them, water pooling in them, soap residue accumulating on them. This requires materials that don’t absorb water and don’t degrade with repeated wetting and drying cycles.
Cleaning Chemicals
Bathrooms are cleaned with products ranging from mild soap to bleach-based cleaners, mold inhibitors, and disinfectants. Most printed materials tolerate mild soap well, but strong oxidizing agents (bleach) can attack some polymer chains over time with repeated exposure.
Material Performance in Bathroom Conditions
| Material | Moisture Resistance | Water Contact | Chemical Resistance | Bathroom Suitability |
|---|---|---|---|---|
| Standard PLA | Poor | Poor | Poor | Not recommended for bathroom |
| PETG | Good | Good | Good | Recommended for most bathroom uses |
| ASA | Excellent | Excellent | Very good | Best for shower zone; UV and moisture stable |
| ABS | Moderate | Moderate | Moderate | Acceptable but not ideal; acetone sensitivity |
| Nylon (PA) | Poor (hygroscopic) | Poor | Good | Not suitable despite other good properties |
| TPU | Good | Good | Good | Excellent for flexible bathroom elements |
| PLA+ | Poor | Poor | Poor | Not significantly better than PLA for moisture |
| HDPE | Excellent | Excellent | Excellent | Excellent properties but very difficult to print |
Why PLA Is Not Suitable for Bathroom Use
PLA is the default beginner filament for good reason — it prints easily, looks good, and works well for most applications. But the bathroom is one of the clearest cases where PLA is the wrong choice:
PLA absorbs moisture. Polylactic acid is somewhat hygroscopic, and in the persistent humidity of a bathroom it will gradually absorb water. Over weeks and months, this causes the print to become slightly dimensionally unstable and the surface to develop a slightly cloudy or chalky appearance.
PLA has poor heat resistance. Hot shower steam can exceed PLA’s glass transition temperature in poorly ventilated bathrooms. A PLA shower hook left in the direct path of steam from a hot shower may slowly deform over time.
PLA can support mold growth. The slightly porous surface structure of FDM prints combined with PLA’s organic nature creates conditions where mold can establish itself in the microscopic surface porosity. This is a hygiene concern for bathroom applications.
The recommendation: Use PETG as the standard material for all bathroom prints. ASA for items in the direct shower zone. TPU for flexible bathroom elements (drain covers, non-slip pads, flexible hooks).
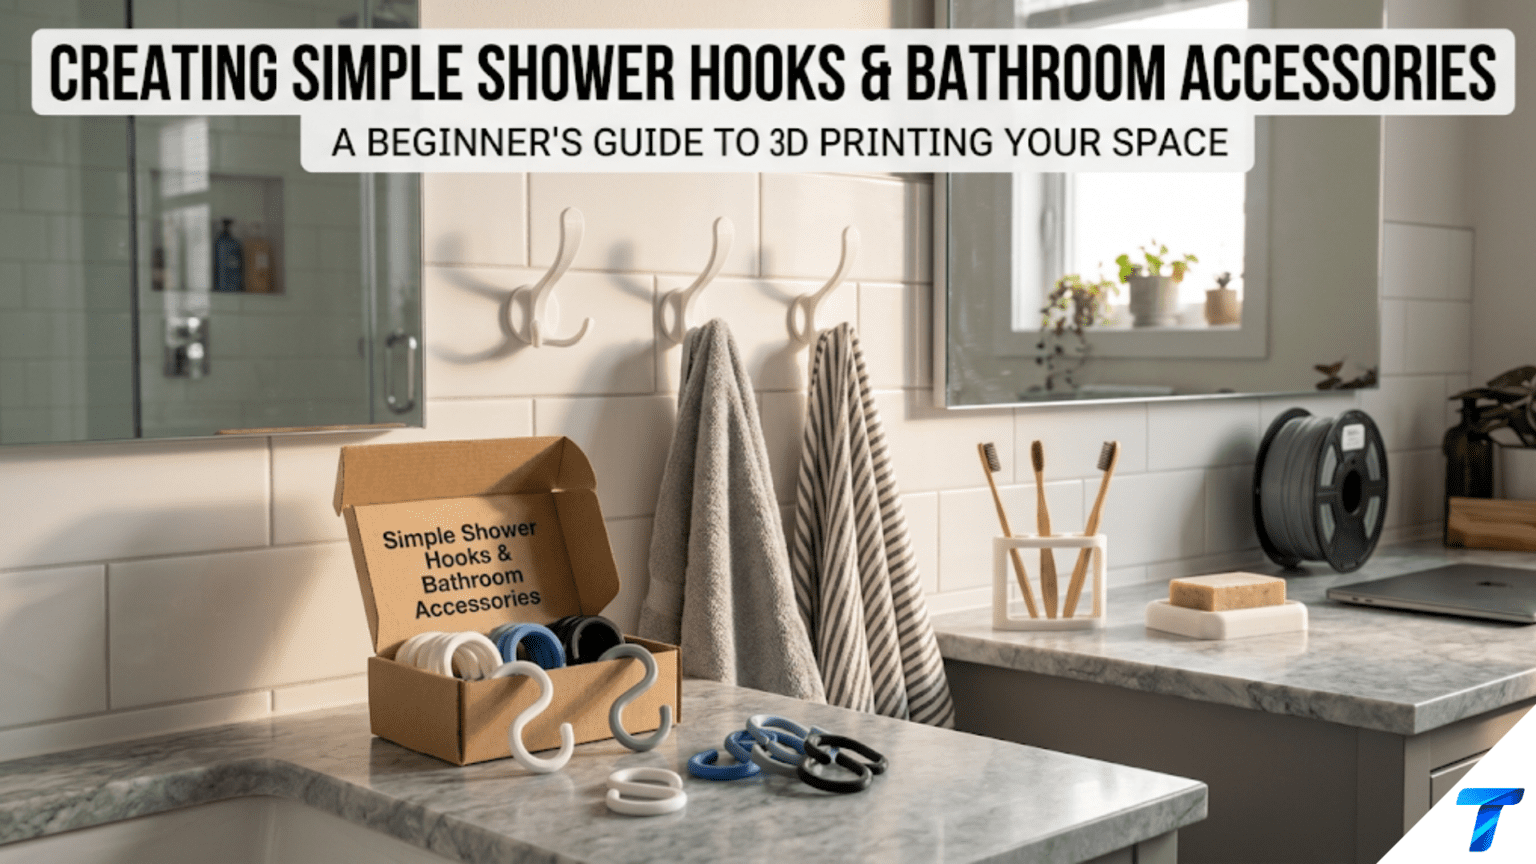
Shower Curtain Hooks
Shower curtain hooks are one of the most requested bathroom prints — they are simple in geometry, immediately functional, and the standard hooks that come with shower rods are often inadequate in number, wrong in style, or break over time.
Standard Shower Hook Dimensions
To design or choose a printed shower curtain hook, you need to understand the standard dimensions:
Shower rod diameter: Standard shower curtain rods are 25mm (1 inch) in diameter. Tension rods (the spring-loaded type) are typically 22–25mm diameter. The hook must accommodate this diameter with enough clearance to slide freely.
Curtain grommet diameter: Standard shower curtain grommets (the metal rings in the top of the curtain) are typically 12–13mm inner diameter. The hook’s lower loop must fit through this grommet.
Hook geometry: The hook has two loops — an upper loop that wraps around the rod, and a lower attachment point that passes through the curtain grommet. These are connected by the hook body.
Printed Hook Design
A simple functional shower hook has:
- Upper ring: Inner diameter 27–28mm (rod diameter + 2–3mm clearance), wall thickness 3mm minimum
- Lower attachment: A loop with inner diameter 14mm (grommet inner diameter + 1–2mm), or a hook profile that passes through the grommet
- Body: Connecting the upper ring to the lower attachment, typically 30–40mm long
- Opening geometry: The upper ring needs an opening large enough to install onto the rod — either a C-shape with a defined opening, or a fully closed ring printed open (for spring-on installation)
Types of Shower Hooks
Standard C-hook: The most common form — a C-shaped upper section that hooks over the rod, with the curtain attachment below. Simple to design and print, easy to install without removing the rod.
Closed ring hook: A closed ring for the upper rod loop (must be installed before the rod end caps are put on, or the rod must be removed). More secure than a C-hook but requires more installation effort.
Double hook: A hook with two lower attachment points — one for the curtain, one for a decorative liner or a second curtain panel. Doubles the hook’s utility.
Decorative hooks: Hooks with decorative elements — a scrollwork pattern, geometric detail, or ornamental form — that transform the hook from purely functional to an aesthetic element visible through the curtain.
Roller hooks: Hooks with a small printed wheel that rolls along the rod, making the curtain slide much more smoothly than standard hooks. Requires a roller element that can rotate freely — either a separate piece or a print-in-place bearing concept.
Print Settings for Shower Hooks
Print shower hooks in PETG with these settings:
- Layer height: 0.2mm
- Perimeters: 4–5 (critical — hooks bear sustained load)
- Infill: 40% Gyroid
- Temperature: 238–242°C (PETG at the warm end for better layer fusion)
- Bed temperature: 80°C
- Cooling: 70–80% (reduced cooling improves PETG layer bonding)
- Orientation: Print with the hook opening facing upward or to the side — never have the weakest stress point at a layer interface
Towel Hooks and Rings
Towel hooks and rings are among the most useful bathroom prints because they can be mounted exactly where you need them — not where a pre-existing hook happens to be — and in exactly the configuration your bathroom layout requires.
Towel Hook Design
A simple wall-mounted towel hook has:
- Mounting plate: A flat backing plate, 60–80mm wide × 40–60mm tall × 6–8mm thick, with screw holes for wall mounting
- Hook projection: A curved or L-shaped arm extending from the mounting plate, projecting 40–60mm from the wall, capable of supporting a folded towel (approximately 300–500g)
- Hook tip: The end of the arm, slightly upturned to prevent towels from sliding off
Load calculation: A wet towel weighs approximately 500–800g. The hook arm experiences this as a bending moment at the mounting plate junction. Design this junction with maximum material (large radius fillet or gusset) and print with high infill (40–50%) and many perimeters (5).
Mount with two screws minimum for any hook that will support towel weight. Single-screw mounting creates a torque that works the screw loose over time.
Towel Ring
A wall-mounted ring that holds a hand towel — the classic bathroom towel ring that holds the towel looped through the ring. The ring itself must be large enough for a folded hand towel to pass through: typically 180–220mm outer diameter, 15–20mm ring cross-section diameter.
Design note: A towel ring experiences significant load on the lower section of the ring as the towel hangs. Ensure the ring cross-section is at least 15mm diameter and print with 4 perimeters for adequate strength. The mounting posts that attach the ring to the wall are the highest stress points — design these with generous cross-section and print orientation that puts the layer lines in the direction of the tensile load.
Soap Dishes and Drainage Solutions
Why Commercial Soap Dishes Fail
Commercial soap dishes typically have one problem: they don’t drain well. Water pools under the soap, which sits in standing water and becomes a soft, slippery mess that is difficult to pick up, wastes soap through dissolution, and creates bacterial growth conditions.
A printed soap dish can be designed specifically for optimal drainage — and specifically for the dimensions of the actual soap bar being used.
Drainage Design Principles
Angled base: The dish base should slope toward drain holes at one end — a 5–10° angle channels water to the drain holes efficiently.
Elevated ribs: Rather than a flat base, raised parallel ribs (3–5mm tall, spaced 8–10mm apart) support the soap above the dish floor. Water drains freely between the ribs and down through drain holes.
Drain holes: Minimum 5–6 holes of 5mm diameter at the lowest point of the dish. Larger or more holes provide better drainage.
Dimensions: Sized for the actual soap bar — measure your soap and add 5–10mm in each horizontal dimension for comfortable placement and removal.
Printed Soap Dish Design
A functional soap dish for a standard bar of soap (approximately 85mm × 55mm × 25mm) should be:
- Interior dimensions: 95mm × 65mm (soap dimensions + 5mm each side)
- Rim height: 20mm (deep enough to contain the soap but not so deep it’s hard to pick up)
- Base design: Ribs or raised floor, sloped 5° toward drain end
- Drain holes: 5–6 holes, 5mm diameter, at the lowest end of the angled base
- Wall thickness: 3mm — adequate without excess weight
- Material: PETG — essential for direct water contact and soap exposure
Toothbrush Holders
Toothbrush holders seem simple but have specific requirements worth considering carefully:
Design Requirements
Individual slots vs. shared cup: Individual slots for each brush are more hygienic — brushes don’t contact each other, reducing cross-contamination risk. A shared cup is simpler and accommodates any number of brushes.
Slot diameter: Standard toothbrush handles are 10–15mm in diameter. Design slots for 16–18mm to accommodate different handle sizes and allow air circulation.
Drainage: Toothbrushes drip water after use. The holder should have drain holes at the base of each slot (or the cup base) to prevent standing water accumulating around brush heads.
Ventilation: Good air circulation helps toothbrush heads dry quickly, reducing bacterial growth. Lattice-pattern sides or ventilation holes improve airflow.
Height: Slots or cup should be deep enough to hold brushes upright without tipping — typically 60–80mm for the holding portion.
Mounting options: Countertop (flat base, stable) or wall-mounted (lighter load on mounting hardware than towel hooks).
The 5-Person Household Problem
Commercial toothbrush holders typically hold 4 brushes. A household of 5 — common with families — has no commercial solution at the standard single-holder scale. A printed 5-slot holder (or any custom count) solves this exactly. Print one with the exact number of slots needed.
Bathroom Organization Projects
Shower Caddy / Shampoo Holder
A shelf or caddy for organizing shampoo, conditioner, body wash, and other shower products. Commercial shower caddies are designed for “average” bottle sizes and often fit poorly.
Design approach:
- Measure the specific bottles being used (height, diameter at the widest point)
- Design compartments sized for each bottle type
- Add a lip or retention feature to prevent bottles from sliding out in the shower
- Include drain holes throughout (water should never pool in a shower caddy)
- Use drainage slots in the bottom rather than solid surfaces for all horizontal areas
Mounting options for shower caddies:
- Tension pole mounting (hooks over an existing tension rod or dedicated tension pole)
- Adhesive mounting (command strip-style for waterproof tile adhesive)
- Suction cup mounting (integrated suction cup recesses in the back of the caddy)
- Over-door mounting (hooks over the top of a shower door frame)
Razor Holder
A wall-mounted or shower caddy-attached holder for a specific razor. The key is matching the holder geometry to the specific razor handle being used.
Design approach:
- Measure the razor handle at its widest and narrowest points
- Design a holder that grips the handle at its natural resting position
- Include a blade guard orientation (razor heads should face inward, away from the user’s hands when retrieving)
- If wall-mounted, use magnetic mounting (a neodymium magnet embedded in the holder, and a corresponding strip on the razor handle — or simply a magnetic razor holder where the razor’s metal head is attracted to the magnet)
Behind-Door Organizer
A hook-over-door organizer for the back of a bathroom door — multiple hooks and holders organized on a frame that hooks over the top of the door without requiring any drilling. Excellent for rental situations where wall drilling isn’t permitted.
Design: A top hook that fits the door thickness (measure door thickness — typically 35–45mm for interior doors), plus a backing frame that hangs behind the door, with hooks, rings, and pockets at accessible heights.
Bathroom Counter Organizer
A desktop-style organizer for the bathroom counter — compartments for cotton balls, cotton swabs, hair ties, makeup, and the various small items that accumulate on bathroom counters. Apply the same design principles as the desk organizers from Article 73, but use PETG for moisture resistance.
Mounting Systems for Bathroom Accessories
Mounting bathroom accessories is more complex than mounting equivalent accessories in dry rooms because:
- Tile and grout surfaces are common and require specialized anchors
- Humidity and water reduce adhesive effectiveness compared to dry environments
- The bathroom occupancy patterns make damage from falling accessories more dangerous (slipping hazard from fallen items)
Screw Mounting into Tile
For permanent installation into tiled walls:
- Use masonry/tile drill bits (carbide-tipped) and drill at low speed with steady pressure
- Drill into the tile (not the grout if possible — grout is weaker)
- Use expansion anchors designed for tile installation
- Apply waterproof silicone sealant around the screw hole before inserting anchor to prevent water infiltration
Design accessories for tile mounting with:
- Countersunk screw holes to allow flush mounting
- A waterproof seal detail (the back face that contacts the wall can include a recess for a bead of silicone sealant)
Adhesive Mounting
For non-permanent installation or rental situations:
3M Command Waterproof Strips: Specifically designed for bathroom use, these adhesive strips hold up to 7kg depending on strip quantity. Designed for high-humidity environments and waterproof surfaces. Follow manufacturer instructions exactly — surface must be completely dry before application.
Design considerations for adhesive mounting:
- The mounting surface on the printed accessory should be flat, smooth, and as large as practical to maximize adhesive contact area
- Print at 0.15mm layer height for the back face to ensure a flat, smooth adhesive surface
- Do not use accessories requiring more than 4–5kg hold from a single command strip pair
Suction Cup Mounting
Integrated suction cups: Commercial suction cups with screws or adhesive pads can be attached to printed accessories.
Printed suction cup receivers: Design circular recesses in the back of the accessory sized to accept standard suction cup diameters (38mm, 50mm common sizes). The suction cup snaps into the recess.
Suction cup effectiveness in bathrooms: Suction cups work best on very smooth, non-porous surfaces (glass shower doors, glazed tiles). They work less well on textured tile or grout. For suction cup mounting, ensure the mounting surface is absolutely clean, dry, and smooth before applying.
Over-Rod and Over-Rail Mounting
The simplest bathroom mounting that requires no drilling, adhesive, or hardware:
- Hooks that hang over the shower rod
- Hooks that hang over the top of a shower door
- Hooks that hang over a towel bar
These designs simply need a hook opening slightly wider than the rod/rail diameter. Quick to design, install, and remove. Perfect for renters.
Slicer Settings for Bathroom Accessories
| Setting | Wet Zone (Shower) | Humid Zone (Vanity/Counter) | Load-Bearing (Hooks) |
|---|---|---|---|
| Material | ASA or PETG | PETG | PETG |
| Layer Height | 0.2mm | 0.2mm | 0.2mm |
| Perimeters/Walls | 4–5 | 3–4 | 5–6 |
| Infill | 35–40% | 25–30% | 40–50% |
| Infill Pattern | Gyroid | Grid | Gyroid |
| Top/Bottom Layers | 5 | 4 | 5 |
| Temperature (PETG) | 238–242°C | 235–238°C | 240–244°C |
| Cooling | 70–75% | 80% | 70–75% |
| Bed Temp | 80°C | 80°C | 80°C |
The Reduced Cooling Recommendation for PETG
Bathroom accessories printed in PETG benefit from slightly reduced cooling compared to standard settings. PETG achieves better layer adhesion with 65–80% cooling versus the 100% used for PLA. Better layer adhesion means:
- Stronger inter-layer bonds that resist delamination
- Better resistance to the stress-relaxation that occurs over time under sustained load
- More uniform mechanical properties throughout the part
For load-bearing bathroom accessories (towel hooks, shower caddies that hold full bottles), this reduced-cooling PETG setting is important for long-term performance.
Step-by-Step: Printing a Complete Shower Hook Set
Let’s walk through printing a replacement set of 12 shower curtain hooks.
Step 1: Measure Your Setup
Measure:
- Shower rod diameter (typically 25mm)
- Curtain grommet inner diameter (typically 12–13mm)
- Number of hooks needed (count the grommets — usually 12)
Step 2: Find or Design the Hook
Search Printables for “shower curtain hook PETG” or “shower hook 25mm rod.” Look for designs with:
- Positive user feedback on durability
- Dimensions specified matching your measurements
- Photos of installed hooks
Alternatively, design in Tinkercad:
- Create the upper ring: 28mm inner diameter, 34mm outer diameter, 12mm wide — this is a torus shape
- Add a C-opening: subtract a 6mm wide box from one side of the ring to create the opening for installation
- Create the lower attachment: a smaller ring 14mm inner diameter, 3mm wide
- Create a connecting body linking the two rings
- Ensure the upper ring opening and lower attachment are oriented to allow curtain grommet threading and rod installation
Step 3: Slice for PETG Strength
Settings:
- PETG at 240°C nozzle / 80°C bed
- 0.2mm layer height
- 5 perimeters
- 40% Gyroid infill
- 5 top/bottom layers
- 75% cooling
- Orient hook with the ring plane vertical (hooks hanging vertically on the build plate using a brim for stability, or flat if the geometry allows)
For 12 hooks, fit as many as possible on the build plate — typically 6–8 per batch for a 220×220mm printer.
Step 4: Print and Inspect
Print both batches. Inspect each hook:
- Upper ring opening is clear and dimensionally correct
- Lower attachment loop is open and the correct size
- No delamination or weak spots at stress points
- Hook body is solid with no voids
Step 5: Install
Install on the rod and curtain per your design’s installation method. Check that:
- Hooks slide smoothly along the rod
- Curtain hangs freely without hooks binding
- No sharp edges contact the curtain fabric (which could tear it over time)
Creative Bathroom Projects Worth Exploring
Custom Bathtub Caddy
A tray that spans the bathtub for holding a book, phone, drink, and bath accessories during a relaxing soak. Designed to rest on the tub ledges on both sides. Print the tray in PETG with a waterproof finish (seal with epoxy or apply a waterproof coating). Include book/phone holders at appropriate angles and cup holders sized for your specific drinkware.
Magnetic Razor Wall Mount
A wall-mounted magnetic strip that holds a razor by its metal head — the razor sticks to the magnet, displayed neatly on the wall and drying efficiently between uses. Embed a strip of neodymium magnets in the wall mount piece during printing. The razor holds to the magnet without any clip or mechanical engagement — just stick and go.
Tiered Vanity Tower
A small stackable tower of bathroom supply trays — each tier sized for specific items (cotton balls, cotton swabs, bobby pins, hair ties) — that organizes the small items that clutter bathroom counters. Similar in concept to the stacking organizer systems from Article 71 but designed specifically for bathroom dimensions and items, in PETG for moisture resistance.
Shower Squeegee Holder
A wall-mounted holder for a shower squeegee — keeping it accessible for post-shower squeegee use while stored neatly. The holder must accommodate the specific squeegee handle profile and hold it securely with good drainage so water from the squeegee runs away from the wall.
Matching Bathroom Set
Designing a complete coordinated bathroom accessory set — soap dish, toothbrush holder, cup/rinse cup holder, small tray for rings and accessories — all in the same design language, same dimensions, same material and color. A matched set transforms a bathroom counter from a collection of mismatched commercial products into a deliberately designed, unified space.
Loofah or Bath Brush Holder
A hook or cradle specifically sized for a loofah or bath brush — keeping it hung to dry between uses rather than sitting in standing water at the bottom of the shower. Must accommodate the specific loofah or brush dimensions and design for good drainage and airflow.
Troubleshooting Common Bathroom Print Issues
Printed Accessory Develops Mold or Mildew Spots
Cause: Microscopic surface porosity in FDM prints harbors moisture and organic material, creating conditions for mold growth.
Solution: Regularly clean bathroom accessories with a mild bleach solution (1 part bleach to 10 parts water) applied with a brush. Pay special attention to surface texture and any recesses. For new prints, seal the surface with a waterproof coating (epoxy or polyurethane) to reduce surface porosity before installation. Consider replacing highly textured bathroom accessories annually if mold recurrence is a problem.
PLA Accessory Has Deformed or Warped After a Few Months
Cause: PLA moisture absorption and heat exposure (from shower steam) causing gradual deformation.
Solution: Replace with PETG. There is no good fix for a deformed PLA bathroom print — the material is simply wrong for this environment. Reprint in PETG or ASA, which maintain dimensional stability in bathroom conditions.
Adhesive-Mounted Accessory Falls Off Wall
Cause: Moisture compromised the adhesive bond; surface wasn’t perfectly clean and dry at installation; accessory weight exceeded adhesive capacity; thermal cycling weakened the bond.
Solution: Allow the bathroom to completely dry (24 hours without showering, ideally with ventilation) before re-mounting. Clean mounting surface thoroughly with isopropyl alcohol. Use Command waterproof strips (not standard strips). Ensure the printed back surface is smooth and flat. Do not mount during humid conditions.
Shower Hook Breaks Under Curtain Load
Cause: Insufficient wall thickness at stress points, PLA instead of PETG, wrong print orientation leaving the stress at the weakest layer-to-layer direction.
Solution: Reprint in PETG. Increase perimeters to 5. Recheck print orientation — hooks should be oriented so the primary stress runs parallel to layer lines (not perpendicular). Check that the upper ring opening isn’t creating a stress concentration at the gap edges — add material or redesign the opening geometry.
PETG Parts Have Stringy Surface Appearance
Cause: PETG strings more than PLA; bathroom accessories often have many travel moves over cutouts and holes; insufficient retraction or too high temperature.
Solution: Increase retraction to 5–6mm (Bowden) or 3–4mm (direct drive). Reduce temperature to 232–235°C (lower end of PETG range). Enable Combing mode to keep travel moves inside the part. Clean light stringing with a heat gun pass from 10cm distance after printing.
Conclusion: The Bathroom That Works for You
The bathroom is one of the spaces where the gap between what commercial products offer and what any specific household actually needs is most clearly felt — because the bathroom serves specific, daily rituals, and small inefficiencies in those rituals are experienced repeatedly, every day.
Printed bathroom accessories close this gap with specificity that no commercial product can match. The exactly right number of shower hooks. The soap dish designed for this bar of soap. The toothbrush holder with exactly the right number of slots. The towel hook placed on precisely the right wall in precisely the right position.
These are small improvements individually. Collectively, they produce a bathroom that works the way you actually use it — not the way a product designer imagined an average user might use it.
Print PETG. Design for drainage. Mount properly. Replace regularly.
Your bathroom can be the space it should be, one printed accessory at a time.