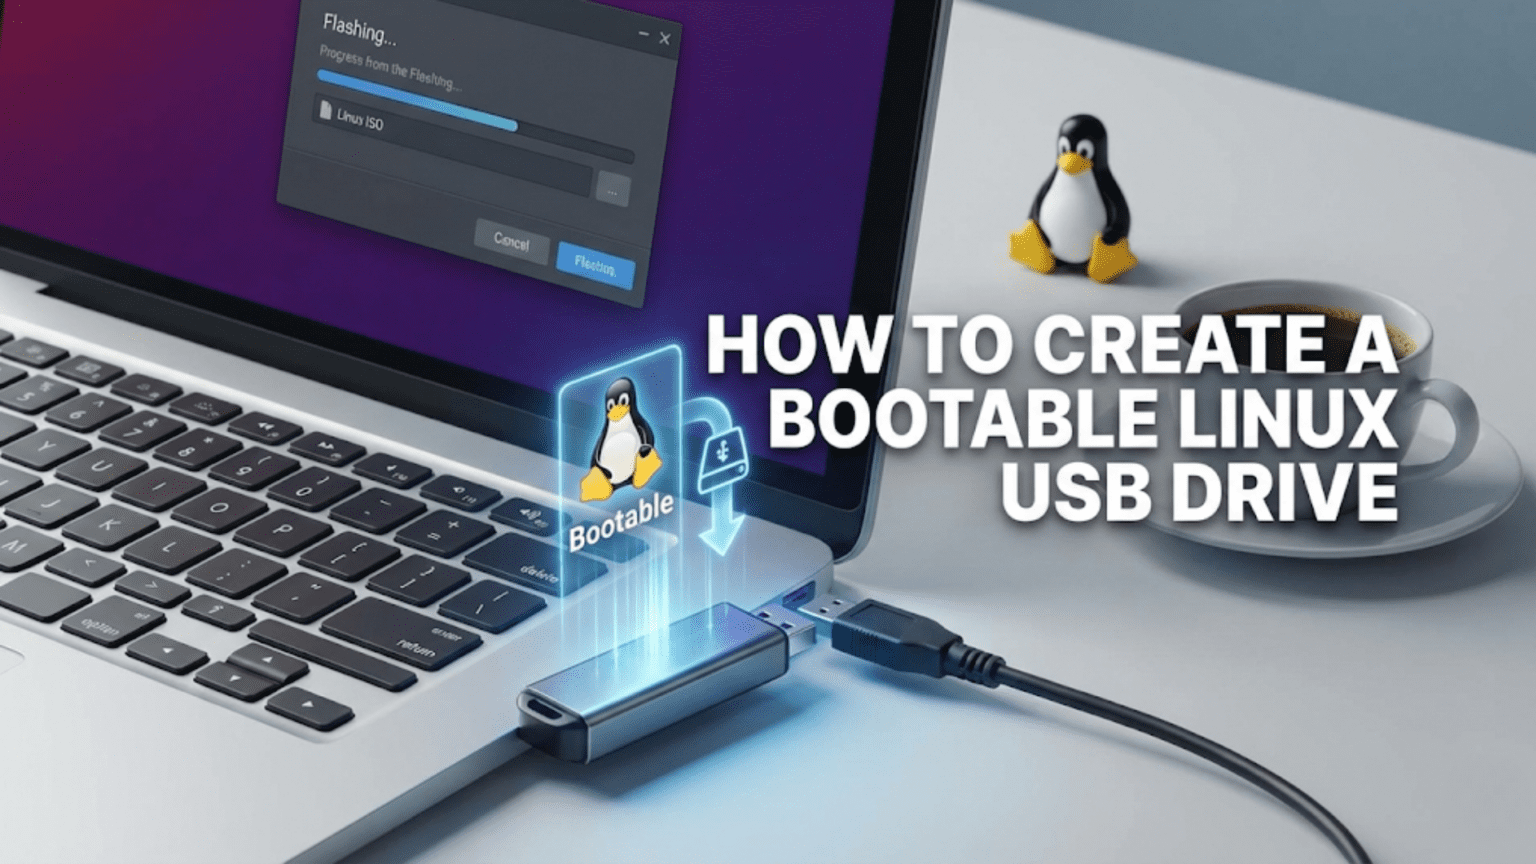
A bootable Linux USB drive is a flash drive that contains a complete Linux operating system, allowing you to run or install Linux on any compatible computer without touching its existing hard drive. To create one, you download a Linux ISO image file, then use a tool like Rufus (Windows), Balena Etcher (any platform), or the dd command (Linux/macOS) to write that image to your USB drive in a bootable format.
Introduction: Your Gateway into the Linux World
Before you can experience Linux for the first time, before you can install it on your computer, and before you can evaluate whether it suits your needs, you need a way to run it. That way is a bootable USB drive — a simple flash drive that carries a complete, functional Linux operating system ready to launch on virtually any computer.
Creating a bootable Linux USB drive is the essential first step in the Linux journey, and it is far simpler than many beginners expect. The entire process takes between ten and twenty minutes, requires only a USB flash drive of modest size, and needs no special technical knowledge to complete. You do not need to understand how Linux works, how computers boot, or what an ISO image is at a deep level — though this article will explain those things too, because understanding what you are doing always makes the process smoother.
This guide will walk you through every step of creating a bootable Linux USB drive, covering all three major current operating systems — Windows, macOS, and Linux itself — and explaining multiple methods for each. We will cover what tools to use, how to download your Linux image safely, what to watch out for, and how to actually boot from the USB drive once it is ready. By the end, you will have everything you need to hold Linux in your hand and run it on any computer you encounter.
Understanding the Basics: What Is a Bootable USB Drive?
Before diving into the how-to steps, a brief explanation of what is happening under the hood will help you understand the process and troubleshoot if anything goes wrong.
What Is Booting?
When you turn on a computer, it goes through a startup sequence called booting. The processor begins executing firmware instructions stored on the motherboard — either the older BIOS (Basic Input/Output System) or the modern UEFI (Unified Extensible Firmware Interface). This firmware performs hardware checks, then looks for a bootable device — something that contains an operating system — and hands control to it.
By default, computers are configured to boot from their internal hard drive or solid-state drive, which is where Windows, macOS, or your current operating system is installed. But computers can also be configured to boot from external devices, including USB flash drives. When a bootable USB drive is inserted and the computer is told to boot from it, the firmware loads the bootloader from the USB drive instead of the internal drive, which then starts the operating system on the USB.
What Is an ISO Image?
Linux distributions are distributed as ISO image files. The ISO format originated as a way to represent the contents of optical discs (CDs and DVDs) as a single file. An ISO image is an exact, sector-by-sector copy of the data that would be written to a disc, including all the filesystem metadata, boot sectors, and file data. When you download an Ubuntu ISO file, for example, you are downloading a complete snapshot of everything that would go on an Ubuntu installation DVD.
To create a bootable USB drive, you need to write the ISO image to the USB drive in a way that preserves its bootable structure — not simply copying the ISO file onto the USB as you would copy a document, but writing the raw image data directly to the drive so that its boot sectors and filesystem are replicated exactly. This is what bootable USB creation tools like Rufus and Etcher do: they handle the technical process of writing the ISO correctly so that the drive becomes bootable.
Why Not Just Copy the ISO File to the USB?
This is a common mistake for beginners. If you copy the ISO file onto a USB drive as you would copy any other file, the USB drive will contain the ISO file in its filesystem, but it will not itself be bootable. The ISO file sitting in a FAT32 or NTFS filesystem on a USB drive cannot be booted directly. The boot sectors that tell firmware how to start the operating system need to be written to specific locations on the drive itself, which requires a dedicated tool. Always use a proper bootable USB creation tool — never just drag and drop the ISO file.
What You Will Need
Preparing before you start saves time and frustration. Here is everything you need to create a bootable Linux USB drive:
A USB flash drive with sufficient capacity. Most current Linux distributions require at least 4 GB for the ISO image, but 8 GB is a comfortable minimum that leaves room for a persistent storage layer if you want to save files between live sessions. Speed matters — a USB 3.0 drive will write faster and run the live system noticeably more quickly than a USB 2.0 drive. For regular use as a live Linux environment, consider a drive of 16 GB or larger.
Important warning about the USB drive: The process of creating a bootable USB drive will completely erase everything currently on the drive. Make sure the drive contains nothing you need to keep, or copy its contents elsewhere before proceeding.
A Linux ISO file downloaded from your chosen distribution’s official website. We will cover how to download and verify this correctly in the next section.
A bootable USB creation tool appropriate for your current operating system. We will cover the best options for Windows, macOS, and Linux.
A computer to create the drive on — this is simply your current computer, whatever operating system it runs.
Step 1: Downloading the Linux ISO
The first step is downloading the ISO image for your chosen Linux distribution. This sounds straightforward, but there are important details about where to download from and how to verify what you have downloaded.
Downloading from Official Sources
Always download Linux ISO files from the official website of the distribution you have chosen. For the three most popular beginner distributions:
Ubuntu is available at ubuntu.com/download/desktop. For most users, the LTS (Long Term Support) version is recommended. The download page clearly labels the current LTS release and provides direct download links.
Linux Mint is available at linuxmint.com/download.php. The Mint website offers three desktop editions — Cinnamon (recommended for most users), MATE, and Xfce (for older hardware). Select the edition you want and use the download link provided.
Fedora is available at fedoraproject.org/workstation. The Fedora Workstation download page provides direct links for the current Fedora release.
Avoid downloading ISO files from third-party mirror sites you find through search engines unless those sites are listed on the official distribution website as official mirrors. The official download pages often list verified mirror servers for faster downloads from nearby geographic regions — these are safe. Random file hosting sites or torrents not listed on the official site may contain modified or malicious versions of the ISO.
File Size
Linux ISO files are typically between 1 GB and 4 GB in size. On a fast broadband connection, downloading should take a few minutes to around half an hour. If you have a slower connection, many distributions offer torrent downloads, which can be more reliable for large files and are perfectly legitimate — the torrent files themselves are listed on official download pages.
Verifying Your Download with Checksums
This step is optional but strongly recommended, especially if you downloaded from a mirror site or had any download interruptions. ISO files can become corrupted during download, and a corrupted ISO will either fail to create a proper bootable drive or produce a drive that fails mid-installation.
Distribution websites publish checksum values alongside their ISO downloads — typically SHA256 hashes. A checksum is a mathematical fingerprint of a file: the same input file always produces the same checksum, and any modification to the file, even changing a single byte, produces a completely different checksum. By comparing the checksum of your downloaded file against the value published on the official website, you can confirm your download is complete and unmodified.
On Windows, you can verify a checksum by opening PowerShell and running:
Get-FileHash C:\path\to\your\file.iso -Algorithm SHA256On macOS, open Terminal and run:
shasum -a 256 /path/to/your/file.isoOn Linux, open a terminal and run:
sha256sum /path/to/your/file.isoCompare the output to the SHA256 value on the distribution’s download page. If they match exactly, your file is intact. If they differ, re-download the ISO before proceeding.
Step 2: Choosing and Installing Your USB Creation Tool
Different tools are available for different operating systems. Each tool covered here is free, reputable, and widely used by the Linux community.
Tools at a Glance
| Tool | Windows | macOS | Linux | Graphical UI | Difficulty |
|---|---|---|---|---|---|
| Rufus | Yes | No | No | Yes | Very Easy |
| Balena Etcher | Yes | Yes | Yes | Yes | Very Easy |
| Ventoy | Yes | No | Yes | Yes | Easy |
| dd command | No | Yes | Yes | No (terminal) | Intermediate |
| GNOME Disks | No | No | Yes | Yes | Easy |
Method 1: Using Rufus (Windows — Recommended)
Rufus is the most widely recommended tool for creating bootable USB drives on Windows. It is fast, reliable, free, and handles BIOS and UEFI boot modes correctly. Rufus has been the community standard for Windows users for years and is trusted by millions of users worldwide.
Downloading Rufus
Visit rufus.ie — the official Rufus website. Download the latest version. Rufus is available as a standard installer or as a portable executable that requires no installation. The portable version is convenient: download it, run it, and no installation is needed.
Using Rufus
Insert your USB drive into your computer. Open Rufus. If Windows asks whether to allow Rufus to make changes to your device, click Yes.
Rufus will automatically detect connected USB drives. Check that the Drive drop-down at the top of the window shows your USB drive. If you have multiple USB drives connected, make absolutely sure you select the correct one — the one you intend to erase and make bootable.
Click the SELECT button and navigate to your downloaded ISO file. Select it and click Open. Rufus will read the ISO and automatically configure most settings appropriately for that specific distribution.
Under Partition scheme, you will usually want GPT if your computer uses UEFI (all computers made after approximately 2012) or MBR if your computer uses the older BIOS firmware. If you are unsure, GPT with UEFI is the correct choice for most modern computers. Rufus may display a dialog asking which mode you detected — if your target computer uses UEFI, choose GPT.
Leave the File system and Cluster size settings at their defaults unless you have a specific reason to change them. The Volume label can be changed to anything you like — it is just the name that will appear for the drive.
Click START. Rufus will warn you that all data on the USB drive will be destroyed. Confirm this is acceptable, and Rufus will begin writing the image. A progress bar shows the write progress. The process typically takes between five and fifteen minutes depending on your USB drive’s write speed.
When Rufus shows READY in green at the bottom of the window, the process is complete. Your bootable USB drive is ready.
Rufus and ISO vs. DD Mode
When writing certain ISO files, Rufus may ask whether to write in ISO Image mode or DD Image mode. For most Linux distributions, ISO Image mode is correct and allows Rufus to optimize the partition layout for better compatibility. If you experience boot problems with ISO Image mode, try again with DD Image mode, which writes the ISO exactly as-is to the drive.
Method 2: Using Balena Etcher (Windows, macOS, Linux)
Balena Etcher is the cross-platform choice — it runs on Windows, macOS, and Linux with an identical interface on all three. Etcher is designed to be as simple as possible: its three-step interface (select image, select drive, flash) makes it the most beginner-friendly option available. It also performs automatic verification after writing, confirming that the data was written correctly.
Downloading Etcher
Visit etcher.balena.io and download the version for your operating system. On Windows, Etcher is available as an installer or a portable executable. On macOS, it is available as a DMG file you drag to your Applications folder. On Linux, it is available as an AppImage that runs without installation.
Using Etcher
Open Etcher. The interface shows three large buttons in sequence.
Click “Flash from file” and navigate to your downloaded ISO file. Select it. Etcher will show the filename and size of the selected image.
Click “Select target” and choose your USB drive from the list of available drives. Etcher clearly shows the drive name, size, and a warning if it detects a drive that might contain important data. Confirm your selection.
Click “Flash!” Etcher will ask for administrator permissions (required to write to drives), then begin writing the image. A progress bar shows both the write progress and, after writing completes, a verification phase where Etcher reads back the written data and confirms it matches the source. This verification step provides confidence that your bootable drive was created correctly.
When Etcher shows “Flash Complete!” the process is finished. Your drive is ready.
Etcher’s main advantage over Rufus is its simplicity and cross-platform availability. Its main limitation is fewer configuration options — for most users writing a Linux ISO, this is not a problem, but advanced users may prefer Rufus’s additional controls.
Method 3: Using Ventoy (Windows and Linux — For Multiple ISOs)
Ventoy takes a fundamentally different approach from Rufus and Etcher. Instead of writing one ISO to a drive (and erasing the drive to add a different ISO later), Ventoy installs itself to the USB drive once, and then you simply copy ISO files to the drive as you would copy any file. When you boot from a Ventoy drive, it displays a menu of all ISO files it finds and lets you boot into any of them.
This approach is excellent if you want to keep multiple Linux distributions on a single USB drive, or if you frequently try different distributions and do not want to re-flash your drive each time. Ventoy supports virtually all Linux distribution ISOs and many other bootable images as well.
Setting Up Ventoy
Visit ventoy.net and download the Windows or Linux version. Run the installer, select your USB drive, and click Install. Ventoy will prepare the drive with its bootloader. This takes only a minute or two.
After installation, your USB drive will appear as a normal storage device in your file manager. Simply copy one or more ISO files to the drive — drag and drop, just like copying any file. Ventoy will detect them automatically when you boot from the drive.
To add or remove distributions in the future, you simply copy new ISO files to the drive or delete existing ones. No re-flashing required.
Method 4: Using the dd Command (macOS and Linux)
The dd command is a Unix utility available on macOS and all Linux distributions that can write ISO images directly to drives. It is more complex than graphical tools and requires careful attention to avoid accidentally writing to the wrong drive, but it is powerful, always available on Unix-like systems, and requires no additional software installation.
Warning: The dd command is sometimes called “disk destroyer” by experienced users because a mistake in specifying the target drive can overwrite your system drive or other important drives. Double-check every command before pressing Enter, and verify the target drive identifier carefully.
Identifying Your USB Drive
On macOS, open Terminal and run:
diskutil listThis displays all disks and their identifiers. Look for your USB drive — it will be identified by its size (matching your USB drive’s capacity) and usually shown as something like /dev/disk2 or /dev/disk3. Note the full identifier.
On Linux, open a terminal and run:
lsblkThis shows all block devices. Your USB drive will appear as something like /dev/sdb or /dev/sdc. Its size should match your USB drive’s capacity. Note the full device path.
Writing the ISO on macOS
First, unmount the disk (but do not eject it physically):
diskutil unmountDisk /dev/disk2(Replace /dev/disk2 with your actual drive identifier.)
Then write the ISO:
sudo dd if=/path/to/linux.iso of=/dev/rdisk2 bs=1m status=progressNote the r prefix in /dev/rdisk2 — this is the raw disk device on macOS, which is significantly faster than using /dev/disk2 directly. Replace the path with your actual ISO file path and drive identifier.
The status=progress option shows a progress indicator. Without it, dd runs silently with no visible output until it finishes, which can be alarming for beginners who think nothing is happening.
Writing the ISO on Linux
On Linux, the command is similar:
sudo dd if=/path/to/linux.iso of=/dev/sdb bs=4M status=progress oflag=syncReplace /dev/sdb with your actual drive identifier and update the path to your ISO file. The oflag=sync option ensures all data is fully written to the drive before the command returns.
dd provides no progress feedback by default in older versions. The status=progress option was added in GNU coreutils 8.24 and should be available on any modern Linux system. On older systems, you can send the USR1 signal to the running dd process to get a one-time progress update: kill -USR1 $(pgrep ^dd).
When dd completes, it prints a summary showing the number of bytes transferred and the transfer rate. Safely eject the USB drive before removing it.
Method 5: Using GNOME Disks (Linux — Graphical)
If you are already running a Linux system with the GNOME desktop environment, GNOME Disks provides a graphical interface for writing ISO images without needing to install additional software.
Open GNOME Disks from your applications menu (search for “Disks”). In the left panel, select your USB drive — identify it by size. Click the three-dot menu icon in the top-right corner of the window and select “Restore Disk Image.” Navigate to your ISO file and click “Start Restoring.” Confirm the operation, enter your administrator password when prompted, and wait for the process to complete.
GNOME Disks is straightforward and effective, though it offers fewer options than Rufus or Etcher. For Linux users who want a simple graphical tool without installing anything new, it is a convenient choice.
Step 3: Booting from Your USB Drive
With your bootable USB drive created, the next step is actually booting from it. This requires either changing your computer’s boot order or using a one-time boot menu.
Accessing the Boot Menu
The easiest way to boot from a USB drive is through the boot menu — a temporary selection screen that most computers provide without requiring permanent changes to BIOS/UEFI settings.
Insert your bootable USB drive into your computer. Restart the computer, and as it starts up, press the boot menu key. This key varies by manufacturer:
Most common boot menu keys by manufacturer are F12 (Dell, Lenovo, most laptops), F8 or F9 (HP), Option key (Apple Mac), F11 (MSI), or Escape (some ASUS models). The correct key is often briefly shown on screen during the very start of the boot process, usually in small text at the bottom of the screen reading something like “Press F12 for boot menu.” You must press the key before Windows starts loading — if Windows begins booting, you missed the window and need to restart and try again.
The boot menu will appear showing available boot devices. Look for your USB drive — it may be listed by its brand name (like “Kingston DataTraveler”), as “USB Storage Device,” or as “USB HDD.” Select it and press Enter. Your computer will boot from the USB drive.
Changing Boot Order in BIOS/UEFI
If the boot menu approach does not work or your computer does not have a boot menu, you can change the boot order in BIOS/UEFI settings. Access BIOS/UEFI by pressing the setup key during startup — commonly Delete, F2, F10, or F1 depending on the manufacturer.
Navigate to the Boot or Boot Order section (navigation varies by BIOS/UEFI — you may need to use arrow keys and Enter, or the interface may support mouse clicks). Find the boot priority list and move USB drive or Removable Devices to the top of the list. Save changes and exit. Your computer will now attempt to boot from USB first, then fall back to the internal drive if no USB is present.
Dealing with Secure Boot
Modern computers with UEFI firmware include a security feature called Secure Boot that verifies the digital signature of bootloaders before allowing them to run. This prevents malware from hijacking the boot process but can also prevent unsigned bootloaders from running — including some Linux distributions.
Major distributions like Ubuntu and Fedora include Microsoft-signed bootloaders (called shim) that work correctly with Secure Boot enabled. If you encounter a “Secure Boot violation” error or the computer refuses to boot your USB drive, you may need to disable Secure Boot in UEFI settings temporarily. Look for a Secure Boot option in the UEFI security settings and set it to Disabled. Remember that this reduces security slightly — re-enable it once you have installed Linux if you prefer.
Using Linux from Your Bootable USB: Live Mode
When your computer boots from the Linux USB drive, you will typically be presented with a menu offering options including “Try Ubuntu” (or “Try Linux Mint,” etc.) and “Install.” Choosing the Try option runs Linux entirely from the USB drive without touching your computer’s internal drive — this is called live mode.
Live mode is extremely useful. It lets you experience the distribution’s desktop, test whether your hardware (especially Wi-Fi, display, and touchpad) works correctly, and explore the applications included before committing to installation. You can browse the web, open files, and use applications just as you would on an installed system.
The main limitation of live mode is that it does not persist changes between sessions. Any files you create or settings you change are lost when you shut down, because they are stored in your computer’s RAM rather than on a permanent drive. Some tools (including Ventoy and certain Rufus options) allow creating a persistent storage area on the USB drive that preserves changes between live sessions — useful for carrying a Linux environment with you that remembers your settings.
Troubleshooting Common Problems
Even with careful preparation, you may occasionally encounter issues. Here are the most common problems and their solutions.
The computer ignores the USB drive and boots normally: The boot order may not be set to prioritize USB, or you may not have pressed the boot menu key quickly enough. Try again with the boot menu key (hold it down as soon as you press the power button, before any logo appears), or change the boot order in UEFI/BIOS settings.
The USB drive is not recognized as bootable: The ISO may not have been written correctly. Verify that you used a proper bootable USB creation tool and did not simply copy the ISO file. Try recreating the drive with Rufus or Etcher. Also verify the ISO checksum to rule out a corrupted download.
Secure Boot error or authentication failure: Your UEFI Secure Boot is rejecting the bootloader. Either your distribution supports Secure Boot (in which case there may be a different issue) or you need to temporarily disable Secure Boot in UEFI settings.
Black screen after booting: This is commonly a graphics driver issue, particularly with NVIDIA graphics cards. At the GRUB boot menu (the menu that appears before Linux starts loading), press e to edit the boot entry, find the line beginning with linux, and add nomodeset before the quiet splash parameters. Press Ctrl+X or F10 to boot with this option. This disables hardware graphics acceleration but allows the system to boot so you can install proper drivers.
The system boots but Wi-Fi does not work: Some Wi-Fi chipsets require proprietary drivers that are not included in the live environment. This is more common with certain Broadcom and Realtek chipsets. Most distributions offer driver management tools that can install additional drivers — check the settings application after installation for a “Additional Drivers” or “Driver Manager” option.
Caring for Your Bootable USB Drive
A properly created bootable Linux USB drive is a durable and useful tool. A few care practices will keep it reliable.
Always safely eject the USB drive rather than simply pulling it out. Even after a write operation completes, some data may be in a write cache. Using the “Eject” or “Safely Remove” option from your operating system ensures all data has been written before the drive is disconnected.
Store USB drives away from strong magnetic fields and extreme temperatures. While USB flash drives are more durable than hard drives (they have no moving parts), they can still be damaged by physical stress, static electricity, and extreme heat.
USB drives do have limited write cycles — flash memory can only be written to a finite number of times before it begins to fail. For a bootable drive that you do not write to frequently, this is rarely a concern in practice, but it is worth being aware of for drives used heavily for persistent storage.
Conclusion: Your Linux USB Is Your Key to the Linux World
Creating a bootable Linux USB drive is the simplest and most accessible way to enter the Linux ecosystem. With a USB drive, a downloaded ISO, and one of the tools covered in this guide, you can have a bootable Linux system ready in under twenty minutes. That drive becomes a powerful tool: a way to try Linux before installing, a recovery environment for troubleshooting problems, and a portable Linux system you can carry and run on any compatible computer.
The process is genuinely accessible to complete beginners. Rufus on Windows and Balena Etcher on any platform eliminate almost all complexity, handling the technical details of writing bootable images with simple graphical interfaces. The dd command is available for those who prefer the terminal. Ventoy offers unmatched flexibility for users who want to carry multiple distributions.
Once your drive is ready and you have spent time exploring Linux in live mode, the natural next step is installation — a process covered in the following article in this series. Your bootable USB drive will serve you there too, as the same drive used to try Linux live is also the installer for putting Linux permanently on your computer.