Navigating the Linux desktop for the first time involves learning how to launch applications, manage windows, browse files, adjust system settings, and connect to the internet — all through a graphical interface that may differ from Windows or macOS but follows logical patterns quickly learned with practice. Modern Linux desktops like GNOME, KDE Plasma, and Cinnamon provide everything a new user needs within a few clicks, and most tasks work exactly as they do on other operating systems.
Introduction: You Have Installed Linux — Now What?
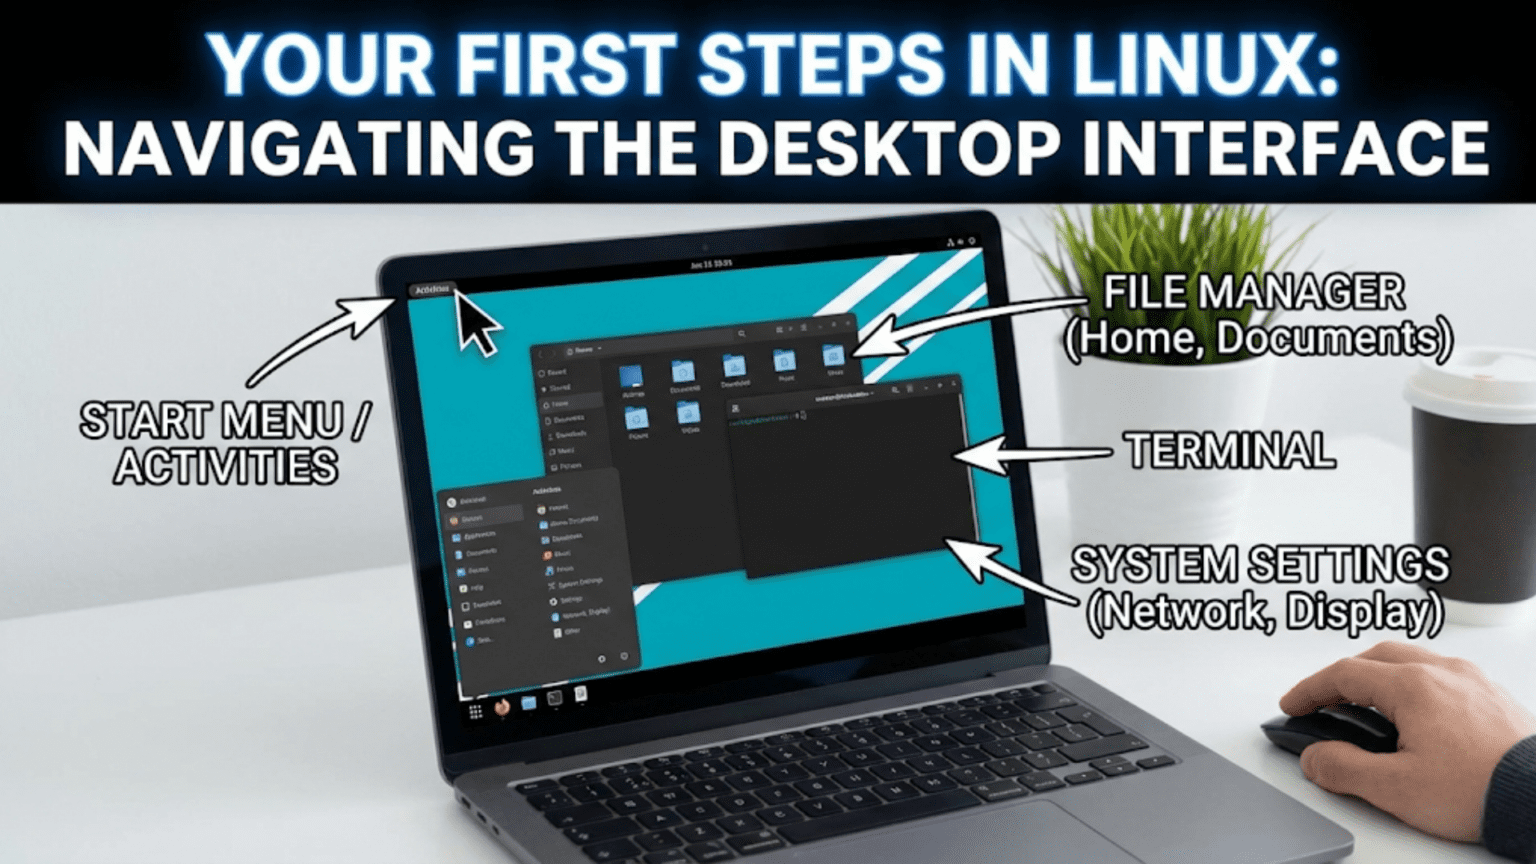
The installation is complete. You have restarted your computer, watched the boot animation play, entered your password at the login screen, and arrived at your new Linux desktop for the very first time. The screen shows a background image, perhaps a panel or dock along one edge, and an overall sense of clean newness. You know this is Linux, you know it is different from what you used before, and you may feel a mixture of excitement and uncertainty about what to do next.
This feeling is completely normal and universally shared by every person who has ever switched to Linux. The desktop looks broadly familiar — there are windows, there are menus, there are icons — but the specific layout, the location of things, and the names of applications are different enough to require a period of orientation. The good news is that this orientation period is measured in days, not weeks. Linux desktops follow logical patterns, and once you understand those patterns, navigating becomes intuitive.
This article is your guided orientation to the Linux desktop. We will walk through everything a new user encounters in the first hours and days of Linux use: understanding the desktop layout, launching applications, managing open windows, browsing and organizing files, connecting to the internet, adjusting settings, installing new software, and building the fundamental habits that make Linux use feel natural. The examples in this article primarily reference Ubuntu (with GNOME), Linux Mint (with Cinnamon), and Fedora (with GNOME), but the concepts apply broadly across all Linux desktop environments.
Understanding Your Desktop Layout
The first step in navigating any new interface is understanding its structure — where things live and what each element does.
The Desktop Background
The desktop background, called the wallpaper, is the image behind everything else on screen. This is purely aesthetic and can be changed to any image you like through your system settings. Right-clicking on an empty area of the desktop typically reveals a context menu with options including “Change Background” or “Desktop Settings.” In most Linux desktop environments, you can also display files and folders directly on the desktop background, though GNOME hides this capability by default and requires an extension to enable it.
The Panel or Taskbar
Most Linux desktops feature one or more panels — bars running along the edges of the screen that contain frequently used controls and information. The exact configuration varies by desktop environment:
In Linux Mint with Cinnamon, a single panel runs along the bottom of the screen, closely resembling the Windows taskbar. On the left is the application menu (the Mint Menu, opened by clicking the Linux Mint logo), in the center is the taskbar showing open windows, and on the right is the system tray containing the clock, volume control, network status, and notification area.
In Ubuntu with GNOME, there is no traditional bottom taskbar. Instead, a top bar shows the activities button on the left, the clock in the center, and a combined system menu on the right. A dock runs along the left side showing pinned and running applications. Open windows do not appear in any permanent bar — they are managed through the Activities Overview instead.
In Fedora with GNOME (stock GNOME), the layout is similar to Ubuntu’s GNOME but without the left dock by default — the dock only appears in the Activities Overview.
In KDE Plasma, a panel runs along the bottom with an application launcher (the KDE Menu) on the left, a taskbar showing open applications in the center, and system tray controls on the right — the most Windows-like layout of the major desktop environments.
Understanding your specific panel layout is the foundation of desktop navigation. Spend a few minutes identifying each element in your panel and what it does before moving on.
The System Tray and Quick Settings
The corner of your panel (typically the right side) contains the system tray — a collection of small icons providing quick access to system status and settings. Clicking on these icons reveals important controls:
The network icon shows your current connection status and allows you to connect to Wi-Fi networks or manage wired connections. Clicking it reveals available networks and a toggle for enabling or disabling networking.
The volume icon controls audio output levels. Clicking typically shows a slider. Right-clicking or holding may reveal options to select different audio output devices if you have speakers and headphones connected.
The battery icon (on laptops) shows remaining charge and estimated time. Clicking may reveal power settings.
The clock shows the current time. Clicking typically expands to show a calendar. Right-clicking may offer options to adjust date and time settings.
The notification area accumulates alerts from applications — software updates available, new emails (if a mail client is configured), download completions, and other events. Clicking opens a notification center showing recent alerts.
On GNOME, these elements are combined into a single “Quick Settings” panel that expands from the top-right corner, showing all status information and common toggles together. On Cinnamon and KDE, they appear as individual icons.
Launching Applications
One of the most fundamental tasks on any desktop is launching applications. Linux provides multiple ways to do this.
The Application Menu
Every major Linux desktop environment provides an application menu — a searchable list of all installed programs organized by category.
In Cinnamon (Linux Mint), click the menu button in the bottom-left corner of the screen (or press the Super key). The Mint Menu opens showing a search bar at the top, category filters in the center, and favorite/recently used applications. Type the name of any application to search for it, or browse categories like Internet, Office, Graphics, and Sound & Video to find programs by type.
In KDE Plasma, click the application launcher in the bottom-left corner. The KDE Application Launcher displays applications in a grid organized by category, with a search bar at the top. You can switch between the grid view and a traditional hierarchical menu view using controls within the launcher.
In GNOME, click “Activities” in the top-left corner or press the Super key to open the Activities Overview. A search bar appears at the top. Type the name of any application to find and launch it instantly. To browse installed applications, click the grid icon (the nine-dot “Show Applications” button) at the bottom of the dock to see all installed applications in a scrollable grid view organized into folders.
The Application Search: The Fastest Way
Regardless of which desktop environment you use, the fastest way to launch any application is to search for it by name. On GNOME and Cinnamon, press the Super key and start typing. On KDE, click the launcher and type. The search is nearly instant — type “fire” and Firefox appears. Type “files” and the file manager appears. Type “term” and the terminal opens.
Developing the habit of searching for applications by name rather than browsing menus is one of the most effective productivity habits you can adopt as a new Linux user. It works faster than navigating menus and requires remembering only the application’s name rather than its location in the menu hierarchy.
The Taskbar: Switching Between Open Applications
When you have multiple applications open, the taskbar (or dock) shows them so you can switch between them quickly. In Cinnamon and KDE, open applications appear as buttons in the central taskbar — click any button to bring that application to the foreground. If an application has multiple windows open, clicking its button may reveal a thumbnail preview of each window for selection.
In GNOME, switching between applications is done through the Activities Overview (press Super to open it) or by pressing Alt+Tab, which cycles through open applications with a visual switcher. Alt+Tab is universal across all Linux desktop environments and is one of the most useful keyboard shortcuts to learn first.
Right-Click Context Menus
Right-clicking on almost anything in Linux reveals a context menu with relevant options, just as in Windows and macOS. Right-clicking on the desktop reveals options for changing the wallpaper and desktop settings. Right-clicking on a file reveals options for opening, copying, moving, renaming, deleting, and compressing. Right-clicking on the taskbar or panel reveals options for configuration. This right-click behavior is consistent and intuitive across all Linux desktop environments.
Managing Windows
Working with application windows in Linux follows patterns familiar from other operating systems, with a few Linux-specific additions worth knowing.
Basic Window Controls
Every application window has title bar controls for closing, minimizing, and maximizing the window. The exact position and appearance of these controls varies:
In most Linux desktop environments, the controls appear in the top-right corner of the window — close (X), maximize (square), minimize (dash) — similar to Windows. In Ubuntu’s GNOME implementation, the controls appear on the right. In some GNOME configurations (and macOS-inspired setups), they appear on the left. You can change the position of window controls through your desktop settings or GNOME Tweaks.
Double-clicking on a window’s title bar typically maximizes it. Double-clicking again restores it to its previous size. Clicking and dragging the title bar moves the window. Clicking and dragging the window’s edge or corner resizes it.
Window Tiling and Snapping
Most Linux desktop environments support window snapping — dragging a window to the edge of the screen causes it to snap to fill half the screen (left or right half), allowing two windows to be viewed side by side.
In Cinnamon and KDE, dragging a window to the left edge snaps it to the left half; dragging to the right edge snaps it to the right half. Dragging to a corner snaps the window to a quarter of the screen. This behavior makes managing multiple document or browser windows comfortable on larger monitors.
GNOME supports snapping as well, triggered by dragging windows to screen edges. KDE additionally supports a powerful tiling system that can be configured for even more automatic window organization.
Keyboard shortcuts for window management are worth learning early. Super+Left Arrow snaps the active window to the left half; Super+Right Arrow snaps it to the right half; Super+Up Arrow maximizes the window; Super+Down Arrow restores or minimizes it. These shortcuts work consistently across Cinnamon, KDE, and GNOME.
Virtual Desktops (Workspaces)
One of Linux’s most useful features for managing multiple tasks is virtual desktops, also called workspaces — multiple separate screens that you switch between, each containing different open windows. This is like having multiple physical monitors, except you switch between them rather than viewing them simultaneously.
In GNOME, workspaces are dynamic — they are created automatically as you fill them with windows and removed when empty. Switch between workspaces with Super+Page Up and Super+Page Down, or through the Activities Overview where workspaces appear as thumbnails on the right side.
In Cinnamon and KDE, workspaces are fixed in number (configurable in settings). The workspace switcher in the panel shows small representations of each workspace. Click a workspace to switch to it, or use keyboard shortcuts: Ctrl+Alt+Left Arrow and Ctrl+Alt+Right Arrow move between workspaces. In KDE, you can also set up a grid of workspaces navigable in two dimensions.
Using workspaces effectively transforms how you manage a busy desktop. Common patterns include keeping your web browser and communication applications on workspace 1, your main work application on workspace 2, and a terminal or reference material on workspace 3. Switching between contexts becomes a single keyboard shortcut rather than hunting through a crowded taskbar.
Browsing and Managing Files
The file manager is one of the applications you will use most frequently in Linux. It provides graphical access to your files and folders and handles everyday file operations.
Your File Manager
Depending on your desktop environment, your default file manager will be:
Nautilus (Files) — the GNOME file manager, used in Ubuntu and Fedora. Clean and minimal interface with a sidebar showing bookmarked locations, a breadcrumb navigation bar, and a clean file view. Right-click provides basic file operations.
Thunar — the XFCE file manager, also used in some other lightweight setups. Fast and efficient with a traditional two-panel interface option.
Dolphin — the KDE file manager, considered the most feature-rich. Supports split-pane views, embedded terminal, tabbed browsing, and extensive right-click functionality.
Nemo — the Cinnamon file manager (a fork of Nautilus). More traditional interface than Nautilus with more visible options and a tree view in the sidebar.
All of these file managers share fundamental behaviors: double-click to open a file or folder, click once to select, Ctrl+click to select multiple items, drag and drop to move files. The keyboard shortcuts Ctrl+C (copy), Ctrl+X (cut), Ctrl+V (paste), Ctrl+Z (undo), and Delete (move to Trash) work consistently.
The Linux Home Folder
One of the first things to understand about the Linux file system is the home folder. Every user account in Linux has a dedicated home folder located at /home/username — for example, /home/sarah. This is where all your personal files live: documents, downloads, music, pictures, and videos. It is the equivalent of the C:\Users\username folder in Windows or the /Users/username folder in macOS.
When you open your file manager, it typically opens your home folder by default. You will see subfolders like Documents, Downloads, Music, Pictures, and Videos — automatically created and recognized by most applications.
One difference from Windows: Linux uses the forward slash (/) as the path separator rather than the backslash (). The path to your Documents folder is /home/username/Documents, not C:\Users\username\Documents. Once you internalize this, it becomes natural.
The Sidebar: Quick Navigation
Your file manager’s sidebar provides shortcuts to frequently accessed locations. Common sidebar entries include:
Home — your personal home folder, the starting point for all your files.
Documents, Music, Pictures, Videos, Downloads — standard personal data folders that most applications use by default when saving files.
Trash — deleted files waiting to be permanently removed. To permanently delete trash contents, right-click the Trash icon and choose “Empty Trash.”
External drives — USB drives and external hard drives appear here automatically when connected. Click to access their contents; right-click and choose “Eject” before physically disconnecting.
Network locations — servers, network shares, and cloud storage locations if configured.
You can add your own bookmarks to the sidebar by navigating to a folder you use frequently and dragging it to the sidebar, or by right-clicking the folder and selecting “Add to Bookmarks.” This is a simple but powerful productivity habit — bookmark your most-used project folders for instant access.
Hidden Files
Linux uses a convention where files and folders whose names begin with a dot (.) are hidden from the normal file manager view. These hidden files and folders store application settings and configuration data — your web browser’s profile, your music player’s library database, and hundreds of similar configuration items. They are hidden because everyday users do not need to see or interact with them.
To show hidden files in your file manager, press Ctrl+H (in most file managers) or look for a “Show Hidden Files” option in the View menu. You will then see dotfiles and dot-folders alongside your regular files. Press Ctrl+H again to hide them.
Creating, Copying, Moving, and Deleting Files
Basic file operations in Linux work exactly as in Windows and macOS. Right-click in an empty area of a folder to create a new folder or a new document. Right-click on a file to copy, cut, paste, rename, or move it to the trash. Drag files between windows to move them; hold Ctrl while dragging to copy instead.
The Trash in Linux works like the Windows Recycle Bin and macOS Trash — deleted files go there temporarily and can be restored if you change your mind. To permanently delete a file without going through the Trash, select it and press Shift+Delete.
Connecting to the Internet
Connecting to the internet in Linux is handled through the Network Manager, a system service with a graphical interface in your system tray or settings application.
Connecting to Wi-Fi
Click the network icon in your system tray (or the Quick Settings area in GNOME). A list of available Wi-Fi networks appears. Click your network’s name. If the network is password protected, a dialog appears requesting the password. Enter it and click Connect. Linux saves this network and connects automatically in future sessions.
If your Wi-Fi adapter is not recognized immediately after installation, it may require a proprietary driver. Open your distribution’s “Additional Drivers” tool (available in Ubuntu and Mint) to check for and install available wireless drivers. After driver installation, restart your computer and try connecting again.
Wired (Ethernet) Connections
Plugging in an Ethernet cable typically results in automatic connection with no configuration required. The network icon in the system tray changes to indicate a wired connection. If a wired connection does not establish automatically, click the network icon and verify that networking is enabled.
Checking Your Connection
Once connected, open a web browser to verify internet access. Firefox is included in most Linux distributions. If pages load normally, your connection is working. If not, check your network settings by opening the full Network settings (available from the network icon or through System Settings) to verify the connection configuration.
Adjusting System Settings
Your system settings application is the control center for your entire Linux experience. Learning its layout early saves time when you need to make adjustments.
Finding System Settings
In GNOME (Ubuntu, Fedora): Open the Activities Overview, search for “Settings,” and open the Settings application. Alternatively, click the Quick Settings panel in the top-right corner and click the settings gear icon.
In Cinnamon (Linux Mint): Click the Mint Menu and look for “System Settings,” or find it in the Preferences section of the menu.
In KDE Plasma: Click the application launcher, find “System Settings,” or right-click on the desktop and select “Display and Monitor” or similar context options.
Key Settings to Configure First
Display settings — verify that your screen resolution is set correctly. Navigate to Display or Displays in your settings. The resolution should match your monitor’s native resolution for the sharpest image. If you have a HiDPI (high-density) display, look for scaling options that make text and interface elements larger and more readable.
Sound settings — verify that your speakers or headphones are working. Navigate to Sound. Test audio output by clicking the test sound option if available. If you have multiple audio devices (speakers and a USB headset, for example), select the default output device here.
Power settings — particularly important for laptops. Configure how quickly the screen dims when idle, when the computer sleeps, and what happens when you close the lid (suspend, hibernate, or do nothing). Navigate to Power or Battery in settings. Setting a reasonable screen dim timeout (5–10 minutes) and suspend timeout (15–30 minutes) conserves battery without being disruptive.
Mouse and touchpad settings — adjust scroll direction, pointer speed, touchpad tap-to-click, and two-finger scroll behavior. Most users switching from Windows will want to verify that “natural scrolling” (where content moves in the direction of your finger, as on a phone) is configured to match their expectation.
Privacy settings — review what data your system collects, whether location services are enabled, and what applications have access to your camera and microphone. GNOME provides a Privacy section in Settings worth reviewing.
Language and region settings — if the installer did not set your language, date format, or currency correctly, adjust these in the Language or Region settings.
Installing Your First Applications
Your freshly installed Linux system comes with a useful set of applications, but you will almost certainly want to add more. The Software Center is the most accessible way to install new software.
The Software Center
Every major distribution provides a graphical Software Center — a curated store of free applications you can browse and install with a click:
Ubuntu Software (Ubuntu) and GNOME Software (Fedora) present a store-style interface with featured applications, categories, and search. Browse by category (Productivity, Utilities, Games, Development, etc.) or search for specific applications. Clicking an application shows its description, screenshots, and reviews. Clicking Install downloads and installs it automatically.
Mint Software Manager (Linux Mint) follows a similar store model with star ratings and category browsing. Linux Mint’s Software Manager is widely praised as particularly user-friendly.
Installing Common Applications
Here are some popular applications new Linux users frequently install and how to find them:
VLC Media Player — the universal video and audio player that handles virtually every media format. Search “VLC” in your Software Center and install.
GIMP — the powerful free image editor (comparable to Adobe Photoshop for many use cases). Search “GIMP” in the Software Center.
Steam — the gaming platform with thousands of Linux-compatible games and Windows game compatibility through Proton. Search “Steam” in the Software Center or download from steampowered.com.
Visual Studio Code — the popular code editor from Microsoft, available for Linux as a .deb package from code.visualstudio.com or through some Software Centers.
Spotify — the music streaming service, available as a Snap (on Ubuntu) or Flatpak (on most distributions) from the Software Center.
Understanding Snap and Flatpak
You may notice that some applications in the Software Center are marked as “Snap” or “Flatpak.” These are universal Linux package formats that bundle an application with its dependencies, allowing it to run across different distributions without compatibility issues.
Snap packages are supported primarily on Ubuntu and Ubuntu-based distributions. They are developed by Canonical and run in a sandbox.
Flatpak packages work across virtually all distributions and are sourced from Flathub (flathub.org), a community-maintained repository of thousands of desktop applications. Flatpaks are generally preferred by the broader Linux community for third-party applications.
Both formats allow you to install applications that might not be in your distribution’s official repositories without adding external software sources. The tradeoff is that Snap and Flatpak applications tend to use more disk space and may start slightly slower than natively packaged applications, because they include their own copies of required libraries.
Essential Keyboard Shortcuts to Learn First
Developing keyboard shortcut habits early dramatically accelerates your Linux navigation speed. These shortcuts work across most Linux desktop environments:
| Shortcut | Action |
|---|---|
| Super (Windows key) | Open Activities Overview or Application Menu |
| Super + L | Lock the screen |
| Super + D | Show desktop (minimize all windows) |
| Super + Left/Right Arrow | Snap window to left/right half |
| Super + Up Arrow | Maximize window |
| Super + Down Arrow | Restore/minimize window |
| Alt + Tab | Switch between open applications |
| Alt + F4 | Close the active window |
| Ctrl + Alt + T | Open terminal (on most distributions) |
| Ctrl + H | Show/hide hidden files (in file manager) |
| Print Screen | Take a screenshot |
| Ctrl + C / Ctrl + V | Copy / Paste (universal) |
| Ctrl + Z | Undo |
The most important shortcut for new Linux users is Ctrl + Alt + T, which opens the terminal — your access to the Linux command line. Even if you plan to do most of your work graphically, knowing how to open the terminal lets you follow tutorials and troubleshoot issues that require command-line steps.
Customizing Your Desktop Appearance
Making your desktop feel like yours is both practically useful and personally satisfying. A few quick customizations can make your Linux desktop feel more comfortable from the first day.
Changing the Wallpaper
Right-click on the desktop background and select “Change Background” or “Desktop Preferences.” A gallery of included wallpapers appears. Click any image to preview it as your wallpaper. Most desktop environments also allow you to use your own photos — look for an option to “Add Picture” or navigate to a custom image file. Changes apply immediately, making it easy to try several options.
Adjusting the Dock or Taskbar
The dock or taskbar can typically be customized to show the applications you use most. Right-clicking on any application icon in the dock reveals options including “Pin to Dock” (to keep it there permanently) or “Remove from Favorites” (to unpin it). To add an application to the dock, launch it first, then right-click its running icon in the dock and choose “Pin to Dock” or “Add to Favorites.”
In KDE and Cinnamon, you can also right-click on the panel itself to add or remove panel items, change its size, or move it to a different screen edge.
Setting Up Dark Mode
Most modern Linux desktop environments support a system-wide dark mode that changes the color scheme of the interface and applications to dark backgrounds with light text. In GNOME Settings, find the Appearance section and toggle between Light and Dark (or Automatic, which switches based on time of day). In Cinnamon, look for the Themes section of System Settings. Dark mode reduces eye strain in low-light environments and is preferred by many developers and night-time users.
Getting Help When You Are Stuck
Every Linux user, regardless of experience, occasionally gets stuck. Knowing where to find help is as important as any other navigation skill.
Built-in Help Documentation
Most Linux applications include built-in help documentation. Press F1 in any application to open its help system. The GNOME Help application (search “Help” in the Activities Overview) provides comprehensive documentation for the GNOME desktop and its included applications. KDE’s help system (KHelpCenter) offers similar resources for KDE applications.
Online Communities
The Linux community is known for being helpful and responsive. For Ubuntu and Mint users, Ask Ubuntu (askubuntu.com) is a Stack Exchange-based Q&A site with answers to hundreds of thousands of Ubuntu questions. The Ubuntu Forums (ubuntuforums.org) and Linux Mint Forums (forums.linuxmint.com) have active communities where experienced users help newcomers.
For Fedora, the Ask Fedora platform (ask.fedoraproject.org) provides dedicated support. The broader r/linux4noobs subreddit on Reddit is an excellent general resource for beginners on any distribution — the community there actively helps new users with respectful, detailed responses.
Search Effectively
When searching for Linux help online, always include your specific distribution name in the search query. “How to connect to Wi-Fi in Ubuntu” will return better results than “How to connect to Wi-Fi in Linux.” Including your desktop environment name (GNOME, Cinnamon, KDE) further refines results. If you encounter an error message, copy the exact error text into your search — error messages are often the fastest path to finding the specific solution.
Building Good Habits from Day One
The transition to Linux is smoothest when you develop a few good habits early that will serve you for years.
Update regularly. Open your distribution’s Update Manager (or run sudo apt update && sudo apt upgrade in a terminal for Ubuntu/Mint, or sudo dnf update for Fedora) at least once a week. Keeping your system updated is the single most important security practice in Linux.
Explore the settings. Spend time simply exploring your System Settings application without any specific goal. Click through each category to see what options exist. You will discover useful features — night light mode, automatic screen rotation, accessibility options — that you might not have known to look for.
Learn one command at a time. Even if you plan to do everything graphically, spending five minutes a week learning a single terminal command builds valuable skills gradually. The terminal section later in this series will provide a structured approach to this.
Use the Software Center before the browser. When you want to install a new application, check the Software Center first before downloading installers from websites. Software Center applications are verified to work with your distribution and update automatically. Installers downloaded from random websites may not integrate cleanly with your system.
Conclusion: Orientation Complete, Adventure Beginning
After a few hours with your new Linux desktop, the initial unfamiliarity fades and the underlying logic becomes clear. Applications live in predictable places. Files follow the same organizational hierarchy. Settings work consistently. The keyboard shortcuts you learn transfer across applications. The desktop environment, whatever its specific layout, follows a coherent design.
What you have accomplished by getting through this orientation is significant: you have set up and begun using a professional-grade, secure, and completely free operating system that powers the world’s most important computer systems. The graphical desktop is your comfortable introduction to a much deeper system — one that rewards continued learning with capabilities that commercial operating systems cannot match.
The next article in this series goes below the graphical surface to explore the Linux file system in depth — understanding the structure of directories that all Linux systems share, what lives where, and why the organization makes more sense than it might initially appear. That knowledge will serve you every time you navigate your files, install software, or troubleshoot a system issue.
Your first steps in Linux are behind you. The exploration is just beginning.