Introduction
Measuring voltage represents the single most frequently performed electrical measurement in electronics work because voltage reveals whether power supplies deliver adequate power, confirms that circuits receive proper operating voltages, enables tracing signals through circuit paths, and provides the first diagnostic check when troubleshooting circuits that fail to operate correctly. Unlike current measurement which requires breaking circuits to insert the meter in series, or resistance measurement which requires powering circuits off and often isolating components, voltage measurement is straightforward and non-invasive—simply touch the multimeter probes to two points in a powered circuit and read the voltage difference displayed on the meter. This simplicity combined with the fundamental importance of voltage in determining circuit behavior makes voltage measurement the essential first skill for anyone learning to work with electronics.
For complete beginners picking up a multimeter for the first time, even simple voltage measurement might feel uncertain because of unfamiliarity with how multimeters work, confusion about which dial position to select, uncertainty about where to place the test probes, and anxiety about potentially damaging the meter or receiving electrical shocks. These concerns are natural when approaching unfamiliar tools and procedures, but voltage measurement is actually quite safe and straightforward once you understand the basic principles and follow systematic procedures. Modern multimeters are designed to tolerate considerable operator error including accidental connection to voltages beyond the selected range, wrong polarity probe connections, and even brief short circuits, though good practice minimizes these situations through conscious attention to meter setup and probe placement.
The fundamental concept underlying voltage measurement is that multimeters measure the electrical potential difference between their two test probes, displaying this difference in volts on the digital readout. When you touch the black probe to circuit ground and the red probe to a circuit node, the meter displays the voltage at that node relative to ground—positive if the node is at higher potential than ground, negative if at lower potential. When measuring voltage across a component like a resistor or LED, the probes touch the two component terminals and the meter displays the voltage drop across that component. Understanding this potential difference concept clarifies what voltage readings mean and where probes should be placed to measure voltages of interest.
The practical value of voltage measurement extends throughout electronics work from initial circuit assembly through testing and troubleshooting. During assembly, measuring power supply voltage confirms it delivers the expected voltage before connecting sensitive circuits that might be damaged by incorrect voltage. After assembly, measuring voltage at various circuit nodes verifies that power distribution is correct and that voltages match design expectations, confirming the circuit should work before investigating why it does not. During troubleshooting, voltage measurements trace signals through circuits identifying where expected voltages appear and where they are absent, systematically narrowing the search for faults. This diagnostic power makes voltage measurement invaluable for anyone working with electronics.
This comprehensive guide will build your voltage measurement skills from fundamental concepts through practical applications, examining what voltage measurements reveal about circuits, how to set up multimeters for voltage measurement, detailed step-by-step procedures for measuring both DC and AC voltage, safety considerations that prevent electrical hazards and equipment damage, interpreting voltage readings correctly, common measurement mistakes and how to avoid them, and advanced voltage measurement techniques as your skills develop. By the end, you will confidently measure voltages in circuits, interpret readings correctly, and use voltage measurements effectively for verification and troubleshooting.
Understanding What Voltage Measurement Reveals
Before diving into measurement procedures, understanding what voltage represents and what voltage readings tell you about circuits provides context that makes measurements more meaningful than merely reading numbers.
Voltage as Electrical Potential Difference
Voltage measures the electrical potential difference between two points, indicating how much energy is available to push electrical charge from one point to the other. Higher voltage differences mean more energy per unit charge, creating stronger electrical pressure that drives larger currents through resistances connecting those points. This energy interpretation explains why voltage determines circuit behavior—sufficient voltage must be present to drive required currents through circuit resistances, power active devices like integrated circuits, and overcome threshold voltages in components like diodes and transistors.
The water pressure analogy helps visualize voltage as electrical pressure. In plumbing systems, water pressure differences between two points determine how rapidly water flows through pipes connecting those points, with higher pressure differences creating faster flow. Similarly in electrical circuits, voltage differences determine how much current flows through resistances, with higher voltages driving more current according to Ohm’s Law. Just as water pressure can be measured at any point in a plumbing system relative to atmospheric pressure or to another point in the system, electrical voltage can be measured at any circuit node relative to ground or to any other circuit point.
Understanding voltage as potential difference clarifies what voltage readings mean. A measurement showing twelve volts between the positive battery terminal and ground indicates twelve volts of electrical pressure available to drive current through circuits connected between those points. A measurement showing two volts across an LED indicates the LED drops two volts while conducting current, with this voltage drop representing energy converted to light and heat in the LED. The concept of voltage drop becomes clearer when you visualize electrical pressure being consumed as current flows through components, similar to water pressure dropping as water flows through restrictive pipes or valves.
DC Voltage Versus AC Voltage
Direct current or DC voltage maintains constant polarity with the positive terminal remaining positive and the negative terminal remaining negative, as produced by batteries, DC power supplies, and solar cells. DC voltage can be steady and unchanging as in fresh batteries, or can vary slowly as batteries discharge or circuits draw varying currents affecting power supply output voltage, but polarity remains constant with positive staying positive and negative staying negative. Most electronics circuits operate on DC voltage because transistors, integrated circuits, and other active devices require steady polarities to function correctly.
Alternating current or AC voltage periodically reverses polarity, with the voltage swinging positive then negative in repeating cycles at specific frequencies measured in hertz or cycles per second. Household electrical power in North America operates at sixty hertz, meaning voltage completes sixty cycles per second swinging from approximately positive one hundred seventy volts to negative one hundred seventy volts and back sixty times each second. The commonly stated one hundred twenty volts for household power represents the RMS or root-mean-square value that indicates the effective voltage for power transfer purposes, mathematically related to the peak voltage by dividing peak by the square root of two.
Multimeters handle DC and AC voltage differently, requiring selection of the appropriate measurement mode through the selector dial or function buttons. DC voltage mode displays the actual voltage with polarity information—positive readings when the red probe is more positive than the black probe, negative readings when red is more negative than black. AC voltage mode displays the RMS magnitude without polarity because polarity constantly alternates, making instantaneous polarity meaningless. Using DC mode to measure AC voltage typically shows near zero or erratic readings because the meter averages rapidly alternating positive and negative values yielding approximately zero, while using AC mode for DC voltage shows the magnitude without sign information, losing the polarity indication that is often important in DC circuit analysis.
What Different Voltage Readings Mean
High voltage readings where you expect them—such as battery voltage at power supply terminals—confirm that power sources are functioning and delivering adequate voltage. Low or zero voltage readings at power supply points indicate dead batteries, disconnected power, blown fuses, or other power delivery problems requiring attention before circuits can function. These power supply voltage checks should always be performed first when troubleshooting non-functioning circuits because inadequate power supply voltage prevents correct operation regardless of how perfectly circuits are assembled.
Intermediate voltage readings at circuit nodes between power supply voltage and ground typically indicate normal circuit operation where voltage dividers, regulators, or active circuits establish specific voltage levels. For example, in a simple resistor voltage divider with equal resistors between twelve volts and ground, you expect to measure six volts at the junction between the resistors. Measuring six volts confirms the voltage divider is working, while measuring twelve volts indicates the resistor to ground is disconnected or broken, and measuring zero volts indicates the resistor to the power supply is disconnected. This diagnostic interpretation of voltage readings enables systematic troubleshooting by comparing measured voltages to expected values.
Voltage drops across components reveal how voltage distributes throughout circuits. Measuring voltage across a resistor shows how much voltage drops across that resistance as current flows, with larger voltage drops indicating either larger resistance or larger current according to Ohm’s Law. Measuring voltage across an LED should show approximately two to three volts depending on LED color when the LED is conducting, confirming both that current flows and that the LED is functioning. Zero volts across an LED suggests no current flows, possibly because the LED is reversed or a current-limiting resistor is disconnected, while measuring full supply voltage across the LED indicates the current-limiting resistor may be missing, causing excessive current.
Setting Up Your Multimeter for Voltage Measurement
Proper multimeter configuration ensures accurate measurements while preventing damage to the meter or the circuit being measured.
Selecting the Correct Voltage Function
Voltage measurement begins by setting the multimeter selector dial or function buttons to the appropriate voltage mode—DC voltage for measuring batteries, DC power supplies, and most electronics circuits, or AC voltage for measuring household power, transformers, and AC signal sources. The selector dial typically indicates DC voltage with a V and straight or dashed lines, while AC voltage appears as a V with a sine wave symbol. Some multimeters use “VDC” and “VAC” labels making the distinction obvious, while others use only symbolic representations requiring you to learn the symbols.
If you are uncertain whether voltage is DC or AC, default to DC voltage mode for electronics circuits because the vast majority of electronics work involves DC voltage. Measuring DC voltage with the meter set to AC mode yields incorrect readings showing magnitude without polarity, but does not damage the meter and can help identify what type of voltage is present—a steady reading in AC mode suggests AC voltage, while zero or very low reading suggests DC voltage that should be measured in DC mode for correct polarity information.
The importance of correct mode selection becomes apparent when troubleshooting because polarity information from DC voltage measurement reveals whether voltages are correct or reversed. A circuit node that should be positive but measures negative relative to ground indicates reversed polarity somewhere in the power supply or circuit wiring. AC voltage mode would show magnitude without revealing this polarity error, missing critical diagnostic information.
Selecting the Appropriate Voltage Range
Manual ranging multimeters require selecting a voltage range appropriate for the expected voltage magnitude, typically choosing from ranges like two hundred millivolts, two volts, twenty volts, two hundred volts, and sometimes higher. The general procedure is starting with the highest available range if expected voltage is unknown, then switching to lower ranges for better resolution once you determine approximate voltage magnitude. Starting with high ranges prevents overloading the meter with voltages exceeding lower ranges, while stepping down to lower ranges improves reading precision by using more of the display’s available digits.
Auto-ranging multimeters automatically select appropriate ranges eliminating manual range selection, making them easier to use particularly for beginners unfamiliar with estimating voltages before measurement. The meter senses the measured voltage magnitude and switches to a range providing reasonable resolution without overload, displaying results in the most readable format. The trade-off for this convenience is slightly higher cost and sometimes slower measurement response as the meter determines the optimal range, though these disadvantages are minor compared to the simplified operation auto-ranging provides.
When using manual ranging meters, if the display shows an overload indication—often dashes, a blank display, or an “OL” symbol—the measured voltage exceeds the selected range and you must switch to a higher range. Conversely, if the display shows a value using only the first or second digit—such as showing “0.04” on a two hundred volt range—switching to a lower range provides better resolution making the reading more precise and easier to interpret. These range adjustment principles apply to all manual ranging measurements including voltage, current, and resistance.
Connecting Test Probes to Input Jacks
Voltage measurement requires connecting test probes to the correct multimeter input jacks. The black probe always connects to the jack labeled COM for common or ground reference, typically colored black or marked with a negative symbol. This jack serves as the reference point for all voltage measurements, with displayed voltages indicating the potential of the red probe relative to this common reference.
The red probe connects to the jack labeled for voltage measurement, often marked with a V symbol, sometimes combined with an omega symbol for resistance since both functions use the same high-impedance input circuit. This jack should be clearly distinguished from current measurement jacks which present very low impedance and would create short circuits if used for voltage measurement. Many multimeters color-code the voltage jack red matching the red test probe, though some meters use other indicators so you must verify jack labeling rather than relying solely on color coding.
The critical importance of correct jack connections cannot be overstated because voltage measurement with probes in current jacks creates short circuits that may damage circuits or blow meter fuses. Before every measurement, consciously verify that the black probe is in the COM jack and the red probe is in the voltage jack, making this verification a conscious habit that prevents expensive mistakes. Some meters include physical barriers or special probe designs that prevent inserting probes in wrong jacks, but most rely on operator attention to ensure correct connections.
Step-by-Step Procedure for Measuring DC Voltage
Following systematic procedures ensures consistent accurate measurements while minimizing opportunities for errors that could damage equipment or create safety hazards.
Step 1: Verify Circuit Is Powered and Safe to Measure
Before connecting the multimeter, visually inspect the circuit confirming power is applied if you are measuring operating voltages, or that power is definitely off if you are checking for absence of voltage. For battery-powered circuits, verify batteries are installed with correct polarity. For power supply operated circuits, confirm the power supply is connected and switched on. This verification prevents confusion when measuring powered circuits that appear dead simply because power was not applied.
Check for obvious hazards including exposed high voltage conductors, damaged insulation, or wet conditions that could create electrical shock risks. While low voltage DC circuits common in electronics present minimal shock hazards, awareness of the electrical environment and potential dangers should precede any measurement activity. If measuring line voltage or other potentially hazardous voltages exceeding fifty volts, verify the multimeter is rated for the voltage levels being measured and ensure you understand safety procedures for high voltage measurement.
Step 2: Configure the Multimeter
Set the selector dial or function buttons to DC voltage mode, indicated by the V symbol with straight or dashed lines or the “VDC” label. If using a manual ranging meter and you know the approximate voltage you expect to measure, select a range slightly higher than the expected voltage—for example, use the twenty volt range to measure a twelve volt battery. If expected voltage is unknown, select the highest available voltage range ensuring you will not overload the meter regardless of actual voltage magnitude.
Verify that test probes are connected to the correct jacks with the black probe in COM and the red probe in the voltage jack. This conscious verification prevents the common mistake of measuring voltage with probes still in current jacks from a previous measurement, which would create a short circuit. Take a moment to visually confirm jack connections match your intended measurement before proceeding to probe placement.
Step 3: Connect Probes to Measurement Points
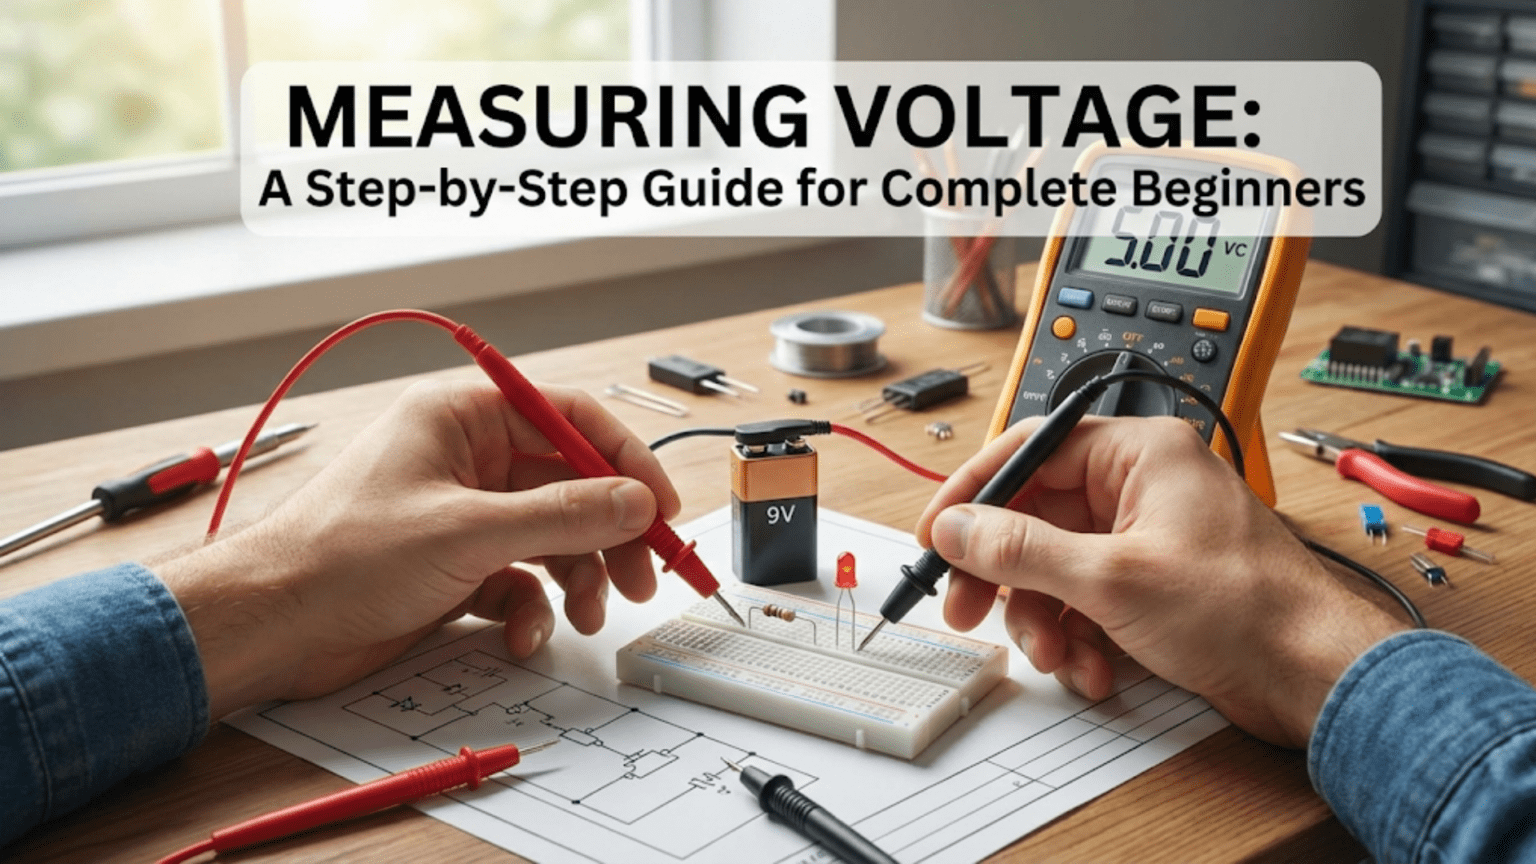
Touch the black probe to circuit ground or to the more negative of the two points where you want to measure voltage. Ground in battery-powered circuits typically connects to the negative battery terminal, while in powered circuits ground might be a specific ground connection point or terminal. The black probe establishes the reference point for the measurement, with the meter displaying voltage at the red probe relative to this reference.
Touch the red probe to the circuit node or component terminal where you want to measure voltage. For measuring power supply voltage, touch the red probe to the positive power terminal. For measuring voltage at a circuit node, touch the red probe to that node while keeping the black probe on ground. For measuring voltage across a component, touch the black probe to one component terminal and the red probe to the other terminal, with the displayed value showing voltage drop across the component.
Maintain firm contact with both probes pressed against metal conductors or component leads ensuring good electrical connections that do not create intermittent readings from poor contact. Probe tips should contact bare metal or component leads directly, not touching plastic insulation or oxidized surfaces that prevent electrical connection. If probes slip or make intermittent contact, readings will fluctuate or show incorrect values, so steady probe placement is essential for accurate measurement.
Step 4: Read and Interpret the Display
Observe the multimeter display noting both the numerical value and its sign. Positive values indicate the red probe is at higher electrical potential than the black probe, which is the normal expectation when measuring power supply voltage with red on positive and black on ground, or when measuring forward voltage drop across components like LEDs or diodes. Negative values indicate the red probe is at lower potential than the black probe, suggesting either reversed probe connections or reversed polarity in the circuit being measured.
Compare the measured value to your expectations based on what the circuit should be providing. A twelve volt power supply should measure approximately twelve volts, perhaps eleven point eight to twelve point two volts accounting for normal regulation variation. A nine volt battery fresh from the package might measure nine point four to nine point six volts. An LED conducting current should measure approximately two to three volts depending on color. If measured values differ significantly from expectations—for example measuring six volts when you expect twelve volts—this indicates problems requiring investigation such as discharged batteries, incorrect power supply settings, or circuit faults.
For manual ranging meters, check whether the measurement uses a reasonable portion of the display range. If you selected the two hundred volt range and are measuring a twelve volt battery showing “12.3 V,” consider switching to the twenty volt range which will display “12.34 V” providing an additional digit of resolution. If the display shows overload indication, switch to a higher range. These range optimizations improve measurement precision and make readings easier to interpret accurately.
Step 5: Document and Disconnect
After reading the measurement, record the value if you are systematically measuring multiple points or troubleshooting circuits where you want to track measurement results. Writing down measurements prevents having to repeat measurements after you forget values, and creates documentation useful for comparing measurements over time or correlating measurements from different circuit points.
Remove probes from the circuit by pulling them straight away from contact points rather than sliding them along surfaces where they might short multiple circuit nodes together. Turn off the multimeter or return the selector to the off position if you are finished measuring to conserve battery life. If you are performing multiple measurements, leave the meter on but consciously verify it remains set to voltage mode for subsequent voltage measurements, or reset it appropriately if switching to different measurement types like current or resistance.
Measuring AC Voltage Safely
AC voltage measurement follows similar procedures to DC voltage measurement but includes additional safety considerations because AC voltages often involve higher magnitudes including potentially lethal line voltages.
Selecting AC Voltage Mode and Range
Set the multimeter selector to AC voltage mode indicated by the V with sine wave symbol or the “VAC” label. The AC voltage function measures RMS or root-mean-square voltage representing the effective voltage for power calculations, which for sine waves equals peak voltage divided by the square root of two or approximately zero point seven zero seven times peak voltage. This RMS value is what meters display and what voltage ratings on AC equipment specify, so a one hundred twenty volt AC outlet actually swings between approximately plus one hundred seventy volts and minus one hundred seventy volts but displays as one hundred twenty volts RMS.
For manual ranging meters measuring household line voltage, select ranges of at least two hundred volts or higher to accommodate the one hundred twenty volt or two hundred forty volt nominal values with adequate margin. Many meters provide six hundred volt or even one thousand volt AC ranges suitable for all household and most industrial AC voltage measurements. Auto-ranging meters handle range selection automatically, though you should verify the meter can measure the voltages you expect—most multimeters measure at least six hundred volts AC, but very inexpensive meters might have lower maximum AC voltage ratings.
Safety Precautions for Line Voltage Measurement
Measuring line voltage presents serious electrical shock hazards that can cause injury or death, requiring heightened safety awareness and precautions beyond low voltage DC measurement. Always assume circuits are energized until proven otherwise with measurements, never relying on switch positions or assumptions about circuit state. Work with one hand when possible, keeping the other hand away from circuits and grounded metal objects to prevent creating current paths through your body from hand to hand across your chest.
Hold probes only by their insulated handles, never touching metal probe tips, shafts, or any exposed metal parts while probes contact energized circuits. Quality multimeter probes include finger guards behind the probe tips preventing your fingers from sliding forward onto metal parts during measurement. Use these guards and maintain awareness of where your fingers are positioned relative to conducting surfaces throughout measurements.
Verify the multimeter is rated for the electrical environment where measurements occur, with CAT II ratings suitable for household circuits and CAT III or CAT IV ratings required for industrial environments or utility service equipment. These safety category ratings indicate the meter’s ability to withstand transient overvoltages and safely measure voltages in increasingly hazardous electrical environments. Using meters with inadequate safety ratings in higher-category environments creates risks of meter damage or electrical hazards.
Interpreting AC Voltage Readings
AC voltage measurements display magnitude without polarity because polarity constantly alternates, making instantaneous polarity meaningless. A measurement of one hundred twenty volts AC indicates the RMS voltage magnitude is one hundred twenty volts, but provides no information about which terminal is hot and which is neutral because both alternate between positive and negative polarities sixty times per second.
Verify measured AC voltages are reasonable for the application. Household outlets should measure approximately one hundred ten to one hundred twenty-five volts in North America or two hundred twenty to two hundred forty volts in regions using higher line voltages. Transformer secondary voltages depend on turns ratios and primary voltage, with calculated secondary voltages based on these parameters. Measured values significantly different from expectations indicate problems such as low input voltage, transformer faults, or incorrect measurement procedures.
Common Voltage Measurement Mistakes
Understanding typical errors beginners make when measuring voltage helps avoid frustration and equipment damage while ensuring measurement accuracy.
Measuring with Incorrect Function or Range
Setting the meter to current mode when intending to measure voltage ranks among the most common and potentially serious multimeter errors. Current mode presents very low resistance—often less than one ohm—so connecting the meter across a voltage source creates a short circuit that may damage the circuit, blow the meter’s protective fuse, or in extreme cases damage the meter itself if short circuit current exceeds fuse ratings. The remedy is always consciously verifying that the selector dial shows voltage mode before connecting probes to circuits, making this verification a deliberate habit rather than assuming the meter is set correctly.
Using DC voltage mode to measure AC voltage yields incorrect readings showing near zero or erratic values because the meter averages rapidly alternating positive and negative voltages producing approximately zero. Conversely, using AC voltage mode for DC voltage measurements shows voltage magnitude without polarity information, losing important diagnostic data about whether voltages are correct polarity. While these mode errors do not damage the meter, they prevent obtaining correct measurements and can waste time troubleshooting circuits that are actually functioning correctly but appear problematic due to incorrect measurements.
Selecting voltage ranges too low for the measured voltage causes overload indications without damaging the meter in most cases, though you must switch to higher ranges to obtain actual readings. Modern multimeters include protection preventing damage from moderate overloads, though repeated severe overloads or sustained overvoltage conditions might eventually damage input circuits. Starting measurements at high ranges when expected voltage is unknown prevents overloads and protects the meter during initial measurements.
Poor Probe Contact and Intermittent Connections
Touching probe tips to oxidized component leads, painted or coated surfaces, or plastic insulation rather than bare metal creates high-resistance contacts or complete lack of electrical connection resulting in incorrect measurements. Probe tips must contact clean metal surfaces to ensure reliable low-resistance electrical paths that accurately transmit voltage signals to the meter. If surfaces appear oxidized or contaminated, scrape them with probe tips or use sandpaper to expose fresh metal before measuring.
Loose probe contact where probe tips barely touch circuit points creates intermittent connections that cause fluctuating readings as contact makes and breaks with slight probe movement. Maintain firm steady pressure holding probes against circuit points throughout measurement, ensuring contact remains constant while reading the display. If probes slip during measurement or if you must stretch to reach measurement points, find a more stable probe placement or use probes with clip attachments that grip circuit points freeing your hands during measurement.
Forgetting Circuit Power Requirements
Attempting to measure voltage in powered-off circuits yields zero readings regardless of whether circuits would provide correct voltages when powered. Voltage exists only when energy sources are active, so measuring battery voltage requires batteries to be installed, and measuring power supply output requires power supplies to be energized. This obvious requirement is surprisingly easy to forget, leading to troubleshooting sessions investigating why circuits show zero voltage when the actual problem is simply that power was never applied.
Conversely, measuring voltages in circuits with intermittent power such as switched power supplies, pulsed circuits, or circuits with enable signals requires ensuring power is active during measurement. Multimeters display average or RMS values for steady voltages, but pulsed or rapidly varying voltages may display incorrectly or show lower than expected values if pulsing is slow enough that the meter’s sampling rate catches periods when voltage is off. Understanding circuit timing and power delivery characteristics prevents misinterpreting measurements from pulsed or intermittent voltage sources.
Practical Applications and Next Steps
Voltage measurement skills transfer to countless practical applications in electronics assembly, testing, and troubleshooting, with measurement becoming routine practice supporting all electronics work.
Using Voltage Measurements for Verification
After assembling breadboard circuits, measuring power supply voltage confirms voltage reaches circuit power rails before connecting sensitive components that might be damaged by incorrect voltage. Measuring voltage at various nodes throughout the circuit verifies that power distribution is correct and voltage levels match design expectations. These verification measurements before applying power or during initial power-up identify problems before they cause component damage or create frustrating troubleshooting situations.
Comparing measured voltages to calculated values from circuit analysis confirms both your calculations and the circuit assembly. If calculations predict six volts at a voltage divider junction and measurements confirm six volts appears there, both the calculation and the circuit are correct. Discrepancies between calculated and measured values indicate either calculation errors or circuit assembly errors, motivating review of both until they agree or the error is identified and corrected.
Using Voltage Measurements for Troubleshooting
When circuits fail to function, systematic voltage measurements trace signals through circuit paths identifying where expected voltages appear and where they are absent, narrowing the search for faults. Start by measuring power supply voltage confirming adequate power is available, then measure voltage at successive circuit nodes following signal paths from inputs through intermediate stages to outputs. The transition from correct voltage to incorrect voltage identifies the circuit section containing the fault, focusing detailed investigation on that specific area.
Voltage measurements across components reveal whether components are functioning or failed. An LED that should be conducting but shows zero voltage drop across it indicates no current flows, suggesting problems with current-limiting resistors or connections. A transistor that should be on but shows full supply voltage across collector and emitter indicates the transistor is not conducting, possibly because base drive is absent or the transistor is damaged. These component-level voltage measurements provide diagnostic information impossible to obtain through visual inspection alone.
Conclusion: Voltage Measurement as Foundation
Measuring voltage represents the fundamental electrical measurement skill underlying all electronics work, enabling verification that circuits receive proper power, confirming that voltage levels match design expectations, and providing diagnostic information when troubleshooting malfunctioning circuits. The straightforward procedure—configure the meter for voltage measurement, connect probes to measurement points, and read the display—becomes routine with practice, transforming from uncertain unfamiliar activity into automatic procedure performed without conscious thought about mechanics.
Understanding what voltage measurements reveal about circuits—power supply status, voltage distribution, component operation—enables interpreting measurements as meaningful diagnostic information rather than merely reading numbers. The ability to predict expected voltages based on circuit design and compare predictions to measurements develops troubleshooting skills that dramatically accelerate fault identification and repair. This predictive capability distinguishes competent electronics practitioners from beginners who measure without knowing what values they should find.
Safety awareness appropriate to voltage levels being measured ensures personal safety and equipment protection during measurement activities. Low voltage DC circuits common in electronics present minimal shock hazards but can create component damage through short circuits if measurements are performed incorrectly. AC line voltage measurements require heightened safety awareness and procedures preventing electrical shock through careful probe handling and appropriate safety equipment.
The mastery of voltage measurement provides foundation for learning current and resistance measurement, which follow similar procedures but with important differences in meter configuration and probe placement. Together these three measurement types enable comprehensive circuit analysis and troubleshooting supporting all electronics work from simple LED circuits through sophisticated microcontroller systems. Time invested practicing voltage measurement until it becomes second nature pays dividends throughout your electronics journey as measurement becomes routine practice supporting circuit assembly, testing, and troubleshooting across all projects and applications.