Introduction
Measuring resistance provides the most straightforward and forgiving multimeter operation because resistance measurement requires circuits to be powered off eliminating electrical shock hazards, uses the same high-impedance input configuration as voltage measurement preventing the short circuit risks that accompany current measurement, and yields unambiguous numerical readings that directly indicate resistance values in ohms without requiring interpretation of positive or negative signs or consideration of circuit loading effects that can complicate voltage and current measurements. Despite this simplicity, resistance measurement provides powerful diagnostic capabilities including verifying that resistors match their color code markings, checking whether wires and connections have low resistance indicating good conductivity, confirming that insulation has high resistance preventing current leakage, testing whether components have failed by developing short circuits or open circuits, and crude testing of component functionality by measuring characteristic resistances that reveal whether devices are operating within expected parameters.
For beginners learning multimeter skills, resistance measurement often provides the most accessible entry point because the power-off requirement eliminates concerns about electrical shock or accidentally short-circuiting powered circuits, and because resistance readings are conceptually simpler than voltage readings that must be interpreted relative to circuit ground or current readings that depend on circuit topology and meter insertion points. You simply connect the meter probes to two points and read the resistance between those points displayed directly in ohms, with no need to worry about polarity for DC measurements or interpretation of AC versus DC readings. This simplicity makes resistance measurement an excellent first hands-on multimeter experience that builds confidence before progressing to the more nuanced voltage and current measurements.
The fundamental principle underlying resistance measurement is Ohm’s Law applied in reverse from normal circuit analysis. Rather than knowing resistance and using Ohm’s Law to calculate voltage or current, the multimeter applies a known small test current through the unknown resistance and measures the resulting voltage across that resistance, then calculates resistance by dividing measured voltage by known test current. This internal calculation happens automatically and invisibly, with the meter displaying only the final calculated resistance value. The test current is deliberately kept small—typically a milliamp or less—to avoid heating components being measured or affecting their resistance through current-dependent effects, ensuring measurements reflect the component’s actual zero-current resistance.
The practical applications of resistance measurement span initial component verification ensuring that parts match their specifications before installation in circuits, post-assembly verification confirming that resistors are correctly installed and connections are properly made, and troubleshooting measurements identifying opens, shorts, and damaged components when circuits malfunction. A resistor color-coded for ten kilohms should measure approximately ten kilohms when tested with a multimeter, with measurements significantly different indicating misread color codes, manufacturing defects, or damaged components. A wire that should provide a continuous path should measure near zero ohms confirming good conductivity, while measuring infinite resistance indicates a broken wire or poor connection. These simple pass-fail tests using resistance measurement quickly identify many common circuit assembly and component problems.
This comprehensive guide will build your resistance measurement skills from fundamental concepts through practical applications, examining what resistance measurements reveal about components and circuits, how multimeters measure resistance internally, detailed procedures for measuring resistance safely and accurately, interpreting resistance readings correctly including understanding meter resolution and range limitations, common mistakes that produce incorrect readings and how to avoid them, practical applications including resistor verification and continuity testing, and advanced resistance measurement techniques for special situations. By the end, you will confidently measure resistance in circuits and components, interpret readings correctly, and use resistance measurements effectively for verification and troubleshooting.
Understanding Resistance Measurement
Before diving into measurement procedures, understanding what resistance represents and how multimeters measure it provides context that makes measurements more meaningful than merely reading numbers.
What Resistance Represents
Resistance quantifies how strongly materials oppose electrical current flow, measured in ohms and represented by the Greek letter omega. Conductors like copper wire have very low resistance—milliohms per foot—allowing substantial current flow with minimal voltage drop. Insulators like rubber or plastic have extremely high resistance—megohms or gigohms—preventing significant current flow even at high voltages. Resistors provide controlled intermediate resistance values for current limiting, voltage division, and other circuit functions spanning ohms through megohms.
The water flow analogy helps visualize resistance as opposition to flow. In plumbing, pipe restrictions like partially closed valves or narrow pipe sections restrict water flow, requiring greater pressure to maintain desired flow rates. Larger restrictions create greater opposition analogous to higher electrical resistance, while unobstructed pipes provide minimal opposition analogous to low resistance conductors. This opposition manifests in pressure drops across restrictions just as electrical resistance creates voltage drops across resistive elements when current flows.
Understanding resistance as opposition to current flow clarifies what resistance measurements reveal. Low resistance measurements confirm that current paths are continuous and conductive as expected for wires, switches when closed, and connections that should carry current. High resistance measurements confirm that insulation prevents current leakage as expected for insulated wires, switches when open, and isolation between circuit sections that should not connect. Intermediate resistance values verify that resistors provide expected resistance for circuit functions like current limiting and voltage division.
How Multimeters Measure Resistance
Multimeters measure resistance by applying a small known test current through the component being measured and measuring the resulting voltage drop across that component, then calculating resistance using Ohm’s Law which states resistance equals voltage divided by current. This technique allows the meter to determine resistance without requiring you to know either the test current or the voltage, as these calculations happen automatically within the meter displaying only the final resistance value.
The test current magnitude varies depending on the selected resistance range, with higher resistance ranges using smaller test currents to avoid requiring excessively large test voltages across high resistances. For example, a meter might apply one milliamp test current on a two hundred ohm range, requiring only zero point two volts to produce full-scale readings. On a two megohm range, the same one milliamp current would require two thousand volts for full scale readings which is impractical, so the meter instead applies one microamp requiring only two volts. This automatic test current adjustment for different ranges allows meters to measure resistances spanning many orders of magnitude from ohms through megohms.
The automatic calculation means you do not need to understand the internal test current or voltage to use resistance measurement effectively. Simply connect the meter probes to the component being measured, read the displayed resistance value, and interpret that value in the context of what resistance you expected. If a resistor color-coded for one thousand ohms measures approximately one thousand ohms, the resistor matches its specification. If the same resistor measures ten thousand ohms or one hundred ohms, something is wrong requiring investigation.
Why Circuits Must Be Powered Off
The small test current and voltage the multimeter applies to measure resistance would be overwhelmed by voltages from active power sources in powered circuits, producing incorrect resistance readings or potentially damaging the meter. If you attempt to measure resistance across a component in a powered circuit, the circuit voltage appears in parallel with the meter’s test voltage, dominating the measurement and causing displayed resistance to reflect circuit voltage divided by test current rather than actual component resistance. This produces wildly incorrect resistance values that do not represent the component being measured.
Additionally, the test current from the meter could potentially forward-bias diodes, partially turn on transistors, or affect other voltage-sensitive components in powered circuits, producing resistance readings that do not reflect the component’s actual zero-current resistance. The power-off requirement ensures that the only voltage present is the meter’s carefully controlled test voltage, and the only current flowing is the meter’s test current, producing resistance readings that accurately reflect component resistance without contamination from circuit voltages or current.
This power-off requirement means resistance measurement cannot be used to check component values in operating circuits. You must power circuits off before measuring resistance, or remove components from circuits entirely to isolate them from other elements. This limitation distinguishes resistance measurement from voltage measurement which specifically requires powered circuits because voltage only exists when energy sources are active. The two measurements are complementary—voltage for powered circuits, resistance for unpowered circuits—rather than alternatives for the same situations.
Setting Up Your Multimeter for Resistance Measurement
Proper meter configuration ensures accurate resistance measurements while preventing common mistakes that produce incorrect readings.
Selecting Resistance Function and Range
Set the multimeter selector dial to the resistance or ohms function, indicated by the Greek letter omega symbol. This function activates the internal test current source and voltage measurement circuit that combine to calculate and display resistance. The selector might include multiple omega-marked positions representing different resistance ranges on manual ranging meters, or a single omega position on auto-ranging meters that automatically select appropriate ranges.
For manual ranging meters, select a resistance range appropriate for the expected resistance magnitude. Common ranges include two hundred ohms, two kilohms, twenty kilohms, two hundred kilohms, and two megohms, with some meters extending to twenty megohms or two hundred megohms for measuring very high resistances. If expected resistance is unknown, start with a mid-range selection like twenty kilohms which accommodates a useful range of typical resistor values, then adjust up or down based on initial readings to find a range providing good resolution without overload.
Auto-ranging meters eliminate manual range selection by automatically determining appropriate ranges based on measured resistance, making them easier to use particularly for beginners. The meter initially may display “OL” for overload as it tests high ranges, then quickly settle on the correct range and display the measured resistance. This automatic ranging prevents the need to estimate resistance magnitude before measurement while ensuring readings use appropriate ranges providing good resolution.
Connecting Test Probes to Input Jacks
Resistance measurement uses the same input jacks as voltage measurement, with the black probe in the COM jack and the red probe in the voltage-omega jack typically marked with V-omega symbols indicating its use for both voltage and resistance measurements. This jack connection is identical to voltage measurement, distinguishing resistance measurement from current measurement which requires moving the red probe to different current-rated jacks.
The convenience of using the same jacks for voltage and resistance means you can switch between these measurements without moving probes, changing only the selector dial position. However, this convenience creates a subtle hazard where someone might forget to verify circuit power state when switching between measurements. Voltage measurement requires powered circuits while resistance measurement requires unpowered circuits, so switching from voltage to resistance measurement without powering off the circuit yields incorrect resistance readings. Similarly, measuring voltage in an unpowered circuit yields zero voltage readings that might be misinterpreted as circuit problems rather than simply reflecting the unpowered state.
Verify that probes are firmly seated in the correct jacks before beginning measurement. Loose probe connections can create intermittent contact producing erratic resistance readings that fluctuate as probes move in jacks. The COM jack is almost always the black probe’s home position for all measurements, while the red probe location distinguishes current measurement from voltage-resistance measurement, making red probe position the primary variable to verify when setting up measurements.
Zeroing or Nulling the Meter
Some multimeters include a feature to zero or null out the resistance of the test leads themselves, which typically measure a few tenths of an ohm. This lead resistance adds to measured component resistance, creating errors when measuring very low resistances where lead resistance represents a significant fraction of total resistance. For example, if leads measure zero point five ohms and you measure a one ohm resistor, the display shows one point five ohms—fifty percent high—unless lead resistance is nulled.
To null lead resistance, touch the probe tips together creating a short circuit with only lead resistance present, then press the meter’s zero or relative button if available. The meter measures and stores the lead resistance, then subtracts this stored value from all subsequent measurements displaying only the actual component resistance without lead resistance contribution. This nulling significantly improves accuracy when measuring resistances below ten ohms where lead resistance otherwise introduces substantial errors.
Not all multimeters provide zeroing capability, particularly inexpensive models. For these meters, you must mentally subtract lead resistance from measurements when measuring low resistances, first measuring lead resistance by shorting probes together and noting the reading, then subtracting this value from subsequent component measurements. For resistances above one hundred ohms, lead resistance of a few tenths of an ohm creates negligible error and can be ignored, making zeroing primarily important for low-resistance measurements.
Step-by-Step Procedure for Measuring Resistance
Following systematic procedures ensures accurate resistance measurements while avoiding common mistakes.
Step 1: Verify Circuit Is Powered Off
Before connecting the multimeter to measure resistance, absolutely verify that the circuit is completely powered off with all voltage sources disconnected or switched off. Remove batteries from battery-powered circuits, unplug power supplies from AC outlets, or use power switches to ensure no voltage sources remain active. This verification prevents the incorrect readings that result from attempting resistance measurement in powered circuits and protects the meter from potential damage from high voltages that might be present.
For circuits that have been recently powered, allow time for capacitors to discharge before measuring resistance because charged capacitors create voltages that affect resistance measurements just as power supplies would. Large capacitors in power supplies might take seconds or even minutes to discharge fully through their internal leakage, so waiting thirty seconds to a minute after powering off ensures capacitor voltages have decayed to negligible levels. Alternatively, carefully short power supply outputs with an insulated screwdriver or resistor to actively discharge capacitors more quickly.
Visual inspection confirming disconnected power sources provides additional verification beyond trusting switches or circuit state. Physically seeing that battery terminals are disconnected, power supply cables are unplugged, or circuit boards are isolated from power sources ensures no hidden power paths remain active. This conservative approach prevents the surprise of measuring what you believe is an unpowered circuit only to discover voltage sources were still active creating incorrect measurements or potential hazards.
Step 2: Configure the Multimeter
Set the selector dial to the resistance or ohms function indicated by the omega symbol. Verify that test probes are connected with black in COM and red in the voltage-omega jack. For manual ranging meters, select an initial resistance range based on expected resistance magnitude if known, or select a mid-range value like twenty kilohms if resistance is uncertain.
If your meter has a zeroing or relative function and you are measuring low resistances, zero the meter by touching probe tips together and activating the zero function. This stores lead resistance and subtracts it from subsequent measurements improving low-resistance accuracy. For measurements of resistances above one hundred ohms, zeroing is optional because lead resistance creates negligible errors at these higher values.
Take a moment to consciously verify the meter is set to resistance mode, not voltage or current mode, and that circuit power is definitely off. These conscious verifications prevent common mistakes including measuring resistance in powered circuits yielding incorrect readings, or attempting to measure voltage immediately after resistance measurement while the circuit is still powered off yielding zero voltage readings that might be misinterpreted as circuit problems.
Step 3: Isolate Component If Necessary
For components installed in circuits, parallel paths through other circuit elements can conduct current around the component being measured, affecting resistance readings. The meter measures total resistance of all parallel paths between its probes, not just the component you intend to measure. If other circuit paths parallel the component of interest, the measured resistance will be lower than the component’s actual resistance following the parallel resistance formula where total parallel resistance is always less than the smallest individual resistance.
To obtain accurate component resistance measurements in circuits, you often must isolate the component by disconnecting one of its leads from the circuit. This breaks any parallel paths ensuring the meter measures only the component resistance. For resistors in breadboard circuits, simply removing one lead from the breadboard isolates the resistor completely. For soldered circuits, desoldering one component lead provides isolation though at the cost of requiring resoldering after measurement completes.
For simple measurements verifying approximate values or detecting complete failures like opens or shorts, isolation may be unnecessary if you understand how parallel paths affect readings. For example, measuring resistance across a suspected shorted component should show very low resistance whether or not parallel paths exist, because shorts create resistances far below typical parallel component values. However, for precision measurements verifying specific resistance values, isolation is essential to ensure readings reflect only the component of interest.
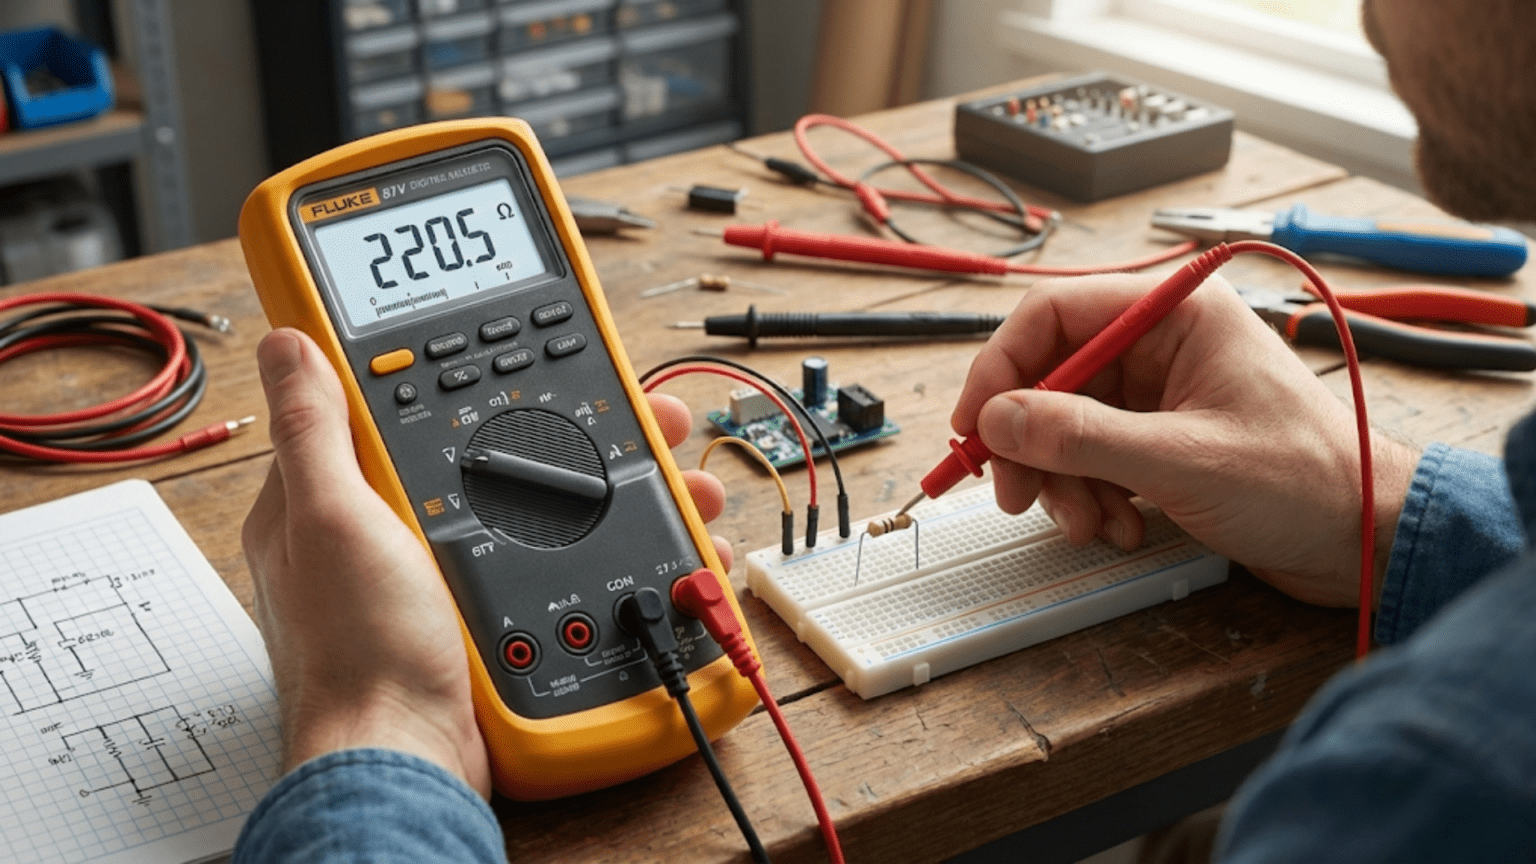
Step 4: Connect Probes to Component
Touch the meter probe tips firmly to the two terminals or leads of the component being measured, ensuring good metal-to-metal contact without oxidation or contamination preventing conduction. For through-hole components with wire leads, probes can touch leads directly. For surface-mount components, probe tips must reach the small terminal pads requiring fine-pointed probes and steady hands. For resistors or other two-terminal passive components, probe polarity does not matter because resistance is symmetric—resistance from point A to point B equals resistance from point B to point A.
Maintain steady firm contact during measurement avoiding movement that creates intermittent connections producing fluctuating readings. Some components particularly electrolytic capacitors may show changing resistance readings over several seconds as the meter’s test current charges the capacitor, making the component appear as changing resistance until fully charged. Wait for readings to stabilize before recording values, giving measurements a few seconds to settle especially when measuring capacitors or other components with charge storage effects.
If component leads are oxidized or contaminated creating high contact resistance that adds to measured values, scrape or clean contact points before measuring. Probe tips should contact shiny clean metal for most accurate measurements, with oxidation or contamination removed through mechanical scraping or chemical cleaning if necessary. For components with plated terminals, avoid excessive scraping that removes plating exposing base metal that may corrode rapidly.
Step 5: Read and Interpret the Display
Observe the multimeter display noting the resistance value and its units which may be ohms, kilohms (indicated by K), or megohms (indicated by M) depending on the magnitude. A reading of “1.5K” or “1.5kΩ” indicates one thousand five hundred ohms, while “2.2M” indicates two point two megohms or two million two hundred thousand ohms. Understanding these prefix abbreviations prevents misinterpreting resistance magnitudes by factors of one thousand or one million.
Compare measured resistance to expected values based on component markings, specifications, or circuit design. For resistors with color code markings, calculate expected resistance from the color bands and verify measured resistance falls within the tolerance indicated by the tolerance band. For example, a resistor marked for ten kilohms with five percent tolerance should measure between nine point five and ten point five kilohms. Measurements significantly outside tolerance suggest misread color codes, manufacturing defects, or component damage.
For manual ranging meters, check whether the measurement uses a reasonable portion of the display range. If you selected the two hundred kilohm range and are measuring a ten kilohm resistor showing “10.2K,” consider switching to the twenty kilohm range which will display “10.23K” providing an additional digit of resolution. If the display shows overload indication “OL” or dashes, the measured resistance exceeds the selected range and you must switch to a higher range. If the display shows a value near the lower end using only the first digit or two, switching to a lower range improves resolution.
Step 6: Document and Disconnect
After reading the measurement, record the value if you are systematically measuring multiple components or documenting circuit conditions for troubleshooting. Remove probes from the component by pulling them straight away ensuring you do not short adjacent circuit points or stress component leads. Power can now be reapplied to the circuit if resistance measurement is complete, or the component can be reinstalled if it was removed for isolated measurement.
If you removed a component lead from a breadboard or desoldered a connection for isolated measurement, reconnect the component restoring circuit continuity before reapplying power. Verify reconnection is correct before powering up, as missing or incorrect connections can create short circuits or open circuits causing circuit malfunction or damage when power applies.
Interpreting Resistance Readings
Understanding what different resistance values mean and how to interpret measurement results enables using resistance measurement effectively for verification and troubleshooting.
Normal Resistance Readings
Resistance measurements that match expected values within component tolerances indicate normal operation. Resistors measuring within their marked tolerance confirm correct component values and proper installation. Wires and connections measuring near zero ohms—typically below one ohm—confirm good conductivity and proper assembly. These normal readings provide confidence that components are correct and circuits are properly assembled, allowing you to focus investigation on other potential problem areas if circuits still malfunction.
Zero or Very Low Resistance
Resistance measurements near zero ohms where higher resistance is expected indicate short circuits or unintended conduction paths. A resistor that should measure one thousand ohms but measures one ohm is either shorted or you are measuring a different component than intended. Shorts can result from solder bridges in soldered circuits, adjacent breadboard rows inadvertently connected through wire or component leads, or component failures creating internal shorts.
However, very low resistance is expected and normal for conductors like wires, closed switches, and connections that should carry current. Measuring near zero ohms across these elements confirms proper conductivity. The distinction between normal and abnormal low resistance depends on what you are measuring—low resistance is problematic for resistors or insulators but expected for conductors.
Infinite or Very High Resistance
Overload indications showing “OL,” dashes, or maximum possible readings indicate resistance exceeding the meter’s range for the selected scale. For components that should have finite resistance like resistors, infinite resistance indicates open circuits from broken components, missing connections, or measurement of isolated terminals that do not connect to each other. For insulators like plastic, rubber, or air gaps between separate circuit sections, infinite resistance is expected and confirms proper insulation.
Opens can result from broken wires, cold solder joints that appear connected but do not conduct, components with internal breaks from damage or manufacturing defects, or simple disconnection in breadboard circuits where leads have pulled out of holes. Measuring infinite resistance where continuity is expected identifies the location of opens enabling targeted investigation and repair.
Inconsistent or Drifting Readings
Resistance readings that fluctuate over time or differ between repeated measurements suggest poor probe contact, contaminated connections, failing components, or components with charge storage like capacitors. Ensuring firm stable probe contact and clean measurement points eliminates fluctuations from poor connections. Waiting for readings to stabilize eliminates transients from capacitor charging effects.
For components showing genuinely inconsistent resistance, the problem may lie in failing components whose resistance varies with electrical stress from the meter’s test current, temperature variations affecting resistance, or mechanical intermittents in connections that vary resistance depending on physical orientation or vibration. These intermittent components often cause difficult-to-diagnose circuit problems because they function sometimes and fail other times, making systematic testing revealing these variations valuable for identifying unreliable components requiring replacement.
Common Resistance Measurement Mistakes
Understanding typical errors prevents incorrect readings and wasted time troubleshooting nonexistent problems.
Measuring Powered Circuits
Attempting resistance measurement in powered circuits creates incorrect readings because circuit voltages interfere with the meter’s test voltage, producing displayed resistance values that do not reflect actual component resistance. This common mistake typically results from transitioning from voltage measurement which requires powered circuits to resistance measurement without remembering to power off the circuit. The displayed values may be wildly incorrect, showing resistance far higher or lower than actual values depending on how circuit voltages interact with meter test currents.
Prevention requires making power state verification a conscious habit before every resistance measurement, explicitly confirming that circuits are powered off before connecting probes. Never assume circuits are off based on recent activity—always verify through visual inspection or test measurements confirming zero voltage across power supply points before proceeding with resistance measurements.
Ignoring Parallel Resistance Effects
Measuring components installed in circuits without accounting for parallel paths produces resistance readings lower than actual component values because the meter measures combined parallel resistance of all paths between probe points. This creates particularly problematic errors when attempting to verify precise resistor values in circuits where parallel components dramatically reduce measured resistance from actual resistor values.
Understanding that in-circuit resistance measurements may not reflect component resistance helps interpret readings correctly. For verification measurements where precise values matter, remove one component lead isolating it from parallel paths. For troubleshooting measurements seeking to identify opens or shorts, in-circuit measurements may suffice because opens still appear as infinite resistance and shorts still appear as very low resistance despite parallel paths affecting exact values.
Poor Contact or Contaminated Connections
Touching probe tips to oxidized component leads, painted surfaces, or plastic insulation rather than clean metal creates high contact resistance that adds to measured component resistance producing erroneously high readings. This particularly affects low-resistance measurements where contact resistance may exceed the resistance being measured, doubling or tripling displayed values.
Ensuring probes contact clean bare metal prevents contact resistance errors. Scraping oxidized leads with probe tips or using sandpaper or chemical cleaners to expose fresh metal provides low-resistance contact points. For components with tinned or plated leads, light scraping removes oxidation without damaging plating. For severely oxidized or corroded connections, more aggressive cleaning or replacement may be necessary before accurate measurements are possible.
Practical Applications of Resistance Measurement
Resistance measurement supports numerous practical applications in electronics assembly, testing, and troubleshooting.
Verifying Resistor Color Codes
Resistor color codes provide visual indication of resistance values, but reading color codes incorrectly or manufacturing variations can result in resistors that do not match expected values. Measuring resistance confirms that resistors match color code interpretations before installing them in circuits, preventing problems from wrong values. This verification is particularly valuable when first learning to read color codes where mistakes are common, or when handling resistors whose color bands are difficult to distinguish due to similar colors or unusual lighting.
The procedure is straightforward—calculate expected resistance from color code, measure resistance with the multimeter, and verify measurement falls within the tolerance indicated by the tolerance band. Gold tolerance bands indicate five percent tolerance meaning measured values within five percent of nominal are acceptable, silver indicates ten percent tolerance, and no tolerance band indicates twenty percent tolerance on older resistors. Modern resistors often include tolerance bands indicating one or two percent tolerance for precision applications.
Testing Continuity of Wires and Connections
Wires, cables, and connections should provide continuous conductive paths with near-zero resistance from end to end. Resistance measurement confirms continuity, with readings below one ohm typically indicating good connections while higher readings suggest poor contact, damaged wires, or incorrect wiring. Testing continuity before installing wires in final assemblies or after mechanical stress like repeated flexing confirms wires remain serviceable.
Many multimeters include dedicated continuity test mode that beeps when resistance is very low, providing audible feedback that speeds testing when checking many connections. Continuity mode operates identically to resistance measurement but activates an audio indicator when resistance falls below a threshold typically around ten to one hundred ohms. The beep allows testing without watching the display, dramatically speeding repetitive testing where you listen for beeps indicating good connections rather than reading resistance values.
Identifying Opens and Shorts in Circuits
Circuit faults often manifest as opens where connections that should conduct show infinite resistance, or shorts where circuit sections that should be isolated show zero resistance. Systematic resistance measurements throughout circuits identify these faults, narrowing fault location to specific components or connections. Measuring resistance between circuit power and ground with power off should show the expected load resistance of the circuit—typically kilohms to megohms. Measuring near zero resistance indicates shorts that would create overcurrent when power applies. Measuring infinite resistance indicates opens preventing current flow.
Measuring resistance across individual components identifies which components have failed as opens or shorts. A resistor showing infinite resistance has failed open and must be replaced. A capacitor showing zero or very low resistance may be shorted requiring replacement. These component-level tests efficiently identify failed parts enabling targeted replacement rather than wholesale component substitution.
Conclusion: Resistance Measurement as Essential Diagnostic Tool
Resistance measurement provides straightforward accessible multimeter operation that yields powerful diagnostic information about components and circuits without the hazards of measuring powered circuits or the complexity of current measurement requiring series insertion. The simple procedure of powering off circuits, connecting meter probes to measurement points, and reading displayed resistance values makes resistance measurement approachable for beginners while providing diagnostic capability supporting electronics work from initial assembly verification through troubleshooting of malfunctioning circuits.
Understanding what resistance values mean—normal values confirming correct components and proper assembly, zero resistance indicating shorts or proper conductivity depending on context, infinite resistance indicating opens or proper insulation—enables interpreting measurements as meaningful diagnostic information rather than merely reading numbers. The ability to predict expected resistance based on component markings and circuit design develops troubleshooting skills that accelerate fault identification and repair.
The power-off requirement that distinguishes resistance measurement from voltage measurement creates complementary capabilities where voltage measurements diagnose powered circuits while resistance measurements diagnose unpowered circuits. Together with current measurement providing flow rate information, these three fundamental measurements enable comprehensive circuit analysis and troubleshooting supporting all electronics work from simple LED circuits through sophisticated microcontroller systems.
Practical applications including verifying resistor color codes, testing wire continuity, and identifying opens and shorts demonstrate resistance measurement’s value throughout electronics work. Time invested mastering resistance measurement pays immediate dividends in confidence and capability as measurement becomes routine practice supporting circuit assembly, component verification, and systematic troubleshooting when circuits fail to operate as expected.