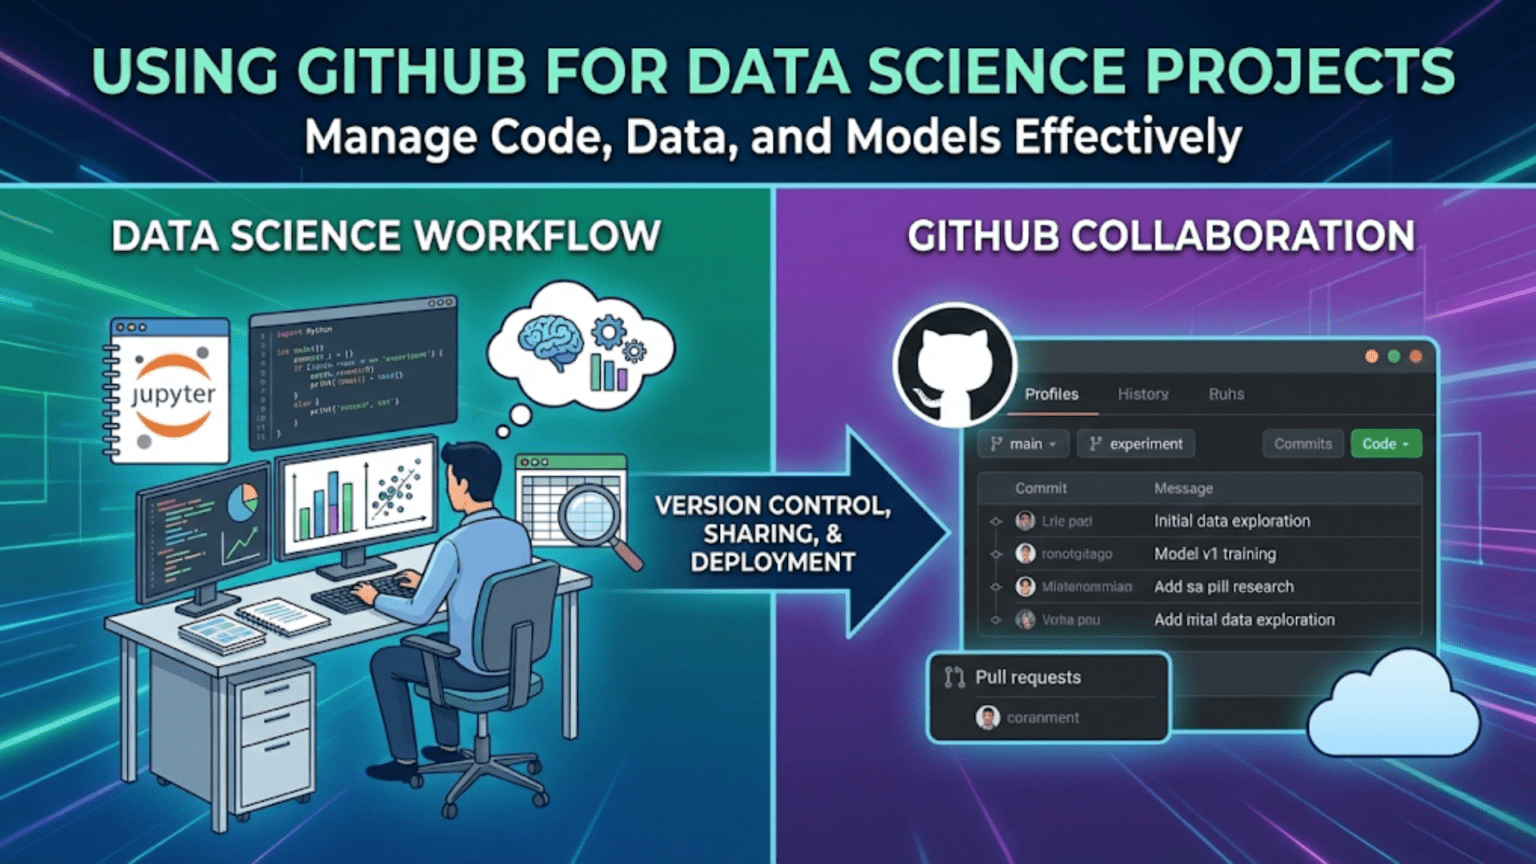
GitHub is a cloud-based platform built on top of Git that enables data scientists to host repositories, collaborate with teammates, review code through pull requests, automate workflows, and share their work with the broader data science community. While Git is the version control system that tracks changes locally, GitHub is the social and collaborative layer that connects your local work to a global ecosystem of data science projects, tools, and professionals.
Introduction
If Git is the engine of version control, GitHub is the car — the complete, user-friendly platform that makes Git’s power accessible, collaborative, and connected to the wider world.
Nearly every professional data science team uses GitHub (or a close equivalent like GitLab or Bitbucket) as the central hub of their work. Open-source libraries you rely on daily — scikit-learn, pandas, PyTorch, Hugging Face Transformers — all live on GitHub. Job postings for data scientists almost universally ask for GitHub experience. Academic researchers publish their code and datasets there. Kaggle competition winners share their notebooks there.
Understanding GitHub is not optional for a modern data scientist. It is table stakes.
This guide takes you from creating your first repository to using GitHub’s most powerful collaboration and automation features. By the end, you’ll understand not just how to use GitHub’s interface, but why each feature exists and how it slots into a professional data science workflow.
GitHub vs. Git: Clarifying the Relationship
Before going further, let’s solidify the distinction that trips up many beginners.
Git is a version control system — a command-line tool installed on your computer that tracks changes to files. It works entirely locally. Git was created by Linus Torvalds in 2005 for managing the Linux kernel’s source code.
GitHub is a web platform and hosting service built around Git. It stores your Git repositories in the cloud, adds a web interface, and layers collaborative features — pull requests, issues, project boards, code review tools, and CI/CD automation — on top of Git’s core functionality.
The analogy: Git is like email protocol (SMTP/IMAP). GitHub is like Gmail — a polished, feature-rich interface that uses the underlying protocol but adds enormous value on top of it.
| Aspect | Git | GitHub |
|---|---|---|
| Type | Command-line tool | Web platform and hosting service |
| Where it lives | Installed on your computer | Cloud (github.com) |
| Core function | Version control and history tracking | Repository hosting + collaboration |
| Requires internet? | No (works fully offline) | Yes (cloud-based) |
| Cost | Free, open-source | Free tier + paid plans |
| Alternatives | Mercurial, SVN | GitLab, Bitbucket, Azure DevOps |
| Created by | Linus Torvalds (2005) | Tom Preston-Werner et al. (2008) |
You use Git locally, and GitHub connects your local work to the cloud and to your collaborators.
Setting Up Your GitHub Account
Creating an Account
Visit github.com and sign up for a free account. Choose your username thoughtfully — it becomes part of your professional identity. Many data scientists use their real name or a recognizable professional handle, since your GitHub profile is often reviewed by employers.
Configuring SSH Authentication
When you push to or pull from GitHub, you need to authenticate. There are two methods: HTTPS (using a username and token) and SSH (using cryptographic key pairs). SSH is generally preferred for regular use because you authenticate once and never need to enter credentials again.
Generate an SSH key pair:
ssh-keygen -t ed25519 -C "your.email@example.com"Press Enter to accept the default file location (~/.ssh/id_ed25519). Optionally add a passphrase for extra security.
Copy your public key:
# On macOS:
pbcopy < ~/.ssh/id_ed25519.pub

# On Linux:
cat ~/.ssh/id_ed25519.pub
# Then copy the output manually

# On Windows (Git Bash):
cat ~/.ssh/id_ed25519.pub | clipAdd the key to GitHub: Go to GitHub → Settings → SSH and GPG keys → New SSH key. Paste your public key, give it a descriptive title (e.g., “MacBook Pro 2026”), and save.
Test the connection:
ssh -T git@github.com
# Expected: "Hi username! You've successfully authenticated..."Once configured, use SSH URLs for cloning:
git clone git@github.com:username/repository-name.gitCreating and Managing Repositories
Creating a New Repository on GitHub
- Click the + icon in the top-right corner of GitHub and select New repository
- Fill in the details:
- Repository name: Use lowercase with hyphens (e.g.,
customer-churn-analysis) - Description: A brief, clear description of the project
- Visibility: Public (visible to everyone) or Private (visible only to you and invited collaborators)
- Initialize with README: Check this for new projects — it creates an initial commit automatically
- Add .gitignore: Select the Python template as a starting point
- Choose a license: Important for open-source projects (MIT is common for data science projects)
- Repository name: Use lowercase with hyphens (e.g.,
- Click Create repository
Connecting a Local Repository to GitHub
If you already have a local Git repository and want to push it to GitHub:
# Add the GitHub repository as a remote
git remote add origin git@github.com:yourusername/your-repo-name.git

# Push your local main branch to GitHub
git push -u origin mainThe -u flag sets origin main as the default tracking branch, so future pushes and pulls can simply be git push and git pull without specifying the remote and branch.
Cloning an Existing Repository
To work on a project that already exists on GitHub:
git clone git@github.com:username/repository-name.git
cd repository-nameThis downloads the entire repository including all history to your local machine and automatically sets up the remote connection.
The Repository Interface: What Everything Means
When you open a repository on GitHub, you’ll see several sections. Understanding each one helps you navigate projects effectively.
Code Tab
The main view showing your repository’s file tree. The default branch (usually main) is displayed. You can navigate directories, view files with syntax highlighting, and see when each file was last modified and by which commit.
README.md
The README.md file in your repository root is automatically rendered below the file tree. This is the front door of your project — the first thing anyone (including future-you) sees. A good README explains what the project does, how to set it up, and how to use it.
Commits
Clicking the clock icon or “N commits” link shows a chronological list of all commits, each with its message, author, timestamp, and a link to see exactly what changed in that commit.
Branches
The branch dropdown (defaulting to main) lets you switch between branches and see their commit histories. Open branches represent work in progress.
Issues
GitHub Issues are the project’s task tracker. Each issue represents a bug, feature request, question, or any unit of work that needs attention. Issues can be assigned to team members, labeled (e.g., bug, enhancement, data-quality), and linked to pull requests.
Pull Requests
Pull requests (PRs) are proposals to merge changes from one branch into another. They are the cornerstone of collaborative development on GitHub and deserve a thorough explanation in the next section.
Actions
GitHub Actions is the CI/CD (Continuous Integration/Continuous Deployment) system. It runs automated workflows — such as running tests, linting code, or deploying a model — triggered by events like pushes or pull requests.
Projects
GitHub Projects is a Kanban-style board for organizing issues and tasks. Teams use it to plan sprints, track progress, and visualize work states (To Do → In Progress → Done).
Pull Requests: The Core of GitHub Collaboration
The Pull Request (PR) is GitHub’s most important feature for team-based work. It is the formal process for proposing, reviewing, discussing, and merging code changes.
What Is a Pull Request?
A pull request says: “I’ve made some changes on this branch — please review them and, if they look good, merge them into the main branch.”
Despite the name, you’re not “pulling” anything — you’re requesting that someone else pull your changes into their branch. The name made more sense in the early days of open-source contribution; today, “merge request” (GitLab’s term) is arguably more descriptive.
The Pull Request Workflow
Here’s the complete lifecycle of a change made through a pull request:
Step 1: Create a feature branch
git switch -c feature/add-model-evaluation-metricsStep 2: Make your changes, commit them
# Edit src/evaluation.py, notebooks/04_evaluation.ipynb...
git add src/evaluation.py
git commit -m "Add precision-recall curve and F1 score reporting"

git add notebooks/04_evaluation.ipynb
git commit -m "Add model evaluation notebook with confusion matrix visualization"Step 3: Push the branch to GitHub
git push origin feature/add-model-evaluation-metricsStep 4: Open a Pull Request on GitHub After pushing, GitHub usually shows a prompt: “You recently pushed the branch feature/add-model-evaluation-metrics — would you like to open a pull request?” Click Compare & pull request.
Alternatively, go to the repository’s Pull requests tab and click New pull request.
Fill in:
- Title: Concise description of the change (e.g., “Add precision-recall curve and F1 reporting to model evaluation”)
- Description: Explain what changed, why, and any context reviewers need. Reference related issues with
Fixes #42orCloses #17 - Reviewers: Tag teammates whose review you want
- Labels: Add relevant labels (
enhancement,data-pipeline, etc.)
Step 5: Code Review Reviewers examine the changes in GitHub’s diff view. They can:
- Comment on specific lines of code
- Request changes (blocking approval until addressed)
- Approve the PR
- Start a discussion thread
Reviewer comment on line 47 of src/evaluation.py:
"Should we also compute ROC-AUC here? It's often expected alongside
precision-recall. Happy to merge without it but worth discussing."

Author reply:
"Good point — I'll add it in a follow-up commit."Step 6: Address Review Feedback Push additional commits to the same branch. The PR automatically updates:
git add src/evaluation.py
git commit -m "Add ROC-AUC computation as suggested in code review"
git push origin feature/add-model-evaluation-metricsStep 7: Merge the Pull Request Once approved, click Merge pull request on GitHub. Options include:
- Create a merge commit: Preserves full branch history
- Squash and merge: Combines all PR commits into one clean commit (useful for noisy experimental branches)
- Rebase and merge: Replays commits on top of main for a linear history
Step 8: Clean Up Delete the feature branch after merging (GitHub offers a button for this). Locally:
git switch main
git pull origin main
git branch -d feature/add-model-evaluation-metricsWriting a Great Pull Request Description
A well-written PR description dramatically improves review speed and quality. Use this template:
## Summary
Brief explanation of what this PR does and why.

## Changes Made
- Added precision-recall curve computation in `src/evaluation.py`
- Added ROC-AUC score reporting
- Created evaluation notebook with confusion matrix heatmap

## How to Test
1. Run `python src/evaluation.py --model models/xgboost_v2.pkl`
2. Open `notebooks/04_evaluation.ipynb` and run all cells
3. Verify outputs match expected ranges in `tests/test_evaluation.py`

## Related Issues
Closes #42

## Screenshots (if applicable)
[Confusion matrix visualization screenshot]GitHub Issues: Tracking Work and Bugs
GitHub Issues is a lightweight but powerful project management tool. Every task, bug, idea, or question that needs attention becomes an issue.
Creating a Useful Issue
A good issue contains:
- Clear title: Specific and searchable (“KeyError in feature_engineering.py when ‘age’ column missing” not “bug”)
- Description: Steps to reproduce a bug, or full context for a feature request
- Expected vs. actual behavior (for bugs)
- Relevant code snippets or error messages
- Environment information (Python version, OS, library versions)
## Bug Report: KeyError in feature_engineering.py

**Description**
Running `python src/feature_engineering.py` on the test dataset raises a
KeyError when the input CSV doesn't contain an 'age' column.

**Steps to Reproduce**
1. Create a CSV without an 'age' column
2. Run `python src/feature_engineering.py --input data/test_no_age.csv`
3. Observe error

**Error Message**KeyError: ‘age’ File “src/feature_engineering.py”, line 47, in create_features df[‘age_group’] = pd.cut(df[‘age’], bins=[0, 18, 35, 60, 100])
**Expected Behavior**
Script should handle missing columns gracefully, either with a default
value or a clear error message specifying which columns are required.

**Environment**
- Python 3.11.4
- pandas 2.0.3
- OS: Ubuntu 22.04Labels and Milestones
Labels categorize issues for filtering and prioritization. Common data science project labels:
bug— Something isn’t workingenhancement— New feature or improvementdata-quality— Issues with input datamodel-performance— Model accuracy or speed issuesdocumentation— Improvements to docsgood-first-issue— Good for new contributors (useful in open-source projects)
Milestones group issues into time-bound goals, like “v1.0 Release” or “Q4 Deliverables.” They show progress toward a target and help prioritize what needs to be completed by a deadline.
Linking Issues to Pull Requests
When you open a PR that resolves an issue, reference it in the PR description:
Closes #42
Fixes #17
Resolves #23When the PR is merged, GitHub automatically closes the linked issues and links the PR in the issue’s timeline — creating a clear paper trail connecting the problem to the solution.
The README: Your Project’s Front Door
A strong README.md is arguably the most important file in a data science repository. It’s the first thing a new team member, collaborator, or potential employer sees.
README Structure for Data Science Projects
# Project Title

Brief one or two sentence description of what this project does.

## Overview
Longer explanation of the problem being solved, approach taken,
and key results.

## Repository Structure
├── data/              # Data directory (not version controlled)
│   ├── raw/           # Original, immutable data
│   └── processed/     # Cleaned, transformed data
├── notebooks/         # Jupyter notebooks for exploration
│   ├── 01_eda.ipynb
│   └── 02_modeling.ipynb
├── src/               # Source code (Python modules)
│   ├── preprocessing.py
│   ├── features.py
│   └── train.py
├── models/            # Saved model files
├── tests/             # Unit tests
├── requirements.txt   # Python dependencies
└── README.md## Setup and Installation
```bash
# Clone the repository
git clone git@github.com:yourusername/project-name.git
cd project-name
# Create virtual environment
python -m venv venv
source venv/bin/activate # On Windows: venv\Scripts\activate
# Install dependencies
pip install -r requirements.txtUsage
# Run the full pipeline
python src/train.py --config config.yaml

# Run evaluation
python src/evaluate.py --model models/best_model.pklResults
| Model | Accuracy | AUC-ROC | F1 Score |
|---|---|---|---|
| Baseline (LR) | 0.781 | 0.823 | 0.764 |
| Random Forest | 0.834 | 0.891 | 0.819 |
| XGBoost | 0.862 | 0.914 | 0.847 |
Data
Describe the data sources, any preprocessing applied, and how to access the data (e.g., download link or DVC instructions).
Contributing
How to contribute (branch naming conventions, PR process, etc.)
License
MIT License — see LICENSE file for details.
A README this thorough signals professionalism and makes your project immediately usable by others.

---

## GitHub for Open-Source Contributions

One of GitHub's most powerful aspects for data scientists is access to — and participation in — the open-source ecosystem.

### Forking a Repository

**Forking** creates your own personal copy of someone else's repository on GitHub. This is how you contribute to projects you don't have write access to (like scikit-learn, pandas, or any public repository).

1. Click **Fork** on the repository page
2. GitHub creates `yourusername/pandas` (a copy) from `pandas-dev/pandas`
3. Clone your fork locally:
   ```bash
git clone git@github.com:yourusername/pandas.git- Add the original repository as an “upstream” remote:
git remote add upstream git@github.com:pandas-dev/pandas.git
Now you have two remotes:
origin— your fork (you have write access)upstream— the original repository (read-only for you)
Contributing to an Open-Source Data Science Project
The standard open-source contribution workflow:
# Keep your fork up to date with the original
git fetch upstream
git switch main
git merge upstream/main
git push origin main

# Create a branch for your contribution
git switch -c fix/documentation-typo-in-groupby

# Make your changes
# Edit the relevant file...

# Commit and push to your fork
git add docs/groupby.md
git commit -m "Fix typo in groupby documentation: 'aggreate' → 'aggregate'"
git push origin fix/documentation-typo-in-groupby

# Open a Pull Request from your fork to the original repository
# Done through GitHub's web interfaceContributing to open-source, even in small ways like fixing documentation typos, builds real skills, grows your network, and creates a public portfolio of meaningful contributions.
Starring and Watching Repositories
Star repositories you find useful — it’s the GitHub equivalent of bookmarking, and it helps surface useful libraries in your starred list later.
Watch repositories where you want to be notified of activity (new issues, PRs, releases). This is useful for staying updated on libraries you depend on heavily.
GitHub Actions: Automating Your Data Science Workflow
GitHub Actions is a powerful CI/CD (Continuous Integration/Continuous Deployment) platform built into GitHub. It runs automated workflows — defined as YAML files — triggered by events like pushes, pull requests, or scheduled times.
For data scientists, GitHub Actions can:
- Run your test suite automatically on every push
- Lint your Python code for style issues
- Automatically execute notebooks and check for errors
- Validate that data schemas haven’t changed unexpectedly
- Deploy updated models or dashboards when you push to
main
Anatomy of a GitHub Actions Workflow
Workflow files live in .github/workflows/ and are written in YAML:
# .github/workflows/tests.yml

name: Run Tests

# Trigger this workflow on pushes to main and on all pull requests
on:
  push:
    branches: [ main ]
  pull_request:
    branches: [ main ]

jobs:
  test:
    # Run on Ubuntu
    runs-on: ubuntu-latest

    steps:
      # Step 1: Check out the repository code
      - name: Checkout code
        uses: actions/checkout@v3

      # Step 2: Set up Python
      - name: Set up Python 3.11
        uses: actions/setup-python@v4
        with:
          python-version: '3.11'

      # Step 3: Install dependencies
      - name: Install dependencies
        run: |
          python -m pip install --upgrade pip
          pip install -r requirements.txt
          pip install pytest

      # Step 4: Run the test suite
      - name: Run tests
run: pytest tests/ -vWith this file committed to your repository, every push and every pull request will automatically trigger GitHub to spin up a virtual machine, install your dependencies, and run your tests. If tests fail, the PR is marked with a red X, alerting reviewers before they even look at the code.
A Data Science CI Workflow Example
Here’s a more complete workflow for a data science project:
# .github/workflows/data-science-ci.yml

name: Data Science CI

on:
  push:
    branches: [ main, develop ]
  pull_request:
    branches: [ main ]

jobs:
  quality-checks:
    runs-on: ubuntu-latest

    steps:
      - uses: actions/checkout@v3

      - name: Set up Python
        uses: actions/setup-python@v4
        with:
          python-version: '3.11'

      - name: Install dependencies
        run: |
          pip install -r requirements.txt
          pip install pytest flake8 black nbval

      # Check code formatting with Black
      - name: Check code formatting
        run: black --check src/ tests/

      # Lint with flake8
      - name: Lint with flake8
        run: flake8 src/ tests/ --max-line-length 88

      # Run unit tests
      - name: Run unit tests
        run: pytest tests/ -v --tb=short

      # Validate that notebooks run without errors
      - name: Validate notebooks
run: pytest --nbval notebooks/ --nbval-laxScheduled Workflows for Data Pipelines
You can also schedule workflows to run at specific times — useful for data pipelines that need to refresh daily:
on:
  schedule:
    # Run at 6 AM UTC every weekday
- cron: '0 6 * * 1-5'GitHub Pages: Publishing Your Data Science Portfolio
GitHub Pages is a free static site hosting service that publishes websites directly from a GitHub repository. This is an excellent way to:
- Share interactive data visualizations built with tools like Plotly or Bokeh
- Publish Jupyter Notebooks as readable HTML reports
- Host your data science portfolio website
- Share project documentation
Setting Up GitHub Pages
- Go to your repository’s Settings tab
- Navigate to Pages in the left sidebar
- Under Source, select the branch to publish from (often
gh-pagesormain/docs) - Your site becomes available at
https://yourusername.github.io/repository-name
Converting Notebooks to GitHub Pages
You can use nbconvert to convert notebooks to HTML and host them via GitHub Pages:
# Convert notebook to HTML
jupyter nbconvert --to html notebooks/analysis.ipynb --output docs/analysis.html

# Commit and push
git add docs/analysis.html
git commit -m "Publish analysis notebook as HTML report"
git push origin mainFor more sophisticated documentation sites, JupyterBook can compile an entire collection of notebooks into a polished, searchable website deployable to GitHub Pages.
GitHub Releases and Tags
When your project reaches a meaningful milestone — a stable model version, a public v1.0 release, or a reproducibility checkpoint — GitHub Releases let you mark that point permanently.
Creating a Release
From the command line:
# Tag the current commit
git tag -a v1.0.0 -m "First production model release: XGBoost baseline"
git push origin v1.0.0From GitHub:
- Go to Releases in the right sidebar of your repository
- Click Create a new release
- Choose an existing tag or create one
- Add a title and release notes describing what’s included
- Optionally attach binary files (model weights, datasets)
Why Tags Matter for Data Science
In machine learning, tagging the exact commit used to train a production model creates a permanent checkpoint:
v2.3.0-production-model
"XGBoost model achieving 86.2% accuracy on Q4 2024 test set.
Trained on customer_data_2024q4.csv (SHA256: a3f8c2d...)
Deployed to production: 2024-12-01"Six months later, if you need to reproduce or audit that model, you can:
git checkout v2.3.0-production-modelAnd you have the exact code that was used.
Collaborating with Teams: GitHub Organization Features
When working on a team, GitHub Organizations provide shared ownership and management of repositories.
Branching Strategies for Teams
Teams need an agreed-upon branching strategy to prevent chaos. Two common approaches are:
GitHub Flow (simple, recommended for most data science teams):
mainbranch is always deployable- All work happens in feature branches
- Branches are merged via PR after code review
- Simple, low overhead, works well for teams deploying frequently
Git Flow (more structured, for teams with formal release cycles):
main— production-ready code onlydevelop— integration branch for featuresfeature/xxx— individual feature branchesrelease/x.x.x— release preparationhotfix/xxx— emergency production fixes
For most data science teams, GitHub Flow is the right choice. Its simplicity reduces overhead and keeps the focus on doing data science rather than managing branches.
Code Owners
GitHub’s CODEOWNERS file lets you automatically request reviews from specific people when certain files are changed:
# .github/CODEOWNERS

# The ML team must review any changes to model training code
src/train.py @ml-team

# The data engineering team owns the pipeline code
src/pipeline.py @data-engineering-team

# Any notebook changes need a data scientist review
notebooks/ @data-science-teamBranch Protection Rules
Branch protection rules prevent direct pushes to important branches and enforce code review:
- Go to Settings → Branches
- Add a protection rule for
main - Enable:
- Require pull request reviews before merging (minimum 1 reviewer)
- Require status checks to pass (automated tests must be green)
- Restrict who can push to matching branches
This prevents anyone — including the repository owner — from accidentally pushing untested code directly to main.
GitHub for Your Data Science Portfolio
Your GitHub profile is your professional portfolio. Potential employers and collaborators use it to assess your skills, work style, and experience. Here’s how to make it shine.
Profile README
GitHub lets you create a special repository named yourusername/yourusername whose README is displayed on your profile page. Use it to introduce yourself, highlight key skills, and link to notable projects.
Pinned Repositories
Pin your six best repositories to your profile. Choose projects that demonstrate:
- End-to-end ML pipelines (data ingestion → preprocessing → modeling → evaluation)
- Clean code structure and good documentation
- Real problems with real datasets
- Clear README files explaining the project and results
What Makes a Standout Data Science Repository
When a recruiter or collaborator browses your GitHub, they’re looking for signal. Here’s what impresses:
| Signals Professionalism | Signals Beginner Mistakes |
|---|---|
| Clear, descriptive README with setup instructions | No README or a one-line README |
| Consistent commit history with descriptive messages | Commits like “fix” or “asdf” or no commits for months then 50 at once |
| Organized project structure (src/, tests/, notebooks/) | Everything in one flat directory |
| Requirements.txt or environment.yml | No dependency management |
| Tests for key functions | No tests whatsoever |
| Data stored separately, not in Git | Large CSV files committed to the repo |
| Well-documented notebooks with Markdown explanations | Notebooks with no text, just code cells |
| Open issues showing active maintenance | Abandoned repositories with known bugs |
| Results table in README showing model performance | No mention of whether the project actually worked |
Contributing to Open-Source Builds Your Profile
Every merged PR to a popular open-source project (scikit-learn, pandas, matplotlib) is visible on your GitHub profile as a contribution. Even small contributions — fixing documentation, improving test coverage, adding type hints — demonstrate that you can read unfamiliar codebases and work within a team’s conventions.
GitHub Codespaces: Development in the Cloud
GitHub Codespaces provides a complete, cloud-hosted development environment accessible through your browser — essentially VS Code running on GitHub’s servers with your repository automatically loaded.
For data scientists, Codespaces is useful when:
- You need to work from a machine that doesn’t have your development environment configured
- You want team members to have identical development environments
- You’re reviewing a complex PR and want to actually run the code without cloning locally
Codespaces can be configured with a devcontainer.json file that specifies the Docker image, extensions, and setup scripts:
// .devcontainer/devcontainer.json
{
  "name": "Data Science Environment",
  "image": "mcr.microsoft.com/devcontainers/python:3.11",
  "postCreateCommand": "pip install -r requirements.txt",
  "customizations": {
    "vscode": {
      "extensions": [
        "ms-python.python",
        "ms-toolsai.jupyter",
        "ms-python.black-formatter"
      ]
    }
  }
}Anyone opening this repository in a Codespace gets a pre-configured Python 3.11 environment with all dependencies installed and the right VS Code extensions ready — zero setup time.
GitHub Security Features
Dependabot
Dependabot automatically scans your requirements.txt or environment.yml for known security vulnerabilities in your dependencies and opens pull requests to update them:
Dependabot opened a PR:
"Bump numpy from 1.24.0 to 1.24.4"
"Security: Fixes CVE-2023-XXXXX in numpy's array manipulation code"Enable Dependabot in Settings → Security → Dependabot.
Secret Scanning
GitHub automatically scans commits for accidentally committed secrets — API keys, passwords, tokens. If detected, it alerts you and often notifies the affected service provider directly.
This is another layer of protection on top of a good .gitignore that excludes .env files, but security-in-depth is always valuable.
Security Advisories and Code Scanning
For production data science applications, GitHub’s code scanning (powered by CodeQL) can detect security vulnerabilities in your Python code automatically on every push.
Common GitHub Workflows for Data Scientists
Workflow 1: Solo Project
main branch (stable, production-ready)
    └── feature branches (experiments, new analysis)
└── PR to merge into main when readyEven for solo projects, using branches and PRs (even if you’re reviewing your own code) enforces discipline and creates a record of what changed and why.
Workflow 2: Small Data Science Team (2-5 people)
main branch (protected, requires PR + review)
    └── develop branch (integration)
         ├── feature/engineer-A-feature-importance
         ├── experiment/engineer-B-lstm-model
└── fix/engineer-C-preprocessing-bugWorkflow 3: Contributing to an Organization’s Data Infrastructure
Organization's main repository
    └── Your fork
         └── Your feature branch
└── PR from your fork to organization's mainA Complete GitHub Setup Checklist for New Data Science Projects
Use this checklist when starting a new project:
Repository Setup:
- [ ] Created repository with a descriptive name (lowercase, hyphens)
- [ ] Added a Python
.gitignoretemplate, customized for data science - [ ] Chose an appropriate license (MIT for open-source)
- [ ] Created initial README.md with project description
- [ ] Set up branch protection on
main(require PRs and passing checks)
Local Setup:
- [ ] Cloned the repository via SSH
- [ ] Created a virtual environment (
python -m venv venv) - [ ] Created
requirements.txtwith pinned dependencies - [ ] Added
requirements.txtto the repository
Collaboration Setup:
- [ ] Created issue labels relevant to the project
- [ ] Added a
CODEOWNERSfile if working in a team - [ ] Set up a project board for task tracking
- [ ] Created a PR template (
.github/pull_request_template.md)
Automation Setup:
- [ ] Added a GitHub Actions workflow for running tests
- [ ] Enabled Dependabot for security alerts
Summary
GitHub transforms Git from a powerful local tool into a complete platform for professional, collaborative, and public data science work. The key features you’ll use in every project are repositories (for hosting code), pull requests (for reviewing and merging changes), issues (for tracking tasks and bugs), and Actions (for automating workflows).
Beyond the mechanics, GitHub is the professional home of the data science community. Open-source libraries live here, collaborators find projects here, and employers evaluate your skills here. Investing time in building a clean, well-documented GitHub presence — with good READMEs, descriptive commits, organized project structures, and contributions to open-source — pays dividends throughout your entire career.
The best way to build GitHub fluency is to use it for everything. Every personal project, every learning exercise, every experiment. The habits formed in low-stakes personal projects are the same habits that make you a valued collaborator on professional teams.
Key Takeaways
- GitHub is a web platform built on Git that adds repository hosting, pull requests, issues, project management, and automation — Git handles local version control, GitHub handles collaboration and cloud hosting
- SSH authentication is the preferred method for connecting your local Git to GitHub — set it up once and never enter credentials again
- Pull requests are the core collaboration mechanism: work on a branch, push it, open a PR, get review, address feedback, merge — this workflow applies to solo projects and large teams alike
- A strong README is the most important non-code file in a repository — it makes your project understandable, usable, and impressive to potential collaborators and employers
- GitHub Actions enables CI/CD automation: running tests, linting, and validating notebooks automatically on every push
- Tags and releases create permanent, reproducible checkpoints — essential for auditing and reproducing ML models in production
- Your GitHub profile is your professional portfolio: pinned repositories with clean code, good documentation, and descriptive commit histories signal quality to employers and collaborators
- Contributing to open-source data science projects is one of the highest-leverage activities for building skills, network, and professional reputation simultaneously