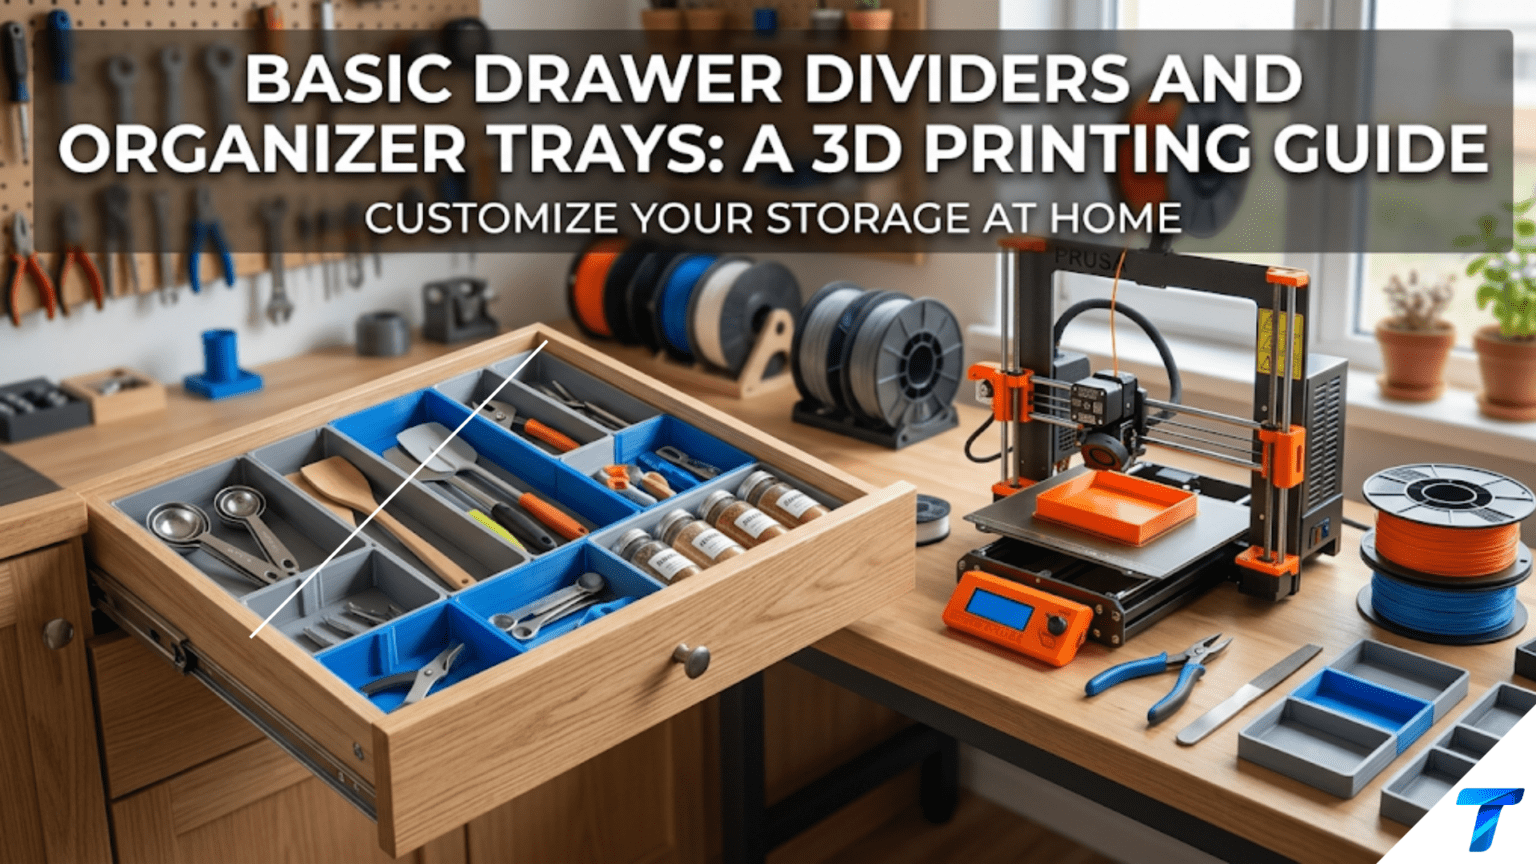
3D printed drawer dividers and organizer trays are custom-fitted inserts that divide drawer and shelf space into tidy compartments sized exactly for the items they hold. Unlike commercial organizers that come in limited standard sizes, printed organizers can be dimensioned precisely to fit any drawer and any item collection — from kitchen cutlery and craft supplies to office stationery and workshop tools — making them one of the most immediately practical and endlessly customizable projects a beginner 3D printer owner can produce.
Introduction: The Drawer Organization Problem
Open any junk drawer in any home and you’ll find the same landscape of organized chaos: rubber bands tangled around batteries, pens mixed with spare change, measuring tape coiled over a mass of takeout menus, and somewhere in there the thing you actually needed that sent you digging in the first place. The junk drawer is almost universal because solving it requires organizational infrastructure — dividers, compartments, sorting containers — and commercial solutions are rarely sized right for the specific combination of items that accumulate in any particular person’s drawer.
This is precisely the problem 3D printing solves better than almost anything else in the organizational world.
A 3D-printed drawer organizer can be sized to fit the exact interior dimensions of your specific drawer. It can have compartments sized for the exact items you need to store — a slot precisely wide enough for a standard deck of cards, a cylinder exactly the right diameter for your most common battery size, a long narrow channel for the measuring tape that always gets coiled in a messy pile. It can be designed as a single integrated tray or as a modular system of interlocking pieces that can be rearranged as your storage needs change.
The commercial alternative — buying a set of plastic drawer organizers from a home goods store — forces you to work with whatever standard sizes the manufacturer decided to produce, using filler pieces and awkward gaps where standard compartments don’t match your items, and accepting a color and finish that may not complement your space.
Beyond the practical advantages, drawer dividers and organizer trays are excellent beginner projects for a less obvious reason: they teach you to think about 3D printing in terms of measurement, space, and customization. Designing or customizing an organizer requires you to measure your drawer, measure your items, think about workflow and access patterns, and translate those practical requirements into a designed object. This design thinking — moving from real-world requirements to printed solution — is the core skill that transforms a beginner from someone who prints other people’s designs to someone who creates solutions to their own specific problems.
This guide covers the full spectrum of drawer and shelf organization with your 3D printer: from finding and printing existing designs, to understanding the massively popular Gridfinity modular system, to measuring and customizing your own organizers, to the slicer settings that produce flat-bottomed, warp-free trays, to creative organizational systems worth building for every room in your home.
Why Drawer Organizers Are Excellent Beginner Projects
Before exploring design options and techniques, it’s worth understanding why drawer organizers are so well suited to beginners — because understanding this helps you get more from the project.
Large Flat Surfaces Teach Critical Skills
Drawer trays and dividers have something in common: large flat surfaces. The bottom of a tray, the base of a divider panel, the floor of a modular bin — these flat areas are among the most technically challenging surfaces to print cleanly because they’re most susceptible to warping, and because any surface imperfection on a large flat area is visually prominent.
Successfully printing a flat, warp-free organizer tray teaches you:
- How to manage bed adhesion and brims effectively
- How to control thermal warping through settings and material choice
- How first layer calibration affects large flat surfaces
- How to use brim settings strategically for objects with large footprints
These are skills that transfer directly to every large, flat, or functional print you’ll ever make.
Measurement Introduces Design Thinking
Even if you never open a 3D modeling program, printing an organizer tray requires measurement — of your drawer, of the items that need to fit in it, of the space you’re working with. This act of translating physical measurements into print decisions is fundamental design thinking, and it makes you a more capable maker even before you touch modeling software.
Iteration Is Low-Stakes and Productive
If a coaster doesn’t fit quite right, you’re disappointed but the consequences are minor. If an organizer compartment is slightly too small for your specific item, you’ve learned something precise and immediately actionable: the compartment needs to be exactly X millimeters wider. This kind of tight feedback loop — where a mistake has a specific, measurable cause and correction — is enormously productive for skill development.
The Results Are Immediately Transformational
Arguably no other category of 3D print transforms a space as immediately and noticeably as organization systems. Printing a set of drawer dividers and installing them is a before-and-after moment that people respond to viscerally. The drawer that was a chaos of loose items becomes a cleanly organized system. This immediate, obvious improvement is motivating in a way that decorative prints often aren’t.
Part One: Understanding Your Options
Option 1: Finding Existing Designs
The most straightforward path to your first organizer tray is finding an existing design that’s close to what you need. This works well when:
- Your drawer is a standard size that many designers have created for
- Your items are common enough that someone has already designed a holder for them
- You want a quick first print without any design work
Where to search:
- Printables.com — search “drawer organizer,” “organizer tray,” “divider insert”
- Thingiverse.com — similarly search “drawer divider,” “cutlery organizer,” “tool organizer”
- MyMiniFactory.com — often has aesthetically refined organizer designs
What to look for:
- Dimensions specified in the description — verify they’ll fit your drawer
- Simple geometry without unnecessary complexity for a first print
- User photos showing the organizer actually in use in a drawer
The limitation of this approach is obvious: someone else’s drawer dimensions are rarely your drawer dimensions. This leads naturally to Option 2.
Option 2: Parametric Customizable Designs
Parametric organizer designs allow you to input your own dimensions and receive a custom-sized tray or divider. These are the sweet spot for beginners who want custom sizing without learning 3D modeling — you simply measure and enter numbers.
The workflow with a parametric design on Thingiverse Customizer:
- Open the parametric design in Thingiverse Customizer
- Enter your drawer width, depth, height, and desired compartment layout
- Preview the generated model
- Download the custom STL
- Import into your slicer and print
Parametric organizer generators can produce trays with any combination of compartment sizes, wall thicknesses, and drawer dimensions. Some of the most flexible ones allow specifying a grid of compartments where each cell can have custom dimensions.
Searching “parametric drawer organizer” or “customizable tray” on Thingiverse or Printables yields many good options. Look for designs with clear parameter descriptions and active communities who have left photos of their custom prints.
Option 3: The Gridfinity System
Gridfinity deserves its own section because it represents something genuinely special in the 3D printing community — a thoughtfully designed, massively popular, open modular organization standard that has attracted hundreds of compatible designs from the community.
What is Gridfinity?
Gridfinity was designed by Zack Freedman and released publicly in 2022. It’s a modular organization system based on a standardized 42mm × 42mm grid unit. A Gridfinity baseplate is a flat surface with a grid of recesses, each 42mm × 42mm, that accept standardized Gridfinity modules. Modules snap into the baseplate via magnetic or mechanical retention and can be pulled out and rearranged without tools.
The genius of Gridfinity is its standardization. Because every module follows the same base dimensions (multiples of 42mm), the entire community creates compatible modules — and there are now thousands of them. Any Gridfinity module from any designer on any platform will fit any Gridfinity baseplate. The ecosystem is enormous and growing.
The Gridfinity unit dimensions:
- Base grid unit: 42mm × 42mm
- Modules are described as N × M units: a 1×1 module fits in one grid cell, a 2×3 module covers six cells
- Height is measured in “units” (approximately 7mm per height unit above the base)
- The base of every module has a specific recessed profile that interfaces with the baseplate
Why Gridfinity is brilliant for 3D printer owners:
Before Gridfinity, organizing a drawer required either accepting commercial organizers that didn’t fit perfectly, or designing custom organizers from scratch for each drawer. With Gridfinity, you:
- Print a baseplate sized to your drawer
- Print whatever combination of standard modules fits your needs
- Arrange modules however works best
- Rearrange whenever needs change by simply lifting modules out
As your storage needs evolve — new tools, different items, changed workflow — you print new modules and rearrange. The baseplate stays in place; only the modules change.
Gridfinity module examples available in the community:
- Simple open bins (1×1, 1×2, 2×2, etc.) for loose items
- Divider bins with internal partitions
- Specialty holders for specific items (SD cards, USB drives, batteries, SIM card tools, pens, drill bits, screwdrivers, measuring tape, etc.)
- Stacking modules for taller storage
- Modules with lids for dust-sensitive items
- Transparent modules that show contents
- Combination modules that do multiple jobs at once
Getting started with Gridfinity:
- Measure your drawer: width and depth (interior dimensions)
- Calculate how many 42mm units fit: divide width and depth by 42mm and round down
- Print a baseplate sized to those dimensions. Note: baseplates can also be printed in sections and assembled for large drawers
- Print a selection of modules for your most common items
- Arrange and use — then iterate as you discover what works best
The official Gridfinity files are available on Thangs.com (the original release) and have since spread to Printables, Thingiverse, and everywhere else. Search “Gridfinity” on any model platform for thousands of results.
Option 4: Design Your Own in Tinkercad
For ultimate customization, designing your own organizer trays in Tinkercad gives you complete control. This is more work than the other options but produces the most precisely fitted result.
Basic tray design workflow in Tinkercad:
- Create a solid box the size of your desired tray (outer dimensions)
- Create a slightly smaller box (outer dimensions minus wall thickness on all sides and minus tray height from the top)
- Set the inner box as a “Hole”
- Group the outer box and inner hole — this produces a tray with the inner cavity hollowed out
- To add dividers, add thin rectangular “solid” objects positioned inside the tray cavity
This process takes about 20–30 minutes for a beginner’s first tray and produces a perfectly custom organizer with exactly the compartment layout you want. Each subsequent tray takes less time as you become more comfortable with the workflow.
Part Two: Measuring and Planning Your Organizer
Essential Measurements
Before printing any organizer, gather these measurements from your target drawer or shelf:
Interior drawer dimensions:
- Interior width (measure at the widest point, then subtract 5–10mm for clearance)
- Interior depth (front to back)
- Interior height/depth (how deep the drawer is)
Important: Measure the usable interior space, not the outer drawer dimensions. Account for any internal protrusions, drawer slides, or other obstacles.
Item measurements (for custom compartments):
- Width and depth of each item type that needs its own compartment
- Add 5–10mm to each dimension for comfortable insertion and removal
- For items you grab frequently, add a bit more clearance; for items stored infrequently, tighter fits are acceptable
Clearance planning:
- The tray needs to be slightly smaller than the drawer interior — typically 3–5mm narrower and 3–5mm shorter than the interior dimensions, to account for print tolerance and easy insertion/removal
- For modular systems, leave even more clearance (5–8mm total) since multiple pieces need to fit together
Workflow Planning
Think about how you access the items in the drawer. Items you reach for most frequently should be in the easiest-to-access positions:
- Front of the drawer for daily-use items
- Back of the drawer for infrequently used items
- Left side for left-handed users, right side for right-handed users
- Taller compartments for items you need to grab quickly without looking
This workflow planning step is worth spending 5–10 minutes on before committing to a design. A tray that’s geometrically perfect but puts your most-used items in an inconvenient position is a worse solution than a less precise tray with better workflow.
The Section Layout
Once you have your measurements and workflow priorities, sketch (even just roughly on paper) the compartment layout you want. This sketch becomes your design specification — the information you’ll enter into a parametric tool or use in Tinkercad.
A typical kitchen utensil drawer organizer sketch might look like:
- One wide, deep compartment (140mm × 80mm) for spatulas and large utensils
- Two medium compartments (80mm × 80mm each) for smaller tools
- A long narrow compartment (200mm × 30mm) for chopsticks or skewers
- Several small compartments (40mm × 40mm) for small items
This sketch gives you everything you need to enter dimensions into a parametric generator or build the design in Tinkercad.
Part Three: Design Considerations for Different Rooms
Different rooms and drawer types have distinct organizational needs that inform how you should design your organizers.
Kitchen Drawer Organizers
Kitchen drawers hold everything from sharp knives to rubber spatulas to measuring spoons. The main design considerations:
Cutlery organizers: The classic kitchen drawer insert. Standard dimensions: forks and spoons need channels about 50–60mm wide and 200mm long. Knives need either wider channels or dividers that secure them safely. A complete cutlery tray typically has 4–5 parallel channels of slightly different widths.
Utensil organizers: Larger items need bigger compartments. Silicone spatulas, whisks, and can openers need 70–100mm wide compartments of 150–200mm depth. Consider making these open-top bins rather than fixed compartments since utensil sizes vary.
Small items drawer: The “junk drawer” equivalent of the kitchen — bottle openers, spare batteries, twist ties, sauce packets. This drawer benefits most from many small compartments to prevent mixing. A Gridfinity system works extremely well here.
Material note for kitchens: Kitchen drawers experience moisture, food residue, and occasional heat from nearby appliances. PETG is preferred over PLA for kitchen organizers — better moisture resistance and better heat tolerance.
Desk and Office Drawer Organizers
Office drawers hold stationery, technology accessories, and small desk items. Key compartments to consider:
- Pen and pencil slots (25–30mm diameter cylinders or rectangular channels)
- Paper clip and binder clip compartments (50–60mm square cells)
- Sticky note storage (sized to standard sticky note dimensions: ~76mm × 76mm)
- USB drive and SD card storage (narrow slots, 20–25mm wide)
- Phone and charging cable compartment (100mm+ wide, open top)
- Ruler storage (long narrow channel, 300mm+ length, 35mm wide)
The desk drawer is where Gridfinity particularly shines — the ability to add specialized modules for specific tech accessories as your collection changes is highly valuable in a tech-heavy workspace.
Bathroom and Medicine Cabinet Organizers
Bathroom drawers hold cosmetics, grooming tools, medications, and small accessories. Key considerations:
- Cylindrical holders for makeup brushes, eyeliner pens, and mascara tubes
- Flat compartments for flat items (nail files, tweezers, bobby pins)
- Medicine bottle storage — often irregular sizes, so flexible open bins are practical
- Small item storage for items like hair ties, bobby pins, safety pins
Important material note: Bathroom environments are high-humidity. PLA is not ideal for bathroom use — it can absorb moisture and degrade over time. PETG is the correct choice for any bathroom organizer.
Workshop and Tool Drawer Organizers
Workshop drawers hold the widest variety of items in the widest variety of sizes. The Gridfinity system is particularly popular in workshops because:
- Tool sizes vary enormously and change as the tool collection grows
- Specialty modules exist for almost every common workshop item
- Modularity allows the system to adapt to different projects
Key workshop compartments:
- Screwdriver storage (cylindrical holes sized to specific handle diameters)
- Allen key/hex key storage (angled slots that display keys at an angle)
- Drill bit storage (angled cylindrical holes in a row)
- Small fastener bins (for screws, bolts, nuts, washers — sized to specific fastener standards)
- Measuring tool storage (calipers, tape measure, squares)
Slicer Settings for Drawer Organizers
Drawer organizers have specific printing requirements that differ from many other print types. The main challenges are: large flat surfaces prone to warping, need for dimensional accuracy so pieces fit together, and adequate floor thickness to prevent flex.
Settings for Standard Organizer Trays
| Setting | Recommended Value | Notes |
|---|---|---|
| Layer Height | 0.2–0.25mm | Higher layer height acceptable — not a detailed print |
| Print Speed | 50–60 mm/s | Slightly faster acceptable for simple geometry |
| Perimeters/Walls | 3 | Adequate for tray walls |
| Infill | 15–20% | Grid pattern — trays don’t need high strength |
| Top Layers | 4–5 | Clean tray floor surface |
| Bottom Layers | 4–5 | Solid, flat base — critical for flat trays |
| Support | None | Well-designed trays never need supports |
| Bed Adhesion | Brim (8–15mm) | Wide brim essential for large flat prints |
| Hotend Temp (PLA) | 205–215°C | Standard PLA range |
| Hotend Temp (PETG) | 230–240°C | Standard PETG range |
| Cooling | 100% PLA / 80% PETG | Standard cooling for each material |
| Seam Position | Back | Hide seam on least visible side |
The Warping Challenge: Large Flat Prints
Drawer trays are prime candidates for warping because they combine two warp-prone characteristics: large footprint and significant flat surface area. When the plastic cools after deposition, it contracts slightly. This contraction creates internal stresses that try to pull the corners upward, causing the characteristic “elephant corner” lift that ruins flat prints.
Strategies to prevent warping:
Brim: The most important single strategy. A brim is a single-layer flat extension printed around the base of the part, adding adhesion area to the corners and edges where lift most commonly starts. For large trays, use a brim of 10–15mm width. This seems like a lot, but it dramatically reduces corner lifting. The brim peels off after printing — peel it away carefully starting from the corners.
First layer temperature: Print the first layer 5–10°C hotter than subsequent layers. This improves bed adhesion for the critical first layer. Most slicers have a “First Layer Temperature” setting separate from the main print temperature.
Bed temperature: For PLA, 60–65°C. For PETG, 70–80°C. Higher bed temperatures maintain a warm environment near the print surface throughout the print, reducing the thermal differential between the print and the air that drives warping.
Draft-free environment: Air currents dramatically accelerate uneven cooling. Keep your printer in a location away from air conditioning vents, open windows, or other drafts when printing large flat objects.
Enclosed printer or draft shield: If your printer supports it, printing inside an enclosure maintains a warm ambient temperature that greatly reduces warping. Alternatively, use your slicer’s “Draft Shield” feature which prints a single-wall enclosure around your object to block air currents.
Filament choice: PETG generally warps less than PLA for large flat prints, somewhat counterintuitively. PLA has a higher coefficient of thermal contraction than PETG in many formulations, leading to more warping. If warping is a persistent problem with PLA, try PETG.
Slower cooling: Reduce your cooling fan speed to 50–70% for large flat prints. This slows the cooling process, reducing thermal gradients across the print and decreasing warping tendency. The tradeoff is slightly reduced dimensional accuracy, but for a drawer tray this is usually acceptable.
Settings for Gridfinity Components
Gridfinity modules have specific requirements because they need dimensional accuracy to interface correctly with the baseplate.
| Setting | Recommended Value | Notes |
|---|---|---|
| Layer Height | 0.2mm | Standard — Gridfinity tolerances are designed for 0.2mm |
| Print Speed | 40–50 mm/s | Moderate for accuracy |
| Perimeters/Walls | 3–4 | Standard |
| Infill | 15% | Grid or Gyroid |
| Top Layers | 4 | Clean bin floors |
| Bottom Layers | 3 | Adequate for the Gridfinity base profile |
| Support | Only if design requires | Most Gridfinity modules don’t need support |
| Bed Adhesion | Brim (5mm) | Standard brim |
| Elephant Foot Compensation | 0.1–0.2mm | Critical for Gridfinity snap fit |
Elephant foot compensation: The elephant foot effect (where the first layer spreads slightly wider than intended due to being squished against the bed) directly affects whether Gridfinity modules snap correctly into baseplates. If the first layer is too wide, the module may not seat properly. Enable elephant foot compensation (0.1–0.2mm in most slicers) to counteract this effect and ensure clean snap-fit engagement.
Step-by-Step: A Complete Drawer Organization Project
Let’s walk through a complete project: designing and printing a custom organizer for a typical home office desk drawer.
Step 1: Clear and Measure the Drawer
Remove everything from the drawer. Measure the interior dimensions:
- Interior width: e.g., 310mm
- Interior depth (front to back): e.g., 200mm
- Interior height: e.g., 50mm
Note any internal obstacles (drawer slide channels, center divide, etc.) and subtract from usable dimensions. For our example, let’s say the usable interior is 300mm × 190mm × 45mm.
Step 2: Inventory Your Items
List everything that needs to go back in this drawer:
- 12 pens and pencils
- Highlighters (4)
- Scissors (1 pair)
- Tape dispenser (fits 75mm × 75mm × 60mm)
- Paper clips (loose)
- Sticky notes (pad, 76mm × 76mm)
- USB drives (3)
- Ruler (300mm)
- Stapler (small, 100mm × 50mm × 35mm)
- Eraser and correction fluid
- Binder clips (5–6)
Step 3: Plan Compartment Layout
Based on your inventory, sketch a layout (on paper or in your head). For a 300mm × 190mm tray:
- Pen/pencil slots: 4 cylindrical or rectangular channels, each 80mm long × 25mm wide × 45mm deep. Position along one side.
- Large item area: 150mm × 100mm open bin for scissors, tape, stapler
- Medium bins: Two 60mm × 60mm bins for paper clips and binder clips
- Sticky notes slot: 80mm × 80mm × 15mm recess
- USB drive slots: 3 slots, each 20mm × 20mm × 30mm deep
- Ruler channel: 300mm × 35mm × 15mm (runs the full width of the tray along one edge)
Step 4: Choose a Creation Method
For this organizer, use a parametric generator on Thingiverse (search “parametric office organizer”) or build it in Tinkercad. For Tinkercad, the workflow is:
- Create the outer tray box: 300mm × 190mm × 45mm
- Hollow out the interior (leaving 3mm floor and walls)
- Add divider walls at planned compartment boundaries
- Add any specific features (pen cylinders, USB slots)
- Export STL
Step 5: Slice with Warp Prevention in Mind
In your slicer:
- Set brim to 12mm (for a large tray)
- 0.2mm layer height
- 3 perimeters
- 18% Grid infill
- 5 top and bottom layers
- First layer temp: 215°C (PLA) or 240°C (PETG)
- Subsequent layers: 210°C (PLA) or 235°C (PETG)
- Cooling: 70% (to reduce warping tendency)
- Draft shield: Enable if available
Check estimated print time. A tray this size typically takes 4–8 hours depending on settings and compartment complexity.
Step 6: Print and Monitor
Start the print. Watch the first 10–15 minutes carefully:
- Is the brim adhering fully around all edges?
- Are the first few layers building up evenly without any corner lifting?
- Is the extrusion consistent across the large flat base area?
Check back every hour. For long prints like this, being home and able to stop the print if something goes wrong saves material and time.
Step 7: Remove and Test Fit
Once printed, remove the brim carefully — for large trays, slide a spatula under the brim edge and work around the perimeter rather than pulling from a single point, which can crack the tray base.
Test fit the tray in the drawer. It should slide in smoothly with a few millimeters of clearance on each side. If it’s slightly too wide or too long, note the discrepancy for the next print — or carefully sand the edges if the difference is very small.
Step 8: Test Fit Your Items
Place each item in its designated compartment. Check:
- Does each item fit without forcing?
- Is there adequate clearance to pick items up easily?
- Are the most frequently used items in the most accessible positions?
- Does anything need a slightly different compartment size?
Note any adjustments needed and implement them in the design before printing more trays for other drawers.
Modular vs. Single-Piece Trays: Trade-offs
An important design decision is whether to print organizers as single pieces or as modular systems. Each approach has distinct advantages:
Single-Piece Trays
Advantages:
- Simpler to design — one piece, no interface geometry required
- Rigid and stable once installed — pieces don’t shift or separate
- Faster to design and iterate for specific drawers
- Perfect fit for fixed, known item collections that won’t change
Disadvantages:
- Not reconfigurable — when your needs change, you print a new tray
- Larger print requiring more time and material
- More susceptible to warping due to large flat area
- Can’t be easily reprinted in sections if one compartment is wrong
Best for: Drawers with stable, permanent item collections — a dedicated cutlery drawer, a fixed set of workshop tools, a cosmetics drawer whose contents don’t change.
Modular Systems (Including Gridfinity)
Advantages:
- Infinitely reconfigurable — rearrange modules as needs change
- Failures are cheap — if one module is wrong, reprint just that module
- Community ecosystem — thousands of compatible modules already exist
- Scales to any drawer size by adding more baseplates
- Different module depths possible in the same drawer
Disadvantages:
- Requires printing both baseplate and modules — more total print time upfront
- Modules can shift if not magnetically retained
- Baseplate printing can be tricky for large drawers (print in sections)
- Gridfinity’s 42mm grid may not divide evenly into your drawer dimensions
Best for: Workshop tool storage, office supply storage where items change regularly, any situation where you value future flexibility over current perfect fit.
Troubleshooting Common Organizer Print Issues
Tray Warping at Corners
Cause: Thermal contraction pulling corners upward during cooling.
Solution: Increase brim width to 12–15mm. Increase bed temperature by 5°C. Reduce cooling fan to 60–70%. Print in PETG instead of PLA. Ensure the printing environment is draft-free. For very large trays, consider printing in two or more sections and gluing them together — smaller sections warp far less than large single pieces.
Tray Floor Has Visible Infill Pattern (Rough or Uneven Surface)
Cause: Insufficient top layers, infill too sparse, or under-extrusion.
Solution: Increase top layers to 5–6. Increase infill to 20% or higher. Check flow rate calibration. Slow down the top layer print speed to 25–30 mm/s for better surface quality.
Gridfinity Modules Don’t Snap Into Baseplate
Cause: Dimensional variation from FDM printing — most commonly from elephant foot effect on the module base or the baseplate recesses printing slightly too small.
Solution: Enable elephant foot compensation (0.1–0.2mm) in your slicer. Try printing at a slightly higher Z offset to reduce first-layer squish. Check that both the baseplate and modules were printed from compatible files (the same Gridfinity standard version). Some users report needing to lightly sand the module base corners for smooth engagement.
Tray Is Slightly Too Wide or Long for the Drawer
Cause: Either the dimensions were entered incorrectly, or FDM dimensional variation (typically +/- 0.3–0.5mm) pushed a tight design out of spec.
Solution: For parametric designs, reduce the target dimension by 1–2mm and reprint. For Tinkercad designs, modify the outer dimensions. A quick fix: lightly sand the sides of the tray with 120-grit sandpaper until it fits — each pass removes about 0.1mm.
Walls Separating From Floor or Delaminating
Cause: Poor layer adhesion at the wall-floor junction, often from insufficient temperature or print speed too high.
Solution: Increase print temperature by 5°C. Reduce print speed to 45 mm/s. Reduce cooling to 80%. Check that your filament is dry — moisture dramatically reduces layer adhesion.
Creative Organizational Systems Worth Building
The Complete Kitchen Organization System
Start with the cutlery drawer (the most-used kitchen drawer), then work through spice storage, under-cabinet organization, pantry bin labels, and countertop accessory holders. A systematic approach to kitchen organization using Gridfinity and custom trays can transform kitchen functionality dramatically.
The Cable and Electronics Drawer
A dedicated electronics drawer with Gridfinity modules for USB drives, SD cards, charging cables, adapters, and small gadgets. Custom modules for specific cable diameters, dedicated slots for your specific set of adapters, and labeled bins for each cable type.
The Craft Supply System
Craft drawers hold threads, needles, scissors, measuring tools, and countless small accessories. Custom organizers sized for your specific thread spool sizes, needle cases, and tool handles make craft projects significantly more enjoyable to set up and put away.
The Medicine Cabinet Organizer
Organized medicine storage with clearly labeled compartments sorted by category (pain relief, cold medicine, bandages, prescription medications). Including dosage information on printed labels embedded in the tray improves medication safety.
The Children’s Toy Organizer
Low drawer inserts for toy storage at children’s height — color-coded bins with pictogram labels (for pre-literate children) that make cleanup straightforward and self-directed. Durable PETG construction survives the rough handling typical of children’s storage.
The Garage Workshop System
A comprehensive Gridfinity installation across an entire workshop workbench — baseplates covering the drawer interiors of a rolling tool cabinet, with thousands of community-designed modules for every tool type. This is a multi-week project but creates a genuinely professional workshop organization system.
Conclusion: Organized Space, Organized Mind
There is a genuine quality-of-life improvement that comes from well-organized spaces. The cognitive overhead of navigating disorder — the tiny mental tax of every “where is it?” moment, every search through a tangled drawer, every delay finding the thing you need right now — accumulates throughout a day into something that genuinely affects how you feel and how efficiently you work.
3D printed organizer trays and drawer dividers address this overhead directly, inexpensively, and with a level of customization that commercial solutions can’t match. They’re one of the categories of 3D printing where the practical value is clearest and most immediately apparent.
Print your first tray. Organize your most chaotic drawer. Notice how differently that drawer feels to use once everything has a place. Then ask yourself what drawer should be next — because once you’ve experienced the transformation, you’ll want it everywhere.
Your printer is ready. Your drawers are waiting. Let’s get organized.