A voltage regulator is an active circuit that maintains a constant output voltage regardless of variations in input voltage, load current, or temperature. Linear voltage regulators—the most common type for hobbyist electronics—work by continuously adjusting a series pass element (transistor) to drop the difference between input and output voltage, dissipating excess power as heat. The popular 78xx series (7805 for 5V, 7812 for 12V) provides fixed voltages; the LM317 provides adjustable output set by two external resistors. Low-dropout (LDO) regulators maintain regulation with input-output voltage differences as small as 100–300mV, crucial for battery-powered circuits. Every regulator has three critical specifications: dropout voltage (minimum V_in – V_out needed), maximum output current, and thermal resistance (determines heatsinking requirements).
Introduction: The Final Stage of Power Conversion
In the previous article on power supplies, we saw how AC mains voltage is transformed, rectified, and filtered to produce DC voltage. But the output of that filtered supply—though DC—still has problems that make it unsuitable for powering sensitive electronics:
Voltage varies with load: Draw more current, and the voltage sags. Reduce the load, and voltage rises. A circuit that worked perfectly at no load may behave erratically or fail completely at full load.
Ripple remains: Even after filtering, hundreds of millivolts of 120Hz ripple persist—enough to cause hum in audio circuits, noise in ADC measurements, and logic errors in digital systems.
Input voltage variations propagate: When the mains voltage fluctuates between 110V and 125V (normal variation in many regions), the transformer output and filtered DC follow proportionally. Your circuit sees variable supply voltage throughout the day.
Temperature affects everything: Component values drift with temperature. The filtered supply voltage changes as the transformer and filter capacitor heat up.
A voltage regulator solves all of these problems. It actively monitors the output voltage, compares it to an internal reference, and continuously adjusts its internal resistance to maintain constant output regardless of what’s happening at the input or load. The result is a supply voltage so stable that variations are measured in millivolts rather than volts—exactly what microcontrollers, analog circuits, and digital logic require.
Voltage regulators are among the most widely used integrated circuits in all of electronics. Every Arduino board has one (usually an AMS1117 or similar LDO). Every 5V or 3.3V supply contains one. Every battery-powered device uses one to maintain stable voltage as the battery discharges. Understanding how they work, how to specify them correctly, and how to use them safely is foundational knowledge for anyone building circuits that need stable power.
This comprehensive guide explores voltage regulators from first principles through practical design: the operating principle and internal architecture, the major families (78xx fixed, LM317 adjustable, LDO types), critical specifications and how to interpret datasheets, thermal management and heatsinking, practical circuits with design calculations, and troubleshooting common regulator problems.
Part 1: How Linear Voltage Regulators Work
The Feedback Control Loop
Every linear voltage regulator operates on the same fundamental principle: negative feedback control.
The basic architecture (simplified):
V_in ──┬─── [Series Pass Element: Power Transistor] ─┬─── V_out
       │                                             │
   [Reference]                                    [R_divider]
       │                                             │
       └──── [Error Amplifier] ◄─────────────────────┘
                    │
GNDComponents:
1. Voltage Reference: Generates a precise, stable reference voltage (typically 1.25V or 2.5V) independent of input voltage, load current, and temperature. Usually a bandgap reference (temperature-compensated).
2. Resistor Divider: Samples the output voltage and scales it down to compare against the reference.
3. Error Amplifier: Compares the divided output voltage against the reference. If output is too low, amplifier output increases; if output is too high, amplifier output decreases.
4. Series Pass Element: A power transistor (Darlington pair or MOSFET) controlled by the error amplifier. Acts as a variable resistor between input and output. More drive from error amplifier = lower resistance = higher output current = higher output voltage.
The feedback mechanism:
If V_out drops (heavy load draws current):
- Divided voltage at error amplifier falls below reference
- Error amplifier increases drive to pass transistor
- Pass transistor resistance decreases
- More current flows to load
- V_out rises back to setpoint
If V_out rises (light load):
- Divided voltage exceeds reference
- Error amplifier decreases drive to pass transistor
- Pass transistor resistance increases
- Less current reaches output
- V_out falls back to setpoint
This continuous adjustment happens at high bandwidth (kHz to MHz), so the regulator responds almost instantaneously to load changes.
Where the Power Goes: Heat Dissipation
The linear regulator’s series pass element drops the difference between input and output voltage. That voltage drop, multiplied by the load current, becomes heat dissipated in the regulator:
P_dissipation = (V_in – V_out) × I_load
This is not negotiable physics—it’s the fundamental trade-off of linear regulation. The regulator maintains output voltage by varying how much voltage it drops, and all that dropped voltage × current becomes heat.
Example: 7805 regulator: V_in = 12V, V_out = 5V, I_load = 1A P_dissipation = (12V – 5V) × 1A = 7W
Seven watts of heat—more than enough to burn your finger if you touch the regulator without a heatsink, and enough to destroy the regulator through thermal overload if not managed.
This heat dissipation is the primary limitation of linear regulators and the reason switching regulators dominate high-power applications.
Part 2: The 78xx Fixed Voltage Regulator Family
The Classic Series
The 78xx series, introduced by Fairchild in the 1970s, remains the most recognized voltage regulator family:
Common types:
- 7805: +5V output, 1A maximum (TO-220 package)
- 7806: +6V output
- 7808: +8V output
- 7809: +9V output
- 7812: +12V output, 1A maximum
- 7815: +15V output
- 7824: +24V output
Negative voltage equivalents (79xx series):
- 7905: -5V output
- 7912: -12V output
- 7915: -15V output
The last two digits indicate the output voltage: 7805 = +5V, 7812 = +12V.
Key 78xx Specifications
Output voltage: Fixed at the designated value ±4% typical (±2% for some modern equivalents)
Output current: Up to 1A (TO-220 package) with adequate heatsinking; 100mA (TO-92 small package)
Dropout voltage: 2–2.5V typical This is the minimum (V_in – V_out) required for regulation:
- 7805 needs V_in ≥ 7.5V to maintain 5V output
- 7812 needs V_in ≥ 14.5V to maintain 12V output
Line regulation: How much output changes when input changes Typical: 4mV per volt of input change (very good)
Load regulation: How much output changes when load current changes Typical: 50mV from no load to full load (acceptable for most uses)
Ripple rejection: How much the regulator attenuates input ripple Typical: 60–80dB at 120Hz Translation: 1V of 120Hz ripple at input → <1mV ripple at output (99.9%+ rejection)
Thermal shutdown: Built-in protection that shuts regulator off if junction temperature exceeds ~150°C, preventing destruction from overheating
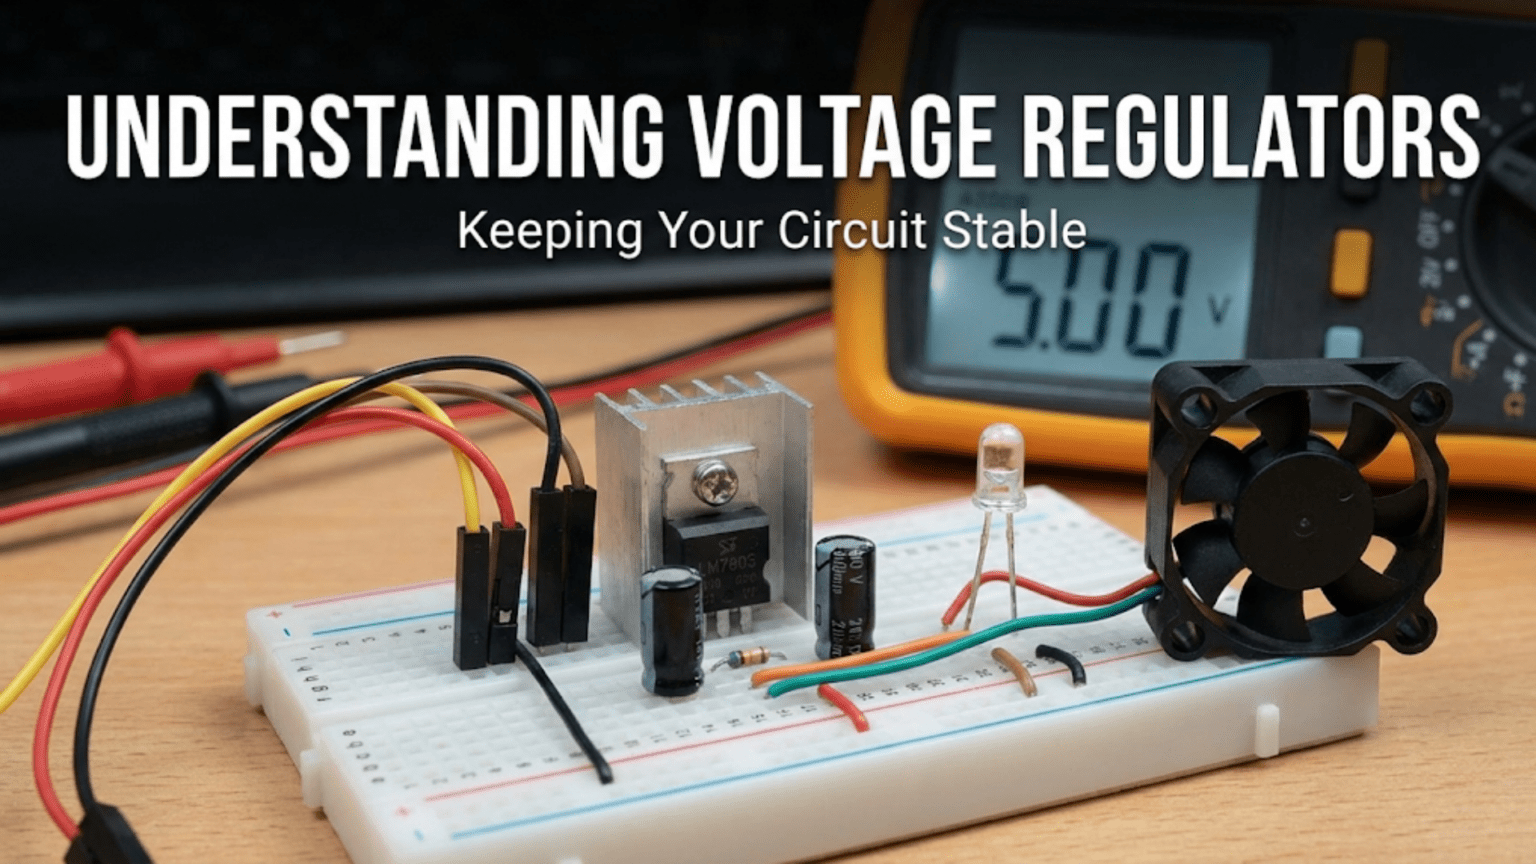
Basic 78xx Circuit
The simplest possible regulated supply:
V_in (unregulated, 7.5–35V) ──┬── IN [7805] OUT ──┬── +5V regulated
                              │                   │
                          [0.33μF]             [0.1μF]
                          (optional but         (output
                          recommended)          bypass)
                              │                   │
                             GND ────────────────GND
Input capacitor (0.33μF): Improves stability if the regulator is located far from the main filter capacitor (more than a few inches of wire). Not strictly required if the regulator is close to the filter, but good practice.
Output capacitor (0.1μF): Improves transient response (regulator’s ability to respond to rapid load changes). Some datasheets require it for stability; always include it.
That’s it. Three pins (IN, GND, OUT), two capacitors, and you have a regulated 5V supply from any 7.5–35V unregulated input.
Part 3: The LM317 Adjustable Voltage Regulator
Why Adjustable Regulators
The 78xx family is limited to standard voltages (5V, 12V, etc.). For custom voltages—3.3V for modern microcontrollers, 9V for guitar pedals, 13.8V for amateur radio equipment—you need an adjustable regulator.
The LM317 (positive) and LM337 (negative) are the universal adjustable regulators.
LM317 Output Voltage Setting
The LM317 maintains exactly 1.25V between its OUT pin and ADJ pin. By placing a voltage divider between OUT and GND, with the center tap connected to ADJ, you set the output voltage:
V_in ──┬── IN [LM317] OUT ──┬── V_out
       │           ADJ      │
    [0.1μF]         │    [0.1μF]
       │          [R1]      │
      GND          │       GND
                   ├───────GND
                   │
                 [R2]
Voltage equation: The regulator forces 1.25V across R1. This creates current I = 1.25V / R1 flowing through R1. The same current (plus a tiny ADJ pin current, typically <100μA) flows through R2.
V_out = 1.25V × (1 + R2/R1) + I_ADJ × R2
Neglecting the small I_ADJ term: V_out ≈ 1.25V × (1 + R2/R1)
Design procedure:
Step 1: Choose R1 Standard practice: R1 = 240Ω (ensures at least 5mA through the divider, well above the regulator’s minimum load current requirement)
Step 2: Calculate R2 R2 = R1 × (V_out/1.25V – 1)
Example: 12V output R2 = 240Ω × (12V/1.25V – 1) = 240Ω × (9.6 – 1) = 240Ω × 8.6 = 2,064Ω
Use 2kΩ (close enough) or use a 2kΩ potentiometer for adjustability from 1.25V to ~20V (depending on input voltage).
Example: 3.3V output R2 = 240Ω × (3.3V/1.25V – 1) = 240Ω × (2.64 – 1) = 240Ω × 1.64 = 394Ω
Use 390Ω (standard value) or 400Ω.
LM317 Specifications
Output voltage range: 1.25V to 37V (limited by maximum input voltage of 40V)
Output current: 1.5A (TO-220 package) with heatsinking
Dropout voltage: ~2V typical (better than 78xx, but not as good as LDO types)
Line regulation: Better than 0.01% per volt input change
Load regulation: Better than 0.5% for full load change
Current limiting: Built-in overcurrent protection (foldback current limiting)
Part 4: Low-Dropout (LDO) Regulators
The Dropout Problem
Standard linear regulators (78xx, LM317) have dropout voltages of 2–2.5V. This creates problems:
Battery-powered circuits: A 9V battery powering a 5V circuit through a 7805:
- Fresh battery: 9V – 5V = 4V headroom ✓
- Partially discharged: 7V – 5V = 2V headroom (marginal)
- Heavily discharged: 6.5V → dropout! Regulator can’t maintain 5V despite battery having 6.5V
The circuit stops working even though the battery has plenty of energy remaining—wasted because of high dropout.
Efficient power use: Higher dropout = more voltage wasted = more heat = lower efficiency For battery life and thermal management, minimizing dropout is critical.
What Makes an LDO Different
Low-dropout regulators achieve dropout voltages of 100–300mV (versus 2V+ for standard regulators) by using a different pass element:
Standard regulator: NPN Darlington pair pass element (requires V_BE + V_CE_sat ≈ 1.5–2V) LDO regulator: PNP transistor or P-channel MOSFET pass element (requires only V_CE_sat or V_DS_on ≈ 0.1–0.3V)
The trade-off: LDO regulators have lower maximum input voltage (typically 16V–20V vs. 40V for standard) and require more careful bypassing (stability issues with certain capacitor types).
Common LDO Families
AMS1117 / LM1117: Very popular 1A LDO, 1.2V dropout, TO-220 and SOT-223 packages
- Fixed versions: AMS1117-3.3 (3.3V), AMS1117-5.0 (5V)
- Adjustable: AMS1117-ADJ (like LM317 but LDO)
- Used on Arduino boards, ESP32 modules, countless cheap modules
LP2950 / LP2985: 100mA LDO, ultra-low quiescent current (75μA), excellent for battery
- Dropout: 380mV at 100mA
- Used in battery-powered sensors, portable equipment
MCP1700 / MCP1702: 250mA LDO, extremely low quiescent current (1.6μA!)
- Dropout: 625mV at 250mA
- Ideal for coin cell battery applications
LM2937: 500mA LDO specifically designed for automotive (handles load dump transients)
- Dropout: 0.5V at 500mA
LD1117: 800mA LDO, common in European designs
- Dropout: 1.2V at 800mA (similar to AMS1117)
LDO Output Capacitor Requirements
LDO regulators are more sensitive to output capacitor type and ESR than standard regulators. Many LDO datasheets specify:
Minimum capacitance: 10μF or 22μF (for stability) ESR range: 0.05Ω to 3Ω for stability
- Too low ESR can cause oscillation
- Too high ESR can cause instability
Capacitor type matters:
- Ceramic capacitors: Very low ESR (can be too low for some LDOs)
- Aluminum electrolytic: ESR in the acceptable range for most LDOs
- Tantalum: Low ESR but acceptable; check datasheet
Solution for ceramics: Add a small resistor (0.5–2Ω) in series with a ceramic output capacitor if oscillation occurs, or use the datasheet-recommended capacitor type.
Part 5: Thermal Management — The Critical Design Factor
Thermal Resistance and Junction Temperature
Every semiconductor has a maximum junction temperature (T_J_max), typically 125°C or 150°C. Exceeding this destroys the device.
Heat flows from the silicon die (junction) through the package to ambient air:
T_junction = T_ambient + (θ_JA × P_dissipation)
Where θ_JA is the thermal resistance from junction to ambient (°C per watt).
Calculating Required Heatsink
Step 1: Calculate power dissipation P_dissipation = (V_in – V_out) × I_load
Example: 7812 with V_in = 18V, V_out = 12V, I_load = 1A P_dissipation = (18 – 12) × 1 = 6W
Step 2: Determine maximum allowable thermal resistance T_J_max = 125°C (from datasheet) T_ambient_max = 50°C (worst-case environment) θ_JA_required = (T_J_max – T_ambient) / P_dissipation θ_JA_required = (125 – 50) / 6 = 12.5°C/W
Step 3: Account for package thermal resistance TO-220 package: θ_JC (junction to case) ≈ 5°C/W Thermal interface (with compound): θ_CS (case to sink) ≈ 0.5°C/W
θ_SA_required (sink to ambient) = θ_JA_required – θ_JC – θ_CS θ_SA_required = 12.5 – 5 – 0.5 = 7°C/W
Select heatsink: Choose a heatsink rated ≤ 7°C/W (lower is better, provides margin)
When Heatsinking Is Not Needed
If the calculated junction temperature is below T_J_max without a heatsink:
Example: LDO regulator, V_in = 5V, V_out = 3.3V, I_load = 100mA P_dissipation = (5 – 3.3) × 0.1 = 0.17W
TO-220 without heatsink: θ_JA ≈ 50°C/W T_junction = 25°C + 50°C/W × 0.17W = 25 + 8.5 = 33.5°C
33.5°C << 125°C → No heatsink needed ✓
Thermal Shutdown Protection
Modern regulators include thermal shutdown — if junction temperature exceeds the limit (typically 150–170°C), the regulator shuts off completely. When it cools below the hysteresis threshold (~140°C), it turns back on.
Why this matters: If your heatsink is inadequate, the regulator will cycle on and off (thermal cycling). This is a sign of inadequate thermal design, not a normal operating mode. The regulator should never reach thermal shutdown in normal operation.
Part 6: Practical Regulator Circuits
Dual-Polarity Supply (±12V from Single AC Transformer)
Many op-amp circuits require dual supplies (positive and negative rails):
          12V AC Transformer Secondary
                   ~ ──────┐
                           │
      ┌────[D1]────┬────[D2]────┐
      │            │            │
      │        [C1: 1000μF]     │
      │            │            │
  ────┴────── +12V unregulated  │
  [7812]                        │
      │                         │
  +12V regulated ───────────────┤
                                │
                              [GND]
                                │
  -12V regulated ───────────────┤
      │                         │
  [7912]                        │
  ────┬────── -12V unregulated  │
      │            │            │
      │        [C2: 1000μF]     │
      │            │            │
      └────[D3]────┴────[D4]────┘
                           │
                   ~ ──────┘
Center-tapped transformer provides two AC outputs in opposite phase. Separate rectification and regulation for each polarity.
High-Current Regulator with Pass Transistor
To exceed the 1A limit of standard regulators, add an external pass transistor:
V_in ──┬─── [Q1: TIP3055 NPN] Collector ─── V_out (5V, 3A)
       │           Emitter
       │              │
       │         ┌────┘
       │         │
       └── IN [7805] OUT ── (connects to Q1 base through small resistor)
              GND
               │
              GND
The 7805 provides the regulated voltage reference and drives the base of Q1. Q1 handles the high current (up to 10A+ with heatsinking). The 7805 itself only supplies the small base current (~100mA).
Low-Noise Regulator for Audio
Standard regulators have output noise of ~50–100μV RMS — acceptable for digital but audible in sensitive audio circuits. Add an RC filter at the output:
[7815] OUT ──[R: 10Ω]──┬── Low-noise +15V
                       │
                   [C: 1000μF]
                       │
GNDThe RC filter forms a low-pass that attenuates high-frequency regulator noise. Trade-off: voltage drop across R when load current flows.
For even lower noise, use specialized low-noise regulators (LT3042, TPS7A47) or LC post-filters.
Part 7: Troubleshooting Regulator Circuits
Output Voltage Incorrect
Too high:
- Check output voltage without load (no-load voltage should be correct ±4%)
- For LM317: Verify R1 and R2 values and connections
- Output capacitor may be leaky or wrong polarity (electrolytic reversed)
Too low:
- Input voltage insufficient (dropout issue) → Increase input or use LDO
- Load current exceeding regulator rating → Reduce load or use higher-current regulator
- Thermal shutdown (overheating) → Improve heatsinking
- Regulator damaged (shorted) → Replace
Oscillation at Output
Symptoms: High-frequency noise/ripple at output (MHz range), regulator may get warm
Causes:
- Missing output capacitor → Add 0.1μF ceramic
- Output capacitor too far from regulator → Move closer or add local bypass
- LDO with wrong output capacitor ESR → Change capacitor type or add series resistor
Regulator Gets Extremely Hot
Normal: Regulator should be warm/hot to touch when dissipating significant power Too hot to touch (>80°C case temperature): Add heatsink or reduce power dissipation
Reduce dissipation by:
- Lower input voltage (use transformer with lower secondary)
- Use LDO (lower dropout = less dissipation)
- Switch to switching regulator for high (V_in – V_out) × I_load
Output Has Ripple/Noise
Low-frequency ripple (120Hz):
- Input filter capacitor too small or failed → Increase capacitance
- Insufficient ripple rejection → Verify input voltage, add more input filtering
High-frequency noise:
- Missing bypass capacitors → Add 0.1μF ceramic at input and output
- Poor PCB layout (long traces) → Shorten connections, use ground plane
Comparison Table: Regulator Types
| Type | Dropout | Max V_in | I_out | Quiescent I | Output Cap | Best For |
|---|---|---|---|---|---|---|
| 78xx (7805) | 2–2.5V | 35–40V | 1A | 5–8mA | 0.1μF (simple) | General purpose, high V_in |
| LM317 | 2–2.5V | 37V (40V abs max) | 1.5A | 5–10mA | 0.1μF (simple) | Adjustable voltage |
| AMS1117 | 1.2V | 15V | 1A | 5–10mA | 10μF+ (critical) | 3.3V/5V regulators, moderate efficiency |
| LP2950 | 0.38V | 30V | 100mA | 75μA | 1μF+ (ESR critical) | Battery-powered, low current |
| MCP1700 | 0.625V | 6V | 250mA | 1.6μA | 1μF+ | Coin cell, ultra-low power |
| LM2937 | 0.5V | 26V | 500mA | 10mA | 22μF+ | Automotive, noisy input |
Conclusion: Stability as the Foundation
The voltage regulator is the component that transforms an adequate but imperfect filtered DC supply into the precise, stable voltage that makes modern electronics possible. Without it, every circuit would need to tolerate wide voltage swings, design for worst-case input conditions, and accept power-supply-induced noise and instability. With it, design becomes straightforward: specify your voltage (3.3V, 5V, 12V), add the appropriate regulator, and know that voltage will be maintained within millivolts regardless of input variation or load changes.
Core Principles Reviewed
Feedback regulation maintains stability. The error amplifier continuously compares output to reference and adjusts the pass element to correct deviations. This closed-loop control is what provides regulation against line, load, and temperature variations.
Linear regulation trades efficiency for simplicity. All the (V_in – V_out) × I_load becomes heat. This limits efficiency but provides the cleanest possible output with minimal complexity.
Dropout voltage defines minimum input. Every regulator needs V_in ≥ V_out + V_dropout. Standard regulators need ~2.5V; LDOs need as little as 0.1V. Choose based on input voltage available.
Thermal management is mandatory. Calculate power dissipation, determine required thermal resistance, select appropriate heatsink. Thermal shutdown is a fault condition, not normal operation.
Capacitors ensure stability. Input and output bypass capacitors are not optional—they prevent oscillation and improve transient response. LDO regulators are particularly sensitive to capacitor type and ESR.
The End of the Beginning
This article—number 60—completes the beginner level foundation. From Ohm’s Law and resistors through transistors, power supplies, and voltage regulators, you’ve built the conceptual toolkit that underlies all of practical electronics. The voltage regulator is a fitting capstone: it is both a simple component (three pins, two capacitors) and a complete system (reference, error amplifier, feedback loop, thermal management).
Everything that follows—operational amplifiers, microcontrollers, digital logic, RF circuits, power electronics—builds on this foundation. The physics doesn’t change. Ohm’s Law still applies. Transistors still amplify. Power must still be managed. What changes is the sophistication of the circuits built from these foundations and the complexity of the problems they solve.
The beginner section has equipped you with the knowledge to understand schematics, design basic circuits, select components intelligently, and troubleshoot when things don’t work as expected. The intermediate section awaits—but you are no longer a beginner.
You understand how voltage regulators keep circuits stable. And in understanding that, you understand the invisible infrastructure that powers the visible world.