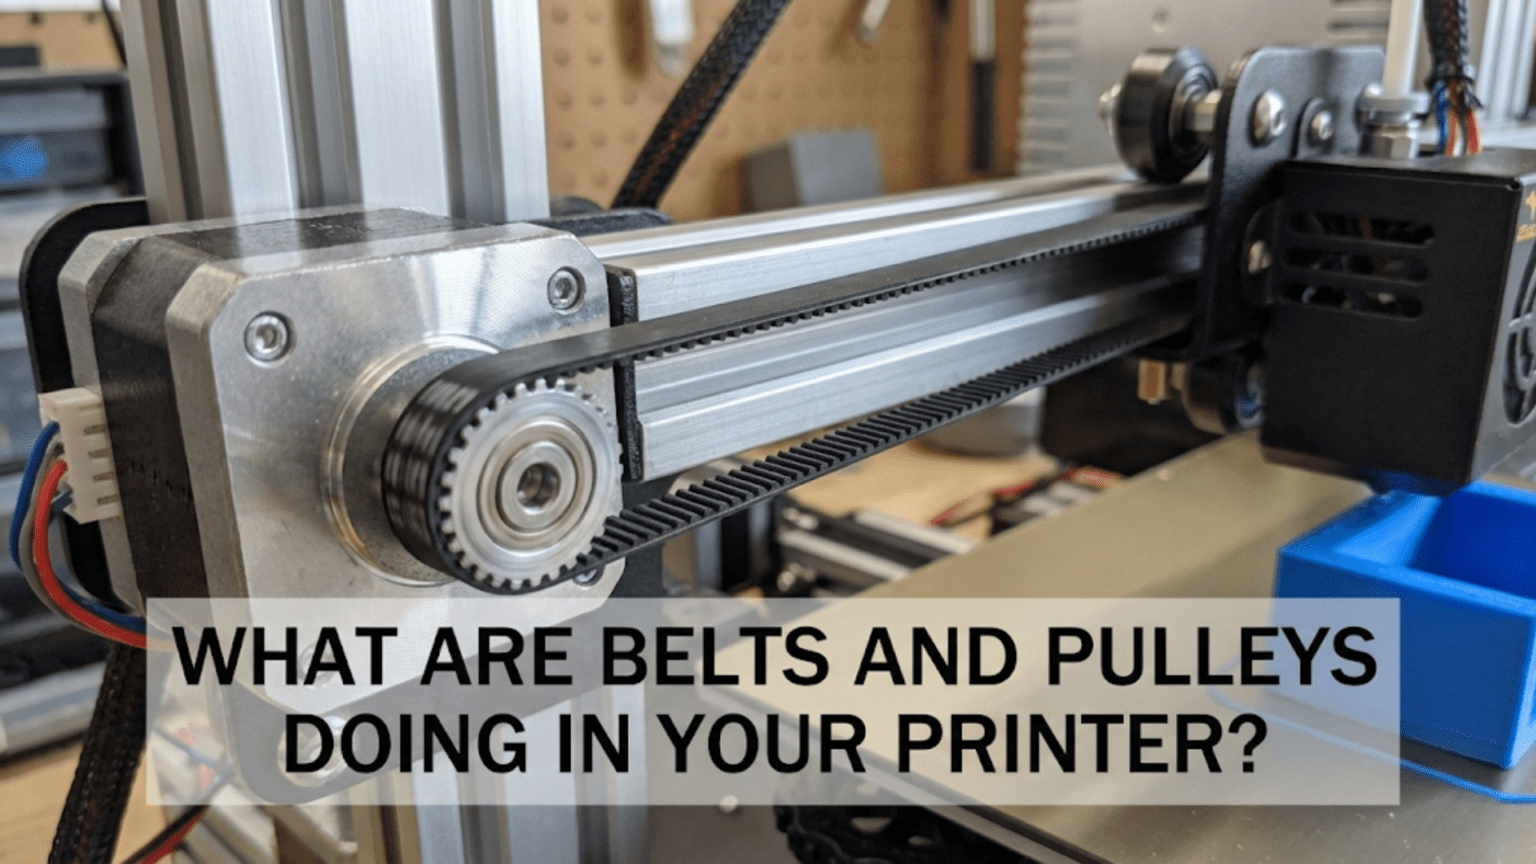
Belts and pulleys form the motion transmission system in most 3D printers, converting the rotational movement of stepper motors into precise linear motion of the print head, bed, or other moving components. Timing belts (typically GT2 type with 2mm tooth pitch) mesh with matching toothed pulleys on motor shafts to create a positive-engagement drive that prevents slippage while allowing long-distance movement, with proper belt tension being critical for maintaining positional accuracy and print quality.
Introduction
When you watch a 3D printer in action, the smooth, precise movements of the print head seem almost magical. The nozzle glides exactly where needed, depositing material with millimeter—sometimes sub-millimeter—accuracy. Behind this precision lies a deceptively simple mechanical system: belts and pulleys converting motor rotation into linear motion.
These components might look unremarkable—just rubber belts wrapped around metal wheels—but they represent an elegant engineering solution to a fundamental challenge. Stepper motors provide rotational motion, but 3D printing requires linear motion. The belt and pulley system bridges this gap, translating circular motor shaft rotation into straight-line movement of the print head or bed.
Yet many users take belts and pulleys for granted until problems arise. Strange layer shifts appear in prints. Dimensional accuracy degrades. Unusual noises emerge during printing. Often, the root cause traces back to belts that have stretched, loosened, worn, or jumped teeth on their pulleys. Understanding how this motion transmission system works—and how to maintain it properly—prevents these frustrations.
In this comprehensive guide, we’ll explore exactly what belts and pulleys do in your printer, how timing belts achieve positive engagement without slippage, why tension matters so critically, and how to maintain and upgrade these essential components for optimal performance.
The Motion Transmission Challenge
Before understanding belts and pulleys specifically, consider the problem they solve:
From Rotation to Linear Movement
Stepper motors excel at controlled rotation. They spin their shafts in precise angular increments, providing accurate rotational positioning. However, 3D printing doesn’t need things rotating—it needs linear movement along X, Y, and Z axes.
Several mechanisms convert rotation to linear motion:
Rack and Pinion: A toothed wheel (pinion) meshes with a straight toothed bar (rack). As the pinion rotates, it walks along the rack, creating linear motion. Simple but limited to straight paths and requires precise alignment.
Lead Screws: A threaded rod rotates while a nut travels along it, converting rotation to linear motion with mechanical advantage. Excellent for Z-axis but too slow for rapid X and Y movement.
Belts and Pulleys: A continuous loop belt rides on pulleys. One pulley connects to the motor while the belt attaches to the moving component (carriage). Motor rotation moves the belt, which carries the carriage linearly. Fast, efficient, and allowing long travel distances.
Most 3D printers use belts and pulleys for X and Y axes because they provide:
- Fast movement speeds
- Long travel distances
- Relatively low cost
- Adequate precision
- Simple implementation
Why Not Direct Drive?
You might wonder why not attach the motor directly to the moving component. Several factors make this impractical:
Motor size and weight: Stepper motors are relatively heavy. Mounting them on moving carriages adds inertia that limits acceleration and can cause ringing artifacts.
Limited travel: Direct attachment restricts movement to the motor’s mounting location. Belts allow the motor to sit stationary while the carriage travels the full axis length.
Mechanical advantage: Pulley size provides gear reduction. A small pulley on the motor shaft creates mechanical advantage, multiplying the motor’s effective force while reducing speed—ideal for 3D printing’s needs.
Understanding Timing Belts
Not just any belt works for 3D printing. The specific type matters tremendously:
GT2 Belt Standard
The overwhelming majority of 3D printers use GT2 (Gates Tooth 2) timing belts:
Tooth Profile: GT2 belts feature a specific tooth shape designed by Gates Corporation. The rounded tooth profile with precisely angled flanks ensures smooth, quiet engagement with pulleys while maintaining positive drive (no slippage).
Pitch: GT2 belts have a 2mm pitch—the distance between tooth centers measures exactly 2mm. This standardization allows different manufacturers’ belts and pulleys to interchange reliably.
Width: Common belt widths include 6mm (most common), 9mm (stronger, used in larger printers), and occasionally 10mm. Wider belts handle higher tension and loads without stretching.
Construction: Timing belts consist of multiple layers:
Core: Fiberglass or steel reinforcement cords run lengthwise through the belt, providing tensile strength and preventing stretching. These cords determine the belt’s stiffness and stretch resistance.
Rubber Compound: Neoprene, polyurethane, or similar elastomer forms the belt body. The compound must balance flexibility (for wrapping around pulleys) with durability (resisting wear and degradation).
Teeth: Molded into the belt’s inner surface, teeth mesh with pulley grooves. Tooth accuracy determines positioning precision.
Backing: Some belts have fabric or coating on the outer surface to protect against wear and provide smooth sliding against idler bearings.
Positive Engagement vs. Friction Drive
Understanding why timing belts work better than smooth belts reveals their advantage:
Friction Belts: Smooth belts rely solely on friction between belt and pulley. Tension creates the gripping force. If load exceeds friction capacity, the belt slips. This slippage loses position accuracy—a disaster for 3D printing.
Timing Belts: Teeth mesh mechanically with pulley grooves. The mechanical interlock creates positive engagement—the belt physically cannot slip relative to the pulley without breaking teeth. Position is maintained regardless of load (within reasonable limits).
This positive engagement provides several benefits:
- No slippage: Position accuracy maintained even under varying loads
- Lower tension required: Mechanical engagement rather than friction means less belt tension needed
- Consistent motion: No micro-slipping creating surface artifacts
- Precise positioning: Belt moves exactly with pulley rotation
Belt Quality Factors
Not all GT2 belts perform equally. Quality differences affect performance:
Core Material:
- Fiberglass cores: Common, adequate for most applications, some stretch over time
- Steel cores: Minimal stretch, maximum stiffness, more expensive, found in quality belts
- Kevlar cores: Excellent strength-to-weight, very low stretch, premium pricing
Compound Quality:
- Cheap rubber: Degrades faster, stretches more, teeth may deform
- Quality polyurethane: Resists degradation, maintains dimensions, lasts longer
- Premium formulations: Optimize durability, flexibility, temperature range
Manufacturing Precision:
- Tooth accuracy: Precisely molded teeth engage cleanly with minimal slop
- Dimensional consistency: Belt width and thickness uniform throughout length
- Core alignment: Reinforcement cords perfectly straight and parallel
Visible Quality Indicators:
- Tooth condition: Sharp, well-defined teeth without flash or irregularities
- Surface finish: Smooth backing without pitting or defects
- Flexibility: Bends smoothly without kinking or stiff spots
- Core visibility: Quality belts show visible reinforcement pattern
Pulley Design and Function
Pulleys work in conjunction with belts to create the motion system:
Drive Pulleys
The drive pulley mounts directly to the motor shaft, transmitting rotation to the belt:
Tooth Count: Common sizes include 16-tooth and 20-tooth pulleys. The tooth count affects:
- Mechanical advantage: Smaller pulleys (16T) provide more torque but slower movement; larger pulleys (20T) move faster with less torque
- Resolution: Smaller pulleys give finer positioning resolution since more motor rotation is needed for equivalent linear movement
- Belt engagement: Larger pulleys engage more teeth simultaneously, distributing load better
Set Screw Attachment: Most pulleys use set screws to clamp onto the motor shaft. The screw tightens against the shaft’s flat side, preventing rotation. Proper tightening is critical—loose pulleys cause position errors.
Bore Diameter: Must match motor shaft diameter (typically 5mm for NEMA 17 motors). Precision machining ensures tight fit without wobble.
Flange: Some pulleys include flanges (raised edges) that prevent the belt from sliding off laterally. Flangeless pulleys require careful alignment.
Material: Usually aluminum for lightweight strength. Precision machining creates accurate tooth profiles. Cheap pulleys may have rough or inconsistent teeth.
Idler Pulleys
Idler pulleys guide and redirect belt paths without providing drive force:
Smooth vs. Toothed:
- Smooth idlers: Bearing pulleys without teeth, contacting the belt’s smooth outer surface. Used where the belt’s back side runs against the pulley.
- Toothed idlers: Have gear teeth matching the belt, used where the belt’s toothed side must run against the idler.
Purpose: Idlers serve several functions:
- Route belts around obstacles or through complex paths
- Maintain belt tension through spring-loaded tensioners
- Change belt direction (for CoreXY and similar kinematics)
- Support belt spans to prevent sagging
Bearing Quality: Idler pulleys contain ball bearings that must spin freely. Cheap bearings bind or develop rough spots, creating resistance and artifacts.
Tensioner Mechanisms
Many printers include adjustable tensioners for maintaining proper belt tension:
Fixed Pulley Tensioners: An idler pulley on an adjustable mount. Moving the mount changes belt path length, adjusting tension.
Spring Tensioners: Spring-loaded idlers automatically maintain constant tension despite belt stretch or thermal expansion.
Eccentric Adjusters: Rotating an eccentric cam moves the idler, adjusting tension precisely.
Belt Clamp Adjusters: Some designs use adjustable clamps that grip the belt end, allowing tension adjustment by moving the clamp position.
How Belts and Pulleys Create Linear Motion
Understanding the complete system reveals how rotation becomes linear movement:
Basic Cartesian Motion
In a simple Cartesian printer (like a Prusa i3):
X-Axis:
- Motor with drive pulley sits at one end of the X-axis
- Belt loops around the drive pulley
- Belt attaches to the X-axis carriage (carrying the hotend)
- Belt continues to an idler pulley at the opposite end
- Belt returns to complete the loop back to the drive pulley
- Motor rotation moves the belt, which carries the carriage left or right
Y-Axis:
- Similar arrangement but moving the bed forward/backward
- Motor drives belt attached to the bed platform
The belt forms a closed loop. The carriage attaches to one section of this loop. Motor rotation advances the loop, moving that section—and thus the carriage—linearly.
CoreXY Complexity
CoreXY kinematics use a more sophisticated belt arrangement:
Two Motors, Two Belts: Both X and Y motors work together for any movement. The belt path crosses through the carriage, with complex routing that allows:
- Both motors turning the same direction moves the carriage in X
- Motors turning opposite directions moves the carriage in Y
- Both motors stationary holds position in both axes
This complexity provides benefits:
- Both motors stationary on the frame (reduced moving mass)
- Faster printing capability
- Improved accuracy
But requires:
- Precise belt tension matching between the two belts
- Accurate pulley alignment
- More complex belt path routing
Distance Calculation
The relationship between motor rotation and linear movement depends on pulley size:
Formula: Distance = (Pulley circumference) × (Number of rotations)
Pulley circumference = Number of teeth × Belt pitch
Example with a 20-tooth pulley and GT2 (2mm pitch) belt:
- Pulley circumference = 20 teeth × 2mm = 40mm
- One motor rotation moves the belt 40mm
- One motor step (1.8° for 200-step motors) moves: 40mm / 200 = 0.2mm
- With 16× microstepping: 40mm / 3200 = 0.0125mm per microstep
The firmware uses these calculations (configured as steps per millimeter) to convert commanded linear distances into motor steps.
Belt Tension: Critical for Quality
Proper belt tension dramatically affects print quality and accuracy:
Why Tension Matters
Too Loose:
- Belt can skip teeth on the pulley under acceleration
- Positional backlash (slack direction changes create position errors)
- Belt vibration and oscillation during movement
- Layer shifting in prints when teeth skip
- Reduced positioning accuracy
Too Tight:
- Excessive bearing wear from high radial loads
- Increased motor load requiring more torque
- Belt stretch over time from constant high stress
- Reduced belt lifespan
- Potential motor overheating from excess resistance
Just Right:
- Firm engagement without slippage
- Minimal backlash for accurate positioning
- Smooth motion without oscillation
- Optimal component lifespan
- Best print quality
Measuring Tension
Several methods gauge belt tension:
Feel Test: The simplest approach involves plucking the belt like a guitar string:
- Proper tension produces a low musical tone when plucked
- Very loose belts feel floppy, sag visibly, and produce no tone
- Correct tension feels firm but not tight, with slight deflection possible
Deflection Test:
- Press the belt midway between pulleys with moderate finger pressure
- Measure deflection distance
- Typical spec: 2-3mm deflection on a 300mm belt span with moderate pressure
- More deflection indicates too loose; minimal deflection suggests too tight
Frequency Measurement:
- Specialized tools measure the belt’s resonant frequency when plucked
- Frequency correlates to tension
- Most accurate method but requires specific tools
Visual Alignment:
- Properly tensioned belts run straight and centered on pulleys
- Loose belts may ride off-center or show lateral movement
- Tight belts may bow slightly between pulleys
Adjusting Tension
The adjustment process varies by printer design:
External Tensioners:
- Locate the adjustment mechanism (often a screw or eccentric cam)
- Loosen mounting hardware if necessary
- Adjust tensioner to increase or decrease belt tension
- Check tension by feel or measurement
- Tighten mounting hardware when correct tension achieved
Belt Clamp Adjusters:
- Loosen the belt clamp
- Pull belt to desired tension
- Secure clamp while maintaining tension
Motor Mount Adjustment:
- Some printers adjust tension by moving the motor mounting position
- Loosen motor mounting screws
- Slide motor to adjust belt tension
- Tighten motor mounts when correct tension achieved
Equal Tension: In systems with multiple belts (CoreXY, dual Z), all belts should have similar tension. Mismatched tension causes positioning errors and uneven wear.
Belt and Pulley Maintenance
Regular maintenance keeps the motion system performing optimally:
Inspection Schedule
Monthly:
- Visual inspection for visible wear or damage
- Check belt tension by feel
- Verify pulleys remain secure on motor shafts
- Listen for unusual noises during movement
Quarterly:
- Detailed inspection of belt teeth for wear
- Clean accumulated dust and debris
- Verify idler bearing smooth rotation
- Re-tension belts if needed
Annually:
- Consider preventive belt replacement if heavily used
- Deep clean entire motion system
- Replace worn idler bearings
- Verify pulley tooth condition
Cleaning
Belt Cleaning:
- Wipe belts with clean dry cloth to remove dust
- For stubborn contamination, use isopropyl alcohol on a cloth
- Avoid petroleum-based cleaners that can degrade rubber
- Ensure belts dry completely before operation
Pulley Cleaning:
- Remove accumulated debris from pulley teeth with brush or compressed air
- Clean idler bearing surfaces
- Avoid getting lubricants on belt contact surfaces
When to Replace
Belts eventually wear and require replacement:
Replacement Indicators:
- Visible tooth damage (broken, worn, or deformed teeth)
- Stretched belt requiring excessive tensioner adjustment
- Cracking or deterioration of rubber compound
- Persistent layer shifts despite proper tension
- Belt age (3-5 years even without visible wear)
Replacement Process:
- Document current belt routing (photos help)
- Release tension completely
- Remove old belt
- Clean pulleys and idlers
- Install new belt following documented routing
- Adjust tension properly
- Verify movement smoothness
- Recalibrate steps/mm if belt type changes
Belt and Pulley Comparison Table
| Specification | Budget Belt/Pulley | Standard Quality | Premium/Performance |
|---|---|---|---|
| Belt Core Material | Basic fiberglass | Quality fiberglass | Steel or Kevlar |
| Belt Compound | Basic rubber | Quality polyurethane | Premium formulation |
| Tooth Precision | Moderate | Good | Excellent |
| Expected Lifespan | 1-2 years | 2-4 years | 4+ years |
| Stretch Resistance | Moderate | Good | Excellent |
| Pulley Material | Generic aluminum | Machined aluminum | Precision aluminum |
| Pulley Tooth Quality | Acceptable | Good | Precision machined |
| Cost (belt + pulleys) | $5-10 | $15-25 | $30-50 |
| Best For | Budget builds, learning | General printing | Performance, precision |
Common Problems and Solutions
Layer Shifting
Symptoms: Layers offset partway through print, creating stepped appearance.
Causes:
- Belt skipping teeth on pulley
- Too-loose belt tension
- Obstruction causing motor to stall
- Pulley slipping on motor shaft
Solutions:
- Increase belt tension
- Tighten pulley set screws
- Check for mechanical binding
- Reduce acceleration or print speed
Dimensional Inaccuracy
Symptoms: Prints measure incorrectly, especially in specific axes.
Causes:
- Belt stretch changing the distance-per-step ratio
- Worn belt teeth creating slop
- Pulley tooth count mismatch with firmware settings
Solutions:
- Replace stretched belts
- Verify and calibrate steps/mm
- Check pulley tooth count matches configuration
Ringing/Ghosting Artifacts
Symptoms: Wavy patterns on flat surfaces, echoing features.
Causes:
- Belt oscillation from loose tension
- Resonance in motion system
Solutions:
- Optimize belt tension
- Reduce acceleration settings
- Add resonance damping
- Verify rigid frame construction
Unusual Noises
Symptoms: Clicking, grinding, or squealing during movement.
Causes:
- Belt rubbing against frame components
- Worn idler bearings
- Damaged belt teeth catching
- Misaligned pulleys
Solutions:
- Check belt routing clearance
- Replace noisy bearings
- Inspect and replace damaged belts
- Verify pulley alignment
Upgrading Belts and Pulleys
Consider upgrades for improved performance:
Belt Upgrades
Steel Core Belts:
- Virtually eliminate stretch
- Improve long-term dimensional accuracy
- Slightly more expensive
- Recommended for precision work
Wider Belts:
- Increase from 6mm to 9mm width
- Handle higher tensions and loads
- Reduce lateral deflection
- Require compatible wider pulleys
Premium Brands:
- Gates original GT2 belts (designed the standard)
- High-quality third-party alternatives
- Consistent manufacturing quality
- Extended lifespan
Pulley Upgrades
Larger Tooth Count:
- Upgrade from 16T to 20T pulleys
- Faster movement for same motor speed
- Slightly reduced resolution (usually not noticeable)
- More teeth engaged with belt (better load distribution)
Flanged Pulleys:
- Add flanges if current pulleys lack them
- Prevent belt lateral movement
- Ensure proper alignment
Precision Machined:
- Replace cheap pulleys with precision machined versions
- Improved tooth accuracy
- Better concentricity (less wobble)
- Smoother operation
System Considerations
Matching Components:
- Use quality belts with quality pulleys
- Mismatched quality creates weak links
- Premium belt on cheap pulleys (or vice versa) wastes investment
Complete Replacement:
- When upgrading, replace both belts and pulleys together
- Ensures optimal engagement
- Maximizes performance improvement
Advanced Belt Systems
Closed-Loop vs. Open-Ended Belts
Closed-Loop (Most Common):
- Belt forms continuous loop
- Pre-made to specific lengths
- Easy to install but requires correct length
- Available in standard lengths (often GT2-6mm in 200mm, 300mm, 400mm, etc.)
Open-Ended:
- Belt cut to exact needed length
- Ends joined with mechanical fasteners or welding
- Custom lengths possible
- More complex installation
- Used in some custom builds or large-format printers
Gates vs. Generic Belts
Gates (Original GT2 Design):
- Premium pricing
- Guaranteed specifications
- Excellent quality control
- Documented performance
- Preferred for critical applications
Quality Generic:
- Reputable manufacturers produce excellent GT2 alternatives
- Significant cost savings
- Performance often comparable to Gates
- Verify seller reputation and reviews
Cheap Generic:
- Very low cost but variable quality
- May stretch, wear quickly, or have poor tooth accuracy
- False economy—cheap belts cause expensive print failures
Conclusion
Belts and pulleys form the motion transmission heart of your 3D printer, bridging the gap between stepper motor rotation and the precise linear movements that create your prints. These seemingly simple rubber loops with molded teeth and aluminum wheels represent sophisticated engineering—the GT2 tooth profile, reinforced belt cores, and precision pulley machining all combine to create reliable, accurate position control.
Understanding how this system works—from the positive engagement that prevents slippage through the critical importance of proper tensioning to the relationship between pulley size and movement distance—transforms belts and pulleys from mysterious components into comprehensible mechanical systems you can maintain, troubleshoot, and optimize.
Proper belt tension might seem like a minor detail, but it profoundly affects print quality. Too loose creates layer shifts and dimensional inaccuracy. Too tight causes excessive wear and motor strain. Finding that “just right” tension ensures smooth, accurate motion that translates to quality prints.
Regular maintenance keeps belts and pulleys performing optimally. Simple cleaning, periodic tension checks, and timely replacement of worn components prevent problems before they ruin prints. When issues do arise—layer shifts, dimensional errors, strange noises—understanding the belt and pulley system helps you diagnose and resolve them quickly.
Whether you’re running budget belts adequate for learning or premium steel-core belts enabling precision work, the fundamental principles remain the same. The rotating motor shaft turns the drive pulley, which pulls the timing belt, which carries the carriage linearly—all thanks to the elegant simplicity of belts and pulleys converting rotation into linear motion, one precisely positioned layer at a time.