The Windows operating system is one of the most widely used platforms globally, known for its user-friendly interface and versatility. For beginners, learning how to navigate the Windows interface effectively can make a big difference in productivity and ease of use. Whether you’re using Windows for personal tasks, work, or gaming, understanding its core components will help you feel more confident and comfortable with your computer.
This guide covers essential tips for beginners to navigate the Windows interface. We’ll explore the desktop, Start menu, taskbar, and other important features that define the Windows experience. By the end of this guide, you’ll have a solid understanding of how to move around your Windows system efficiently, access applications, manage settings, and customize the environment to fit your preferences.
Understanding the Windows Desktop
The desktop is the main workspace in Windows, where you interact with applications, files, and folders. It’s the first thing you see after logging in, and it serves as the hub for accessing everything on your computer.
1. Desktop Icons
Desktop icons provide quick access to important files, folders, and applications. By default, you’ll usually see the Recycle Bin on your desktop, but you can add more icons for frequently used programs and files.
To add an icon to the desktop:
- Find the application or file you want to add in File Explorer or the Start menu.
- Right-click on the item and select Send to > Desktop (create shortcut).
You can also organize your desktop by right-clicking on a blank space, choosing View, and selecting how to arrange the icons (e.g., by name, size, or date).
2. Customizing the Desktop Background
Personalizing your desktop background can make your workspace more enjoyable and reflect your style. Windows allows you to change the background to a picture, solid color, or slideshow of images.
To change the background:
- Right-click on the desktop and select Personalize.
- In the Background section, choose a picture, color, or slideshow.
- Click Browse to select your images, or use the provided options.
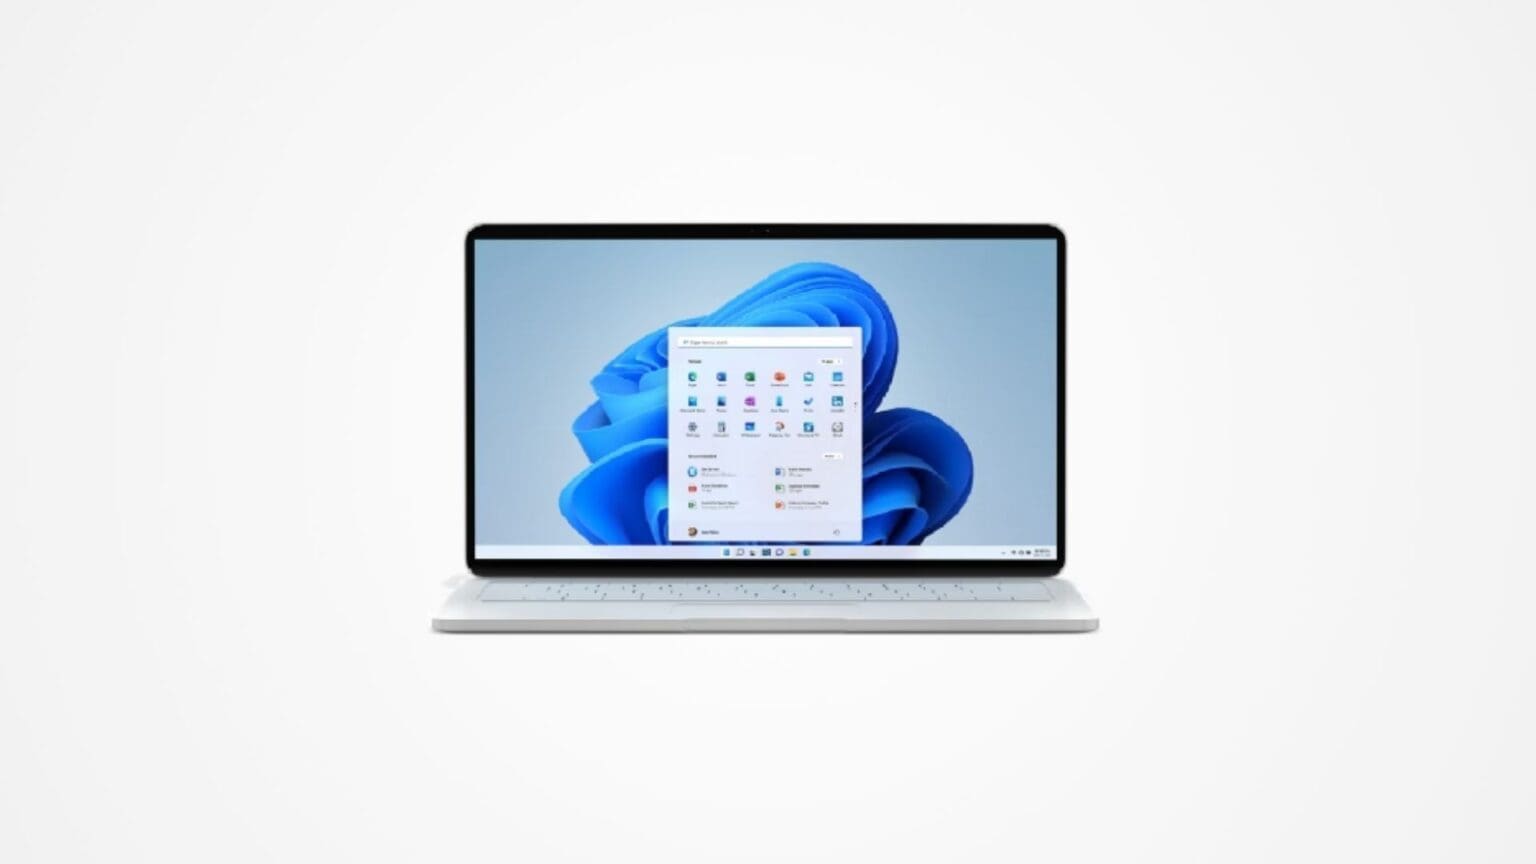
The Start Menu: Central Hub for Accessing Apps and Settings
The Start menu is one of the most essential features in Windows. It serves as the gateway to all of your applications, settings, and system features. Learning how to use the Start menu efficiently can save time and help you find what you need quickly.
1. Opening the Start Menu
You can open the Start menu by clicking the Windows logo in the lower-left corner of your screen, or by pressing the Windows key on your keyboard. The Start menu has two main sections:
- The left panel contains shortcuts to your most-used applications, as well as quick access to essential system features like Settings, File Explorer, and Power options (for shutting down or restarting your PC).
- The right panel (on Windows 10) includes customizable Live Tiles, which are interactive tiles that provide updates from apps like Weather, Calendar, and News. In Windows 11, these tiles have been replaced with a streamlined grid of pinned apps.
2. Pinning Apps to the Start Menu
To make frequently used apps more accessible, you can pin them to the Start menu:
- Open the Start menu and find the app you want to pin.
- Right-click on the app and select Pin to Start.
- The app will appear in the right panel (Windows 10) or in the grid of apps (Windows 11).
You can rearrange pinned apps by clicking and dragging them to your desired position.
3. Searching for Apps, Files, and Settings
One of the quickest ways to find anything on your computer is by using the search bar in the Start menu. Simply open the Start menu and start typing the name of the application, file, or setting you’re looking for. Windows will automatically display results as you type, making it easy to find what you need.
For example, if you type “Word,” Windows will show Microsoft Word if it’s installed, along with related documents or settings. This search functionality saves time and allows you to access tools or files without navigating through multiple menus.
The Taskbar: Managing Applications and Multitasking
The taskbar is the horizontal bar located at the bottom of your screen. It provides quick access to open applications, system notifications, and essential system functions. Mastering the taskbar can improve your ability to multitask and switch between applications seamlessly.
1. Pinning Applications to the Taskbar
Pinning apps to the taskbar allows you to launch them quickly without opening the Start menu. To pin an app:
- Open the application you want to pin.
- Right-click the app’s icon in the taskbar and select Pin to taskbar.
- The app will remain on the taskbar even after closing it, making it easily accessible.
You can remove a pinned app by right-clicking its icon again and selecting Unpin from taskbar.
2. Switching Between Open Applications
When you have multiple applications open, their icons appear on the taskbar. To switch between them, simply click the corresponding icon on the taskbar. Alternatively, you can use the keyboard shortcut Alt + Tab to switch between open applications in a thumbnail view.
For more advanced multitasking, you can hover over the app icons to see a preview of the open windows, then click on the window you want to bring into focus.
3. Using Task View for Multitasking
The Task View feature, available in both Windows 10 and 11, helps you manage open applications and switch between tasks more easily. It also allows you to create and use virtual desktops, which are separate workspaces where you can organize different sets of apps or tasks.
To open Task View:
- Click the Task View button next to the search bar on the taskbar, or press Windows key + Tab on your keyboard.
From here, you can see all open applications, create new virtual desktops, and move apps between desktops to keep your workflow organized.
4. System Tray and Notifications
The system tray (or notification area) is located on the far right of the taskbar. It shows important system icons, like the clock, volume control, network status, and notifications.
- Notifications: Windows uses notifications to alert you about system updates, app messages, and other important information. You can view and manage notifications by clicking the Action Center (Windows 10) or Notification Center (Windows 11) icon in the system tray.
- Managing Notifications: If you want to limit the notifications you receive, you can adjust your notification settings:
- Open Settings > System > Notifications & actions.
- From here, you can choose which apps are allowed to send notifications and customize how notifications appear on your screen.
File Explorer: Managing Your Files and Folders
File Explorer is the built-in file management tool in Windows, allowing you to browse, organize, and manage your files and folders. Learning to navigate File Explorer effectively will help you manage your data more efficiently.
1. Opening File Explorer
You can open File Explorer by clicking the folder icon on the taskbar or pressing Windows key + E on your keyboard. File Explorer is divided into several key areas:
- Navigation Pane: Located on the left side, it shows quick access links to important folders (e.g., Documents, Downloads, Pictures) and drives (e.g., C: drive, external devices).
- File List: The main area that displays the contents of the folder or drive you are currently viewing.
2. Navigating Folders and Drives
In File Explorer, you can navigate between folders and drives by clicking on them in the Navigation Pane. You can also use the back and forward arrows in the toolbar to move between recently visited folders.
If you’re searching for a specific file, you can use the search bar at the top-right of the File Explorer window to find it by name or file type.
3. Creating New Folders
To keep your files organized, it’s helpful to create new folders. To create a new folder:
- Navigate to the location where you want to create the folder.
- Right-click on a blank space and select New > Folder.
- Name the folder and press Enter.
Organizing files into folders helps reduce clutter and makes it easier to find what you need when you need it.
Customizing the Windows Interface
One of the key strengths of Windows is its flexibility in customization, allowing users to tailor the interface to their preferences. Customizing the desktop, taskbar, and other elements of the system can enhance productivity and make your computer feel more personal.
1. Changing Theme and Colors
Windows allows you to customize the overall look and feel of the interface by selecting different themes and color schemes. Themes control the appearance of the desktop background, window borders, and sounds, while color settings adjust how the taskbar, Start menu, and other interface elements appear.
To change your theme:
- Right-click on the desktop and select Personalize.
- Go to the Themes section.
- Select a theme from the available options or download new themes from the Microsoft Store.
You can also customize the color scheme:
- In the Personalization settings, go to Colors.
- Choose whether to use Light, Dark, or Custom mode.
- You can select an accent color to be applied to the taskbar, Start menu, and other interface elements.
This allows you to create a more personalized and visually appealing workspace that matches your style or helps you focus.
2. Taskbar Customization
The taskbar is one of the most important parts of the Windows interface, and Windows offers various ways to customize it to suit your needs.
- Changing Taskbar Position: By default, the taskbar is located at the bottom of the screen, but you can move it to the top, left, or right side:
- Right-click the taskbar and select Taskbar settings.
- Under Taskbar location on screen, choose the desired position.
- Resize Taskbar Icons: If you prefer more screen space or larger icons, you can resize the taskbar icons:
- In Taskbar settings, toggle on Use small taskbar buttons to reduce the size of the icons.
- To increase the size, turn this option off.
- Hiding the Taskbar: If you want a cleaner desktop and more space for your applications, you can set the taskbar to automatically hide when not in use:
- In Taskbar settings, toggle on Automatically hide the taskbar in desktop mode.
- The taskbar will now appear only when you move your mouse to the bottom of the screen.
3. Start Menu Customization
Customizing the Start menu can make it easier to access your favorite apps and files, while also decluttering the interface.
- Resize the Start Menu: In Windows 10, you can adjust the size of the Start menu by dragging the top or side edge to make it taller or wider. In Windows 11, the Start menu is more fixed, but you can still pin and arrange apps in a way that suits you.
- Organize Live Tiles (Windows 10): If you’re using Windows 10, the Start menu contains Live Tiles—dynamic tiles that display information like weather updates, calendar events, or news. You can rearrange, resize, or remove these tiles:
- Right-click on a tile and select Resize to change its size.
- Drag tiles to group them in specific sections or folders.
- If you don’t want Live Tiles in your Start menu, you can right-click on a tile and select Unpin from Start to remove it.
- Pin Your Favorite Apps: Pinning frequently used apps to the Start menu allows for quicker access. Simply right-click on any app in the Start menu and select Pin to Start.
4. Adding Widgets (Windows 11)
In Windows 11, Widgets provide an easy way to access personalized news, weather updates, stock information, and calendar events all in one place. These widgets are located in a dedicated panel that you can access by clicking the Widgets button on the taskbar or pressing Windows key + W.
To customize your Widgets panel:
- Click the Widgets button on the taskbar.
- Use the + Add widgets option to include widgets like Weather, Calendar, or News.
- Rearrange and resize widgets by dragging them to different positions within the panel.
Widgets allow you to stay updated on important information at a glance, helping you manage your day more efficiently.
Using Keyboard Shortcuts for Faster Navigation
Keyboard shortcuts are a powerful way to increase your productivity in Windows. Instead of clicking through menus, you can use specific key combinations to perform common tasks more quickly. Here are some essential keyboard shortcuts that beginners should know:
1. Basic Navigation Shortcuts
- Windows Key: Opens the Start menu.
- Windows Key + D: Minimizes all open windows and shows the desktop.
- Alt + Tab: Switches between open applications.
- Windows Key + E: Opens File Explorer.
- Windows Key + L: Locks the computer.
2. Task Management Shortcuts
- Ctrl + Shift + Esc: Opens the Task Manager, where you can monitor system performance or force-quit unresponsive programs.
- Windows Key + X: Opens a quick access menu with shortcuts to common system management tools (like Settings, Device Manager, or Task Manager).
3. Window Management Shortcuts
- Windows Key + Arrow Keys: Snaps windows to different parts of the screen. For example, Windows Key + Left Arrow will snap a window to the left half of the screen, making it easy to work with multiple windows simultaneously.
- Windows Key + Up Arrow: Maximizes the current window.
- Windows Key + Down Arrow: Minimizes the current window.
Mastering these shortcuts will help you navigate and manage your system faster, allowing for more efficient multitasking.
Managing Multitasking in Windows
Windows offers several features to help users manage multiple applications and tasks effectively. These multitasking tools are especially useful when you’re working with several open programs at once.
1. Snap Assist
Snap Assist is a built-in feature that makes it easier to organize windows on your screen by “snapping” them into place. This feature allows you to work with two or more windows side by side without manually resizing them.
To use Snap Assist:
- Click and drag a window to the left or right edge of the screen until it snaps into place.
- Windows will display thumbnails of your other open applications on the opposite side of the screen. Click on one to snap it to the other half of the screen.
You can also use the Windows Key + Left/Right Arrow keyboard shortcut to quickly snap windows into position.
2. Virtual Desktops
Virtual desktops allow you to create multiple desktops, each with its own set of open applications. This is useful for organizing different tasks or projects, such as separating your work apps from your personal apps.
To create a new virtual desktop:
- Click the Task View button on the taskbar (or press Windows Key + Tab).
- Select New Desktop at the top of the screen.
- You can switch between desktops by returning to Task View and selecting the desired desktop.
You can also move apps between virtual desktops by dragging them from one desktop to another within the Task View interface. This feature is great for managing large workloads or keeping personal and professional tasks separate.
3. Focus Assist
Focus Assist helps minimize distractions by silencing notifications when you need to focus on a task. You can configure Focus Assist to activate during specific times or when certain applications are in use, such as while presenting or gaming.
To enable Focus Assist:
- Open Settings > System > Focus Assist.
- Choose between different modes: Off, Priority Only (which only shows notifications from apps you prioritize), or Alarms Only (which hides all notifications except alarms).
You can also quickly enable Focus Assist from the Action Center (Windows 10) or Notification Center (Windows 11) by clicking the Focus Assist icon.
Exploring System Settings for Better Control
Windows offers a wide range of system settings that allow you to fine-tune your computer’s performance, security, and functionality. Knowing how to navigate and configure these settings is key to getting the most out of your Windows experience.
1. Accessing System Settings
To access system settings, open the Start menu and select Settings (or press Windows key + I). The Settings app provides a user-friendly interface where you can manage everything from display preferences to network settings.
Key sections of the Settings app include:
- System: Manage display settings, notifications, power and sleep options, and more.
- Devices: Configure printers, scanners, Bluetooth, and other connected devices.
- Network & Internet: Set up Wi-Fi, Ethernet, and VPN connections.
- Accounts: Manage user accounts, sign-in options, and sync settings.
- Privacy & Security: Control permissions for apps, manage security settings, and view privacy options.
Each section contains detailed options, allowing you to customize how Windows behaves. For example, under System > Display, you can adjust the screen resolution, change the display orientation, and configure multiple monitors.
2. Adjusting Display Settings
Your display settings directly impact your experience when working on the computer, especially if you use multiple monitors or need to adjust for eye comfort.
- Changing Resolution: To change the resolution of your display, go to Settings > System > Display and select your preferred resolution from the Display Resolution dropdown. Higher resolutions provide clearer and sharper visuals but require more system resources.
- Adjusting Scale and Layout: If text and icons appear too small or too large, you can change the scaling by going to Settings > System > Display and adjusting the Scale and layout settings. This feature is especially useful for high-resolution displays where elements might look tiny by default.
- Night Light Mode: To reduce eye strain in low-light conditions, you can enable Night Light, which applies a warmer color tone to your display. Go to Settings > System > Display and toggle on Night Light.
3. Configuring Power Settings for Better Efficiency
Power settings help you control how your computer uses energy, which is especially important for laptops. Customizing these settings can improve battery life or enhance performance depending on your needs.
To access power settings:
- Go to Settings > System > Power & sleep.
- Adjust the Screen and Sleep options to control when your screen turns off and when your PC goes to sleep.
For more detailed control over power consumption, click Additional power settings under Related settings. Here, you can choose between power plans:
- Balanced: Automatically balances performance with energy consumption.
- Power saver: Reduces energy consumption by limiting background processes and lowering screen brightness.
- High performance: Maximizes performance by keeping your system running at full power, though this uses more energy.
4. Managing Notifications and Focus Assist
Notifications are helpful for keeping you updated, but too many can become distracting. Windows provides tools to control and manage notifications effectively.
- Managing Notifications: To customize your notification preferences, go to Settings > System > Notifications & actions. Here, you can choose which apps are allowed to send notifications, control notification sounds, and decide how notifications appear on your screen.
- Focus Assist: If you need a distraction-free environment, enabling Focus Assist will limit notifications. In Settings > System > Focus Assist, choose from three modes:
- Off: All notifications are displayed.
- Priority only: Only notifications from apps and contacts you’ve prioritized will appear.
- Alarms only: All notifications are suppressed except for alarms.
You can also set up automatic rules to activate Focus Assist during specific times, such as while gaming or during presentations.
5. Setting Up Windows Update for Automatic Maintenance
Keeping Windows up-to-date is essential for security and performance. Windows Update ensures that your system receives the latest patches, driver updates, and feature improvements.
To manage Windows Update:
- Go to Settings > Update & Security > Windows Update.
- Click Check for updates to see if any updates are available.
You can also adjust the Active hours setting so that Windows installs updates outside your typical working hours, minimizing disruptions.
Troubleshooting Common Interface Issues
Even with the best configurations, you might encounter issues while navigating the Windows interface. Here are some common problems and how to troubleshoot them.
1. Unresponsive Programs
Occasionally, an application may stop responding or freeze. When this happens, you can use Task Manager to close the problematic app.
To open Task Manager:
- Press Ctrl + Shift + Esc to launch Task Manager.
- Find the unresponsive application in the Processes tab.
- Click End task to force the application to close.
This method is useful when apps are frozen and cannot be closed normally.
2. Missing Taskbar or Start Menu
If your taskbar or Start menu disappears or stops responding, you can restart the Windows Explorer process to resolve the issue.
- Press Ctrl + Shift + Esc to open Task Manager.
- Scroll down to find Windows Explorer under Processes.
- Right-click Windows Explorer and select Restart.
This action will refresh the taskbar and Start menu without affecting your open programs.
3. Display Scaling Issues
Sometimes, display scaling can cause blurry text or misaligned windows, especially on high-resolution monitors. To fix these issues:
- Go to Settings > System > Display.
- Adjust the Scale and layout settings to a different percentage (e.g., 100%, 125%, or 150%).
- If an application still appears blurry, right-click the app icon, select Properties, go to the Compatibility tab, and check Override high DPI scaling behavior.
This should resolve scaling problems and ensure clear visuals.
Advanced Tips for Maximizing Productivity
For users who want to go beyond the basics, Windows offers advanced features that can significantly enhance productivity and make daily tasks more efficient.
1. Using PowerToys for Enhanced Productivity
PowerToys is a set of advanced utilities that extend Windows functionality for power users. Some useful PowerToys features include:
- FancyZones: A window manager that lets you create custom window layouts for improved multitasking.
- Keyboard Manager: Allows you to remap keys or create custom keyboard shortcuts to streamline your workflow.
You can download PowerToys from the Microsoft GitHub repository and customize its features according to your needs.
2. Enabling Clipboard History
Windows has a built-in Clipboard History feature that lets you copy and store multiple items in the clipboard for easy access.
To enable Clipboard History:
- Go to Settings > System > Clipboard.
- Toggle on Clipboard history.
Once enabled, you can press Windows key + V to view a list of previously copied items and paste them as needed.
3. Virtual Desktops for Task Separation
If you often find yourself juggling multiple tasks, using Virtual Desktops is an excellent way to keep things organized. Virtual desktops allow you to create separate workspaces, each dedicated to different tasks or projects.
To manage virtual desktops:
- Press Windows key + Tab to open Task View.
- Click New desktop to create a new workspace.
- You can switch between desktops by pressing Ctrl + Windows key + Left/Right Arrow.
This is especially useful for users who want to keep personal and work applications separate or manage multiple projects simultaneously.
Conclusion
Navigating the Windows interface efficiently is a fundamental skill that can greatly enhance your productivity and make using your computer more enjoyable. Whether you’re customizing the desktop, mastering keyboard shortcuts, or managing system settings, understanding how to optimize the Windows environment helps you get the most out of your system. By following the tips outlined in this guide, even beginners can become proficient in using Windows and managing their daily tasks with ease.
Windows offers a flexible and feature-rich interface that can be tailored to individual preferences, making it accessible to a wide range of users. With the right knowledge, you can take full control of your Windows experience and streamline your workflow, all while maintaining a personalized and efficient system.