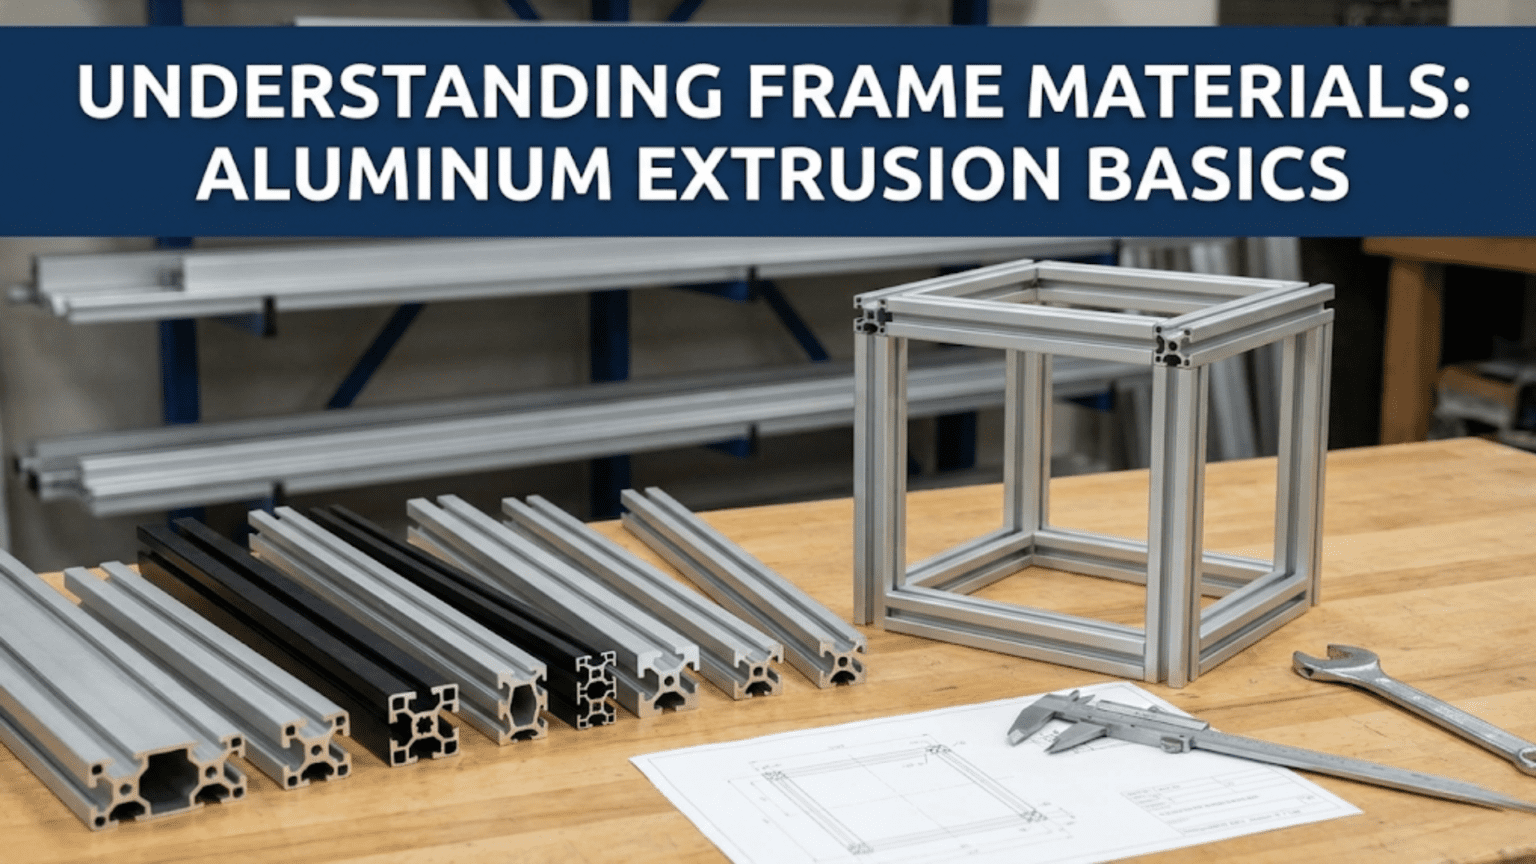
Aluminum extrusion frames use standardized T-slot profiles (like 2020, 4040, or 2040 designations indicating dimensions in millimeters) that provide modular, rigid structural frameworks for 3D printers through interlocking slots accepting drop-in nuts and bolts for easy assembly and modification. These extruded aluminum beams offer excellent strength-to-weight ratios, thermal stability, precision machined surfaces for mounting components, and the flexibility to adjust, expand, or completely reconfigure printer designs without welding or specialized tools, making them the dominant choice for consumer and custom 3D printer construction.
Introduction
The frame forms the foundation of every 3D printer. It must hold components in precise alignment, resist forces from motion and vibration, maintain stability across temperature changes, and provide mounting points for everything from electronics to linear rails. The material and construction method you choose for this frame profoundly affects printer performance, assembly difficulty, upgrade potential, and long-term reliability.
Aluminum extrusion has become the dominant choice for consumer 3D printer frames, and for good reasons. These precisely manufactured profiles combine excellent rigidity with reasonable cost, provide integrated mounting solutions through T-slot channels, and enable modular designs that can be assembled, modified, or expanded without specialized tools or skills. Understanding what aluminum extrusion is, how different profiles compare, and why this construction method works so well helps you evaluate printers and plan modifications.
Yet not all extrusion is created equal. Profile sizes matter—2020 beams offer different characteristics than 4040. Extrusion quality varies between manufacturers. Assembly techniques affect final rigidity. Corner bracket choices influence frame strength. Understanding these details transforms aluminum extrusion from a generic “metal frame” into a comprehensible structural system you can work with confidently.
In this comprehensive guide, we’ll explore aluminum extrusion for 3D printer frames, understanding the material, common profiles, assembly techniques, and design considerations that create rigid, reliable printer structures.
What Is Aluminum Extrusion?
Understanding the manufacturing process and resulting product:
Extrusion Process
How Extrusion Works:
- Aluminum billet heated to ~500°C
- Forced through shaped die under high pressure
- Emerges as continuous profile matching die shape
- Cooled and cut to length
- Often anodized for surface protection
Advantages of Extrusion:
- Complex cross-sections possible
- Consistent profile along entire length
- Excellent straightness and dimensional accuracy
- Cost-effective for standard profiles
- Strong and lightweight
Aluminum Alloy:
- Typically 6061 or 6063 alloy
- Good strength and machinability
- Corrosion resistant
- Adequate rigidity for 3D printer applications
T-Slot Profile Design
Channel Features:
- Longitudinal slots running length of beam
- T-shaped channel cross-section
- Accepts drop-in T-nuts
- Enables mounting without pre-drilled holes
- Multiple slots per beam for flexibility
Mounting Versatility:
- Components bolt to any position along length
- No fixed mounting points
- Adjustment possible after assembly
- Easy to add or relocate parts
- Ideal for iterative designs
Standard Profiles:
- Open sides with accessible slots
- Closed center for rigidity
- Smooth flat faces for mounting
- Precisely machined dimensions
Common Extrusion Profiles
Understanding naming and sizing:
Profile Nomenclature
Dimension Coding:
- 2020: 20mm × 20mm cross-section
- 4040: 40mm × 40mm cross-section
- 2040: 20mm × 40mm cross-section
- 3030: 30mm × 30mm cross-section
- Numbers indicate width × height in millimeters
Slot Configuration:
- Most have 4 T-slots (one per side)
- Some have 6 slots (sides plus internal)
- Larger profiles may have 8 slots
- More slots = more mounting flexibility
2020 Extrusion
Smallest Common Size:
- 20mm × 20mm cross-section
- Lightweight and compact
- Lower cost per meter
- Common in budget printers
Strength Characteristics:
- Adequate for small printers (200mm cube)
- Can deflect on larger spans
- Less rigid than larger profiles
- Suitable where space/weight critical
Applications:
- Small format printers
- Lightweight structures
- Internal bracing
- Budget builds
Limitations:
- Insufficient for large printers alone
- May need bracing on long spans
- Less resistant to racking forces
- Frame rigidity limited
4040 Extrusion
Larger, Stiffer Profile:
- 40mm × 40mm cross-section
- Much higher section modulus
- Significantly stiffer than 2020
- Heavier and more expensive
Strength Benefits:
- Minimal deflection on long spans
- Excellent rigidity for large printers
- Resists twisting and bending
- Professional-grade stiffness
Applications:
- Large format printers (300mm+)
- High-precision machines
- Production environments
- Where rigidity is critical
Cost Consideration:
- 2-3× cost of 2020 per meter
- Heavier shipping
- Worth it for demanding applications
- Overkill for small printers
2040 Extrusion
Rectangular Profile:
- 20mm × 40mm cross-section
- Asymmetric strength
- Stiffer in one direction
- Versatile hybrid option
Strategic Use:
- Vertical members (40mm dimension vertical)
- Horizontal bracing (20mm dimension vertical)
- Optimizes material where needed
- Cost-effective compromise
Applications:
- Medium printers (250-300mm)
- Selective reinforcement
- Mixed profile designs
3030 Extrusion
Middle Ground:
- 30mm × 30mm cross-section
- More rigid than 2020
- Lighter/cheaper than 4040
- Less common but useful
Characteristics:
- Good for medium printers
- Balanced cost/performance
- Less accessory availability
- Adequate for most applications
Frame Rigidity and Design
Understanding structural principles:
Section Modulus and Stiffness
Bending Resistance:
- Rigidity increases with cube of dimension
- 4040 is ~8× stiffer than 2020 in bending
- Critical for reducing print artifacts
- Span length matters greatly
Practical Implications:
- Longer unsupported spans need larger profiles
- 2020 adequate for <300mm spans
- 4040 handles 600mm+ spans well
- Bracing reduces effective span
Triangle Principle
Structural Efficiency:
- Triangles inherently rigid
- Squares/rectangles can rack without bracing
- Diagonal bracing creates triangles
- Dramatically increases rigidity
Frame Designs:
- Cubic frames need diagonal bracing
- Corner gussets help but less effective than full diagonals
- Some printers use diagonal members structurally
- CoreXY frames often highly triangulated
Material Distribution
Moment of Inertia:
- Material farther from neutral axis more effective
- Hollow profiles efficient (material at edges)
- Aluminum extrusion optimizes this
- Better than solid rods for equivalent weight
T-Slot Nuts and Fasteners
Connecting components to extrusion:
Drop-In T-Nuts
Common Types:
- Spring-loaded T-nuts: Spring holds nut in slot, easy installation
- Slide-in T-nuts: Flat nuts that slide in from end
- Hammer-head nuts: Rotate to lock, strong connection
- Roll-in nuts: Spring steel, very easy insertion
Sizing:
- M3, M4, M5 thread sizes common
- M5 most popular for printer frames
- Must match extrusion slot size
- Different profiles may need different nuts
Installation:
- Drop-in types insert from top at any point
- Slide-in enter from beam end only
- Rotate/spring mechanism locks in slot
- Pre-positioning possible before tightening
Bolts and Screws
Thread Types:
- Socket head cap screws most common
- Button head for low-profile mounting
- M5×8mm, M5×10mm typical lengths
- Longer for thicker mounting plates
Proper Installation:
- Don’t overtighten (aluminum threads strip)
- Use threadlocker for vibration resistance
- Proper engagement depth critical
- Consider washers for large mounting holes
Corner Brackets and Connectors
90° Corner Brackets:
- L-shaped brackets joining perpendicular beams
- Various sizes for different profiles
- Hidden (inside) or exposed mounting
- Critical for frame rigidity
3-Way Corner Brackets:
- Join three perpendicular beams
- Stronger than multiple L-brackets
- Create rigid cubic corners
- Common in 3D printer frames
Angle Brackets:
- Reinforcement at corners
- Increase rigidity significantly
- Inexpensive but effective
- Multiple per corner for best results
Linear Rail Mounting:
- Specialized brackets/plates for linear rails
- Align rails to extrusion faces
- Precisely machined for accuracy
- Critical for motion system alignment
Assembly Techniques
Building rigid frames:
Squaring the Frame
Importance:
- Frame must be square (90° corners)
- Affects print accuracy directly
- Diagonal bracing won’t work if not square
- Difficult to correct after full assembly
Measurement Methods:
- Diagonal measurement (equal diagonals = square)
- Precision square tool at corners
- Measure and compare all dimensions
- Adjust before final tightening
Tightening Sequence
Proper Procedure:
- Assemble frame loosely
- Square and align
- Tighten corner brackets progressively
- Recheck square after each corner
- Final tightening when fully aligned
Avoid:
- Tightening one corner completely first
- Forcing misaligned joints
- Over-tightening (strips threads)
Bracing and Reinforcement
Diagonal Braces:
- Connect opposite corners
- Creates triangulation
- Dramatically increases rigidity
- Can add after initial assembly
Panel Mounting:
- Acrylic or metal panels increase rigidity
- Acts as shear web
- Doubles as enclosure
- Multiple functions
Extrusion Quality Differences
Not all extrusion is equal:
Premium vs. Generic
Premium Brands (Misumi, 80/20, Bosch Rexroth):
- Tighter dimensional tolerances
- Better surface finish
- Consistent slot dimensions
- More expensive
- Professional applications
Generic/Chinese:
- Variable quality
- Usually adequate
- Significantly cheaper
- May need checking/sorting
- Fine for hobbyist use
Quality Indicators:
- Straightness (bow over length)
- Slot dimensions (T-nut fit)
- Surface finish (anodizing quality)
- Dimensional accuracy
Anodizing
Purpose:
- Corrosion protection
- Surface hardness
- Aesthetic finish
- Wear resistance
Types:
- Natural (clear/silver)
- Black (most common in printers)
- Colored options available
- Thickness varies by quality
Frame Design Considerations
Planning printer structures:
Enclosed vs. Open Frame
Enclosed Designs:
- Better temperature control
- Noise reduction
- Dust protection
- More material/cost
Open Designs:
- Easier access
- Better cooling
- Lower cost
- Simpler construction
Bed Movement vs. Toolhead Movement
Moving Bed (Y-axis):
- Frame supports bed motion system
- Must handle bed weight
- Inertia considerations
- Common in many designs
Moving Toolhead (CoreXY, etc.):
- Bed stationary on frame
- Frame rigidity more critical
- Less moving mass
- Different structural demands
Expansion and Modification
Modular Advantages:
- Easy to add components later
- Reconfigure without starting over
- Upgrade paths straightforward
- Experimental freedom
Design for Growth:
- Extra T-slot positions
- Longer beams allow expansion
- Standard profiles enable additions
- Future-proofing
Common Frame Problems
Racking (parallelogram deformation):
- Insufficient corner bracing
- No diagonal members
- Loose connections
- Add bracing, tighten assembly
Vibration:
- Frame resonance
- Loose components
- Inadequate rigidity
- Damping or stiffening needed
Alignment Issues:
- Not square during assembly
- Component mounting misaligned
- Extrusion not straight
- Careful assembly prevents
Conclusion
Aluminum extrusion provides the ideal foundation for 3D printer frames—combining rigidity, modularity, and affordability in precisely manufactured profiles that make assembly straightforward even for beginners. The T-slot design’s genius lies in its simplicity: standardized profiles with integrated mounting channels accepting drop-in nuts that enable component attachment anywhere along the beam’s length without pre-drilling or specialized tools.
Understanding profile sizes—from compact 2020 through massive 4040—helps you choose appropriate materials for your printer’s scale and precision requirements. A small printer doesn’t need 4040’s rigidity, while a large format machine suffers with 2020’s flexibility. The physics of section modulus and structural triangulation explain why diagonal bracing transforms wobbly cubic frames into rigid structures that maintain precision during rapid movements.
Proper assembly techniques matter enormously. A carefully squared frame with progressively tightened corner brackets creates a stable platform. Rushed assembly with forced joints and uneven tightening produces misaligned structures that cause persistent print quality issues. The difference between success and frustration often comes down to patient, methodical construction.
The next time you examine a 3D printer’s frame—whether evaluating a purchase or planning a build—look beyond “aluminum frame” to understand the actual profiles used, how they’re connected, and whether the design creates the triangulated rigidity precision printing demands. Those extruded aluminum beams aren’t just holding parts in place—they’re providing the stable, aligned foundation that enables every successful print.