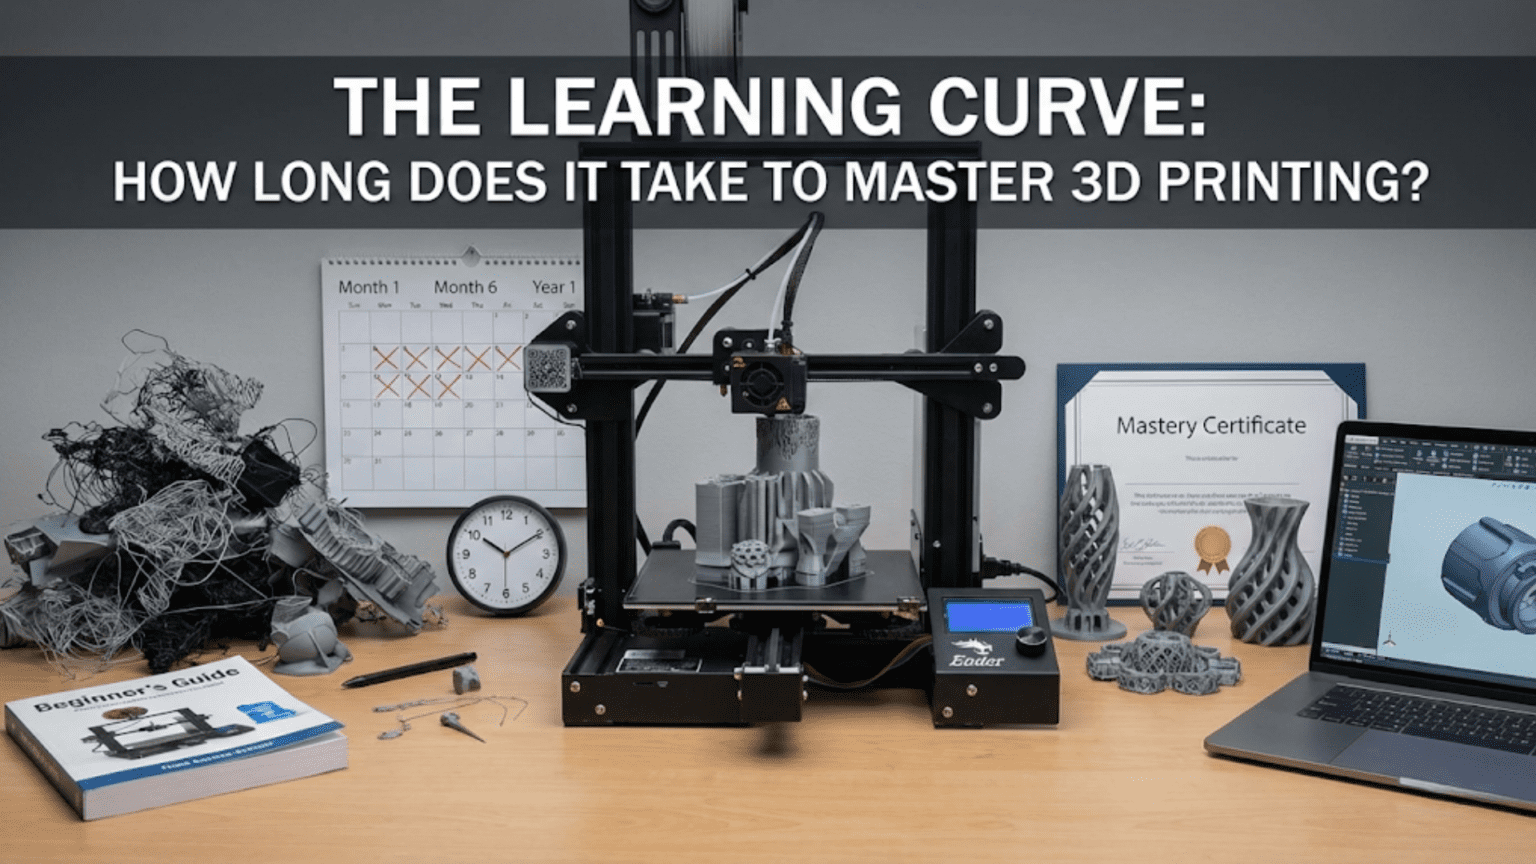
Introduction: Setting Realistic Expectations
One of the first questions beginners ask after deciding to explore 3D printing is “How long will it take me to get good at this?” It’s a natural question that reflects both eagerness to succeed and anxiety about the unknown. Unfortunately, it’s also a question without a simple answer. The learning curve for 3D printing varies dramatically between individuals based on prior experience, learning style, available time, goals, and even the specific printer and materials you’re working with. Two people starting on the same day might find themselves at very different skill levels six months later depending on these factors.
What we can do, however, is map out the typical stages of 3D printing proficiency, describe what skills and understanding characterize each stage, and provide realistic timeframes for how long each stage typically lasts. This roadmap helps you understand where you are currently, what comes next, and whether your progress is normal or if you might be stuck on something that’s holding you back. Understanding the journey helps you be patient with yourself during the early struggles while also recognizing when you’ve progressed to new levels of capability.
The concept of “mastery” itself requires definition because it means different things to different people. For some, mastery means reliably printing downloaded models without failures. For others, it means designing custom functional parts that work perfectly the first time. For still others, it means running a small business producing products through 3D printing, or pushing the boundaries of exotic materials and advanced techniques. These different definitions of mastery will require different learning paths and timelines. Understanding your own goals helps you chart an appropriate course.
One thing worth emphasizing immediately is that you don’t need to master 3D printing to get value from it. Your first successful print, even if it takes several attempts and looks imperfect, represents real accomplishment and utility. The functional bracket you print after a week of learning solves a real problem regardless of whether it meets expert standards of quality. The custom phone stand you create in your first month brings value even though an expert might have done it better or faster. Progress brings rewards at every stage, and the journey of learning is often as satisfying as the destination of mastery.
The learning curve for 3D printing is also neither linear nor unidirectional. You’ll experience periods of rapid improvement followed by frustrating plateaus where nothing seems to get better. You’ll occasionally regress, with prints mysteriously failing after weeks of success, forcing you to troubleshoot and relearn things you thought you understood. This is completely normal and happens to everyone. The learning process includes setbacks, and accepting this as part of the journey rather than evidence of failure helps maintain motivation through inevitable difficult periods.
Another important aspect of learning 3D printing is that the technology itself continues evolving. Printers improve, slicers add features, new materials become available, and best practices shift over time. This means that “mastery” isn’t a fixed destination you reach and then stop learning. Even experts continue learning throughout their 3D printing journeys, adapting to new developments and refining their understanding. The mindset of continuous learning serves you better than thinking of mastery as a finish line you’ll someday cross.
This article explores the 3D printing learning curve in realistic detail, breaking down the typical stages from absolute beginner through various levels of proficiency toward genuine mastery. We’ll discuss what you can expect to achieve in your first hours, days, weeks, and months with a 3D printer. We’ll examine what factors accelerate or slow learning, how to identify and break through common learning plateaus, and how different goals require different learning paths. Whether you’re just starting your 3D printing journey or have been printing for a while and wondering if your progress is typical, this roadmap will help you understand where you are and where you’re going.
The First Day: Unboxing to First Successful Print
The first day with your 3D printer sets the tone for everything that follows, and understanding what to expect helps you appreciate successes while maintaining perspective on early challenges. This initial period focuses on basic setup, fundamental understanding, and achieving that crucial first successful print that proves the printer works and you can operate it.
For beginners with fully assembled printers and clear instructions, the first successful print might happen within a few hours of unboxing. You spend time on physical setup, reading initial documentation, perhaps watching tutorial videos, and then nervously starting your first print with included sample G-code or a simple test model. If everything goes right, this first print completes successfully and you experience the genuine satisfaction of creating a physical object with your new tool. This early success, while modest, is psychologically important because it validates your purchase and provides motivation to continue learning.
However, “if everything goes right” is a significant qualifier. Many beginners experience challenges even before their first print completes. Bed leveling, discussed extensively in previous articles, often presents the first major hurdle. Getting all corners of the bed properly adjusted to the correct distance from the nozzle requires patience and, for many beginners, multiple attempts. It’s entirely normal to spend an hour or more on initial bed leveling, stopping and restarting test prints as you dial in the correct settings. This time isn’t wasted, you’re learning what proper first layer adhesion looks like and developing the feel for correct nozzle-to-bed distance.
Assembly, for partially assembled or kit printers, extends this first day considerably. Following assembly instructions carefully might take anywhere from one to several hours depending on the printer and your mechanical aptitude. Assembly offers valuable education about how printers work, but it also introduces opportunities for errors that can cause problems. Incorrectly assembled components, missed steps in instructions, or overtightened or undertightened mechanical connections can all cause issues that aren’t immediately obvious but prevent successful printing. Patient, methodical assembly with careful verification at each step minimizes these problems.
The first day typically includes multiple small learning experiences beyond just the successful print. You learn how to load filament into the extruder, a simple task that nonetheless has specific steps and possible pitfalls. You learn how to navigate the printer’s control interface, whether physical buttons or a touchscreen. You learn how to send print files to the printer, whether through SD cards, USB connection, or network printing. Each of these tasks is straightforward once understood but represents new skills you’re acquiring.
Common first-day challenges beyond bed leveling include filament loading difficulties, confusion about proper temperatures for different materials, uncertainty about when to intervene in struggling prints versus letting them continue, and general unfamiliarity with what normal operation looks and sounds like. Your first print might fail for any number of reasons, from adhesion problems to filament tangles to incorrect temperature settings. These failures aren’t personal failings, they’re part of the learning process that helps you understand what can go wrong and how to recognize problems early.
By the end of the first day, realistic goals include successfully assembling or setting up the printer if required, completing basic calibration including bed leveling, loading filament successfully, and ideally completing one successful test print. If you achieve all of this in your first several hours, you’re off to an excellent start. If you encounter problems and end the first day without a successful print, that’s also normal and doesn’t indicate you’ve made a mistake or chosen the wrong printer. Some printers and situations simply require more time to get running properly.
The emotions of the first day often swing between excitement and frustration, sometimes multiple times. Starting with enthusiasm, encountering a confusing problem that creates frustration, solving it and feeling accomplished, then encountering a new challenge creates an emotional rollercoaster. Understanding that this is normal helps you maintain perspective. The first day is about taking initial steps, not achieving mastery. Every small success, even just getting the printer to home correctly or achieving good bed adhesion on one corner, represents progress.
Documentation and resources become valuable during this first day as you inevitably encounter questions not covered in your initial understanding. Having access to the printer manual, online tutorials, community forums, and troubleshooting guides helps you work through challenges. Don’t hesitate to search for solutions or ask questions in beginner-friendly communities. Your questions have almost certainly been asked and answered before, and experienced users generally enjoy helping beginners succeed.
The actual skills you develop on day one are foundational: physical printer operation, basic troubleshooting, pattern recognition for what success looks like, and perhaps most importantly, the confidence that you can actually make this machine produce results. These basics support all future learning. Even if your first day includes frustrations, ending it with at least some understanding of how the printer operates and what the next steps are positions you well for continued progress.
The First Week: Building Basic Competence
The first week of 3D printing focuses on developing basic operational competence where you can reliably produce simple prints without constant failures. During this week, you’ll print multiple objects, encounter various challenges, solve some problems, learn to identify others, and generally build a foundation of practical experience that transforms the printer from mysterious machine to familiar tool.
During the first week, you’ll likely print a mix of included sample models, simple downloaded designs from repositories like Thingiverse or Printables, and possibly your first custom-designed or customized objects. These prints teach you about different model types, how various geometries interact with printing processes, and what makes models easier or harder to print successfully. You’ll quickly learn that not all models are created equal, some slice and print beautifully while others present challenges even for experts.
Bed leveling maintenance becomes part of your routine during the first week as you discover that beds don’t stay perfectly leveled indefinitely. You’ll check leveling before prints, make minor adjustments, and develop faster proficiency with the leveling process. What took an hour on day one might take five minutes by the end of week one as you recognize correct nozzle distance more quickly and make adjustments more confidently. This accelerating proficiency with routine tasks is one marker of your developing competence.
You’ll encounter your first print failures during the first week and begin developing troubleshooting skills. A print might fail to adhere to the bed, prompting investigation of leveling, temperature, or surface cleanliness. Another might warp and lift from the bed, teaching you about thermal contraction and material properties. Yet another might show stringing or blobs, introducing you to retraction settings and extrusion quality. Each failure, while temporarily frustrating, teaches specific lessons about the relationships between settings, materials, and results.
Slicer software proficiency develops significantly during the first week as you move beyond just using default settings and start making conscious choices about orientation, support generation, infill, and layer height. You’ll learn that the same model can be sliced multiple ways with different trade-offs in time, material usage, strength, and surface quality. Understanding how to position models on the build plate, when to add supports, and how to adjust basic settings gives you more control over results.
Material handling skills emerge as you print through more filament and potentially try different materials. You’ll learn how to change filament colors or types, how to properly store filament to prevent moisture absorption, and how to recognize when filament quality issues might be causing print problems. If you start with just PLA, you might experiment with PETG or another material during week one, learning that different materials require different temperature and cooling strategies.
By the end of the first week, reasonable achievement includes successfully printing multiple simple objects, developing a routine for bed leveling and print preparation, understanding basic slicer functions, recognizing common print quality issues even if you can’t always fix them immediately, and generally operating the printer with less uncertainty and more confidence. You’re no longer following tutorials step by step without understanding; you’re making informed decisions about basic operations even if your knowledge remains incomplete.
The learning pace during the first week is typically rapid because everything is new and each print teaches multiple lessons. You’re building mental models of how printing works, what good prints look like, what various problems look like, and how different adjustments affect outcomes. This flood of new information and experience means you’ll notice significant improvement from day one to day seven. The learning curve during this initial week is steep but rewarding as capability grows noticeably with each successful print.
Common first-week plateaus or stumbling blocks include difficulty getting consistent first layer adhesion, confusion about when supports are necessary, frustration with print quality that doesn’t match online examples, and uncertainty about how to fix specific problems. These are all normal and don’t indicate inadequacy. First weeks are about building basic competence, not achieving perfection. If you can successfully print simple models most of the time by week’s end, you’re making appropriate progress regardless of lingering questions or unresolved challenges.
Time investment during the first week typically ranges from several hours to many hours depending on your schedule and enthusiasm. Someone dedicating every evening to printing might accumulate twenty or thirty hours of experience and many completed prints. Someone printing occasionally might accumulate only five to ten hours. Both timelines are fine; more time accelerates learning but even limited engagement allows progress. The key is regular interaction rather than marathon sessions, as learning needs time between sessions for concepts to consolidate.
The First Month: Developing Troubleshooting Skills
The first month of 3D printing is characterized by developing systematic troubleshooting abilities and expanding your understanding of why things work the way they do rather than just memorizing steps. You’re moving from beginner who can follow instructions to someone who can diagnose and solve problems independently, at least for common issues.
During this month, you’ll likely experience most major categories of print problems: adhesion failures, warping, stringing, layer shifting, under-extrusion, over-extrusion, poor bridges and overhangs, rough surfaces, and various other quality issues. Each category teaches specific lessons about material behavior, mechanical alignment, temperature effects, or slicer settings. Your first encounter with each problem might stump you, requiring research and experimentation to solve. But second encounters with similar problems allow you to apply previous learning and resolve issues faster.
Your mental model of the printing process becomes more sophisticated during this month. Instead of seeing the printer as a black box that sometimes works and sometimes doesn’t, you begin understanding the causal relationships between variables. You recognize that stringing indicates temperature or retraction issues, that layer shifting suggests mechanical or speed problems, that warping results from thermal contraction and inadequate adhesion. This deeper understanding lets you form hypotheses about problem causes and test those hypotheses through targeted adjustments rather than random setting changes.
Calibration becomes a focus during the first month as you learn about and perform various calibration procedures. You might calibrate extrusion multiplier to ensure accurate material flow, tune retraction settings to minimize stringing, perform temperature towers to find optimal temperatures for each material, or adjust flow rates for specific filaments. These calibrations take time but dramatically improve print quality and reliability. Learning when calibration is needed versus when problems have other causes is part of developing judgment.
You’ll probably explore more advanced slicer features during month one, including adaptive layer heights, variable infill, custom supports, modifier meshes, and sequential printing. These features expand what you can accomplish and how efficiently you can achieve results. Understanding when to use advanced features versus when simpler approaches suffice represents growing sophistication in your approach to printing. Not every print needs complex optimization, and recognizing when standard settings work fine saves time.
Material experimentation often accelerates during the first month as you try materials beyond basic PLA. PETG teaches you about higher temperature printing and more aggressive material behavior. TPU or other flexible filaments reveal the challenges of printing non-rigid materials. ABS or ASA introduce warping management and environmental control requirements. Each material expands your capability and understanding while also requiring its own learning curve. By month’s end, you might have developed competence with three or four different materials.
Your first custom designs or significant modifications to existing models likely happen during this first month as you gain confidence to move beyond just printing what others have created. Whether using simple modeling tools or more sophisticated CAD software, creating objects that match your specific needs represents a significant milestone. These early designs might be simple, perhaps a custom-sized bracket or a holder for a specific item, but they demonstrate that you’re thinking about design for printability and can execute ideas from concept to physical reality.
The community becomes increasingly valuable during month one as you ask more specific questions and contribute beginning insights from your own experience. You’ve moved beyond universal beginner questions to printer-specific or material-specific challenges. Participating in discussions, even as a relative novice, helps consolidate your learning and often teaches you things you didn’t know you needed to learn. Explaining what you’ve learned to others also reinforces your own understanding.
By the end of month one, realistic achievement includes reliably printing models of moderate complexity, troubleshooting common problems without external help, understanding core relationships between settings and results, successfully working with multiple materials, and perhaps creating simple custom designs. You’re comfortable with routine operations and can handle most standard printing tasks without uncertainty. You’re not an expert, but you’re no longer a beginner either. You’ve entered the intermediate stage where you have solid foundational knowledge and growing practical skill.
Time investment during the first month might range from twenty to sixty hours of active printer time plus additional hours spent researching, designing, or learning about techniques. The actual printing time is multiplied by the learning time around it. Someone dedicating serious attention might complete dozens of prints and build substantial experience. Someone with limited time might complete fewer prints but still make meaningful progress. What matters more than raw hours is regular engagement that keeps learning active and allows skills to develop progressively.
Months Two Through Six: Expanding Capability and Refinement
The period from months two through six sees your capabilities expand significantly as you tackle more challenging projects, refine technique, optimize workflows, and develop your own approaches to common situations. You’re solidly in the intermediate phase where you can accomplish most standard printing tasks reliably and are pushing toward more advanced applications.
During these months, you’ll likely undertake increasingly ambitious projects that test and develop your skills. Multi-part assemblies requiring precise dimensional accuracy teach you about design tolerances and how to achieve reliable part fit. Functional mechanical objects like hinges, gears, or tools teach you about material strength, layer orientation for mechanical stress, and design principles for 3D printed mechanisms. Decorative pieces requiring excellent surface finish push you to optimize layer heights, cooling, speeds, and post-processing techniques.
Print quality optimization becomes a focus as you’re no longer satisfied with “good enough” results and want to push toward excellent quality. You’ll experiment with different nozzle sizes, learning when smaller nozzles for detail or larger nozzles for speed are appropriate. You’ll develop advanced slicer techniques like painting support blockers, using support interfaces for cleaner separation, implementing variable layer heights for optimal quality-to-speed ratios, and creating custom print profiles for specific model types.
You’ll probably experience and solve your first significant mechanical issues during this period, whether that’s replacing a worn nozzle, dealing with a clogged hotend, addressing Z-axis binding, tensioning or replacing belts, or upgrading components that were limiting your results. These maintenance and upgrade experiences teach you about printer mechanics and build confidence that you can fix things rather than being helpless when problems occur. The printer transitions from appliance to tool that you understand and can service.
Material mastery deepens as you develop nuanced understanding of how each material behaves and how to achieve optimal results with it. You’ll discover the specific temperature and cooling combinations that work best for your particular PLA brands and colors. You’ll learn PETG’s tendency to string and how to control it. If you print ABS, you’ll develop strategies for managing warping. Your material profiles in the slicer become increasingly refined based on actual experience rather than just copied from defaults.
Design skills progress significantly during this period as you create more complex custom parts and iterate on designs based on printed prototypes. You’ll learn common design techniques for 3D printing like adding chamfers for better overhang performance, designing integrated supports that can be easily removed, creating snap-fit joints that assemble reliably, and incorporating clearances that account for printer tolerances. Each designed-and-printed part teaches lessons about what works and what doesn’t in translated from CAD to physical reality.
You might explore post-processing techniques during this period including sanding, priming, painting, epoxy coating, or smoothing. These finishing techniques allow you to produce results that don’t look obviously 3D printed and open possibilities for display pieces, gifts, or even small-scale production. Learning that the as-printed result is just the starting point for finished pieces expands what you can accomplish aesthetically.
Community involvement often deepens during months two through six as you transition from primarily learning from others to occasionally helping others while still learning yourself. You might share your successful prints, contribute tips you’ve discovered, or answer beginner questions in areas where you’ve developed competence. This teaching role reinforces your own learning and often reveals gaps in your understanding that you then fill.
By six months, achievement levels vary widely between individuals based on time investment, goals, and focus areas. Someone dedicating substantial time might be designing and printing complex assemblies, achieving exhibition-quality surface finishes, reliably printing exotic materials, or even selling printed items. Someone with limited time might have solid command of basics and successfully print most things they attempt, even if advanced techniques remain unexplored. Both represent meaningful progress from day one’s uncertainty.
The learning curve from months two through six is less steep than the initial weeks but still shows steady improvement. You’re refining technique, expanding knowledge, and building experience rather than learning fundamentals. Progress feels different, less dramatic daily improvement but substantial capability growth over the months. Comparing what you can accomplish at six months versus what you could at one month reveals significant advancement even if daily progress is less obvious.
Common six-month plateaus include feeling that print quality isn’t improving further despite efforts, difficulty troubleshooting intermittent or complex problems that don’t have obvious causes, frustration with design skills not keeping pace with printing capability, or uncertainty about where to focus learning efforts for continued improvement. These plateaus are normal and often broken by trying new materials, taking on challenging projects that force skill development, or deliberately studying specific areas like advanced slicing or CAD techniques.
The Path to Mastery: Year One and Beyond
Genuine mastery of 3D printing is measured in years rather than months, though you can achieve high proficiency and accomplish sophisticated projects much sooner. Understanding what mastery actually entails and how it develops over time helps set appropriate expectations and maintain motivation through the long learning journey.
By the one-year mark, dedicated practitioners typically exhibit confident command over the complete printing process from design through post-processing. They troubleshoot effectively even when encountering novel problems, draw on extensive experience to predict what will work before printing, and consistently produce high-quality results across diverse applications. They’re comfortable with multiple materials including some challenging ones, understand their printer’s capabilities and limitations intimately, and can optimize workflows for efficiency without sacrificing quality.
However, even at one year, there remain areas for growth and learning. Someone might be excellent at mechanical design but have limited experience with artistic organic modeling. Another might excel at achieving perfect surface finishes but struggle with designing snap-fits that work reliably. Yet another might be skilled at printing but less experienced with post-processing. Mastery across all aspects of 3D printing requires even more time and often conscious effort to develop competence in weaker areas.
True masters, generally those with several years of dedicated practice, exhibit characteristics beyond just technical proficiency. They intuitively understand how design decisions will translate to printing challenges or successes. They diagnose problems from minimal information, often knowing what’s wrong from a brief description or single photo. They creatively solve problems using techniques they’ve developed or adapted from various sources. They maintain organized workflows and documentation that make their printing efficient and repeatable. They contribute to community knowledge by sharing discoveries, creating resources, or helping others learn.
The path to mastery isn’t linear or uniform. Different people take different routes based on their interests and goals. Someone focused on miniature painting might develop exceptional skills at resin printing and finishing but limited knowledge of FDM functional part design. An engineer designing tooling might master dimensional accuracy and material strength but never pursue artistic prints. A business owner producing products might excel at production efficiency and consistency but lack interest in pushing technical boundaries. These different paths all represent valid forms of mastery within specific domains.
Continuous learning characterizes even long-term practitioners because the technology evolves continuously. New printer designs, updated slicer features, novel materials, and emerging techniques mean there’s always more to learn. The most skilled practitioners maintain curiosity and willingness to experiment rather than settling into fixed approaches. They recognize that mastery is a journey without end rather than a destination reached and left.
The time investment to reach various proficiency levels varies tremendously between individuals. Someone dedicating twenty hours weekly to 3D printing might reach solid intermediate proficiency in three months and advanced proficiency in six to twelve months. Someone printing casually a few hours weekly might take six months to reach intermediate level and one to two years for advanced proficiency. Both timelines are valid; more time accelerates learning but even limited practice allows steady progression.
Factors affecting learning speed include prior experience with related technologies, mechanical aptitude, design experience, problem-solving approach, quality of learning resources used, printer reliability, mentorship availability, and natural affinity for the spatial reasoning that 3D printing requires. Younger learners might progress faster with new technology while older learners might bring valuable general problem-solving skills. Some people naturally visualize three-dimensional objects easily while others need to develop this skill deliberately.
The role of deliberate practice versus casual experimentation matters for advancement rate. Deliberately choosing projects that stretch your current capabilities, systematically working through calibration procedures, consciously studying areas where you’re weak, and analyzing both successes and failures to extract lessons all accelerate learning compared to casually printing random objects without reflection. However, casual experimentation has its own value in maintaining enjoyment and revealing unexpected interests.
Realistic self-assessment helps you understand your current level and what developing areas would most benefit your goals. If you can reliably print most downloaded models but struggle with dimensional accuracy, focusing on calibration and measurement skills advances your capability. If you print successfully but want to create original designs, studying CAD or modeling deepens that specific skill. Identifying growth areas and deliberately working on them prevents stagnation at comfortable plateaus.
Factors That Accelerate or Slow Learning
Understanding what helps or hinders learning lets you optimize your own learning journey and avoid common traps that slow progress. While everyone learns at their own pace, certain factors consistently affect learning speed for better or worse.
Regular practice matters more than marathon sessions. Printing frequently, even if just one item every few days, keeps skills fresh and maintains mental models of how printing works. Long gaps between prints, weeks or months of inactivity, require relearning things you had previously grasped. Consistency builds and maintains proficiency while sporadic engagement creates a cycle of forgetting and relearning that slows overall progress.
Quality of learning resources dramatically affects how quickly you develop understanding. Well-produced tutorial videos, clearly-written guides, and beginner-focused forums with helpful community members accelerate learning by providing clear explanations and proven solutions. Conversely, poor documentation, outdated information, or toxic communities that dismiss beginner questions slow learning by forcing you to figure everything out through trial and error or making you reluctant to ask for help.
Printer reliability influences learning speed because unreliable printers force you to spend time fighting equipment rather than learning printing technique. When every print requires troubleshooting printer-specific issues, you’re not building generalizable printing knowledge. A reliable printer that consistently produces successful prints lets you focus on learning design, materials, and optimization rather than constant equipment troubleshooting. This is why choosing a good beginner printer matters so much for learning trajectory.
Prior experience with related fields provides foundation for faster 3D printing learning. Background in CAD, machining, or other manufacturing gives you mental models that transfer to 3D printing. Programming experience helps with G-code understanding and potentially printer firmware. Artistic background aids with design and finishing. However, lack of prior experience isn’t disqualifying; many successful printers started with no relevant background and learned everything from scratch. Prior experience accelerates learning but isn’t required for eventual mastery.
Goal clarity focuses learning effort effectively. If you know you want to print miniatures, you can focus on resolution optimization, support strategies, and finishing techniques relevant to that goal rather than trying to learn everything simultaneously. If functional mechanical parts are your interest, you emphasize dimensional accuracy, material strength, and design for assembly. Diffuse goals where you try to learn everything equally might actually slow progress compared to focused development in your areas of interest.
Learning style matching to resources improves comprehension. Visual learners benefit from video tutorials and image-heavy guides. Text-oriented learners might prefer written documentation they can study carefully. Hands-on learners might learn best through projects with minimal instruction, figuring things out by doing. Understanding your learning style and seeking resources that match it makes learning more efficient and enjoyable.
Problem-solving mindset versus defeatist mindset strongly affects learning trajectory. Viewing failures as learning opportunities, approaching problems systematically, and persisting through difficulties enables continued progress. Conversely, giving up when things don’t work immediately, assuming problems are insurmountable, or blaming equipment rather than investigating root causes prevents learning. Developing resilient problem-solving habits matters as much as technical knowledge.
Access to multiple materials enables broader learning because each material teaches different lessons. However, material diversity isn’t required immediately; mastering PLA thoroughly before exploring other materials provides solid foundation. Trying to learn multiple materials simultaneously might actually slow progress by multiplying variables. Depth in one material before breadth across many often works better than shallow experience with everything.
Community engagement provides access to accumulated knowledge that accelerates learning beyond what you could discover alone. Asking questions, reading others’ troubleshooting threads, and absorbing shared knowledge saves enormous time compared to rediscovering everything through personal trial and error. However, over-reliance on community where you immediately ask for help rather than attempting to solve problems independently might slow learning by preventing you from developing troubleshooting skills. Balance between leveraging community knowledge and building independent problem-solving creates optimal learning.
Financial constraints affect learning speed indirectly. Budget limitations might mean a less reliable printer requiring more troubleshooting, limited material variety to experiment with, or inability to upgrade components that would improve results. However, constraints also encourage creativity and deep understanding of working within limitations. Some extremely proficient printers have learned on very basic equipment by extracting maximum capability through deep understanding. While unlimited budgets might accelerate learning, they’re not required for eventual mastery.
Time availability obviously affects absolute learning speed but doesn’t determine ultimate achievement. Someone with two hours weekly will progress more slowly than someone with twenty hours weekly, but both can eventually reach high proficiency. What matters is using available time effectively rather than total time invested. Quality practice beats quantity of unfocused activity.
Conclusion: Your Personal Learning Journey
The question “how long does it take to master 3D printing?” ultimately has as many answers as there are people learning the craft. Your journey will be unique, influenced by your goals, resources, prior experience, learning style, and countless other factors. What matters less than matching some predetermined timeline is making steady progress, maintaining enthusiasm, and achieving your personal printing goals, whatever they might be.
The learning stages outlined in this article—from first successful print through expanding capability toward mastery—provide a framework for understanding typical progress, not a rigid schedule you must follow. If you reach intermediate proficiency faster than described, excellent. If you progress more slowly, that’s equally fine. The destination of competent printing is reached through many different paths at many different speeds. Comparing yourself to others’ timelines is less useful than comparing your current self to your past self and noting genuine progress.
The steep initial learning curve where simple operations feel overwhelming gradually gives way to comfortable familiarity with basics, then to growing competence with complex applications, and eventually to intuitive understanding that makes printing feel natural. This progression happens for everyone who persists through the initial challenges. The time it takes varies, but the progression itself is universal. Every expert was once a confused beginner wondering if they’d ever figure it out.
The satisfaction of 3D printing comes partly from what you create but also from the journey of developing capability. Solving a problem that stumped you for days brings genuine satisfaction. Successfully printing something challenging validates your developing skills. Creating original designs that work demonstrates mastery over the complete process. These milestones mark your progress more meaningfully than arbitrary timelines. Celebrating these achievements helps maintain motivation through inevitable difficulties.
Understanding that setbacks, plateaus, and occasional regressions are normal parts of learning prevents discouragement during difficult periods. Everyone experiences prints that mysteriously fail after weeks of success. Everyone hits periods where improvement seems to stop despite continued effort. Everyone sometimes feels frustrated with technology that won’t cooperate. These experiences are universal and temporary. Persistence through them rather than quitting because things got hard is what distinguishes those who eventually achieve mastery from those who give up.
The practical advice for accelerating your learning journey includes printing regularly rather than sporadically, seeking quality learning resources, engaging with helpful communities, taking on projects that stretch your current abilities, reflecting on both successes and failures to extract lessons, maintaining organized documentation of what works, and staying curious about new techniques rather than settling into rigid routines. These habits support continuous improvement regardless of your natural learning pace.
Remember that you don’t need to master everything to get value from 3D printing. If your goal is printing miniatures for tabletop gaming, you don’t need to learn functional mechanical design. If you want to create custom organizational items for your home, you don’t need exhibition-quality surface finishing techniques. Learn what serves your goals and don’t worry about the rest. Breadth of knowledge comes gradually as interests expand; depth in your areas of focus matters more initially.
The 3D printing community welcomes learners at all levels and generally enjoys helping people develop skills. Don’t hesitate to ask questions, share your work even if imperfect, and contribute what you learn back to others. Your beginner perspective often helps other beginners in ways that expert knowledge doesn’t. You’re not just a student of 3D printing but increasingly a member of its community. Your learning journey enriches that community just as the community enriches your learning.
Looking forward, your capabilities a year from now will exceed what you can currently imagine. The prints you’ll complete confidently will include things that seem impossibly difficult today. The problems you’ll solve routinely will include challenges that currently stump you. This growth happens through accumulated experience, each print building on previous learning, each solved problem adding to your troubleshooting toolkit, each successful project increasing your design confidence. Trust the process and trust yourself.
The only real failure in learning 3D printing is giving up prematurely before experiencing the satisfaction that comes from mastery. Persistence through early frustrations, continued engagement despite plateaus, and maintaining curiosity about new developments ensure continued growth. Whether you’re measuring your progress in days, months, or years, each step forward represents genuine achievement. Your personal learning timeline is exactly right for you, and your unique path through the learning landscape creates your distinctive set of skills and knowledge. Embrace your individual journey, learn at your natural pace, and enjoy the remarkable satisfaction of bringing digital creations into physical reality through your developing mastery of 3D printing.