A 3D printed smartphone stand is a custom-designed holder that supports a phone at a comfortable viewing angle for video calls, media playback, navigation, desk use, or bedside access. Smartphone stands are ideal beginner projects because they are compact, print without supports in most designs, require no hardware beyond the printed part itself, and teach core functional design principles — particularly how geometry, angle, and material work together to create a stable, useful object that fits your exact phone and use case.
Introduction: The Most Personal Functional Print
Every smartphone owner has needed a stand at some point. Propping a phone against a coffee mug to watch a recipe video while cooking. Balancing it against a book during a video call that keeps sliding out of frame. Holding it awkwardly at an angle to follow along with a workout routine. The solutions people improvise tell you a lot about how universal the need is — and how poorly the average available stand meets it.
Commercial smartphone stands are widely available at every price point, from dollar-store plastic props to machined aluminum desk accessories costing fifty dollars or more. And yet, for all that variety, commercial stands share a common limitation: they’re designed for a hypothetical average user with a hypothetical average phone, not for your specific phone, your specific desk, your specific viewing distance, or your specific use case.
Your 3D printer changes this equation completely. A custom-printed smartphone stand can be designed (or chosen) for the exact dimensions of your phone including its case, angled precisely for the height at which your eyes rest when sitting at your desk, finished in the exact color that matches your workspace, and optimized for whether you primarily use your phone in portrait or landscape orientation. It can incorporate cable routing for charging, be sized to grip the edge of a specific shelf, or be designed to fold flat for travel.
Beyond these practical advantages, the smartphone stand is an exceptionally well-chosen beginner project from a learning perspective. It’s one of the first prints where you encounter real design decisions that have functional consequences: How steep should the viewing angle be? How wide should the phone slot be to fit your specific device? How wide does the base need to be to prevent tipping? What happens to print strength when the stand’s most stressed point is oriented in a particular way relative to the print layers?
These are the questions of functional design — the discipline of making things that not only look right but work right, work reliably, and work for a specific purpose with specific constraints. Smartphone stands are an ideal first encounter with functional design because the consequences of getting it right or wrong are immediately apparent, the geometry is simple enough to reason about clearly, and iteration is fast enough that you can try several approaches in a single day.
This guide covers everything you need to know about printing smartphone stands: the types of stands worth printing, the key design decisions that determine function and stability, slicer settings optimized for these parts, material considerations, a complete step-by-step workflow, troubleshooting guidance, and a range of creative stand variations worth exploring as your skills develop.
Understanding Smartphone Stand Geometry
Before choosing a design or opening your slicer, it’s worth spending time understanding the geometry that makes a smartphone stand work. This understanding will help you evaluate existing designs intelligently and will be directly applicable when you eventually design your own.
The Three Core Geometric Challenges
Every smartphone stand design must solve three fundamental geometric challenges simultaneously:
Challenge 1: Angle The phone must be held at a viewing angle that is comfortable for the intended use. For video calls at a desk, slightly above horizontal (70–80° from horizontal, or 10–20° tilted back from vertical) tends to position the camera at eye level when the phone is at desk height. For media viewing while lying down, a much more reclined angle (30–45° from horizontal) is more comfortable. For navigation while driving, nearly vertical (85–90° from horizontal) maximizes screen visibility.
The angle is baked into the stand’s geometry — specifically the angle of the slot or ledge that holds the phone. Changing the angle means changing the design. This is one of the key reasons custom-printed stands are more valuable than commercial alternatives: you choose the exact angle for your situation.
Challenge 2: Stability The stand must not tip over under the weight of the phone, under the force of touching the screen, or under the vibration of notifications. Stability is governed by the relationship between the stand’s center of gravity (when loaded with the phone), the width of the base footprint, and the height of the stand. Taller stands with narrower bases tip more easily. Shorter stands with wider bases are more stable. The base must extend far enough forward of the phone’s weight center to prevent forward tipping, and far enough back to prevent rearward tipping when the user touches the screen.
Challenge 3: Fit The stand must fit the phone (including any case) securely enough that the phone doesn’t slide out or fall, while being loose enough that inserting and removing the phone is convenient. This is the tolerance challenge — and it’s where FDM printing’s dimensional characteristics become directly relevant. A slot or ledge designed for exactly 8mm of phone thickness might print at 7.6mm or 8.4mm depending on your printer’s calibration, which could mean the phone either doesn’t fit or falls through.
The Main Structural Approaches
Smartphone stand designs can be broadly categorized by how they solve these three challenges:
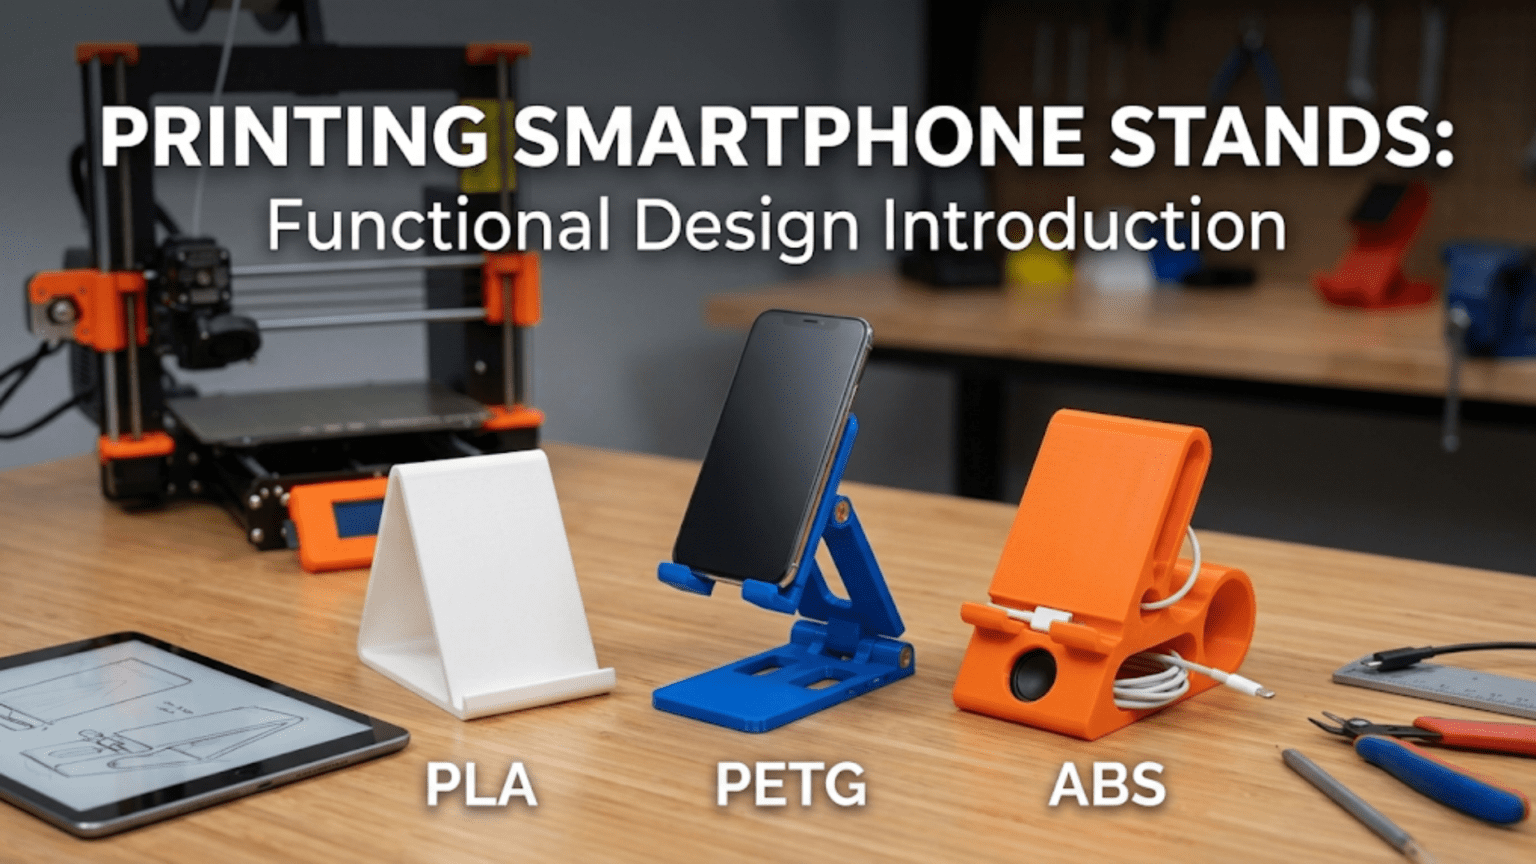
The Simple Angled Ledge: A solid triangular or wedge-shaped block with a slot or groove cut at the appropriate angle. The simplest possible approach — geometrically. The base is wide, the angle is fixed, and the phone rests in the slot by gravity and friction. These designs print quickly, are highly stable, and are the most reliable structurally. The limitation is that they’re bulky and offer no adjustability.
The Easel Frame: A frame with two angled legs and a horizontal phone ledge, like a miniature picture frame easel. More elegant than a solid wedge, uses less material, and has a more open, refined appearance. The structural challenge is that the legs must be stiff enough not to flex under the phone’s weight — which requires adequate wall thickness and infill at the leg-to-base junction.
The Folding Stand: A multi-part design with hinged or rotating components that fold flat for storage or travel and unfold to the use position. These are more complex to design and print but extraordinarily practical for anyone who travels or needs a stand that takes minimal bag space. Functional hinges in 3D printing are a slightly advanced topic — they require precise tolerances and often a specific amount of print-in-place clearance.
The Clip Stand: A stand that clips onto the phone itself rather than having the phone rest in it. These mount to a case or directly to the phone body and fold flat against the phone back when not in use. They require precise fit to the phone dimensions but are extremely compact.
The Weighted Base Stand: A stand designed with a heavy base (sometimes using embedded weights like coins or metal rods) to maximize stability while minimizing the base footprint. The weight lowers the center of gravity, allowing a taller, narrower stand to remain stable.
The Adjustable Angle Stand: A more sophisticated design with a mechanism (friction joint, ratchet, or detent positions) that allows the viewing angle to be adjusted. These can serve multiple use cases from a single stand. Designing reliable adjustable mechanisms is an intermediate-to-advanced skill, but several well-designed adjustable stand files are available for printing.
Types of Smartphone Stands Worth Printing
Within these structural approaches, specific stand designs serve specific use cases particularly well.
1. Desk Viewing Stand
The most commonly printed smartphone stand is a simple desk stand for use at a workstation. These stands position the phone at a comfortable height and angle for video calls, reference viewing, or media playback during work hours.
Key design requirements:
- Viewing angle of 70–80° from horizontal for desk use
- Base wide enough to be stable when the phone screen is tapped
- Portrait and/or landscape orientation support
- Cable routing slot if the phone will be charged while in the stand
- Compact enough not to clutter the desk
Best designs to look for: Search “phone stand desk” on Printables. Look for designs with a stated angle specification that matches your needs, user photos showing the phone at a realistic desk viewing position, and a base that’s clearly wider than it is tall for good stability.
2. Bedside Charging Stand
A bedside stand positions the phone at a comfortable angle for viewing while lying down, typically doubles as a charging dock, and often incorporates some cable management to keep the charging cable tidy on the nightstand.
Key design requirements:
- Lower viewing angle (40–60° from horizontal) for comfortable viewing when slightly reclined
- Cable routing or integrated channel for a charging cable
- Easy one-handed phone insertion and removal (you’re often half-asleep)
- Compact footprint for small nightstand surfaces
Best designs to look for: Search “bedside phone stand” or “charging stand.” Look for cable routing features and a reclined angle specification. Designs that hold the phone at the charging port end (rather than at the sides) allow wireless charging without removing the phone.
3. Kitchen and Recipe Stand
A kitchen phone stand holds the phone at a comfortable reading distance and angle for following recipes, watching cooking videos, or taking video calls while cooking. These stands typically need to be more robust than desk stands because they’ll be handled with potentially sticky or greasy hands, placed on wet countertops, and occasionally splashed.
Key design requirements:
- Stable, wide base that won’t tip easily
- Landscape orientation preferred for recipe and video content
- Easy to wipe clean (smooth surfaces, no crevices where food can accumulate)
- PETG or ASA material for moisture resistance and food environment compatibility
Best designs to look for: Search “kitchen phone stand” or “recipe holder.” Look for designs with smooth, easy-to-clean surfaces and sturdy, wide bases.
4. Travel Folding Stand
A folding or collapsible stand that packs flat in a bag or pocket for use while traveling. These are among the most genuinely useful smartphone accessories for frequent travelers.
Key design requirements:
- Folds completely flat (or nearly so) for packing
- Unfolds quickly and holds securely in use position
- Light weight — every gram matters when traveling
- Durable hinge mechanism that won’t break after repeated folding
Best designs to look for: Search “folding phone stand” or “travel phone stand.” Look for designs with clearly explained hinge mechanisms and user reports of durability after extended use. Print in PETG rather than PLA for better hinge durability.
5. Car Mount and Navigation Holder
A dashboard or vent-mount phone holder for navigation use. These need to be extremely secure — a phone that falls onto the driver’s lap during highway driving is a serious safety hazard.
Note: Commercial car mounts from reputable manufacturers are extensively tested for vibration resistance and heat resistance (car interiors can reach temperatures that will deform PLA). For car mounting applications where safety is directly involved, commercial solutions are generally recommended over printed parts. If you do print a car mount, use ASA or PETG for heat resistance, and design it as a supplement to (rather than replacement for) a secure mechanical attachment point like a vent clip.
6. MagSafe-Compatible Stand
For iPhone users with MagSafe accessories, printed MagSafe-compatible stands that incorporate a standard MagSafe puck holder combine wireless charging with a stand. These designs are widely available on Printables and represent a clever integration of commercial hardware with custom-printed geometry.
Key design requirements:
- Correct circular recess sized to accept the MagSafe charger puck (typically 58mm diameter, 5.3mm deep)
- Cable routing for the MagSafe cable
- Appropriate viewing angle
Key Design Decisions: What Every Maker Should Understand
Whether you’re evaluating an existing design or beginning to design your own, understanding these key design decisions will help you make better choices.
Viewing Angle Selection
The optimal viewing angle depends entirely on your use case and your eye level relative to the phone when the stand is in use. There is no universally correct angle — a stand that’s perfect at a high desk where you sit upright will be wrong for a low coffee table viewed from a couch.
A practical approach: before printing, prop your phone against something at your intended desk location and adjust the angle until the screen is comfortable to view. Measure that angle with a phone app (bubble level apps can measure surface angle) or a protractor. Then look for a stand design with that specific angle specification.
For reference, common angle preferences by use case:
| Use Case | Recommended Viewing Angle (from horizontal) |
|---|---|
| Desk video calls (seated upright) | 70–80° |
| Desk reference viewing | 60–70° |
| Reclined media viewing | 30–50° |
| Bedside (lying down) | 25–40° |
| Kitchen counter (standing) | 65–75° |
| Lap/couch casual viewing | 45–60° |
| Navigation (nearly vertical) | 80–88° |
Phone Slot Width and Tolerance
The slot or ledge that holds the phone needs to fit your specific phone. Phone dimensions vary significantly — from the slim iPhone SE (7.7mm thick without case) to large-cased Android phones that might be 15mm thick or more in a heavy-duty case. Measure your phone with its case using calipers and find a design sized for that measurement, or use a parametric design that lets you enter your phone dimensions.
For slot width specifically, add 1.5–2.5mm to your phone’s measured thickness. This gives you:
- +1.5mm: A snug fit that provides more grip and stability. Good for designs where the phone only needs to be inserted/removed occasionally.
- +2.0mm: A comfortable fit that’s easy to use one-handed. The most common recommendation.
- +2.5mm: A looser fit that accommodates slight print variation and makes insertion very easy. Good for frequently inserted/removed phones.
Remember that FDM prints are typically 0.2–0.4mm smaller than designed for internal dimensions. If a design says it fits phones up to 10mm thick, your actual slot will likely be 9.6–9.8mm. Add another 0.3mm to your tolerance estimate to account for this.
Base Width and Stability Calculation
A simple way to think about stability: the base must extend at least as far in front of the phone cradle point as the phone’s center of gravity extends forward of that point. For a typical phone resting at 70°, the center of gravity is roughly half the phone height forward of the bottom edge.
In practice, a base depth of 60–80mm from front to back provides adequate stability for most desk stand configurations. Wider bases (80–100mm) are better for stands that will be used with touch interaction (pressing buttons, scrolling) as the lateral force from touching the screen can tip a narrower stand.
The Importance of Print Orientation for Stands
Just as with hooks and hangers, print orientation dramatically affects the strength of a smartphone stand. The stand’s weakest potential point is wherever the load creates tensile stress perpendicular to layer lines.
For most easel-style stands, the primary stress is on the angled legs — gravity tries to push the angled leg down and compress it at its base. Printing the stand upright (so the legs are printed as vertical features) means layer lines run horizontally through the legs. The compressive load from the phone presses down along the layer lines (the strong direction), while the bending moment at the base applies lateral stress — manageable with adequate wall thickness and infill.
For wedge-style solid stands, print orientation is less critical because the solid geometry distributes stress broadly, but printing with the flat base on the bed (the natural orientation) is still optimal.
Slicer Settings for Smartphone Stands
Smartphone stands have somewhat different requirements than the ultra-thin-wall cookie cutters or the maximum-strength hooks from previous articles. They need moderate strength (they’re holding a 150–250g device), good surface quality (they live on your desk where appearance matters), and dimensional accuracy (the phone slot must fit correctly).
| Setting | Recommended Value | Notes |
|---|---|---|
| Layer Height | 0.15–0.2mm | 0.15mm for better surface quality on visible faces |
| Print Speed | 40–50 mm/s | Moderate speed for quality finish |
| Perimeters/Walls | 3–4 | Adequate strength for the load |
| Infill | 20–30% | Grid or Gyroid pattern |
| Top/Bottom Layers | 4–5 | Clean surface appearance on desk |
| Support | Only if needed | Good designs avoid supports |
| Bed Adhesion | Brim (3–5mm) | Helpful for stands with small footprints |
| Hotend Temp (PLA) | 205–215°C | Standard PLA range |
| Hotend Temp (PETG) | 230–240°C | Standard PETG range |
| Cooling | 80–100% | Full cooling for PLA; 80% for PETG |
Surface Quality Considerations
Smartphone stands live on desks, nightstands, and kitchen counters where they’re seen constantly. Unlike purely functional parts where appearance is secondary, stand aesthetics actually matter. A few settings adjustments that improve surface appearance:
Reduce layer height to 0.15mm — this cuts print time by about 25% more than 0.2mm but produces noticeably smoother surfaces that look more refined on a desk.
Enable “Ironing” in Cura (or “Ironing” in PrusaSlicer) — this post-processes the top surfaces of the print with a dry pass of the hot nozzle, partially melting the surface and producing a much smoother top finish. Worth enabling for desk accessories where the top surface is prominently visible.
Seam placement — set your seam placement to “Sharpest Corner” or a location that’s on the rear or underside of the stand when in use. This hides the inevitable seam line from the most visible surfaces.
Material Selection for Smartphone Stands
| Material | Best For | Considerations |
|---|---|---|
| PLA | Indoor desk stands, bedroom stands, most indoor use | Excellent print quality; avoid hot environments (car, sunny window) |
| PETG | Kitchen stands, bathroom use, any environment with moisture or heat | Slightly more challenging to print; better heat and moisture resistance |
| ASA | Outdoor use, car mounts, sunny windowsill | Best UV and heat resistance; requires higher temps and ideally an enclosure |
| TPU | Flexible bumper-style stands, stands that need to grip the phone gently | Flexible; prints slowly; excellent grip surface |
Color as a Design Element
Smartphone stands are one of the few functional prints where color choice is genuinely part of the design. A stand in a color that complements your desk accessories, matches your phone case, or contrasts with your desk surface in a pleasing way looks considered and intentional. With PLA available in hundreds of colors — including metallic, silk-finish, gradient, and translucent options — the aesthetic possibilities are genuine.
Matte PLA (available from several manufacturers) produces surfaces that look more refined and less “plasticky” than standard PLA, and tends to show fingerprints less on desk accessories. Many makers who display their prints prominently default to matte PLA for this reason.
Step-by-Step: Printing a Desk Phone Stand
Let’s walk through a complete workflow for printing a simple, elegant desk phone stand.
Step 1: Measure Your Phone
Before downloading any file, measure your phone (with its case if you use one) in all relevant dimensions:
- Thickness: The most critical dimension for slot fit. Measure with calipers.
- Width: Relevant for landscape orientation stands with side rails.
- Height: Relevant for portrait orientation stands.
Write these measurements down — you’ll need them to choose the right design variant.
Step 2: Find and Download a Design
Navigate to Printables.com and search “desk phone stand.” Filter by “Most Downloaded” or “Most Liked.” Look for a design with:
- A slot width specification that matches your phone + 2mm tolerance
- A viewing angle specification appropriate for desk use (70–75° is a good starting point)
- Clean user photos showing the printed result
- Ideally some user photos showing the stand in actual use with a phone
Download the STL.
Step 3: Import and Orient in Slicer
Open your slicer and import the STL. Verify orientation — for most simple wedge stands, the flat base should be on the build plate. For easel designs, the stand may need to be rotated to print with the base flat.
Use your slicer’s “Auto Orient” feature if available; it will usually choose the best orientation for stability and printability.
Step 4: Check for Support Requirements
In the layer preview, check whether any part of the design has unsupported overhangs beyond 45°. Most well-designed phone stands avoid this. If supports are needed, enable them set to “Build Plate Only” with a 45° overhang threshold. Tree supports (available in Cura and PrusaSlicer) are less intrusive for this kind of organic geometry.
Step 5: Apply Settings and Slice
Apply the recommended settings:
- 0.15mm layer height (for good surface quality)
- 3–4 perimeters
- 25% infill, grid pattern
- 4–5 top and bottom layers
- Enable ironing for top surfaces if your slicer supports it
- 5mm brim
- Seam placement at sharpest corner or rear-facing position
Slice and review estimated print time. Most simple desk stands print in 1–2 hours at 0.15mm layer height.
Step 6: Print and Monitor
Start the print. Watch the first layer — stands often have varied footprint geometry, and verifying that all areas of the base are adhering correctly is important. Check after the first few layers that walls are forming cleanly and consistently.
Step 7: Test Fit Before Finishing
Before celebrating a completed print, test fit your phone immediately. Insert the phone into the stand and check:
- Does the phone slide in smoothly without excessive force?
- Is the phone held securely without wobbling?
- Does the stand tip when you tap the screen?
- Is the viewing angle comfortable for your intended use case?
If the fit is off, note the direction (too tight or too loose) and the magnitude (how far off) for your next print.
Step 8: Final Touches
Remove the brim cleanly. If you printed with ironing enabled, the top surfaces should already be smooth. A light pass with 400-grit sandpaper on any rough areas improves the final appearance. For maximum polish, a quick wipe with isopropyl alcohol gives the surface a clean, consistent finish.
Introduction to Functional Design Thinking
The smartphone stand is an excellent first encounter with what designers call functional design thinking — the practice of approaching object design from the perspective of how it will be used, rather than purely how it looks.
Every decision in a smartphone stand design has a functional consequence:
The slot width determines whether your phone fits at all, and how easily it can be inserted and removed. Too narrow and the phone won’t go in; too wide and it falls through.
The slot depth determines how much of the phone sits in the stand versus how much extends above it. Too shallow and the phone isn’t supported enough; too deep and the slot blocks the charging port or camera.
The base depth determines whether the stand tips when you touch the screen. Too shallow and even gentle screen interaction sends the stand toppling.
The viewing angle determines whether the screen is actually comfortable to view in the intended position. A stand angled for use at a standing desk is wrong for a seated desk and vice versa.
The wall thickness at the stand’s most stressed points determines whether it holds up to repeated use or develops cracks over months of handling.
Each of these is a design decision — and each teaches you something generalizable about functional design that applies to every useful object you’ll ever print. The smartphone stand is small enough that iteration is fast, specific enough that you know exactly whether it worked, and complex enough that at least three or four genuine design decisions were required to produce it.
This is functional design thinking in its most accessible form. Work through it with a smartphone stand and you’ll be better prepared for every functional design challenge that comes after.
Troubleshooting Common Smartphone Stand Issues
Phone Doesn’t Fit in the Slot
Cause: The printed slot is smaller than designed due to FDM dimensional variation, or the design was intended for a thinner phone.
Solution: Use calipers to measure the actual printed slot width. Calculate the difference from your phone’s thickness plus your target tolerance. In your slicer, use the scale tool to scale only the X axis (if the slot runs front-to-back) or only the Y axis (if the slot runs side-to-side) by the appropriate percentage. Alternatively, look for a design variant with a larger slot or a parametric design where you can enter your exact phone dimensions.
Stand Tips Forward When Phone Is Inserted
Cause: The base is not deep enough to counterbalance the phone’s weight and forward-leaning center of gravity.
Solution: Find a design with a longer, deeper base. If designing your own, the base should extend at least 50–60mm in front of the phone support point. As a quick fix for a printed stand, adding a small amount of weight (a coin, a few pennies, even some adhesive putty) to the front of the base shifts the center of gravity forward and can prevent tipping.
Stand Tips Backward When Screen Is Touched
Cause: The base doesn’t extend far enough behind the phone’s contact point to resist the rearward force of pressing the screen.
Solution: Find a design with more material behind the phone cradle, or add weight to the rear of the base. For the next version, ensure the base extends at least 20–30mm behind the phone’s back surface when in the stand.
Surface Finish Is Rough or Shows Visible Layer Lines
Cause: Layer height is too high or ironing isn’t enabled.
Solution: Reprint with 0.15mm layer height instead of 0.2mm. Enable ironing for top surfaces. Sand visible faces with 220-grit followed by 400-grit sandpaper. A thin coat of clear spray paint can also smooth and unify the surface.
Hinge on Folding Stand Is Too Tight or Loose
Cause: FDM tolerance variation in the hinge mechanism. Print-in-place hinges are particularly sensitive to first-layer squish and temperature variation.
Solution: For tight hinges, carefully work the joint open by flexing it gently through its range of motion multiple times — this burnishes the surfaces and loosens the fit. For loose hinges, the only print-side solution is to reprint with slightly lower Z-offset (making layers slightly thicker to close up the gap) or to find a design with tighter hinge tolerances. Alternatively, a thin strip of adhesive-backed foam inside the hinge can provide friction.
Stand Wobbles on Desk Surface
Cause: The base isn’t perfectly flat, either due to slight print warping or uneven surface texture from the build plate.
Solution: Sand the base flat on a sheet of sandpaper placed on a flat surface. Placing adhesive felt pads or rubber feet on the base corners prevents sliding and can also compensate for minor flatness issues.
Creative Variations Worth Exploring
Once you’ve mastered a basic desk stand, these variations push the concept further while remaining accessible to beginners:
Multi-Device Stand
A stand designed to hold both a phone and a tablet simultaneously, with slots at different heights and angles for each device. Excellent for workstations where both devices are used regularly.
Dual-Phone Stand
Two phone slots side by side — useful for anyone who carries two phones, or for a shared family charging station.
Stand with Business Card Holder
A desk phone stand with an integrated business card pocket or slot — combines two desk accessories into one elegant piece.
Stand with Pen/Stylus Holder
A phone stand with a small cylindrical holder for a pen, stylus, or pencil integrated into the design. Particularly useful for digital note-taking setups.
Adjustable Angle Stand with Click Positions
A stand with a ratcheting or detent mechanism that allows the viewing angle to be adjusted between several fixed positions. Requires careful design of the adjustment mechanism but produces an extremely versatile result.
Wall-Mounted Phone Dock
A phone stand designed to mount to a wall via screws, providing a hands-free video call station or smart home display position. Particularly useful in kitchens, offices, or entryways.
Stand Integrated with Cable Management
A desk stand with an integrated channel for routing a charging cable from the desk edge to the phone, keeping the cable neat and preventing it from pulling the stand around. One of the most practical refinements for a charging station stand.
From Stand to System: Building a Desk Accessory Ecosystem
One of the pleasures of 3D printing is the ability to build a cohesive ecosystem of desk accessories in matching designs, colors, and styles. A smartphone stand is often the first piece of this ecosystem — and it establishes the aesthetic and functional vocabulary for everything that follows.
Once you’ve found or designed a smartphone stand you’re happy with, consider what else your desk needs:
- A companion tablet stand in the same style
- Matching cable clips in the same color
- A pen holder that complements the stand’s geometry
- A cable management solution in the same material and finish
- A small tray or organizer for desk miscellany
Printing all of these pieces in the same filament color (or a complementary pair of colors) with consistent design language creates a desk setup that looks considered and cohesive — something that’s otherwise difficult to achieve without spending significant money on matching commercial accessories.
Your 3D printer gives you the ability to create a personalized, coherent workspace environment one small, practical piece at a time. The smartphone stand is a great place to start.
Conclusion: Function, Form, and the Learning Embedded in Both
The smartphone stand is a deceptively simple object. At first glance, it’s just a piece of plastic with a slot in it. But the journey from “I need something to hold my phone” to a printed stand that holds your specific phone at your specific angle on your specific desk teaches you a remarkable amount about functional design, print orientation, dimensional tolerance, material selection, and the relationship between digital geometry and physical objects.
These are not abstract lessons. They’re the practical foundations of everything that comes next in your 3D printing journey — every functional part, every custom accessory, every replacement component, every mechanical assembly. The smartphone stand teaches them in the most accessible possible context: a small, fast print with immediate, unambiguous feedback about whether it worked.
Print your stand. Put it on your desk. Put your phone in it. And the next time you’re on a video call without hunting for something to prop your phone against, take a moment to appreciate what you made — and what you learned making it.