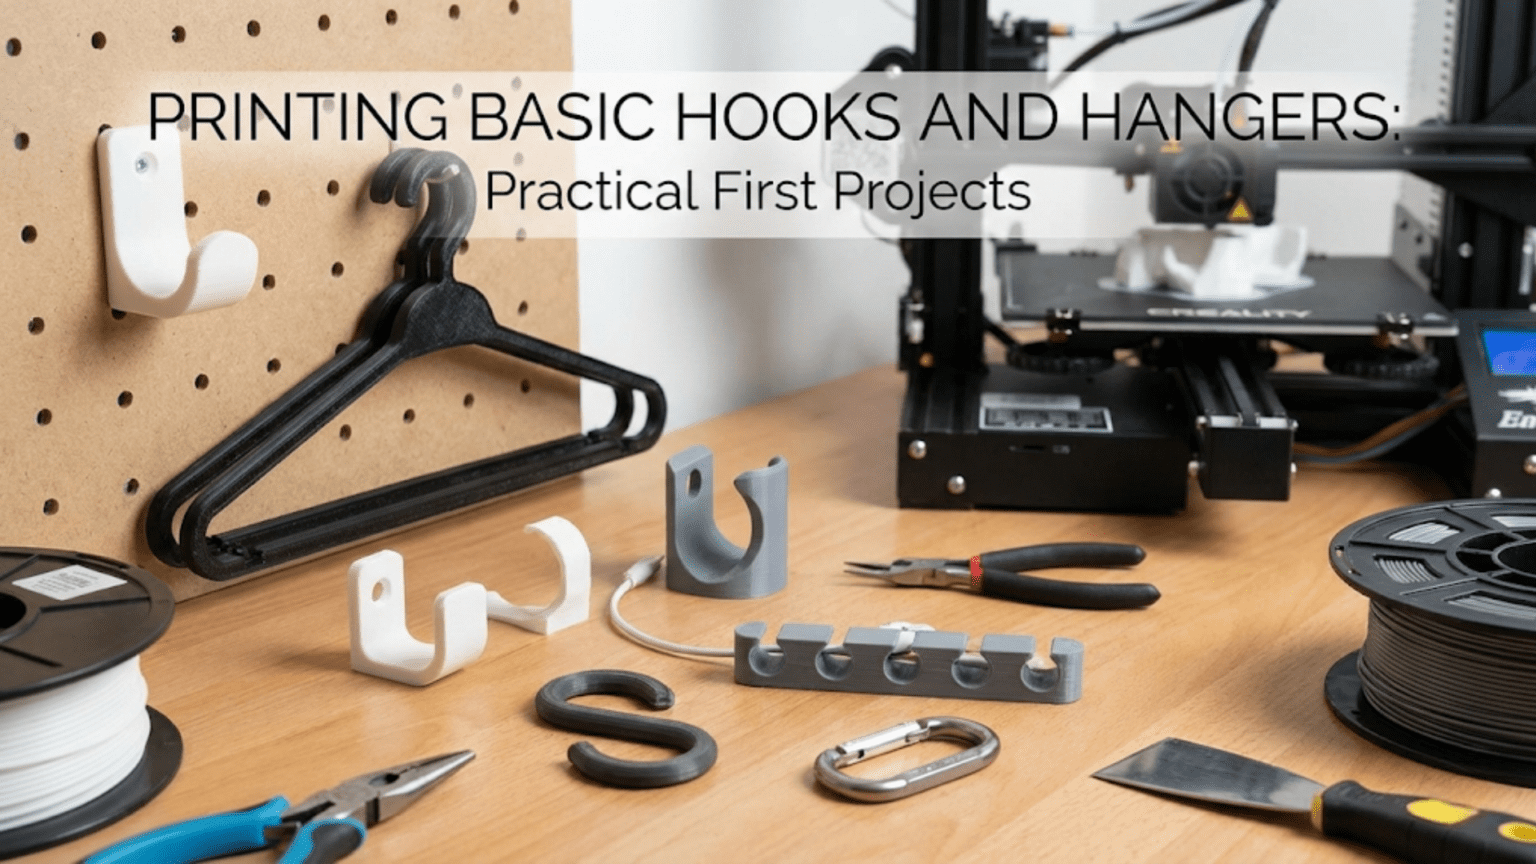
3D printed hooks and hangers are among the most practical and beginner-friendly projects you can make with a desktop FDM printer. By choosing the right design, material, print orientation, and settings, you can produce strong, reliable hooks for kitchens, bathrooms, workshops, offices, and garages — customized to exactly the size, shape, and load capacity you need, at a fraction of the cost of store-bought alternatives.
Introduction: The Case for Printing Your Own Hooks
Walk through any hardware store or home goods retailer and you’ll find entire aisles dedicated to hooks and hangers. Adhesive hooks, over-door hangers, pegboard hooks, screw-mount brackets, wall-mounted rails with sliding hooks — the commercial market for these simple objects is enormous, which tells you something important: people need a lot of hooks, in a lot of different sizes and configurations, for a lot of different purposes.
And yet, despite this abundance of commercially available options, 3D-printed hooks and hangers have become one of the most popular categories of prints in the maker community. Why? Because commercial hooks come in a limited range of standard sizes, standard mounting styles, and standard aesthetics. They’re designed to work for the average home, not for your specific wall, your specific cabinet depth, your specific tool, or your specific organizational system.
Your 3D printer, on the other hand, can produce a hook that is precisely sized for the tool it holds, designed to mount exactly where you need it, shaped to match your decor, and printed in any color you choose — often in under an hour, using materials that cost just a few cents per hook.
Beyond the practical appeal, hooks and hangers are genuinely excellent beginner projects for a deeper reason: they teach you the most important structural lesson in FDM 3D printing. Load-bearing geometry, print orientation, material selection, and infill settings all work together to determine whether a hook holds confidently or snaps the first time you hang something on it. Learning these principles through a simple hook prepares you for every functional part you’ll ever print.
This guide covers everything you need to know about 3D printing basic hooks and hangers: the types of hooks worth printing, how to find and evaluate designs, the slicer settings that produce strong results, the critical importance of print orientation, material choices for different applications, and a troubleshooting guide for the most common issues beginners encounter.
By the end, you’ll be printing hooks that hold confidently — and you’ll understand why they hold, which is even more valuable.
Understanding What Makes a Hook Strong
Before choosing a design or adjusting settings, it’s essential to understand what makes a 3D printed hook strong enough to be functional. This is where many beginners go wrong — they assume that any printed hook will work, or they assume that higher infill always equals more strength. The reality is more nuanced and more interesting.
The Direction of Force Matters Most
When you hang something on a hook, the weight of that object creates a downward force on the hook. This force doesn’t act uniformly across the entire hook — it concentrates at specific points, particularly at the point where the hook curves away from the wall and at the point where the hook meets its mounting surface.
In FDM printing, parts are strongest parallel to their layer lines and weakest perpendicular to them. Layers bond to each other through a combination of heat fusion and mechanical interlocking, but this bond is always weaker than the plastic itself. When a force is applied that tries to pull layers apart — what engineers call “interlaminar tension” — the hook is at risk of delamination along the layer boundary.
This means that print orientation is not just a convenience consideration — it is the single most important factor in a printed hook’s strength. A hook printed in the wrong orientation might look identical to one printed correctly, but it could be five to ten times weaker under load.
Wall Count Beats Infill for Hooks
For most 3D printed objects, increasing infill is the go-to strategy for adding strength. For hooks and other load-bearing parts, however, wall count (perimeters) is usually more effective than infill percentage.
Here’s why: the load on a hook is primarily carried through the outer shell of the part — the perimeter walls — rather than through the internal structure. Increasing from 2 to 4 perimeters roughly doubles the cross-sectional area of solid material that the force must travel through. Increasing infill from 20% to 50% has a much smaller effect on the critical stress points.
A practical hook setting is 4–5 perimeters with 30–40% infill. This gives you strong outer walls without dramatically increasing print time or material usage.
Geometry: Hook Shape and Stress Distribution
The shape of the hook itself matters significantly. Sharp corners concentrate stress — a right-angle hook is weaker at its corner than a hook with a gentle fillet or radius at that point. Well-designed hooks use curved transitions rather than sharp 90° angles at the wall junction, which distributes the load more evenly and reduces the likelihood of cracking at that point.
When evaluating hook designs, look for generous radii at the transition between the wall-mounting section and the hook arm. Avoid designs with extremely thin cross-sections at this critical point unless you’re using a material with high impact resistance.
Types of Hooks Worth Printing
The range of hooks you can print is enormous. Here are the most practical categories for beginners, with notes on what makes each one worth printing.
1. Adhesive-Mount Hooks
Adhesive-mount hooks attach to smooth surfaces using double-sided adhesive tape (Command strips are the most popular brand). These hooks don’t require drilling and can be repositioned, making them ideal for renters, for smooth surfaces where drilling would be difficult, and for temporary organizational setups.
What makes them printable: Standard commercial adhesive hooks come in very limited sizes and styles. Printing your own lets you create hooks with a flat mounting pad sized perfectly for standard adhesive strips, combined with a hook arm in exactly the size and orientation you need. You can print a hook designed specifically for a bicycle helmet, a set of headphones, a specific tool — shapes that no commercial adhesive hook addresses.
Design considerations: The mounting pad must be perfectly flat on its contact surface to ensure good adhesion. Print this flat side facing down on the build plate. The hook arm should be as smooth as possible — rough surfaces can cause the hook to snag items.
2. Screw-Mount Hooks
Screw-mount hooks are anchored to walls, studs, or other solid surfaces using screws or bolts. They’re much stronger than adhesive hooks and appropriate for heavier loads: coats, bags, bicycle accessories, tool storage, kitchen utensils, and more.
What makes them printable: Commercial screw-mount hooks are available in limited sizes and finishes. Printing your own gives you full control over hook depth, arm angle, mounting hole placement, and aesthetic. You can also print hooks with multiple arms, hooks with specific shapes for particular tools, and hooks that integrate with custom organizational systems.
Design considerations: The screw holes should be sized to accept your chosen fastener with appropriate clearance. Standard wood screws in the #6 to #8 range typically use a 4–4.5mm hole in the printed part. Countersunk holes allow flat-head screws to sit flush with the surface. If hanging heavy items, use at least two screws and ensure both anchors into solid material.
3. Over-Door Hooks
Over-door hooks loop over the top of a cabinet door, closet door, or bedroom door, providing instant storage without any mounting hardware at all. They rely entirely on their geometry to stay in place.
What makes them printable: Over-door hooks must fit a specific door thickness to work correctly. Standard commercial hooks fit doors in a limited thickness range — often 35–45mm — but doors vary in thickness from around 25mm (interior hollow-core doors) to 60mm or more (solid exterior doors). Printing your own means you can measure your door and create a hook that fits perfectly without wobbling.
Design considerations: The critical dimension is the distance between the inner and outer arms that sandwich the door. Measure your door thickness and add 2–3mm of clearance for a snug but not crushing fit. The inner arm (the side facing the room) should be long enough to prevent the hook from tipping forward under load.
4. Pegboard Hooks
Pegboard hook systems are popular in workshops and garages for tool organization. Standard pegboard has holes in a 1-inch (25.4mm) grid, and hooks for this system have pegs that insert into these holes.
What makes them printable: The commercial pegboard hook market is mature, but standard hooks are designed for generic tools. Printing custom pegboard hooks lets you create specialized holders for specific tools — a wrench with an oddly shaped handle, a specialized clamp, a unique measuring instrument — in shapes that commercial hooks simply don’t offer.
Design considerations: Pegboard hook pegs need to be dimensionally accurate to fit properly. The standard pegboard hole diameter is approximately 6.35mm (¼ inch), and peg diameter should be around 5.8–6.0mm for a functional fit with printed parts (allowing for the slight dimensional inaccuracy of FDM printing). Always print a single hook first and test the fit before printing a full set.
5. Towel Hooks and Bathroom Hangers
Bathroom hooks hold towels, robes, loofahs, and other bathroom accessories. They’re usually mounted at a comfortable height on the wall and need to be both functional and aesthetically appropriate for a bathroom environment.
What makes them printable: The bathroom accessories market offers limited styles, and matching hooks to specific bathroom decor — particularly for unusual or custom tile schemes — can be difficult commercially. Printing your own lets you match the style, size, and finish of your bathroom accessories exactly.
Design considerations: Bathroom environments involve moisture. PLA is not an ideal material for consistently wet environments because it can absorb moisture over time and degrade. PETG is a better choice for bathroom hooks — it has good moisture resistance, adequate strength, and prints nearly as easily as PLA.
6. Kitchen and Utensil Hooks
Kitchen hooks hold utensils, pot lids, oven mitts, cutting boards, and other cooking accessories. They’re often mounted under cabinets, inside cabinet doors, or on backsplash tiles.
What makes them printable: Kitchen organization is highly personal — what you need to access quickly and where you need to store it varies enormously between kitchens and cooks. Printing custom kitchen hooks lets you build an organization system that fits your specific cookware and workflow rather than forcing you to adapt to commercial standards.
Design considerations: Kitchen environments involve some heat exposure (from cooking) and occasional moisture. For hooks near the stove, avoid PLA (which softens at relatively low temperatures around 60°C) and use PETG or ASA instead. For hooks mounted well away from heat sources, PLA is acceptable.
7. Workshop and Tool Hooks
Workshop hooks hold hand tools, power tool accessories, safety equipment, extension cords, and other workshop items. They’re typically mounted on pegboard or directly to wall studs.
What makes them printable: Workshop tools come in an enormous variety of shapes and sizes, and generic hooks rarely hold them as efficiently or as accessibly as a custom solution. Printing tool-specific holders — a holder that keeps your drill bits organized, a hook sized precisely for your favorite hammer’s handle, a bracket that keeps safety glasses at eye level — makes your workspace dramatically more functional.
Design considerations: Workshop items can be heavy, and workshop environments are often rough. Use PETG or ASA for workshop hooks rather than PLA. Increase infill to 40–50% for hooks holding heavy tools. Ensure your mounting solution — pegboard, screws, or other anchoring — is rated for the weight you’re hanging.
Finding and Evaluating Hook Designs
With a clear picture of the types of hooks available, the next step is finding or creating suitable designs.
Where to Find Hook Designs
Printables.com is the best starting point for most hook designs. Search terms like “wall hook,” “adhesive hook,” “over door hook,” “kitchen hook,” “pegboard hook,” and “towel hook” all yield hundreds of results. Filter by “Most Liked” or “Most Downloaded” to surface the most community-validated designs.
Thingiverse.com has an enormous archive of hook designs, many of which are older and extremely well-tested. The XYZ Calibration Cube community overlaps heavily with the hook and hanger community — these are practical-minded makers who value function over aesthetics.
MyMiniFactory.com tends to have higher-quality, more aesthetically refined hook designs, particularly for decorative bathroom and kitchen applications.
Cults3D.com has both free and paid hook designs. Some of the paid options are architecturally designed pieces that double as home decor.
What to Look for in a Hook Design
When evaluating a hook design before downloading, consider these factors:
Generous cross-section at the wall junction: The point where the hook arm meets the mounting section is where stress concentrates. Designs with thin, narrow cross-sections at this point are inherently weaker. Look for designs where this transition is thick and ideally has a fillet or rounded corner.
Appropriate mounting hole placement: For screw-mount hooks, the mounting holes should be positioned to give you good leverage against the wall. Holes placed too close to the hook arm leave inadequate material between the hole and the arm. Holes should be spaced far enough apart to prevent rotation.
Smooth inner curve radius: The inner curve of the hook (where items actually rest) should have a generous radius. A tight radius concentrates load at a point and can cause items with handles (like mugs) to sit uncomfortably or tip.
Clear documentation: The best hook designs include the target load capacity, recommended print settings (especially perimeter count and infill), and recommended material in their description. Designers who have thought carefully about these factors have usually also thought carefully about the geometry.
Community validation: User photos and comments on design pages are invaluable. If 500 people have printed a hook successfully and left positive comments, that’s strong evidence the design is robust. If multiple users report breakage at a specific point, that’s equally important information.
Critical: Print Orientation for Hooks
This section deserves its own emphasis because print orientation is the most commonly misunderstood factor in printing functional hooks. Getting this wrong produces a hook that looks perfect but fails under minimal load.
The Layer Line Principle Applied to Hooks
Imagine a simple L-shaped hook: a flat mounting plate that attaches to the wall, and a horizontal arm that extends outward and curves upward. When you hang something on this hook, gravity pulls it straight down on the tip of the arm.
This downward force creates a bending moment at the junction between the arm and the mounting plate — essentially trying to snap the arm downward. The material on the top of the arm (near the wall junction) is in tension, while the material on the bottom is in compression.
FDM plastic is much stronger in compression than in tension across layer boundaries. The critical question is: do the layer lines run parallel or perpendicular to the direction of this tensile stress?
Correct orientation: If the hook is printed with its arm extending vertically on the build plate — upright, as if the “wall” it would mount on is the build plate — the layer lines run horizontally through the arm. The tensile force at the top of the arm pulls parallel to the layer lines, which is the strong direction. This orientation produces a much stronger hook.
Incorrect orientation: If the hook is printed lying flat on its back (as if the hook is laying down on the floor), the layer lines run parallel to the flat mounting surface, and the tensile force at the arm junction tries to peel layers apart from each other. This is the weakest possible orientation for a load-bearing hook.
Practical Orientation Guidance
For most hook designs:
- Adhesive hooks: Print with the mounting surface facing down (on the bed) and the hook arm pointing upward. This keeps the mounting surface perfectly flat for adhesion while allowing the arm to be printed with layers running in the strong direction.
- Screw-mount hooks: Print with the mounting surface facing the bed (flat side down) if the hook arm is short and stubby. For hooks with longer arms, consider printing with the mounting surface vertical (90° rotation) so the arm layers run in the strong direction. Some hooks specifically include a note in their documentation about optimal orientation — follow this guidance.
- Over-door hooks: These are typically best printed with the door-gripping section flat on the bed and the hook arm extending upward. This keeps the gripping section’s critical flat surfaces clean and puts the arm’s layers in a favorable orientation.
When in doubt, look at where the greatest stress will occur in use, identify the direction of the tensile force at that point, and orient the print so that layer lines run parallel (not perpendicular) to that force.
Recommended Slicer Settings for Hooks
| Setting | Recommended Value | Notes |
|---|---|---|
| Layer Height | 0.2mm | Standard; 0.15mm for better strength |
| Print Speed | 40–50 mm/s | Slower for better layer adhesion |
| Perimeters/Walls | 4–5 | Critical for hook strength |
| Infill | 30–40% | Grid or gyroid for isotropic strength |
| Top/Bottom Layers | 4–5 | Keeps surfaces closed and solid |
| Support | Only if needed | Good hook designs avoid support need |
| Bed Adhesion | Brim (5mm) | Especially for tall, narrow prints |
| Hotend Temperature | 210°C (PLA) / 230°C (PETG) | Slightly higher temp = better adhesion |
| Cooling | 80–100% for PLA | Slightly reduced for PETG |
Why These Settings Differ from the Beginner Baseline
You’ll notice these settings are somewhat more aggressive than the general beginner baseline from the previous article. The increased perimeter count is the most important change — for functional parts that bear loads, perimeter walls are the primary load-bearing structure, and 4–5 perimeters provide meaningfully more strength than the standard 3.
The slightly higher hotend temperature recommendation comes from the principle that better layer fusion means stronger interlaminar bonds. For load-bearing hooks where layer separation is a real failure mode, erring on the warmer side of your filament’s temperature range (within reason) produces stronger parts.
Material Selection Guide for Hooks
| Material | Best For | Avoid For | Relative Strength |
|---|---|---|---|
| PLA | Light-duty indoor hooks, decoration, cool dry locations | Hot environments, outdoor use, high-humidity rooms | Moderate (brittle) |
| PETG | Bathroom hooks, kitchen hooks, moderate loads, some outdoor use | High-temperature environments (>80°C) | Good (tough) |
| ASA | Outdoor hooks, workshop hooks, high UV environments | Fine detail hooks (lower detail quality) | Very Good |
| ABS | Workshop hooks needing heat resistance | Outdoor use (UV degradation), beginners (harder to print) | Good (but brittle in cold) |
| TPU | Flexible hooks, hooks for delicate items | Heavy load applications | Flexible, lower rigidity |
PLA: The Starting Point
PLA is the easiest material to print and perfectly adequate for many hook applications. Light-duty hooks in cool, dry, indoor environments — a hook for headphones, a hook for lightweight tools, a hook for a calendar — work well in PLA. The limitation is PLA’s relatively low glass transition temperature (around 60°C), which means hooks in warm environments (sunny windowsills, near appliances that generate heat, inside vehicles) can deform and fail.
PETG: The Better Choice for Most Hooks
For the majority of practical household hooks, PETG is actually the superior choice. It’s slightly more challenging to print than PLA (more prone to stringing, needs higher temperatures, doesn’t adhere as aggressively to some bed surfaces) but offers meaningfully better toughness, better heat resistance, and better moisture resistance. Many experienced makers default to PETG for any load-bearing functional part, reserving PLA for decorative or non-structural items.
ASA: For Outdoor and UV Exposure
If you need hooks for outdoor use — shed organization, garden equipment, outdoor furniture hooks — ASA (Acrylonitrile Styrene Acrylate) is the material of choice. ASA offers excellent UV resistance (unlike PLA and ABS, which degrade and become brittle in sunlight) along with good heat resistance and toughness. It’s a more demanding print material requiring higher temperatures and ideally an enclosure, but for outdoor applications it’s often the only practical choice among common filaments.
Step-by-Step: Printing Your First Hook
Let’s walk through a complete workflow for printing a simple screw-mount wall hook from start to finish.
Step 1: Choose Your Hook Design
Navigate to Printables.com and search for “wall hook.” Filter by most downloaded. Look for a design with:
- Clear photos showing the finished hook in use
- A description that mentions load capacity and recommended settings
- A generous cross-section at the wall-arm junction
- Good community ratings and photos
Download the STL file to your computer.
Step 2: Open in Your Slicer
Import the STL file into Cura or PrusaSlicer. Examine the model’s default orientation on the build plate. Ask yourself: in this orientation, which direction do the layer lines run, and does that match the direction of the load the hook will bear?
If the orientation isn’t optimal (most designs auto-orient correctly, but not all), use the rotation tool to correct it. For a simple L-shaped hook, the mounting surface should typically be flat on the bed with the hook arm pointing upward.
Step 3: Apply Settings
Apply the hook-specific settings from the table above:
- Layer height: 0.2mm
- Perimeters: 4–5
- Infill: 35%, Grid pattern
- Top/bottom layers: 4
- Support: Off (if the design doesn’t require it)
- Brim: 5mm (for stability during printing)
Set your temperature according to your material: 205–215°C for PLA, 230–240°C for PETG.
Step 4: Preview and Slice
Use your slicer’s layer preview feature to inspect the print. Check that:
- The outer walls are solid and continuous
- The infill pattern is consistent throughout
- Any overhangs look manageable (under 45° from vertical for most printers)
- The brim is applied correctly around the base
Slice the model and check the estimated print time. A simple screw-mount hook should print in 30–90 minutes depending on size and settings.
Step 5: Print and Monitor
Start the print and watch the first layer carefully. The first layer should be slightly squished — you should see good contact between the filament and the bed with no gaps or lifting at the edges. If the brim is lifting, your bed temperature may need to be slightly higher or your Z-offset adjusted.
For PETG specifically, watch for stringing between the hook features during travel moves. If stringing is significant, note it for retraction setting adjustment after this print.
Step 6: Post-Processing
Once printed and cooled, remove the brim by peeling it away — most brims come off cleanly, especially with PETG. A brief pass with a hobby knife or sandpaper cleans up any remaining brim edge.
If the hook has screw holes, test them with your chosen fastener. Printed holes are often slightly undersized due to FDM dimensional variation — a 4mm drill bit can clean up a screw hole if needed, or you can use a self-tapping screw designed for plastic.
Step 7: Test Before Loading
Before hanging your first item, mount the hook securely and test it with a load slightly heavier than your intended use. Apply the load gradually and check for any cracking sounds, deformation, or movement in the mounting. A good hook should feel completely rigid under expected loads.
Troubleshooting: Common Hook Printing Problems
Hook Snaps at the Wall Junction
Cause: Almost always a print orientation issue. If the hook was printed lying flat, the layer lines run in the weakest direction for this load.
Solution: Reprint with the hook arm pointing upward from the build plate. If orientation was already correct, increase perimeter count to 5 and infill to 40%. Consider switching to PETG for better toughness.
Adhesive Hook Won’t Stay on the Wall
Cause: The mounting surface is not flat enough for good adhesive contact, or the printed surface is too rough for the adhesive strip to bond to.
Solution: Sand the mounting surface with 220-grit sandpaper until it’s smooth and flat. Ensure you’re using appropriate adhesive for the surface type. Command strips work better on smooth painted walls than on textured surfaces.
Over-Door Hook Keeps Falling Off
Cause: The gap between the inner and outer arms is too large for your door thickness, causing the hook to wobble and eventually slide off.
Solution: Measure your door thickness precisely and reprint with the gap adjusted to door thickness plus 1–2mm (not 3mm). You can also add a small foam or rubber pad to the inner arm to reduce the effective gap and provide friction.
Hook is Printing with Lots of Stringing
Cause: Retraction settings inadequate for the material, or print temperature too high.
Solution: Increase retraction distance slightly (0.5mm increments) and check that your print temperature isn’t at the top of the recommended range. For PETG specifically, enable “Combing” in your slicer to keep travel moves within the hook body rather than crossing open air.
Screw Holes Are Too Small
Cause: FDM dimensional shrinkage and the nature of printing circles means holes typically come out 0.2–0.4mm smaller than designed.
Solution: Use a drill bit to clean up holes to the correct diameter. Alternatively, in your slicer, look for a “hole expansion” or “hole compensation” setting (available in PrusaSlicer as “Elephant foot compensation” and in Cura as “Hole Horizontal Expansion”) and set it to 0.2–0.3mm to automatically oversize holes in the sliced model.
Hook Warping During Print
Cause: Inadequate bed adhesion, especially with PETG or larger hooks with significant flat areas.
Solution: Clean the bed thoroughly with IPA before printing. Increase bed temperature by 5°C. Use a brim of 8–10mm for large hooks. For PETG, a thin layer of glue stick on the bed can improve adhesion significantly.
Creative Hook Ideas Worth Printing
Once you’ve mastered the basics, here are some creative hook projects that push the concept further while remaining within beginner reach:
Headphone hook: A monitor-mounted or wall-mounted hook specifically sized and shaped for your headphones. A simple curved arm that keeps the headband from bending while storing the headphones neatly.
Cable hook + charging station: A wall hook with an integrated channel for routing a charging cable — hang your headphones and charge them simultaneously.
Mug tree hooks: A set of hooks designed to mount under a cabinet shelf, creating a hanging mug tree that frees up counter space.
Bicycle accessory hooks: Custom hooks sized for specific cycling accessories — cycling shoes, helmets, gloves — mounted near your garage door for quick access.
Key and mail hook: A combination piece with a hook for keys and a small shelf or clip for incoming mail or important papers.
Kids’ backpack hooks: Low-mounted hooks at the right height for a child’s backpack, with a fun shape (animal, star, car) that makes them visually appealing and easy for young children to use independently.
Modular hook rail: A wall-mounted horizontal rail with standardized slots into which different hook styles can be inserted and removed — the 3D printed equivalent of a commercial hook rail system but customized to your exact specifications.
Conclusion: Simple Parts, Important Lessons
The humble hook and hanger is perhaps the most underrated category of 3D printing projects. It’s easy to dismiss them as mundane in a world of complex models and intricate assemblies, but that would be a mistake. Hooks teach you everything that matters about functional 3D printing in the simplest possible context.
They teach you about print orientation and why it determines structural strength. They teach you about wall count versus infill for load-bearing geometry. They teach you about material selection for specific environments and applications. They teach you about dimensional accuracy in the context of real-world mounting hardware. And they give you immediate, unambiguous feedback about the quality of your print — either the hook holds, or it doesn’t.
Print a dozen different hooks. Mount them around your home or workshop. Load them up. Notice how the good prints feel completely solid and the poorly-oriented ones feel slightly wrong even before they fail. Build the intuition that comes from printing functional parts and seeing how they perform in the real world.
These lessons will serve you in every functional part you print from this point forward. And in the meantime, you’ll have a more organized home — which is its own reward.