Introduction
One of the most common misconceptions people hold about three-dimensional printing stems from watching time-lapse videos that compress hours of printing into seconds of footage, creating the impression that objects materialize almost instantly from the printer. This dramatic visual representation, while entertaining and useful for showing the layer-by-layer construction process, sets unrealistic expectations about how quickly additive manufacturing actually produces finished parts. The reality involves timescales measured in hours rather than minutes for most objects, with complex or large prints potentially requiring days of continuous operation.
Understanding how long 3D printing takes matters for anyone considering using the technology, whether purchasing equipment for home use, planning product development timelines, evaluating the technology for production applications, or simply trying to grasp what makes additive manufacturing practical despite the extended build times. The temporal characteristics of 3D printing fundamentally differ from traditional manufacturing processes, with different trade-offs between setup time, production time, and batch efficiency that affect when the technology makes economic sense.
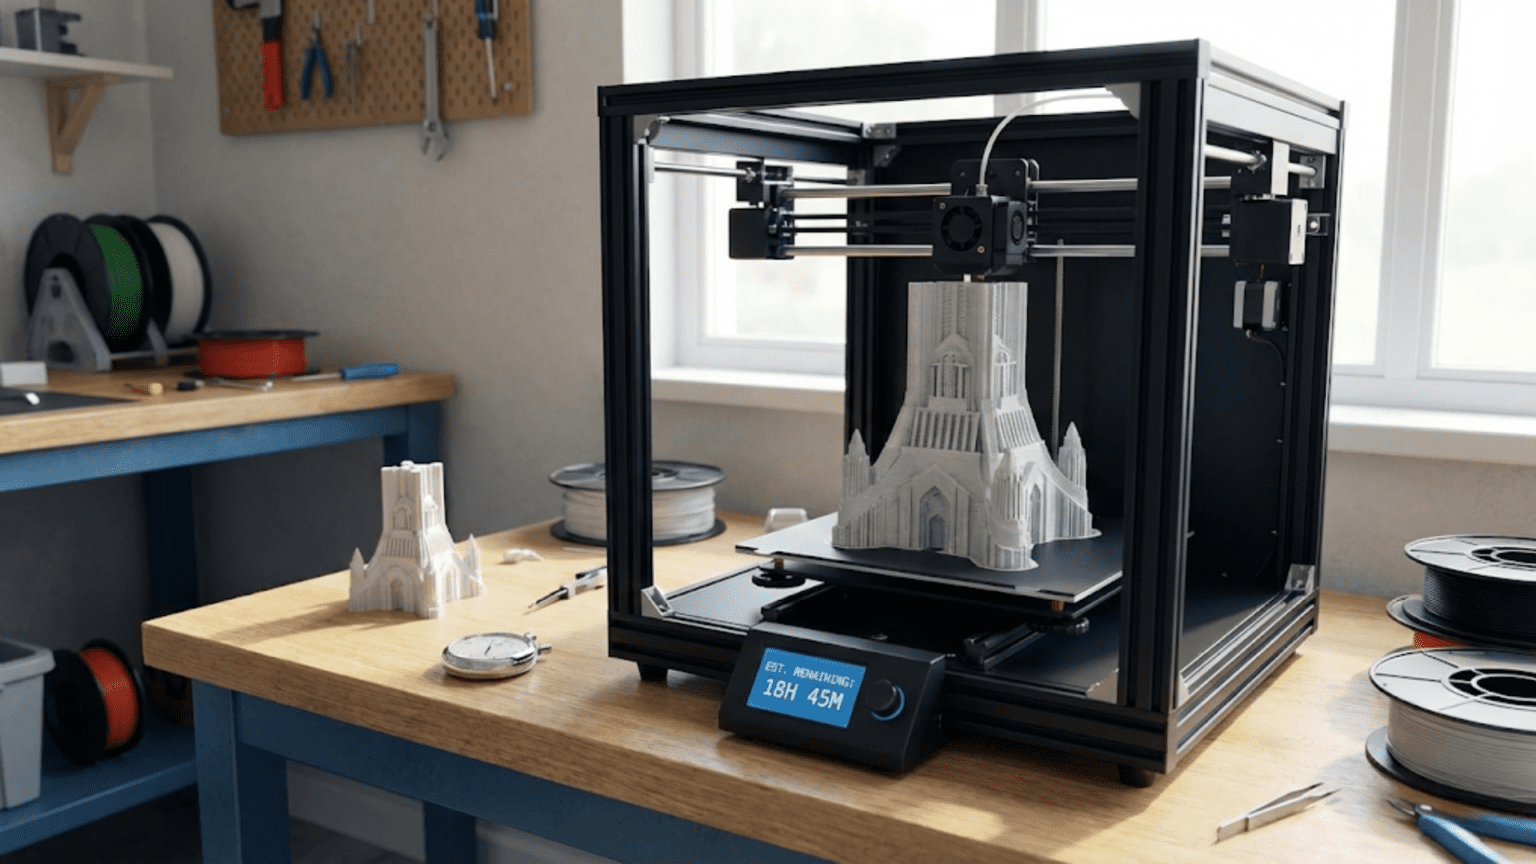
Print time depends on numerous interconnected factors that make simple answers impossible without knowing specific details about the object being printed, the technology being used, and the quality requirements. A small simple object might complete in thirty minutes, while a large complex part could require forty-eight hours or more. The relationship between object characteristics and print time follows different patterns than traditional manufacturing, where complexity often increases production time but size and height have less direct correlation with duration.
This comprehensive exploration of 3D printing timescales will examine what factors determine how long prints take, how different printing technologies compare in terms of speed, what trade-offs exist between print speed and quality, how to estimate print times for projects, what strategies can reduce time requirements, and what realistic expectations should guide planning for various applications. By understanding these temporal dynamics, you will be better equipped to evaluate whether 3D printing’s extended build times represent acceptable trade-offs for your specific needs or whether alternative manufacturing approaches better match your timeline requirements.
The Fundamental Time Factors in Layer-by-Layer Construction
The layer-by-layer nature of additive manufacturing inherently creates time requirements that differ fundamentally from traditional production methods. Understanding why building objects incrementally takes substantial time requires examining how the physical processes work and what limits how quickly they can proceed without compromising quality.
The most basic constraint on 3D printing speed comes from the fact that material must be deposited or solidified for every cubic millimeter of the final object’s volume. Unlike machining where multiple cutting edges can remove material simultaneously from different locations, or molding where an entire cavity fills at once, additive manufacturing typically addresses one small area at a time in sequence. A print head moves along a calculated path depositing material, or a laser scans across a powder bed fusing particles, or a projector exposes one layer of resin. Even technologies that process entire layers simultaneously must still build one complete layer before moving to the next.
Layer height represents the most direct factor affecting print time because it determines how many layers are required to build any given vertical distance. An object that stands one hundred millimeters tall requires one thousand layers when printed at 0.1 millimeter layer height but only five hundred layers at 0.2 millimeter layer height. Since each layer requires time for the print head to trace its path or for material to solidify, halving the layer height doubles the number of layers and roughly doubles the total print time for a given object.
However, layer height affects more than just the count of layers. Thinner layers also typically require slower printing speeds to maintain quality. When depositing material in very thin layers, the printer must move more slowly to allow precise control of material placement and to prevent mechanical issues like the nozzle dragging through previously deposited material. The relationship is not perfectly linear, but generally, printing at half the layer height requires more than double the total time because both the layer count doubles and the speed per layer decreases.
The cross-sectional area at each layer determines how much area the printer must cover for that layer. A tall thin object with small cross-sections requires relatively little time per layer, while a wide flat object with large cross-sections demands substantial time for each layer even though the total layer count remains low. The total print time thus correlates with both the object’s height, which determines layer count, and its volume, which represents the cumulative area across all layers that must be filled with material.
Infill density affects print time for FDM printing because it determines how much material must be deposited in the object’s interior. An object printed as a hollow shell with only outer walls completes much faster than the same object printed solid throughout. Typical infill patterns like rectilinear, honeycomb, or gyroid fill the interior with partially hollow structures that provide strength while reducing material consumption and print time. A part printed with twenty percent infill might take half the time of the same part printed with one hundred percent infill, though the exact relationship depends on the ratio of surface area to volume.
Print speed settings directly control how quickly the print head or laser moves during building. Measured in millimeters per second, typical FDM print speeds range from twenty to one hundred millimeters per second depending on the layer being printed, the feature being created, and the quality requirements. First layers typically print slower for reliability, outer perimeters print slower for surface quality, and infill prints faster because internal structure quality matters less than external surfaces. Small detailed features may require slower speeds for accuracy, while long straight paths allow faster movement.
Acceleration and jerk settings limit how quickly the print head can change speed or direction. When the printer needs to slow down for a corner, decelerate to a stop, or change direction, acceleration limits determine how rapidly these speed changes occur. Conservative acceleration settings create smoother motion that reduces mechanical stress and vibration but requires more time for speed changes. Aggressive acceleration settings reduce time spent changing speeds but can introduce quality issues like ringing or missed steps if pushed beyond the printer’s mechanical capabilities.
Travel moves between different regions of a print add time without depositing material. When the print head must move from one part of the layer to another without printing, it travels at high speed but still requires time. Complex prints with many separate regions or multiple parts printed simultaneously accumulate substantial travel time. Retraction during these travels, where filament pulls back to prevent oozing, adds additional time as the extruder reverses direction before and after each travel move.
The warm-up period before printing begins adds fixed overhead to every print. The hotend must reach operating temperature, the bed must heat to the target temperature, and the printer typically performs homing and bed leveling routines. This startup time might range from five to fifteen minutes depending on the printer and the target temperatures. For very short prints, this startup time can represent a significant fraction of total time, while for long prints it becomes negligible overhead.
Comparing Print Times Across Technologies
Different additive manufacturing technologies show characteristic time profiles that make some faster than others for specific types of objects. Understanding these differences helps explain why certain applications gravitate toward particular technologies and what trade-offs exist between speed and other capabilities.
Fused Deposition Modeling printing speed correlates strongly with the volume of material that must be extruded because the print head must physically move along paths that trace every feature. A small low-volume object might print in thirty minutes to an hour, while a larger item filling much of the build volume could require twelve to twenty-four hours. Very large prints that fully utilize 300 millimeter or larger build volumes may run for days. The relationship between volume and time is roughly linear, though geometric complexity adds time through increased travel moves and speed reductions for detailed features.
The volumetric flow rate limits how quickly FDM printers can deposit material. Standard hotends typically max out around ten to fifteen cubic millimeters per second of melted plastic flow. High-flow hotends with more powerful heaters and optimized thermal designs can achieve twenty to thirty cubic millimeters per second. When print speeds push against this flow rate limit, the printer cannot maintain speed without under-extruding. For very fast printing or large nozzle sizes, the hotend’s maximum flow rate becomes the limiting factor rather than mechanical movement speed.
Nozzle size significantly affects FDM print times because larger nozzles can extrude thicker lines that cover more area per pass. A 0.4 millimeter nozzle depositing 0.4 millimeter wide lines must make many closely-spaced passes to fill an area. A 0.8 millimeter nozzle depositing 0.8 millimeter wide lines covers four times the area per pass, potentially reducing print time by half or more for objects where large features dominate. However, larger nozzles sacrifice fine detail capability and surface smoothness, creating trade-offs between speed and resolution.
Stereolithography and DLP print times show different characteristics because entire layers expose simultaneously rather than being traced sequentially. For SLA using a laser that scans point by point, print time correlates with the layer’s area because the laser must trace larger areas to cure them fully. A small object takes roughly the same time per layer as a tall narrow object with similar cross-section, but wide flat objects require more time per layer. For DLP using projection to expose entire layers at once, all layers take approximately the same time regardless of area because the projector flashes the complete layer image simultaneously.
This characteristic makes DLP particularly fast for objects with small cross-sections but tall heights. A tall cylindrical part might take the same total time as a short wide plate if both have the same number of layers, because each layer exposes in the same fixed time. The layer height determines total time more directly than volume for DLP printing. Typical DLP layer exposure times range from a few seconds for standard resins to ten or twenty seconds for specialty materials, yielding total print times of one to several hours for typical objects.
Powder bed fusion technologies like SLS show time profiles influenced by both the layer area being sintered and the laser scan speed. The laser must trace across all regions that should fuse for each layer, so larger cross-sections require more time per layer. However, the process also requires substantial preheat time to bring the powder bed to operating temperature and extended cooling time after the build completes to prevent thermal shock from causing part warping or cracking. These fixed overheads can represent many hours added to the actual build time, making SLS builds often measure in days from start to finished parts even for relatively small components.
Multi-part builds affect time differently across technologies. FDM printing multiple parts simultaneously increases total print time roughly proportionally to the combined volume of all parts because the printer must extrude material for everything. However, printing parts sequentially, one complete part at a time, can actually increase total time further due to the warm-up time before each part and cooling time between parts. SLA shows similar patterns where multiple parts increase time proportionally to total volume. DLP and SLS can achieve better efficiency with multiple parts because many small parts can pack into a single build with minimal time penalty, as the per-layer time depends more on build height than part count.
The Speed-Quality Trade-Off
Print quality and print speed exist in fundamental tension because the physical processes that determine quality require time to execute properly. Understanding these trade-offs allows making informed decisions about when to prioritize speed and when quality demands accepting longer print times.
Layer height represents the most obvious speed-quality trade-off because it directly affects surface smoothness. Thicker layers create more visible layer lines that give surfaces a striated texture, while thinner layers produce smoother surfaces that more closely approximate continuous curves. An object printed at 0.3 millimeter layer height might complete in half the time of the same object at 0.15 millimeter layers, but the surface quality difference is immediately apparent. For internal parts where appearance does not matter, the speed of thick layers makes sense. For visible surfaces or display models, the quality of thin layers justifies the additional time.
Print speed settings affect surface quality through several mechanisms. Faster speeds reduce the time plastic has to cool and solidify before the next layer deposits on top, potentially causing sagging or poor layer bonding. Higher speeds can also introduce mechanical vibrations and ringing artifacts where the printer’s frame resonates, creating ripples in surfaces. Outer perimeters printed at slower speeds achieve better surface finish and dimensional accuracy than the same perimeters printed quickly. Most slicing software uses separate speed settings for outer walls, inner walls, and infill, printing external surfaces slowly for quality while accelerating for internal structure where quality matters less.
Cooling settings interact with speed to affect quality. Insufficient part cooling when printing quickly causes plastic to remain soft too long, leading to sagging overhangs and poor bridges. Excessive cooling when printing slowly can create layer adhesion problems and warping from thermal stress. The optimal cooling for quality depends on print speed, with faster printing typically requiring more aggressive cooling to solidify material quickly. This interdependence means print speeds cannot be adjusted in isolation without reconsidering cooling settings.
First layer speed and quality determine whether prints adhere successfully or fail immediately. Printing the first layer too quickly increases the likelihood of poor adhesion and warping. Most printers use significantly slower speeds for first layers, perhaps twenty to thirty percent of normal print speeds, to ensure reliable adhesion. While this slower first layer adds time to every print, the reliability improvement justifies the overhead because a failed first layer wastes all the time that would have been spent on subsequent layers.
Detail resolution suffers when printing too quickly because the printer cannot accurately follow tight curves and small features at high speed. Sharp corners become rounded as the print head’s momentum carries it past the intended turn point. Small features may not print at their intended dimensions when speed prevents accurate positioning. Reducing speed for detailed regions allows more precise execution of complex geometries. Advanced slicing software can automatically detect high-detail regions and reduce speed locally while maintaining faster speeds for simpler geometry.
Stringing and oozing, where thin strands of plastic stretch between parts of the print, increase with faster printing. Higher speeds give the retraction mechanism less time to pull molten plastic back into the nozzle before travel moves. The compromises required to print quickly may necessitate more extensive post-processing to remove strings and clean up surfaces. For some applications, this trade-off makes sense: print quickly and accept cleanup time rather than printing slowly for cleaner results. For others, printing slower eliminates post-processing entirely.
Mechanical properties can be affected by print speed because layer bonding depends on the heat transfer between layers. When layers deposit too quickly, the previous layer may cool too much before the new layer adds on top, reducing the heat available for molecular bonding between layers. This can create weaker layer adhesion that makes parts more prone to delamination. Printing slower allows more complete bonding by maintaining higher temperatures in previously printed layers when new material deposits.
Estimating Print Times for Your Projects
Accurately estimating how long prints will take enables better project planning, realistic timeline expectations, and informed decisions about whether to optimize for speed or quality. Several approaches provide estimates with varying accuracy depending on how much information is available.
Slicing software provides the most accurate time estimates because it calculates the exact tool paths the printer will follow and knows the speed settings for different features. After loading a model and slicing it with specific print settings, the software displays an estimated print time based on the cumulative time to execute all movement commands. These estimates typically prove quite accurate, within ten percent of actual print time, though they may not account for some factors like bed heating time or potential issues that cause the printer to slow down.
The slicer’s time estimate should be considered a minimum that assumes everything proceeds smoothly without intervention. Real-world printing often encounters minor issues that add time: the printer pauses briefly to rebuild temperature after a cooling fan surge, a slight tangle in the filament spool creates momentary resistance that triggers the printer to reduce speed, or the first layer takes multiple attempts to achieve good adhesion. Adding ten to twenty percent margin to slicer estimates provides more realistic planning figures that account for these contingencies.
Quick mental estimates help evaluate whether a project is feasible before investing time in detailed slicing. For FDM printing, a rough heuristic is that small handheld objects take one to three hours, larger items around the size of a coffee mug take three to eight hours, and objects that substantially fill the build volume require twelve to twenty-four hours or more. These rough estimates help quickly eliminate completely unrealistic expectations, like thinking a large complex print will complete in thirty minutes, without requiring detailed analysis.
Volume-based estimation provides another approximation method. Knowing that typical FDM printing deposits roughly five to fifteen cubic centimeters per hour depending on settings, dividing the object’s volume by this rate gives a ballpark time estimate. An object with one hundred cubic centimeters volume might take seven to twenty hours at these rates. This approach works reasonably well for solid or moderately infilled objects but overestimates time for hollow objects with substantial empty interior volume.
Height-based estimation accounts for the layer count directly. Dividing the object’s height by the layer height gives the layer count. Multiplying by an estimated time per layer provides a time estimate. Typical layer times might range from thirty seconds for small simple layers to five minutes for large complex layers. This approach works better than volume-based estimation for hollow objects or tall thin parts where volume poorly correlates with actual print time.
Comparison to previous prints provides useful estimates when printing similar objects. If you previously printed a similar size and complexity object in six hours, a new project with similar characteristics likely requires similar time. Maintaining notes about print times for completed projects builds a reference library for future estimation. Over time, you develop intuition about how long various types of prints take with your specific equipment and typical settings.
Test prints of simplified versions help estimate time for complex projects before committing to full prints. Printing a single component of a multi-part assembly or a scaled-down version of a large model provides actual time data that scales to the full project. If a twenty percent scale test model takes two hours, the full size version might require twenty-five to fifty hours depending on whether time scales with volume or surface area, which depends on the object’s geometry.
Strategies for Reducing Print Time
When project timelines create pressure to reduce print times, several strategies can shave hours off builds while accepting various trade-offs in quality, reliability, or capability. Understanding these options allows choosing approaches that provide the most time savings with the least compromise to critical requirements.
Increasing layer height provides the most dramatic time reduction for FDM printing because it both reduces layer count and typically allows faster print speeds. Doubling layer height from 0.15 millimeters to 0.3 millimeters can cut print time by half or more. The cost is significantly more visible layer lines and reduced capability to reproduce fine vertical details. For functional parts where appearance does not matter, this trade-off makes excellent sense. For display models or parts with important surface finish, the quality sacrifice may not be acceptable.
Larger nozzles enable thicker extrusion lines that cover more area per pass. Switching from a 0.4 millimeter nozzle to a 0.6 or 0.8 millimeter nozzle can reduce print time by thirty to fifty percent for large simple parts by allowing wider lines and often thicker layers. However, larger nozzles sacrifice the ability to print fine details and thin walls. The approach works best for large simple objects where detail is not critical. Changing nozzles also requires recalibration and adjusting print profiles, adding setup overhead that only makes sense for substantial time savings on large prints.
Reducing infill density decreases the material that must be deposited in the interior, potentially reducing print time significantly for parts with large interior volumes. Dropping from thirty percent infill to fifteen percent might save twenty or thirty percent of print time while maintaining adequate strength for many applications. The limit is that below approximately ten percent infill, parts become noticeably weaker and more flexible. Understanding the loading conditions and strength requirements determines how low infill can go while maintaining acceptable performance.
Increasing print speed settings reduces time in direct proportion to speed increases, but only up to the limits imposed by the hotend’s volumetric flow capacity and mechanical acceleration limits. If print speeds are conservative, perhaps fifty millimeters per second, doubling to one hundred millimeters per second might cut print time nearly in half. However, pushing speeds beyond what the printer can mechanically handle or the hotend can sustain creates quality problems and potential print failures that waste more time than slow printing would have taken.
Optimizing part orientation affects print time through several mechanisms. Orienting parts to minimize height reduces layer count and therefore time. Arranging multiple parts efficiently to minimize wasted space and travel moves reduces overall time. Orienting parts to minimize support structure requirements eliminates time spent printing supports and post-processing time removing them. Finding the optimal orientation requires considering all these factors and sometimes involves compromise between competing objectives.
Printing multiple objects simultaneously rather than sequentially eliminates the warm-up time before each print and the cool-down time between prints. If you need ten small objects that each take one hour to print, printing them one at a time requires ten hours plus nine additional warm-up cycles. Printing all ten simultaneously might require four hours total including only one warm-up period. The trade-off is that if the print fails, all objects are lost rather than just one, and the build must be monitored for longer continuous periods.
Draft mode settings in slicing software provide pre-configured combinations of settings optimized for speed at the expense of quality. These profiles typically use thicker layers, faster speeds, higher layer heights, lower infill, and fewer wall lines to minimize print time. For rough prototypes where exact dimensions and surface quality matter little, draft mode can cut print time by half or more compared to normal quality settings. The resulting parts show rougher surfaces and potentially weaker construction but serve adequately for many validation purposes.
Adaptive layer height allows using thicker layers in flat or gradually curving regions while automatically switching to thinner layers where the surface geometry requires it for detail reproduction. This provides time savings similar to globally thick layers while maintaining detail where necessary. The feature requires slicing software support and adds complexity to print time estimation, but it represents an effective compromise between the speed of thick layers and the quality of thin layers for parts with varying detail requirements.
Setting Realistic Timeline Expectations
Understanding 3D printing timescales allows setting expectations that avoid disappointment while enabling effective planning for projects across different applications. Realistic expectations depend on the specific use case and what alternatives exist for obtaining parts.
For hobbyist home printing, accepting that most prints require overnight or multi-day building helps avoid frustration. Starting prints before bed allows them to complete overnight, with finished parts ready the next morning. Weekend projects can utilize the full forty-eight hours for large prints that would otherwise need to be split into multiple sessions. The key is integrating print times into schedules rather than expecting immediate results. Unlike paper printing that completes in minutes, 3D printing is more like slow cooking: you prepare it, set it running, and return later to collect the results.
Prototyping timelines should account for one to three day turnaround per iteration when using in-house 3D printing. A design iteration might complete in the morning, print overnight, undergo testing the following day, and incorporate lessons into the next iteration that prints the second night. This allows roughly two iterations per week, or perhaps three if prints complete quickly enough for same-day testing. While this represents dramatic acceleration compared to traditional prototyping requiring weeks per iteration, it still demands patience for thorough development work involving many iterations.
Production planning must consider batch sizes and printer capacity when using additive manufacturing for manufacturing. A printer producing parts for twelve hours per day might complete four small parts daily, twenty to thirty per week. Scaling to hundreds of parts requires multiple printers running continuously or accepting extended timelines measured in weeks. Understanding these constraints prevents overpromising delivery schedules to customers or failing to maintain adequate inventory for demand.
Service bureau timelines add queue time to the actual print time. When sending designs to contract manufacturing services, the parts might not start printing immediately upon receipt. The service bureau schedules jobs to optimize their equipment utilization, potentially meaning your parts wait hours or days before printing begins. Build time might be eight hours, but total turnaround from file submission to parts shipping could be three to five business days. Rush service may be available for premium pricing to expedite through the queue.
Emergency replacement parts and repairs benefit from 3D printing’s ability to produce parts faster than traditional manufacturing or shipping could provide, even though printing itself takes hours. If a broken appliance part would take two weeks to ship from a supplier or require paying a service technician for an emergency visit, printing the replacement overnight still represents a dramatic time advantage. The appropriate comparison is not to instantaneous availability but to the realistic alternatives.
Design-for-manufacturing iteration should accommodate the reality that print time requirements might influence design decisions. If a part design would require forty-eight hours to print but modifying the design to reduce height or simplify geometry cuts print time to twelve hours, that modification might be worth implementing even if it requires design compromise. The ability to test designs four times as quickly enables more thorough validation within the same calendar timeline, potentially improving the final product enough to justify the design constraints.
Educational applications benefit from planning print schedules around class schedules and project timelines. Student design projects should build in sufficient time for multiple print iterations, recognizing that failed prints happen and add delay. Starting prints on Friday allows weekend time for completion before Monday classes resume. Multi-day prints might need to start early in the week to finish before weekend deadlines. Teachers and students who understand these temporal constraints can plan projects that leverage 3D printing effectively rather than creating last-minute deadline pressure.
Conclusion
The question of how long 3D printing takes has no single answer because the time required ranges from less than an hour for small simple objects to days for large complex parts. Understanding the factors that determine print time—layer height, object volume and height, infill density, print speed, and technology type—allows estimating times for specific projects and making informed decisions about settings that balance speed against quality requirements.
The fundamental reality is that layer-by-layer construction requires time measured in hours rather than minutes for most useful objects. This temporal characteristic differs dramatically from paper printing or other technologies that the term “printing” might bring to mind, and recognizing this difference helps set appropriate expectations. The extended build times represent a trade-off for the capabilities additive manufacturing provides: geometric freedom, customization without tooling costs, rapid design iteration, and on-demand production.
Different printing technologies show characteristic time profiles that make some faster than others for specific object types. FDM correlates strongly with volume, DLP correlates with height, and SLS includes substantial fixed overhead regardless of part size. Understanding these patterns helps select appropriate technologies for time-sensitive applications and informs decisions about when to use 3D printing versus alternative manufacturing methods.
The speed-quality trade-off creates opportunities to reduce print time by accepting lower quality or reduced capability. Thicker layers, larger nozzles, reduced infill, and faster speeds all cut time while compromising various aspects of the result. When time pressure exists, strategically accepting these compromises in areas where they matter least allows meaningful time savings while maintaining critical requirements.
Setting realistic timeline expectations based on actual print characteristics rather than idealized assumptions enables effective project planning and prevents disappointment. Integrating 3D printing into workflows that accommodate multi-hour or overnight build times, planning prototyping cycles around day-long turnarounds, and understanding service bureau queue times ensures that projects leverage the technology’s strengths while working within its temporal constraints. Whether printing at home, developing products professionally, or exploring the technology educationally, realistic time expectations separate successful adoption from frustrated abandonment of a technology that requires patience but delivers genuine value.